Featured image for hanging string lights around patio
Image source: menterarchitects.com
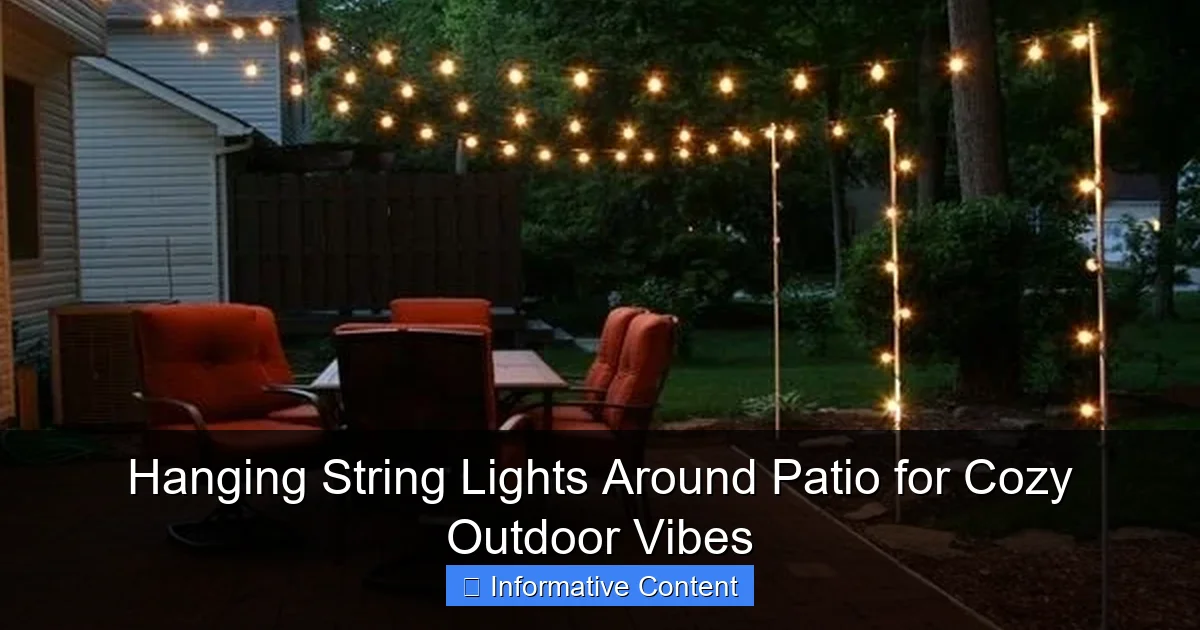
Transform your patio into a cozy retreat by hanging string lights to create warm, inviting ambiance for evening gatherings. Strategic placement along railings, pergolas, or overhead grids enhances mood and functionality, making your outdoor space usable long after sunset.
Key Takeaways
- Plan your layout: Sketch light placement before hanging to avoid uneven spacing.
- Choose durable lights: Opt for weather-resistant, commercial-grade string lights for longevity.
- Use secure anchors: Install hooks or eye screws into sturdy structures for safety.
- Mix heights creatively: Vary light levels to add depth and visual interest.
- Layer lighting: Combine string lights with lanterns or candles for ambiance.
- Test before finalizing: Check brightness and connections before completing installation.
📑 Table of Contents
- Why String Lights Are the Secret to a Cozy Outdoor Space
- Choosing the Right String Lights for Your Patio
- Planning Your Layout: Where and How to Hang
- Installation: Tools, Techniques, and Safety Tips
- Creative Ideas to Elevate Your Design
- Maintenance and Longevity: Keeping Your Lights Glowing
- Final Thoughts: Light Up Your Life
Why String Lights Are the Secret to a Cozy Outdoor Space
Remember that one summer evening when you invited friends over for dinner, and the sun dipped behind the trees? The conversation was flowing, laughter filled the air, and then—someone said, “It’s getting dark.” That moment, when the mood shifts because the lighting fades, is exactly when hanging string lights around patio areas can make all the difference.
String lights aren’t just for holidays or Instagram backdrops. When thoughtfully placed, they transform your outdoor space into a warm, inviting extension of your home. Whether you’re sipping coffee at dawn, hosting a barbecue, or stargazing with a glass of wine, the soft glow of string lights adds a layer of comfort and charm. And the best part? You don’t need an electrician or a huge budget. With a few tools, some planning, and a touch of creativity, you can create an outdoor oasis that feels like a vacation spot in your own backyard.
Choosing the Right String Lights for Your Patio
Types of String Lights: What’s Out There?
Not all string lights are created equal. Before you start hanging string lights around patio spaces, take a moment to understand the options. Each type has its own vibe, durability, and installation needs.
Visual guide about hanging string lights around patio
Image source: nextluxury.com
- LED String Lights: Energy-efficient, long-lasting, and available in warm white, cool white, or color-changing versions. Perfect for year-round use. I once used warm white LEDs in my backyard, and even in winter, they gave off a cozy, candle-like glow.
- Incandescent String Lights: The classic choice with a nostalgic, slightly yellow glow. They’re cheaper upfront but burn out faster and use more power. I used these in college for a rooftop party—they looked great, but one strand died mid-event.
- Solar-Powered String Lights: Great for eco-conscious homeowners. They charge during the day and turn on at dusk. However, they’re not as bright and may not last all night, especially in winter. I tried them on a shaded patio once—ended up needing backup.
- Edison-Style Bulb Strings: Vintage look with exposed filaments. They’re stylish and popular for rustic or industrial patios. Just be mindful of wind—they can swing and break if not secured.
- Weatherproof vs. Indoor/Outdoor: Always check the label. “Outdoor-rated” means they can handle rain, UV rays, and temperature swings. Indoor-only lights might short out or degrade quickly.
Bulb Size, Spacing, and Brightness: What Works Best?
Here’s a personal rule of thumb: more bulbs, more ambiance. Lights spaced too far apart look sparse. Too close, and they feel like a construction zone. Most experts recommend spacing bulbs 4–6 inches apart for a balanced glow.
Bulb size matters too. Smaller bulbs (like G40 or mini LEDs) give a subtle, twinkling effect—ideal for a romantic dinner. Larger bulbs (like S14 or Edison-style) are bolder and better for larger patios where you want more light. I once hung large bulbs over a 12-foot dining table, and the difference was night and day—literally. Everyone could see their food and each other without needing a flashlight.
Brightness is measured in lumens. For ambiance, 100–300 lumens per string is enough. If you’re using lights for task lighting (like grilling), go for 400+ lumens. But remember: the goal is cozy, not stadium-lit. I learned this the hard way when I bought super-bright commercial-grade lights—my guests felt like they were at a warehouse sale.
Power Source and Cord Length: Plan Ahead
Before you buy, map out your patio’s layout. Measure the perimeter or the area you want to light. A 25-foot string might sound long, but if you’re going around a pergola and down posts, you’ll need more. Always buy 10–20% extra length to account for curves, corners, and slack.
Power sources matter too:
- Plug-in: Most reliable. Just make sure you have an outdoor GFCI outlet nearby. Use extension cords rated for outdoor use—regular indoor cords can be a fire hazard.
- Plug-in with Timer: A game-changer. Set them to turn on at dusk and off at midnight. I use this in my backyard, and it’s like having a personal lighting assistant.
- Solar: No cords, no outlets. But they need 6–8 hours of direct sunlight to work well. If your patio is under trees or covered, they might not charge fully.
Planning Your Layout: Where and How to Hang
Mapping Your Patio: Zones and Focal Points
Think of your patio like a room. You wouldn’t just throw a rug in the middle—you’d place furniture, define zones, and add lighting to highlight areas. The same goes for hanging string lights around patio spaces.
Start by identifying:
- Dining area: Hang lights directly above the table for task and ambiance lighting.
- Seating area: Use a canopy or crisscross pattern to create a “ceiling” effect.
- Pathways: String lights along railings or low posts to guide movement and add safety.
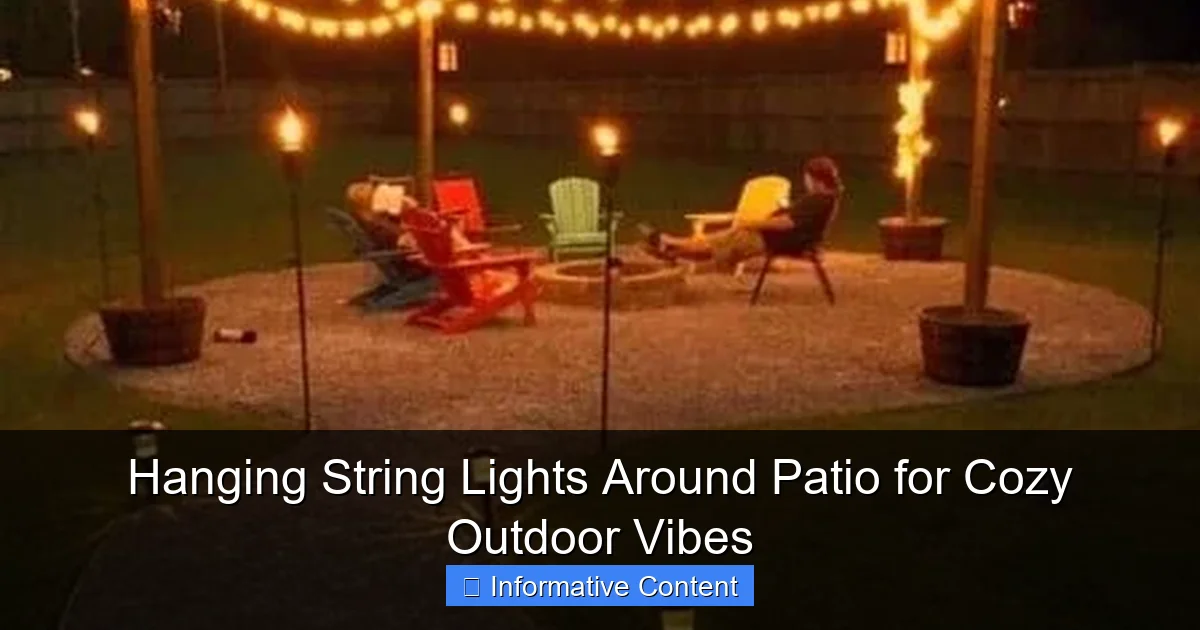
- Focal points: A fire pit, water feature, or garden wall can be highlighted with a spotlight or a halo of lights.
I once visited a friend who had a small patio with a built-in bench and a fire pit. She hung string lights in a “V” shape from a tree to the back wall, creating a cozy nook. It felt like a secret garden—all from one well-planned layout.
Common Hanging Patterns (With Examples)
Here are five popular patterns, with real-life examples:
- Canopy (or “Tent”) Style: String lights run from one high point (like a pergola) to another, creating a ceiling. Great for covered patios. Example: I used this over my 10×12-foot pergola. I attached hooks to the beams, then ran strings in parallel lines, spaced 12 inches apart. The effect was like dining under the stars—but without bugs.
- Crisscross (or “X” Pattern): Lights cross diagonally from post to post, adding visual interest. Works well on square or rectangular patios. Example: My neighbor used this on his 15×15-foot deck. He anchored lights to the house on one side and to posts on the other, crisscrossing them like a net. It looked modern and dynamic.
- Linear (Straight Lines): Simple and effective. Lights run straight across from one side to another. Best for narrow patios or under eaves. Example: I used this on a 6-foot-wide side patio. One string across the back wall, anchored to the house and a fence post, gave just enough light for evening walks.
- Perimeter (or “Border”) Style: Lights run around the edges of the patio. Creates a defined, cozy boundary. Example: A friend with a concrete patio used this. She attached lights to the fence, house, and a pergola, forming a glowing rectangle. It felt like an outdoor room.
- Hanging from Trees: For patios near trees, use branches as natural anchors. Just make sure the branches are sturdy and not brittle. Example: I hung lights from an old oak tree to a pergola. The dappled light through the leaves was magical—like fireflies.
Measuring and Marking: Don’t Skip This Step
Grab a measuring tape and some masking tape or chalk. Mark where each anchor point will go. This helps you visualize the layout and avoid “Oops, that’s too high” moments.
Pro tip: Use a level or a laser level to keep lines straight. I once skipped this and ended up with a lopsided canopy that looked like it was melting. Not my finest moment.
Installation: Tools, Techniques, and Safety Tips
Tools You’ll Need (and What to Skip)
You don’t need a full toolbox, but these items help:
- Measuring tape: For spacing and length.
- Drill and screws: For permanent installations (like pergolas).
- Hooks, eye screws, or cup hooks: For anchoring lights. Use stainless steel or coated ones—they won’t rust.
- Zip ties or cable clips: For securing cords along walls or railings.
- Ladder: For high areas. Always use a sturdy one and have someone spot you.
- Extension cords and timers: For power management.
What to skip:
- Nails or tacks—they can damage surfaces and aren’t as secure.
- Adhesive hooks—they might fall off in heat or rain.
- Indoor-rated extension cords—they’re not safe outdoors.
Step-by-Step Hanging Guide (With Real-World Tips)
Here’s how I do it, based on years of trial and error:
- Turn off power: If you’re near electrical outlets, switch them off.
- Install anchors: Drill pilot holes, then screw in hooks or eye screws. Space them 4–6 feet apart for straight lines, or 2–3 feet for crisscross patterns. Tip: Use a stud finder if attaching to wood—don’t just screw into drywall.
- Test the lights: Plug them in before hanging. I’ve wasted hours hanging a dead string before realizing it was faulty.
- Hang the strings: Start at one end and work your way across. Use S-hooks or carabiners to attach lights to anchors—they’re easy to remove if needed. Tip: For crisscross patterns, use a helper to keep tension even.
- Secure cords: Use zip ties or clips to keep cords off the ground. This prevents tripping and keeps them clean.
- Test again: Turn them on at night. Adjust spacing or height if needed.
One time, I hung lights on a windy day. By evening, one strand had swung loose and was hitting the house. Lesson learned: always secure the ends tightly and use wind-resistant clips.
Safety First: Avoiding Hazards
Safety isn’t just about avoiding shocks—it’s about long-term peace of mind.
- Use GFCI outlets: These cut power if there’s a short circuit. Most outdoor outlets are GFCI, but test them regularly.
- Check for frayed cords: Inspect strings before hanging. Replace any with exposed wires.
- Don’t overload circuits: A standard outlet can handle about 1,500 watts. Most string lights use 10–50 watts each. If you’re using 20+ strings, use a power strip with a built-in breaker.
- Keep lights away from water: Don’t drape them over sprinklers or near pools. Use waterproof connectors if needed.
- Trim overhanging branches: Falling limbs can damage lights—and people.
Creative Ideas to Elevate Your Design
Mixing Light Types for Depth and Interest
Why settle for one style? Combine different lights for a layered look.
- String lights + lanterns: Hang strings overhead, then place lanterns on tables. I did this for a birthday party—the mix of overhead glow and tabletop warmth was perfect.
- String lights + fairy lights: Use fairy lights in glass jars or wrapped around railings for a whimsical touch.
- Colored lights + warm white: Use color for holidays, then switch to warm white for everyday. My friend uses red and green for Christmas, then changes to white for New Year’s.
Using Nature and Architecture as Anchors
Your patio’s existing features are your best tools.
- Pergolas and arbors: Use beams as anchor points. I hung lights from the top beam to the sides, creating a glowing tunnel.
- Fences and railings: Attach hooks or use zip ties to run lights along the top. A friend used this on her balcony—it felt like a private skyline.
- Plants and trellises: Weave lights through climbing roses or ivy. Just don’t let them touch the bulbs—heat can damage plants.
Seasonal and Themed Displays
Switch up your lights with the seasons or events.
- Summer: Use bright whites or blues. Add citronella candles for ambiance and bug control.
- Fall: Warm yellows or oranges. Pair with pumpkins and mums.
- Winter: Twinkling whites or cool blues. I add a timer so they turn on at sunset—perfect for snowy evenings.
- Events: Use colored lights for parties. I hung pink and gold for a baby shower—it felt like a fairy tale.
Maintenance and Longevity: Keeping Your Lights Glowing
Cleaning and Storage Tips
After the season, don’t just toss lights in a box. Take care of them.
- Turn off and unplug: Always do this before handling.
- Wipe bulbs gently: Use a dry cloth. For stubborn dirt, dampen with water and mild soap.
- Check for damage: Look for cracked bulbs, frayed cords, or loose connections.
- Store properly: Wrap strings around a cardboard tube or a reel. Store in a cool, dry place. I use labeled bins—one for warm white, one for colored, one for solar.
One year, I stored a string in a damp basement. The next summer, it didn’t work. Moisture had corroded the connections. Now I store them in sealed plastic bins.
Troubleshooting Common Issues
Even the best-laid plans go awry. Here’s how to fix common problems:
- Half the string is dark: Usually one bulb is loose. Unplug, check each bulb, and reseat it. If that doesn’t work, the string may be dead—time to replace.
- Lights flicker: Could be a loose connection, a bad bulb, or a power issue. Check the plug, then each bulb.
- Solar lights don’t turn on: They might not have charged. Clean the solar panel and ensure it gets 6+ hours of sun. Or, the battery may need replacing (usually every 1–2 years).
- Wind damage: Use wind-resistant clips or take lights down on stormy nights.
How Long Do String Lights Last?
Here’s a quick reference:
| Type | Average Lifespan | Notes |
|---|---|---|
| LED String Lights | 25,000–50,000 hours | Last 5–10 years with regular use |
| Incandescent | 1,000–2,000 hours | Last 1–2 seasons; higher energy use |
| Solar-Powered | 2–4 years (battery) | Battery replacement needed; less bright |
| Edison-Style | 10,000–20,000 hours | Fragile; avoid windy areas |
LEDs are the clear winner for longevity and cost. I’ve had the same set for seven years—still going strong.
Final Thoughts: Light Up Your Life
Hanging string lights around your patio isn’t just about adding light—it’s about adding feeling. The soft glow invites conversation, slows down time, and makes ordinary moments feel special. Whether you’re alone with a book or surrounded by friends, those little bulbs create a sense of home.
You don’t need a huge budget or fancy tools. Start small—maybe just one string across your dining table. See how it feels. Then expand. Add a canopy. Try a new pattern. Play with colors. The best part? Every time you step outside, you’ll smile. Because that’s the magic of hanging string lights around patio spaces: they don’t just light up the night—they light up your life.
So grab a ladder, a friend, and a string of lights. Your cozy outdoor oasis is waiting.
Frequently Asked Questions
How do I hang string lights around my patio without damaging the walls?
Use removable adhesive hooks, gutter clips, or tension rods to secure your string lights without nails or screws. These methods work well for rental properties and preserve surfaces while creating cozy outdoor vibes.
What’s the best way to hang string lights around a patio with no overhead structure?
Install freestanding poles, shepherd’s hooks, or attach lights to nearby trees or railings. For a seamless look, drape the lights in a zigzag or canopy pattern between anchor points.
Can I use indoor string lights for my patio?
No—always choose weather-resistant string lights with an IP44 or higher rating for outdoor use. Indoor lights lack the insulation and durability needed to withstand humidity, rain, and temperature changes.
How many string light strands can I connect together?
Check the manufacturer’s guidelines, but most outdoor-rated lights allow 3–5 strands per outlet. Exceeding the limit can cause overheating or tripped breakers, especially with older models.
Where should I place string lights for optimal ambiance on my patio?
Frame seating areas by hanging lights along railings, pergolas, or fences, or create a starry effect by suspending them overhead. Layering lights at different heights enhances depth and warmth.
Do I need a special outlet for hanging string lights around my patio?
Use a GFCI (ground fault circuit interrupter) outlet for safety, especially outdoors. If your patio lacks one, install a weatherproof outdoor extension cord or consult an electrician to add a permanent outlet.

