Featured image for hanging string lights on a fence
Image source: pngmart.com
Transform your outdoor space instantly by securely attaching string lights to your fence using weather-resistant hooks or zip ties for a clean, professional look. Ensure even spacing and maintain a safe distance from power sources to combine stunning ambiance with safety. This simple DIY upgrade adds warmth, style, and nighttime charm to patios, gardens, or backyard gatherings.
Key Takeaways
- Plan spacing first: Measure and mark light placement for even, balanced coverage.
- Use weatherproof lights: Choose UL-listed, outdoor-rated string lights for durability.
- Secure with clips: Install adhesive or screw-in clips to avoid damaging the fence.
- Test before hanging: Plug in lights to confirm functionality and length.
- Anchor the ends: Use hooks or nails to stabilize the first and last light.
- Hide the cords: Route wires along fence edges or under plants for a clean look.
📑 Table of Contents
- How to Hang String Lights on a Fence for Stunning Outdoor Ambiance
- Why Hang String Lights on a Fence?
- Choosing the Right String Lights for Your Fence
- Tools and Materials You’ll Need
- Step-by-Step Installation Guide
- Maintenance and Long-Term Care
- Data Table: Recommended String Lights for Fences
- Final Thoughts: Light Up Your Life (Literally)
How to Hang String Lights on a Fence for Stunning Outdoor Ambiance
There’s something magical about the warm glow of string lights dancing in the evening breeze. Whether you’re hosting a backyard BBQ, enjoying a quiet night with a book, or simply want to make your outdoor space feel more inviting, hanging string lights on a fence can transform your yard into a cozy retreat. I remember the first time I strung up lights on my own fence—it felt like I’d added a personal touch that made my patio feel like an extension of my home. The best part? It’s easier than you might think.
But let’s be honest: the idea of hanging lights can seem daunting if you’ve never done it before. You might worry about damaging your fence, dealing with tangled cords, or making the setup look messy. Don’t stress—this guide is here to walk you through every step with practical tips, real-world examples, and a few lessons I’ve learned the hard way. By the end, you’ll have a beautifully lit fence that’s both functional and Instagram-worthy.
Why Hang String Lights on a Fence?
Instant Atmosphere and Curb Appeal
String lights do more than just provide light—they create mood. That soft, twinkling glow can make your outdoor space feel intimate, festive, or even romantic. Think about it: when you see a patio or porch with well-placed lights, doesn’t it just feel more welcoming? I once visited a friend’s backyard where they’d draped lights along their wooden fence, and it instantly made the space feel like a hidden oasis. The same effect works for your own yard.
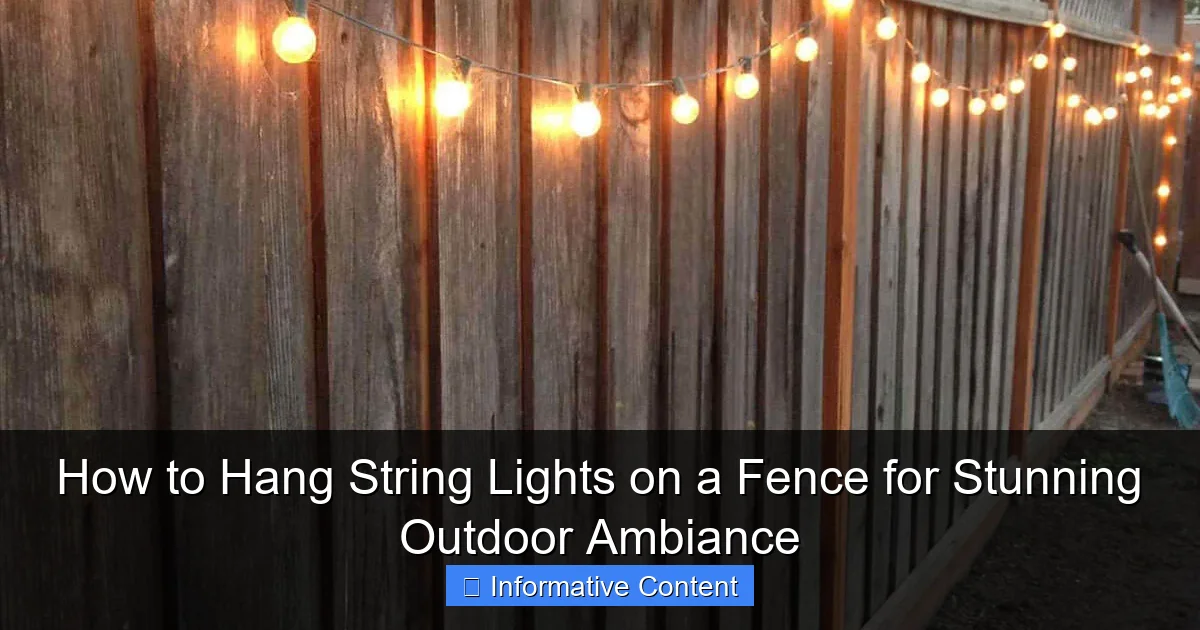
Visual guide about hanging string lights on a fence
Image source: homebnc.com
Plus, it’s a low-cost upgrade with high impact. Unlike permanent lighting installations, string lights are affordable, easy to install, and can be changed seasonally. Want a spooky vibe for Halloween? Swap in orange and purple lights. Hosting a holiday party? Add warm white or multicolored strands. The flexibility is endless.
Functional and Practical Benefits
Beyond aesthetics, hanging string lights on a fence serves practical purposes. They extend usable outdoor time after sunset, making it safer to walk around your yard or entertain guests. If you have kids or pets, the extra light helps prevent trips and falls. And if your fence runs along a pathway, lights can act as subtle markers, guiding guests safely.
Here’s a real-life example: My neighbor installed solar-powered string lights on their chain-link fence to light up their garden path. Not only did it look charming, but it also meant they could enjoy their garden at night without fumbling with flashlights. It’s a small change that made a big difference in their daily life.
Versatility for Any Fence Type
One of the best things about string lights is that they work on almost any fence—wood, vinyl, metal, or even a lattice design. The key is choosing the right hardware and method for your fence type. For instance, a wooden fence might need screws or hooks, while a vinyl or metal fence could require adhesive mounts or magnetic clips. We’ll dive into the specifics later, but the point is: there’s no “one size fits all” solution, and that’s okay. The adaptability is part of the charm.
Choosing the Right String Lights for Your Fence
Types of String Lights: Pros and Cons
Not all string lights are created equal. Here’s a quick rundown of the most common types you’ll encounter, along with their strengths and weaknesses:
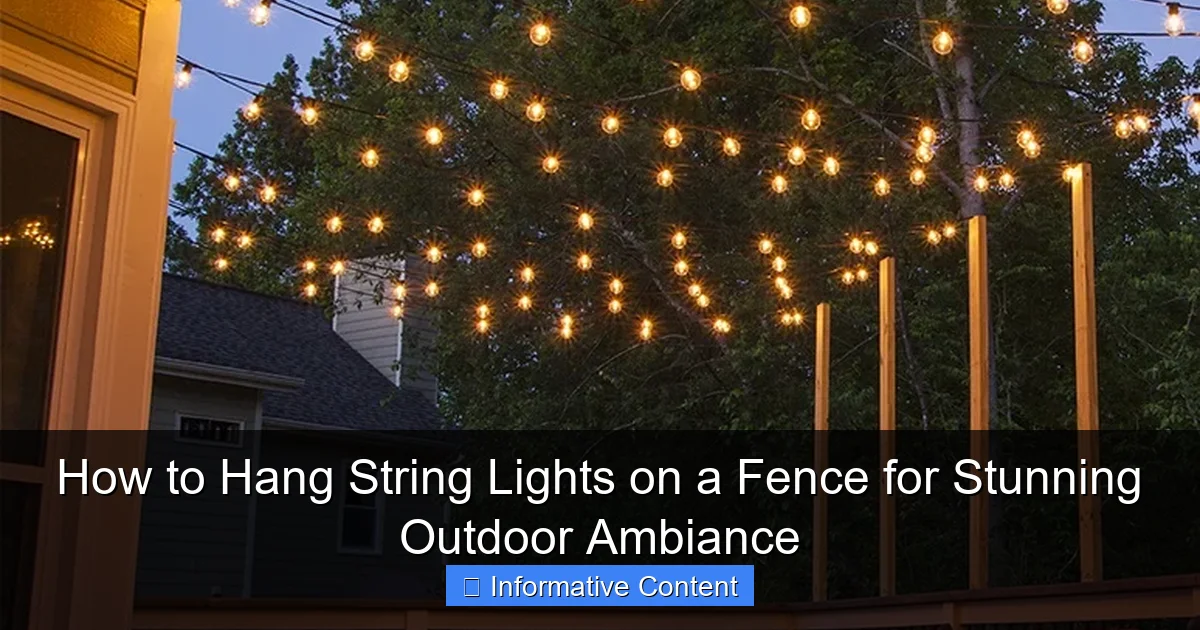
Visual guide about hanging string lights on a fence
Image source: cdn.christmaslightsetc.com
- Incandescent: The classic warm glow, but less energy-efficient and shorter lifespan. Great for occasional use (e.g., holiday parties).
- LED: Energy-efficient, long-lasting, and available in various colors and temperatures. My go-to for year-round use.
- Solar-powered: Eco-friendly and no wiring needed, but performance depends on sunlight exposure. Ideal for sunny yards or temporary setups.
- Plug-in (wired): Reliable and bright, but requires access to an outdoor outlet. Best for permanent installations.
- Smart lights: Can be controlled via app or voice (e.g., color-changing, scheduling). A bit pricier but worth it for tech lovers.
When I upgraded to LED lights, I was amazed by how much brighter they were while using less energy. Plus, they lasted years—no more replacing burned-out bulbs every season!
Key Features to Consider
Before buying, ask yourself a few questions:
- Length: Measure your fence to ensure you buy enough lights. Always add 10-15% extra for overlap or mistakes.
- Bulb spacing: Tighter spacing (e.g., 4-6 inches) creates a denser glow; wider spacing (8-12 inches) feels more subtle.
- Weather resistance: Look for “weatherproof” or “IP65” ratings for outdoor use. My first lights weren’t rated for rain—lesson learned!
- Power source: Solar lights are great if outlets are scarce, but plug-in lights offer consistent brightness.
- Color temperature: Warm white (2700K-3000K) feels cozy; cool white (4000K+) feels modern. I prefer warm white for a classic look.
Pro tip: Buy lights with a timer or dusk-to-dawn sensor. It saves energy and means you don’t have to remember to turn them on/off.
Where to Buy and Budget Tips
You can find string lights at home improvement stores (Home Depot, Lowe’s), online (Amazon, Wayfair), or even thrift stores for vintage finds. For budget-friendly options, look for sales around holidays (e.g., post-Christmas discounts). I once scored a 100-foot LED strand for 50% off in January—perfect for my summer patio setup.
If you’re splurging, consider investing in higher-quality lights. Cheap strands often have inconsistent brightness or break easily. I’ve had my current LED lights for 5 years with zero issues.
Tools and Materials You’ll Need
Basic Hardware for Every Fence Type
You don’t need a toolbox full of gadgets—just a few essentials. Here’s what I keep on hand:
- Measuring tape: For planning light placement and spacing.
- Drill (for wood/metal fences): To attach screws or hooks.
- Screwdriver (manual or electric): For smaller adjustments.
- Staple gun (for wood fences): To secure wires without damaging bulbs.
- Adhesive hooks or clips (for vinyl/metal): No drilling required. I use these on my vinyl fence—they’re a lifesaver.
- Zip ties or twist ties: For temporary setups or bundling excess cord.
- Outdoor-rated extension cord (if needed): Always check the gauge (16-gauge or thicker for safety).
Fence-Specific Solutions
Your fence material dictates the best approach:
- Wooden fences: Use screws, hooks, or staples. Pre-drill holes to prevent splitting. I use cup hooks for a clean look.
- Vinyl fences: Avoid nails/screws (they can crack). Opt for adhesive hooks or magnetic clips. Test adhesive strength first.
- Metal fences (chain-link, wrought iron): Use S-hooks, magnetic clips, or zip ties. I once used carabiners on my chain-link fence—worked perfectly!
- Lattice or mesh fences: Weave lights directly through the openings or use zip ties. Great for a “floating” effect.
Safety and Prep Checklist
Before you start, double-check:
- Inspect lights: Test each strand before hanging. No one wants to climb a ladder twice!
- Check local codes: Some areas have rules about outdoor electrical setups. When in doubt, consult a pro.
- Turn off power: If using plug-in lights, ensure outlets are GFCI-protected (outdoor safety standard).
- Weather forecast: Avoid hanging lights in rain or high winds. I learned this the hard way—my first attempt ended with tangled lights and a soaked shirt.
Step-by-Step Installation Guide
Measuring and Planning Your Layout
Measure your fence’s height and length. Decide on a pattern: straight lines, zigzags, waves, or a “curtain” effect (lights draped vertically). For a classic look, I prefer horizontal lines spaced 2-3 feet apart.
Mark anchor points with tape or chalk. Pro tip: Lay lights on the ground first to visualize the layout. I once hung lights too high—they looked like a distant galaxy, not a cozy glow!
Hanging Lights on Different Fence Types
Wooden fence: Pre-drill holes, then screw in cup hooks or use a staple gun to secure wires. Keep staples loose to avoid crushing bulbs. I space hooks every 2-3 feet for even support.
Vinyl fence: Apply adhesive hooks (like 3M Command hooks) and press firmly for 30 seconds. Wait 24 hours before hanging lights. I’ve used these for years with no peeling.
Metal fence: Use S-hooks or zip ties. For chain-link, weave lights through the mesh or attach with twist ties. Magnetic clips work great on wrought iron.
Lattice fence: Weave lights horizontally or vertically. For a “curtain” effect, hang a horizontal wire and attach lights to it with clips.
Securing Cords and Managing Excess
Nothing ruins the look like dangling cords. Here’s how to hide them:
- Bundle excess: Use zip ties or velcro straps to keep cords tidy.
- Route along fence edges: Tuck cords behind hooks or use cord covers (like raceway channels).
- Use a power strip: Place it near an outlet and run a single extension cord to the lights. I keep mine in a weatherproof box.
- For solar lights: Position the solar panel in direct sunlight. I mount mine on a fence post facing south.
Pro tip: Leave a small loop at the end of each strand for expansion or repairs. I once needed to replace a bulb—the loop made it easy!
Creative Patterns and Pro Tips
Want to go beyond straight lines? Try:
- Zigzag pattern: Alternate lights up/down for a dynamic look.
- Wave pattern: Hang lights in gentle S-curves. I use this for a “dancing” effect.
- Layered lights: Combine horizontal and vertical strands. Great for large fences.
- Spotlight effect: Cluster lights in one area (e.g., around a seating nook).
Always leave a little slack—wind and temperature changes can strain lights. I learned this after a storm snapped a strand that was pulled too tight.
Maintenance and Long-Term Care
Seasonal Upkeep
String lights last longer with a little TLC:
- Spring/summer: Wipe down lights with a damp cloth to remove dust. Check for frayed wires.
- Fall/winter: Remove lights if you live in a harsh climate (e.g., snow, salt air). Store in a dry place.
- Year-round: Trim nearby branches to prevent damage from falling debris.
I leave my lights up year-round (they’re weatherproof), but I check them monthly for loose hooks or tangled cords.
Troubleshooting Common Issues
Even the best setups have hiccups. Here’s how to fix them:
- Flickering lights: Check for loose bulbs or faulty connections. Tighten or replace as needed.
- Dim bulbs: Clean the contacts with rubbing alcohol. My solar lights brightened up after a good wipe.
- Water damage: Dry lights thoroughly before use. If damaged, replace the strand.
- Adhesive hooks peeling: Reapply with stronger adhesive (e.g., Gorilla Mounting Tape).
Pro tip: Keep spare bulbs and a small toolkit in your outdoor storage. It saved me during a last-minute party!
Upgrading or Replacing Lights
If your lights are old or outdated, consider:
- Switching to smart lights: Control colors/brightness from your phone.
- Adding a dimmer: Adjust ambiance for different occasions.
- Trying new styles: Globe lights, Edison bulbs, or fairy lights can refresh your setup.
Data Table: Recommended String Lights for Fences
| Brand/Model | Type | Length | Bulb Spacing | Weather Rating | Best For | Price Range |
|---|---|---|---|---|---|---|
| Brightown LED | Plug-in LED | 48 ft | 3.9 in | IP65 | Wooden fences | $20-$30 |
| Twinkle Star Solar | Solar LED | 33 ft | 4 in | IP65 | Chain-link fences | $15-$25 |
| Minetom Edison | Plug-in LED | 25 ft | 6 in | IP44 | Vinyl fences | $30-$40 |
| Philips Hue Outdoor | Smart LED | 20 ft | 4 in | IP67 | High-tech setups | $80-$100 |
Note: Prices are approximate and vary by retailer. Always check reviews before buying.
Final Thoughts: Light Up Your Life (Literally)
Hanging string lights on a fence isn’t just about adding light—it’s about creating moments. Whether you’re laughing with friends under a canopy of twinkling bulbs or enjoying a quiet night with a glass of wine, those little lights make your outdoor space feel alive. And the best part? It’s a DIY project anyone can tackle.
Remember, perfection isn’t the goal. My first attempt had a few wonky lines and a tangle or two, but my guests didn’t notice—they were too busy admiring the ambiance. So grab your lights, pick a sunny day, and give it a try. You’ll be amazed at how a few simple steps can transform your yard into a place where memories are made. And who knows? You might just start a neighborhood trend. Happy lighting!
Frequently Asked Questions
How do I hang string lights on a fence without damaging it?
Use non-invasive methods like zip ties, adhesive hooks, or S-hooks to secure the lights without nails or screws. These options are sturdy yet gentle on wood, vinyl, or metal fencing. Always check the weight limit of your chosen hardware to avoid sagging.
What’s the best way to hang string lights on a fence for a professional look?
Plan your layout first, spacing hooks evenly and keeping the strand taut. Drape the lights in zigzag or wave patterns for visual interest, and use clips or ties designed for outdoor use to maintain consistency and durability.
Can I use regular string lights for outdoor fences, or do I need special ones?
Always opt for outdoor-rated string lights with a weatherproof coating and UL certification. Indoor lights lack the durability to withstand rain, wind, or UV exposure, which can shorten their lifespan or create safety hazards.
How far apart should I place hooks when hanging string lights on a fence?
Space hooks every 12–18 inches for lightweight LED strings and 8–12 inches for heavier incandescent bulbs. This prevents sagging and ensures even lighting. Adjust based on your fence’s material and the lights’ weight.
What tools or hardware do I need to hang string lights on a fence securely?
Essential tools include zip ties, outdoor-rated adhesive hooks, screw-in hooks (for wood), or magnetic clips (for metal fences). Pair these with a ladder, measuring tape, and extension cord for a polished setup.
How do I hide the wires when hanging string lights on a fence?
Thread the cords behind the lights or use cable clips to tuck them along the fence’s edge. For a seamless look, match cord colors to your fence or run them under planters or railings to minimize visibility.

