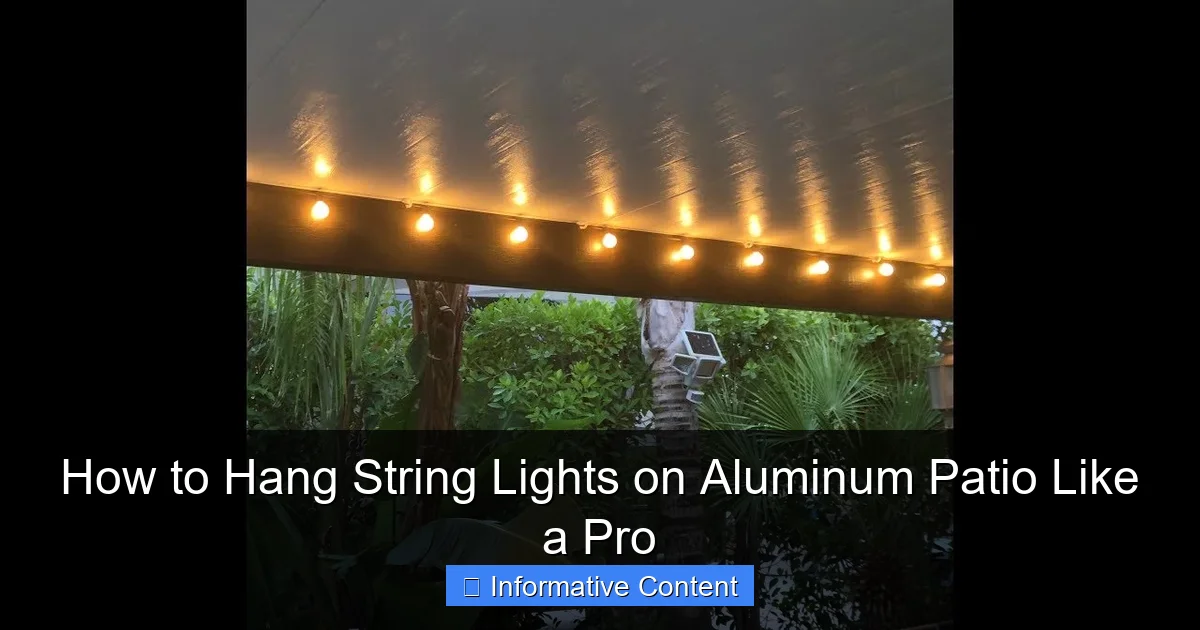
Featured image for hanging string lights on aluminum patio
Image source: i.ytimg.com
Transform your aluminum patio into a stunning nighttime retreat by using non-invasive, weather-resistant mounting solutions like adhesive hooks or snap-in clips designed for metal surfaces. Skip drilling and damaging your patio frame—opt for adjustable tension rods or magnetic mounts that securely hold string lights without tools or permanent alterations. Achieve a professional, polished look in minutes with minimal effort.
Key Takeaways
- Plan your layout first: Measure and mark light placement for even spacing.
- Use adhesive hooks: Secure, damage-free option for aluminum surfaces.
- Anchor to beams: Screw-in hooks offer stability in high-wind areas.
- Test lights before hanging: Ensure functionality to avoid rework.
- Weatherproof connections: Use outdoor-rated extension cords and covers.
- Maintain tension: Avoid sagging with proper wire or zip tie support.
📑 Table of Contents
- The Magic of String Lights on Your Aluminum Patio
- Why Aluminum Patios Are Perfect for String Lights
- Planning Your String Light Setup
- Tools and Materials You’ll Need
- Step-by-Step Installation Guide
- Common Mistakes and How to Avoid Them
- Maintaining Your String Lights
- Final Thoughts: Create Your Dream Patio
The Magic of String Lights on Your Aluminum Patio
Imagine this: it’s a warm summer evening, the sun has just dipped below the horizon, and your patio is bathed in the soft, golden glow of string lights. You’re sipping a drink, laughing with friends, and the atmosphere is pure magic. String lights aren’t just for holidays—they’re a year-round game-changer for outdoor spaces. And if you’ve got an aluminum patio, you’re in luck. Aluminum is durable, lightweight, and surprisingly easy to work with, making it an ideal canvas for creating a dreamy, lit-up oasis.
But let’s be real: hanging string lights on an aluminum patio can feel like a puzzle. How do you secure them without damaging the material? What if the lights sag or look uneven? And what about weatherproofing? Don’t worry—I’ve been there. After countless trial-and-error attempts (and a few minor disasters), I’ve learned the tricks to hanging string lights like a pro. Whether you’re a DIY newbie or a seasoned tinkerer, this guide will walk you through every step, from planning to execution, so you can create a space that’s equal parts functional and enchanting.
Why Aluminum Patios Are Perfect for String Lights
Aluminum patios are a popular choice for modern outdoor spaces, and for good reason. They’re lightweight, rust-resistant, and require minimal maintenance—qualities that make them ideal for string light installations. But what really sets aluminum apart is its versatility. Unlike wood, which can splinter or rot, or steel, which is prone to rust, aluminum holds up beautifully against the elements. Plus, its smooth surface makes it easy to attach lights without worrying about warping or discoloration.
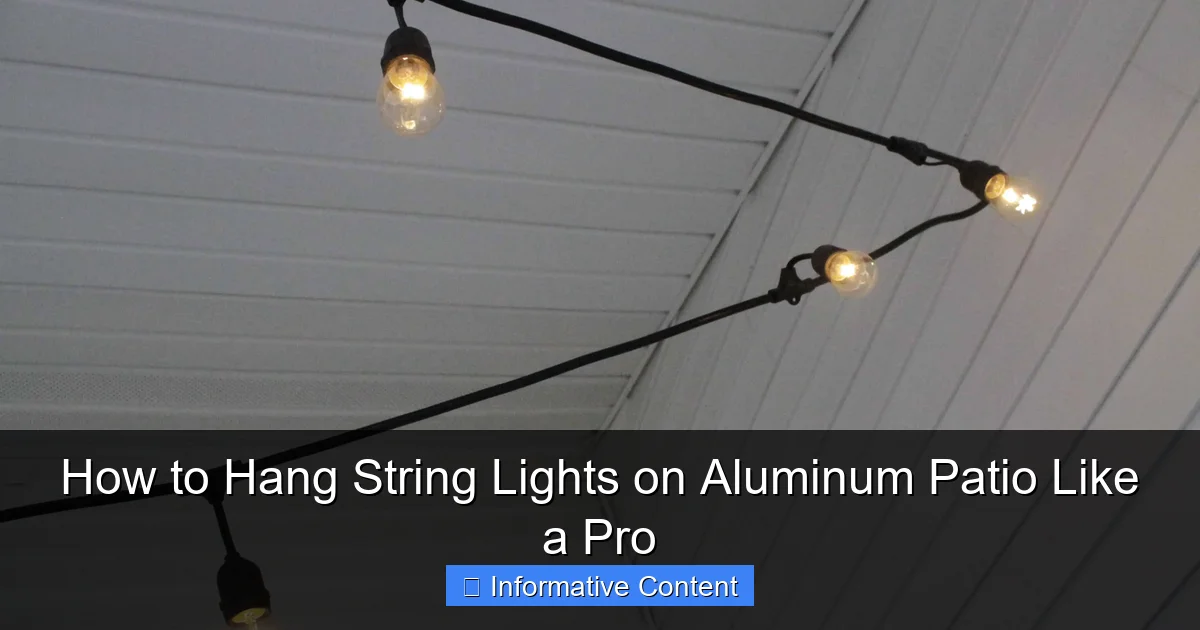
Visual guide about hanging string lights on aluminum patio
Image source: charlestoncrafted.com
Durability and Weather Resistance
One of the biggest perks of aluminum is its resistance to rust and corrosion. This means your lights won’t be compromised by rain, humidity, or even salty coastal air. For example, I installed string lights on my aluminum pergola last summer, and after a season of thunderstorms and blazing sun, the fixtures and the patio itself are still in pristine condition. No rust, no warping—just reliable, long-term performance.
That said, it’s still important to use outdoor-rated string lights and hardware. Cheap, indoor-only lights will fade, fray, or even short-circuit when exposed to moisture. Look for fixtures labeled “outdoor use” or “weatherproof,” and consider LED lights for energy efficiency and longevity.
Flexibility in Design
Aluminum’s lightweight nature gives you more creative freedom. You can hang lights in straight lines, zigzags, or even intricate patterns without overburdening the structure. For instance, I once saw a friend create a “starry sky” effect by crisscrossing lights in a grid pattern above their aluminum patio. The result? A cozy, intimate vibe that felt like dining under the stars.
Another advantage: aluminum is easy to modify. If you need to drill holes for hooks or brackets, a standard drill with the right bit will do the trick. Just avoid over-tightening, as aluminum can strip more easily than steel.
Planning Your String Light Setup
Before you start hammering or drilling, take a step back and plan your layout. A little prep work goes a long way in avoiding headaches (and crooked lines). Here’s how to approach it:
Measure Your Space
Grab a tape measure and jot down the dimensions of your patio, including any overhangs, posts, or railings. Pay attention to:
- The total length of the area you want to light.
- The height of any structures (e.g., pergola beams, roof overhangs).
- Obstacles like furniture, planters, or doorways.
For example, if your patio is 20 feet long and you’re hanging lights along the perimeter, you’ll need at least 60–80 feet of lights (factoring in a slight sag for aesthetics). Pro tip: Buy 10% more lights than you think you’ll need—better to have extra than to run short!
Choose the Right Lights
Not all string lights are created equal. Here’s what to consider:
- Bulb type: LEDs last longer and use less energy, while incandescent bulbs give a warmer, vintage glow.
- Spacing: Tighter spacing (e.g., 3–4 inches) creates a denser look; wider spacing (6+ inches) feels more subtle.
- Length: Measure the distance between your power source and the farthest point of the installation. If you’re running lights from a corner to the center, add extra length to avoid a dangling cord.
For aluminum patios, I recommend outdoor-rated LED lights with a 24-foot length. They’re energy-efficient, durable, and easy to daisy-chain for longer runs.
Sketch Your Layout
Grab a piece of paper or use a digital tool to sketch your patio and mark where you’ll place lights. Common layouts include:
- Linear: Lights run straight across beams or railings (great for minimalist styles).
- Grid: Lights crisscross to create a canopy effect (ideal for large patios).
- Zigzag: Lights run diagonally between posts or corners (adds visual interest).
I once tried a zigzag layout on my patio and loved how it drew the eye upward, making the space feel larger. Just avoid overcomplicating it—sometimes simple is best!
Tools and Materials You’ll Need
Having the right tools makes the job easier and safer. Here’s a checklist of essentials:
Basic Hardware
- Outdoor-rated string lights (LEDs recommended).
- Stainless steel hooks or eye screws (rust-proof and strong enough for aluminum).
- Cable clips or adhesive hooks (for a no-drill option).
- Extension cords (outdoor-rated, GFCI-protected).
- Zip ties (for securing loose cords).
For example, I use 304 stainless steel hooks for my aluminum pergola. They’re corrosion-resistant and hold up to 10 lbs each—perfect for string lights.
Tools for Installation
- Drill with metal bits (for drilling aluminum).
- Measuring tape.
- Level (to keep lines straight).
- Scissors or wire cutters (for trimming zip ties).
- Ladder (if working above ground level).
Pro tip: If you’re drilling into aluminum, use a low-speed setting on your drill to avoid overheating the metal. A drop of lubricant (like WD-40) also helps.
Optional but Helpful
- Light tester (to check bulbs before installation).
- Timer or smart plug (for automatic on/off).
- Weatherproof sealant (to protect drilled holes from moisture).
I once forgot a level and ended up with a crooked line of lights. Lesson learned: always double-check alignment!
Step-by-Step Installation Guide
Now for the fun part—actually hanging the lights! Follow these steps for a professional-looking result.
Step 1: Mark Your Anchor Points
Use a pencil or masking tape to mark where hooks or clips will go. For a straight line, measure equal distances (e.g., every 4 feet). For a grid, mark intersections where lights will cross. Pro tip: Use a level to ensure your marks are aligned.
Step 2: Install Hooks or Clips
If using screws:
- Drill a pilot hole slightly smaller than the screw diameter.
- Insert the hook and tighten gently (don’t over-torque!).
- Seal the hole with a dab of clear silicone if desired.
If using adhesive hooks:
- Clean the aluminum surface with rubbing alcohol.
- Peel off the backing and press firmly for 30 seconds.
- Wait 24 hours before hanging lights (adhesive needs time to cure).
I once rushed this step and had hooks fall off after a week. Patience pays off!
Step 3: Hang the Lights
Start at the power source and work outward:
- Loop the first bulb socket over the first hook.
- Stretch the string taut (but not too tight) to the next hook.
- Repeat, leaving a slight sag between hooks for a natural look.
- Secure any loose cords with zip ties.
For grid patterns, use a ladder to weave lights across hooks. I like to test the lights as I go—nothing worse than finishing and finding a dead section!
Step 4: Conceal Cords
No one wants to see a mess of wires. Here’s how to hide them:
- Run extension cords along railings or under furniture.
- Use cord covers (available in aluminum-matching colors).
- Tuck excess cord behind hooks or into planters.
My go-to trick: I use black zip ties to secure cords to the underside of my aluminum beams. They’re nearly invisible!
Common Mistakes and How to Avoid Them
Even the pros make mistakes. Here’s how to dodge the most common pitfalls:
Overloading the Structure
Aluminum is strong, but it’s not indestructible. Avoid:
- Using heavy fixtures (e.g., glass bulbs).
- Hanging lights in a way that creates tension on weak points (like thin railings).
Instead, opt for lightweight LEDs and distribute weight evenly. For example, I once hung a chandelier-style light on a pergola—it looked great until a strong wind bent the beam. Lesson: keep it light!
Ignoring Weatherproofing
Moisture is the enemy of outdoor lights. Prevent issues by:
- Using waterproof seals on drilled holes.
- Choosing lights with sealed sockets (no exposed wiring).
- Elevating plugs off the ground to avoid puddles.
I learned this the hard way when a rainstorm shorted out my lights. Now I use outlet covers and drip loops (a small loop in the cord that prevents water from flowing to the plug).
Skipping the Test Run
Always test your lights before hanging them. Check for:
- Dead bulbs.
- Loose connections.
- Frayed wires.
I once spent hours hanging a 50-foot string, only to realize the last 10 bulbs were out. A quick test would’ve saved me time and frustration.
Maintaining Your String Lights
Once your lights are up, a little TLC keeps them shining bright.
Cleaning Tips
Dust and grime can dim your lights. Every few months:
- Turn off and unplug the lights.
- Wipe bulbs with a dry microfiber cloth.
- Use a damp cloth for stubborn dirt (avoid soaking the sockets).
I like to clean mine during daylight so I can spot any damaged wires or bulbs.
Storage Advice
If you take lights down seasonally:
- Coil them loosely (no tight loops).
- Store in a breathable bag (not plastic, which traps moisture).
- Keep them in a dry, temperature-controlled space.
Pro tip: Wrap the lights around a cardboard tube to prevent tangling.
Troubleshooting
Common issues and fixes:
| Problem | Solution |
|---|---|
| Flickering lights | Check for loose bulbs or frayed wires. |
| Partial outage | Replace the first dead bulb in the string. |
| Corroded sockets | Apply dielectric grease to prevent rust. |
I once had a flickering light that turned out to be a loose bulb—a 30-second fix saved me from buying a new string!
Final Thoughts: Create Your Dream Patio
Hanging string lights on an aluminum patio isn’t just about adding light—it’s about creating a mood. Whether you’re hosting a dinner party or enjoying a quiet night solo, the right lighting transforms your space into a sanctuary. And the best part? It’s easier than you think. With a little planning, the right tools, and a dash of creativity, you’ll have a setup that looks professionally installed.
Remember, the key is to start small. Try a simple line of lights first, then experiment with patterns and layouts. Don’t stress about perfection—your patio is a living space, not a Pinterest board. Embrace the little imperfections, and focus on what matters: the joy of a space that feels uniquely yours. So grab your lights, roll up your sleeves, and get ready to light up your aluminum patio like a pro. Your evenings (and your Instagram feed) will thank you.
Frequently Asked Questions
How do I hang string lights on an aluminum patio without drilling holes?
Use adhesive hooks, magnetic clips, or tension rods designed for metal surfaces to avoid damaging your aluminum patio. These methods are secure, removable, and won’t void warranties.
What’s the best way to hang string lights on aluminum patio frames or rails?
Wrap the lights around aluminum rails using zip ties or silicone-coated hooks for a snug fit. Ensure the lights are spaced evenly and avoid overloading circuits.
Can I use outdoor string lights on an aluminum patio year-round?
Yes, as long as the lights are rated for outdoor use and weatherproof (IP44 or higher). Aluminum patios offer great durability, so pair them with UV-resistant lights for longevity.
How do I hide the wires when hanging string lights on aluminum patio edges?
Route cords through aluminum conduit channels or use raceway covers painted to match your patio. Alternatively, tuck wires behind railings or furniture for a cleaner look.
Are there special clips for hanging string lights on aluminum patio structures?
Yes, look for aluminum-compatible clips like rubber-lined hooks, magnetic holders, or adjustable clamps. These prevent scratching and provide a secure grip on smooth metal surfaces.
How far apart should I space string lights on an aluminum patio?
Space lights 2–4 feet apart for even illumination, adjusting based on bulb size and patio layout. Use a measuring tape and temporary hooks to test spacing before final installation.

