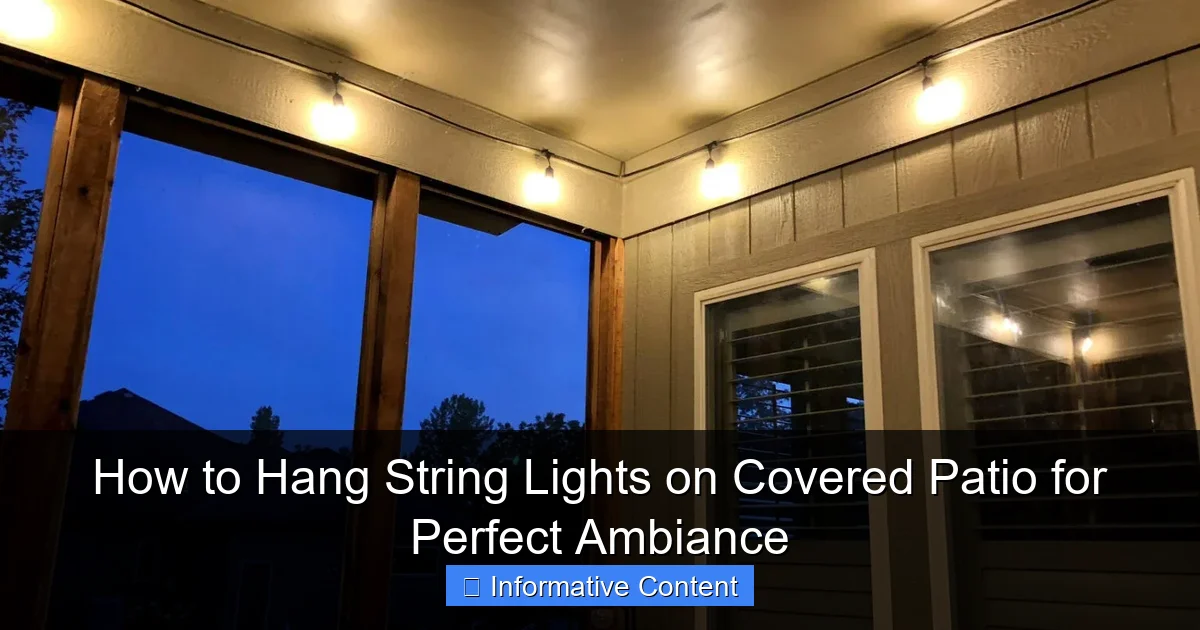
Featured image for hanging string lights on covered patio
Image source: sengerson.com
Transform your covered patio into a cozy retreat by strategically hanging string lights to enhance ambiance and functionality. Use hooks, adhesive clips, or existing beams to create a balanced, weather-safe glow that extends your outdoor enjoyment into the night.
Key Takeaways
- Plan your layout first: Sketch light placement for balanced, even coverage.
- Use waterproof lights: Ensure durability in covered but damp outdoor spaces.
- Secure with removable hooks: Avoid damage while keeping lights stable.
- Measure spacing accurately: Maintain consistent gaps for a polished look.
- Layer lighting thoughtfully: Combine string lights with other fixtures for depth.
- Test before final install: Check connections and brightness prior to mounting.
📑 Table of Contents
- Setting the Scene: Why String Lights Transform Your Covered Patio
- Choosing the Right String Lights for Your Covered Patio
- Planning Your Layout: Design Before You Hang
- Hardware and Tools: What You’ll Need to Hang Lights Safely
- Step-by-Step Installation: How to Hang String Lights on Covered Patio
- Enhancing the Ambiance: Pro Tips for a Stunning Setup
- Maintenance and Longevity: Keeping Your Lights Glowing
- Final Thoughts: Your Patio, Your Paradise
Setting the Scene: Why String Lights Transform Your Covered Patio
Imagine this: It’s a warm summer evening. The sun has dipped below the horizon, and the air is just cool enough to enjoy a glass of wine or a mug of cocoa outside. You step onto your covered patio, and the first thing that hits you isn’t the breeze—it’s the soft, golden glow of string lights gently swaying above. Suddenly, your patio isn’t just a roofed space; it’s a sanctuary. A place to unwind, laugh with friends, or steal a quiet moment under a canopy of light.
This isn’t magic. It’s ambiance. And the secret? Hanging string lights on a covered patio. Whether you’re hosting a dinner party or enjoying a solo nightcap, the right lighting can turn an ordinary space into something extraordinary. But here’s the catch: it’s not as simple as draping lights across beams and calling it a day. Done wrong, you’ll end up with tangled cords, uneven lighting, or—worst of all—a setup that doesn’t last through the season. So let’s talk about how to do it right.
Choosing the Right String Lights for Your Covered Patio
Before you start hammering hooks or unraveling cords, take a beat to think about the lights themselves. Not all string lights are created equal, and your choice will make or break the final look.
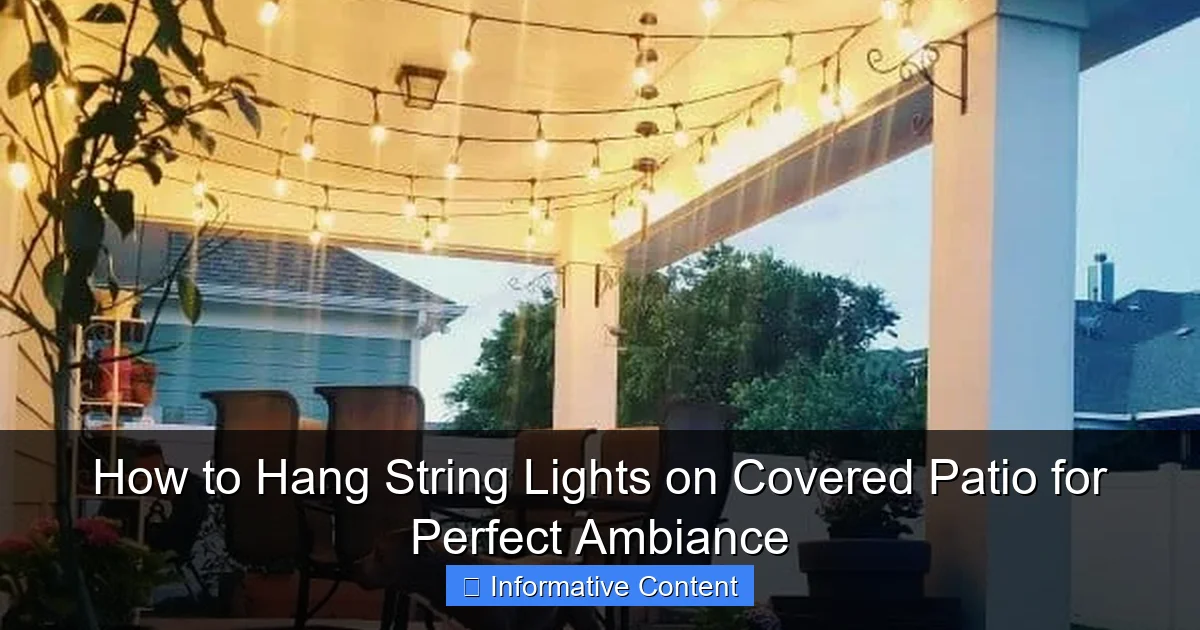
Visual guide about hanging string lights on covered patio
Image source: nextluxury.com
Types of String Lights: LED vs. Incandescent
Let’s get this out of the way: LED string lights are the way to go. They’re energy-efficient, last longer (up to 25,000+ hours), and stay cool to the touch—important when you’re hanging them near wood or fabric. Incandescent lights, while nostalgic and warm, burn hotter, use more energy, and don’t last nearly as long. If you’re going for a vintage vibe, look for LED bulbs with a warm white glow (around 2700K–3000K) to mimic that classic incandescent feel.
Pro tip: If you live in a humid area or plan to use your patio year-round, look for weatherproof or damp-rated LED lights. These are designed to handle moisture, which is common under covered patios, especially if you have a ceiling fan or nearby plants.
Bulb Shape and Spacing
Bulb style affects both aesthetics and function. Here’s a quick breakdown:
- Edison bulbs: Vintage charm, larger bulbs with visible filaments. Great for rustic or industrial looks. But they cast more shadows and may require closer spacing.
- Mini globe bulbs: Uniform, soft glow. Ideal for a cozy, modern feel. Spaced 4–6 inches apart, they create a consistent wash of light.
- Fairy lights (micro LEDs): Delicate and whimsical. Perfect for wrapping around beams or draping over railings. Use them as accent lighting, not primary illumination.
Spacing matters. Too far apart, and you’ll have dark gaps. Too close, and it feels cluttered. A good rule: 6-inch spacing for ambient lighting, 3–4 inches for a denser, romantic feel.
Length and Power Source
Measure your patio’s perimeter or the area you plan to cover. Then add 10–15% extra length for draping, loops, or unexpected gaps. Nothing’s worse than running out of light mid-installation.
Also, check the power source. Do you have an outdoor outlet nearby? If not, consider battery-powered or solar options. Solar string lights are great for eco-conscious setups, but they need direct sunlight during the day to charge. Battery packs offer flexibility but require regular changes or charging.
Planning Your Layout: Design Before You Hang
You wouldn’t build a house without a blueprint, right? Same goes for hanging string lights on a covered patio. A little planning prevents a lot of headaches.
Map Out Your Space
Grab a tape measure and sketch your patio. Note:
- Ceiling height and beam locations
- Support posts or columns
- Doors, windows, and furniture placement
- Power source location
Now, decide on your lighting pattern. Here are three popular options:
- Linear (straight lines): Run lights parallel to the ceiling or along beams. Clean, modern, and easy to install. Works well for rectangular patios.
- Crisscross (X-pattern): Create an “X” between opposite corners or beams. Adds visual interest and spreads light evenly. Great for square or open layouts.
- Canopy (draped or zigzag): Drape lights in gentle waves or zigzags from one side to the other. Creates a romantic, starry-sky effect. Best for larger patios with multiple anchor points.
Try this: Use painter’s tape or chalk to mark your layout on the ceiling or beams. Step back and assess. Does it feel balanced? Are there any dark spots? Adjust before committing to hardware.
Consider Light Direction and Shadow
Lighting isn’t just about brightness—it’s about direction. If you hang lights too high, they’ll wash out the ceiling. Too low, and they’ll shine in your eyes.
Aim for a height of 7–8 feet above the floor. This keeps the light at eye level or slightly above, creating a warm glow without glare. If your patio has a sloped ceiling, hang lights along the lowest point to maximize coverage.
Also, think about shadows. Lights placed directly above a dining table will cast shadows on faces. Instead, run them along the perimeter or at an angle so light comes from the sides.
Test the Flow
Walk through your patio with the lights unplugged (but laid out in your planned pattern). Does the path to the grill or seating area feel inviting? Can you move freely without tripping over cords? Adjust as needed.
Hardware and Tools: What You’ll Need to Hang Lights Safely
Now that you’ve got your design, let’s talk tools. The right hardware ensures your lights stay up—and your patio stays safe.
Choosing the Right Fasteners
Your covered patio likely has wood beams, concrete posts, or metal framing. Each requires different hardware:
- Wood beams or rafters: Use cup hooks or eye screws. They’re easy to screw in and hold weight well. Choose stainless steel or zinc-plated to prevent rust.
- Concrete or brick columns: Use masonry anchors or tapcon screws with plastic anchors. Drill pilot holes first to avoid cracking.
- Metal framing or gutters: Use screw-in hooks or magnetic hooks (if the metal is thick enough). Avoid adhesives—they fail in heat or humidity.
- No-damage options: If you’re renting or hate holes, try adhesive-backed clips (like 3M Command™) or ceiling-mounted track systems. Just ensure they’re rated for outdoor use and the weight of your lights.
Pro tip: For a clean look, install hooks or clips every 12–18 inches. Closer spacing prevents sagging, especially with heavier Edison bulbs.
Essential Tools
Here’s your toolkit:
- Measuring tape
- Pencil or chalk
- Drill (with masonry bit if needed)
- Screwdriver
- Step ladder
- Level (to keep lines straight)
- Extension cord (outdoor-rated, if needed)
Don’t forget safety: Wear safety glasses when drilling, and use a stable ladder. If your patio is high, consider a ladder stabilizer or ask a friend to spot you.
Dealing with Power Cords
Nothing ruins ambiance like a tangled mess of cords. Plan your power path:
- Run cords along beams or under eaves to hide them.
- Use cord clips or raceways to secure them.
- If you need an extension cord, choose a weatherproof outdoor cord and keep it elevated (not on the ground) to prevent tripping.
Bonus: If your lights have a plug-in end, position the outlet so the cord isn’t visible from your main seating area. Tuck it behind a post or planter.
Step-by-Step Installation: How to Hang String Lights on Covered Patio
Time to bring your vision to life. Follow these steps for a smooth, stress-free install.
Step 1: Install Your Hardware
Start by marking your hook/clip locations with a pencil. Use a level to ensure they’re straight. Then:
- For wood: Screw in cup hooks or eye screws by hand or with a screwdriver.
- For concrete: Drill pilot holes, insert anchors, then screw in hooks.
- For metal: Use magnetic hooks or screw-in types.
Pro tip: Pre-screw all hooks before hanging lights. It’s easier to adjust spacing when they’re not under tension.
Step 2: Test the Lights
Before hanging, plug in your string lights to check for dead bulbs or frayed cords. Replace any faulty strands. Trust me—you don’t want to find a dead bulb halfway through installation.
Step 3: Hang the Lights
Start at the power source. Hang the first bulb or clip, then work your way outward. For linear patterns, run the lights straight. For crisscross, create an “X” by connecting opposite hooks. For canopies, drape in gentle waves or zigzags.
Use these techniques:
- For straight lines: Stretch the lights taut between hooks. Don’t pull too hard—LEDs can snap.
- For draping: Let the lights hang in soft curves. Adjust spacing so bulbs aren’t too bunched or spread.
- For corners: Use a hook at each turn to maintain tension.
Pro tip: If your lights have a male/female end, connect multiple strands end-to-end (but don’t exceed the manufacturer’s max connection length—usually 3–5 strands).
Step 4: Secure and Conceal Cords
Once lights are up, secure any loose cords with clips or zip ties (outdoor-rated). Tuck the plug end near the outlet, and use a cord cover or plant to hide it.
If you’re using a timer or dimmer, install it close to the outlet for easy access.
Step 5: Step Back and Adjust
Turn on the lights and walk through the space. Look for:
- Uneven spacing
- Glare or shadows
- Sagging strands
- Visible cords
Make small tweaks. Add a hook here, adjust a drape there. Perfection takes patience!
Enhancing the Ambiance: Pro Tips for a Stunning Setup
You’ve hung the lights—now let’s make them shine (literally).
Layer Your Lighting
String lights are the star, but don’t stop there. Add layers for depth:
- Floor lamps: Place a rattan or metal floor lamp in a corner for warm, diffused light.
- Table lamps: Use battery-powered lanterns on side tables.
- Fairy lights in jars: Scatter them on shelves or hang from beams.
The goal: Avoid a single bright source. Multiple low-level lights create a cozy, inviting glow.
Add Dimmers or Timers
A dimmer switch lets you adjust brightness for different moods—bright for cooking, soft for romance. A timer automates on/off times, so your patio glows at sunset without you lifting a finger.
Pro tip: Smart plugs or Wi-Fi-enabled outlets let you control lights from your phone. Perfect for impromptu gatherings.
Use Reflectors to Amplify Light
Dark walls or ceilings absorb light. To bounce it back:
- Hang mirrors or metallic decor on walls.
- Use light-colored furniture (white, beige, light wood).
- Add a white or silver canopy or shade sail overhead.
This trick works especially well in small patios.
Seasonal Swaps
Keep your setup fresh:
- Spring: Add pastel-colored bulbs or floral garlands.
- Summer: Use bright white or warm white for a classic look.
- Fall: Swap in amber or orange bulbs with leaf-shaped covers.
- Winter: Add icicle lights or white LEDs with a snowflake motif.
No need to remove the entire setup—just switch out bulbs or add seasonal decor.
Maintenance and Longevity: Keeping Your Lights Glowing
Your lights should last for years—if you care for them properly.
Regular Cleaning
Dust, pollen, and spider webs dull bulbs. Every few months:
- Unplug the lights.
- Wipe bulbs with a soft, dry cloth.
- Use a soft brush to remove debris from sockets.
Never use water or cleaners—they can damage LEDs.
Storage Tips
If you take lights down seasonally:
- Remove bulbs (if possible) to prevent breakage.
- Wrap strands around a cardboard tube or reel to avoid tangles.
- Store in a dry, temperature-controlled space.
Pro tip: Label each strand with its length and bulb type. Saves time next year!
Troubleshooting Common Issues
Even the best setups have hiccups. Here’s how to fix them:
- One bulb out, whole strand dark: Check for a loose bulb. Replace it, and the strand should light up.
- Flickering lights: Tighten loose bulbs or check the power source.
- Sagging strands: Add extra hooks or tighten existing ones.
- Cords exposed: Use cord covers or reposition furniture to hide them.
| Issue | Cause | Solution |
|---|---|---|
| Bulb not lighting | Loose connection or dead bulb | Firmly seat the bulb or replace it |
| Strand not turning on | Faulty plug or overloaded circuit | Test with another outlet; don’t exceed max connections |
| Sagging lights | Insufficient support | Add hooks every 12–18 inches |
| Cord damage | Exposure to weather or pets | Replace the strand or use outdoor-rated cord |
Final Thoughts: Your Patio, Your Paradise
Hanging string lights on a covered patio isn’t just about adding light—it’s about creating a feeling. A place where stories are shared, meals are savored, and quiet moments feel golden. And the best part? You don’t need a designer’s eye or a contractor’s skills. With the right tools, a little planning, and these tips, you can transform your space in a weekend.
Remember: Start with quality LED lights, plan your layout, use the right hardware, and layer your lighting for depth. Don’t rush the process. Take breaks, step back, and tweak until it feels just right. And when you finally flick that switch and see your patio bathed in warm, inviting glow? That’s the moment it all pays off.
So go ahead—grab those lights, gather your tools, and get to work. Your perfect ambiance is waiting. And when your guests gasp, “This is magical,” you can smile and say, “Yeah. I did that.”
Frequently Asked Questions
How do I hang string lights on a covered patio without drilling holes?
Use removable adhesive hooks, tension rods, or magnetic mounts to avoid damaging surfaces. These options work well on wood, metal, or vinyl structures while still providing secure support for your lights.
What’s the best way to hang string lights on a covered patio for even lighting?
Plan a zigzag or crisscross pattern between anchor points to distribute lights evenly. For a covered patio, ensure lights are spaced 12–18 inches apart to avoid dark spots and create balanced ambiance.
Can I use outdoor-rated string lights on a covered patio?
Yes, even if your patio is covered, outdoor-rated lights are recommended for moisture and UV resistance. They’ll last longer and perform better in varying weather conditions.
How do I power string lights on a covered patio without an outdoor outlet?
Use a heavy-duty extension cord rated for outdoor use or install a weatherproof outlet nearby. Alternatively, opt for solar-powered string lights for a cord-free solution.
What are the best anchor points for hanging string lights on a covered patio?
Secure lights to beams, eaves, railings, or gutters using hooks, zip ties, or clips. For stability, reinforce connections with weather-resistant materials like stainless steel or nylon.
How do I hide the wires when hanging string lights on a covered patio?
Route cords behind beams or railings, or use cord covers to blend them into the structure. For a cleaner look, choose lights with matching wire colors or run them along existing architectural lines.

