Featured image for hanging string lights on fence
Image source: clipart-library.com
Transform your outdoor space into a magical retreat by securely hanging string lights on your fence using weather-resistant hooks or zip ties for a clean, professional look. Choose a lighting pattern—like zigzag, curtain, or canopy—to enhance ambiance while ensuring even spacing and proper power source access. With the right tools and a little creativity, you can achieve a stunning glow that elevates any evening gathering.
Key Takeaways
- Plan your layout first: Sketch light placement for balanced, even coverage.
- Use outdoor-rated lights: Ensure safety and durability with weatherproof string lights.
- Secure with proper hardware: Use hooks or clips, not nails, to protect fence integrity.
- Test lights before hanging: Check functionality to avoid mid-installation surprises.
- Hide cords creatively: Tuck wires behind fence boards for a clean look.
- Space evenly for glow: Keep 6–8 inches between bulbs for ideal brightness.
📑 Table of Contents
- Why String Lights Transform Your Fence Into a Dreamy Escape
- Planning Your Fence Lighting: Design and Layout
- Choosing the Right String Lights for Your Fence
- Tools and Materials: What You’ll Need
- Step-by-Step Guide to Hanging String Lights on Fence
- Maintaining Your Glow: Care and Troubleshooting
- Creative Ideas and Final Tips for a Stunning Display
Why String Lights Transform Your Fence Into a Dreamy Escape
Imagine stepping into your backyard after sunset. The air is warm, the stars are out, and suddenly, your fence isn’t just a boundary—it’s a glowing canvas of soft, golden light. String lights can turn any ordinary outdoor space into a cozy, magical retreat. Whether you’re hosting a summer barbecue, enjoying a quiet evening with a book, or celebrating a holiday, hanging string lights on fence instantly adds charm and warmth. It’s not just about illumination—it’s about creating a mood, a feeling, a little slice of wonder right outside your door.
I remember the first time I hung lights on my own fence. I was skeptical—would they look cheesy? Would they survive a rainy week? But after just one evening, I was hooked. The way the lights danced in the breeze, casting delicate shadows on the grass, made my yard feel like a secret garden. And the best part? It was easier than I expected. With the right tools, a little planning, and some practical tips, anyone can master the art of hanging string lights on fence to create that perfect outdoor glow.
Planning Your Fence Lighting: Design and Layout
Measure Your Fence and Choose the Right Length
Before you buy a single bulb, grab a tape measure. Measure the total length of your fence where you plan to hang the lights. Add 10–15% extra to account for sagging, corners, and any decorative loops or swags. For example, if your fence is 50 feet long, aim for 55–60 feet of string lights. This prevents the frustration of running out mid-installation.
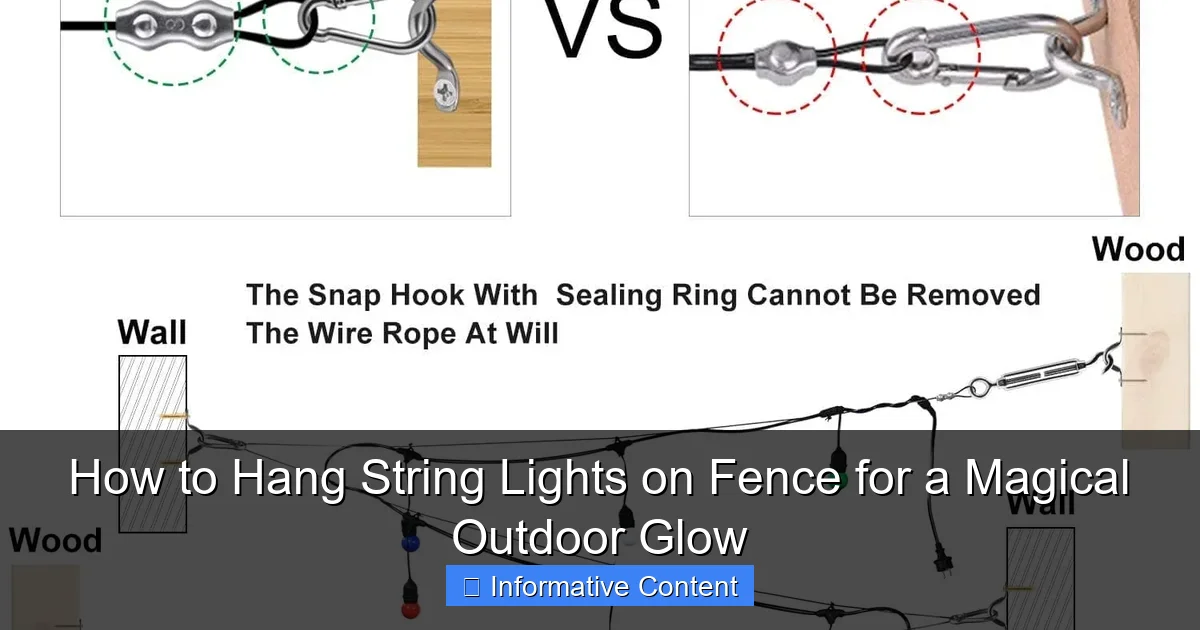
Visual guide about hanging string lights on fence
Image source: sunbrightlighting.com
Also, consider how you want the lights to flow. Do you want them straight across the top rail? Wrapped around posts? Draped in gentle curves? Sketch a quick diagram to visualize the layout. This helps avoid awkward gaps or overhangs later.
Decide on the Lighting Style: Straight, Swag, or Wrap
There are three popular styles for hanging string lights on fence:
- Straight line: Lights run horizontally along the top of the fence. Clean and modern, ideal for minimalist spaces.
- Swag or drape: Lights hang in gentle U-shapes between posts. Creates a romantic, boho vibe. Works well with longer runs.
- Post wrap: Lights spiral around fence posts, often with horizontal runs between. Great for adding vertical interest and highlighting structure.
For a balanced look, many people combine styles. For instance, straight lines on long stretches with swags between key posts. Just remember: more swag = more light needed. A 10-foot swag might need 15 feet of lights to achieve a soft drape.
Check Power Source and Outlet Access
Are your lights battery-powered, solar, or plug-in? Most string lights use standard electrical outlets, so plan your layout around accessible outdoor GFCI outlets. If your fence is far from a power source, consider:
- Using an outdoor-rated extension cord (look for “SJTW” or “weather-resistant” labels)
- Installing a weatherproof outlet box near the fence
- Choosing solar-powered lights (great for remote areas, but less reliable in shade)
Pro tip: Test your lights before hanging. Plug them in to ensure all bulbs work and the cord length fits your layout.
Choosing the Right String Lights for Your Fence
Types of String Lights: LED vs. Incandescent
LED lights are the clear winner for most outdoor projects. Here’s why:
Visual guide about hanging string lights on fence
Image source: m.media-amazon.com
- Energy-efficient: Use up to 80% less power than incandescent
- Long-lasting: Last 25,000–50,000 hours (vs. 1,000–2,000 for incandescent)
- Cool to the touch: Safer around kids, pets, and plants
- Weather-resistant: Most are rated for outdoor use (look for IP65 or higher)
Incandescent lights give off a warmer, vintage glow but burn out faster and get hot. They’re fine for short-term events, but for year-round use, LED is the smarter choice.
Bulb Shapes and Spacing Matter
String lights come with different bulb types:
- Globe (round): Classic look, even glow. Best for general ambiance.
- Candelabra (flame-shaped): Mimics candlelight. Adds elegance.
- Edison (exposed filament): Industrial, retro vibe. Great for modern spaces.
- Mini (tiny bulbs): Delicate, subtle sparkle. Ideal for wrapping posts.
Bulb spacing also affects the look. Tight spacing (3–4 inches apart) creates a bright, continuous glow. Wider spacing (6–8 inches) gives a more twinkly, starry effect. For a balanced look, I prefer 4–5 inch spacing on straight runs and 6–8 inches on swags.
Weather Resistance and Durability
Your lights need to survive rain, wind, and temperature swings. Look for:
- Outdoor rating: IP44 (splash-proof) or IP65 (dust and water-resistant)
- UV-protected cords: Prevents yellowing and brittleness in sunlight
- Heavy-duty sockets: Resists cracking from expansion/contraction
Avoid lights labeled “indoor use only.” Even if they look cute, they’ll fail within weeks outside.
Tools and Materials: What You’ll Need
Essential Tools for Safe, Secure Installation
Don’t rush into hanging lights without the right gear. Here’s what I always use:
- Measuring tape: For precise layout planning
- Outdoor-rated hooks or clips: Fence-mounted, adhesive, or magnetic types
- Drill and screws (optional): For permanent installations on wooden fences
- Extension ladder: For tall fences (use a stable, non-slip model)
- Gloves: Protect hands from splinters and sharp edges
- Zip ties: For securing loose cords or bundling extra length
- Timer or smart plug: Automate on/off times (a game-changer!)
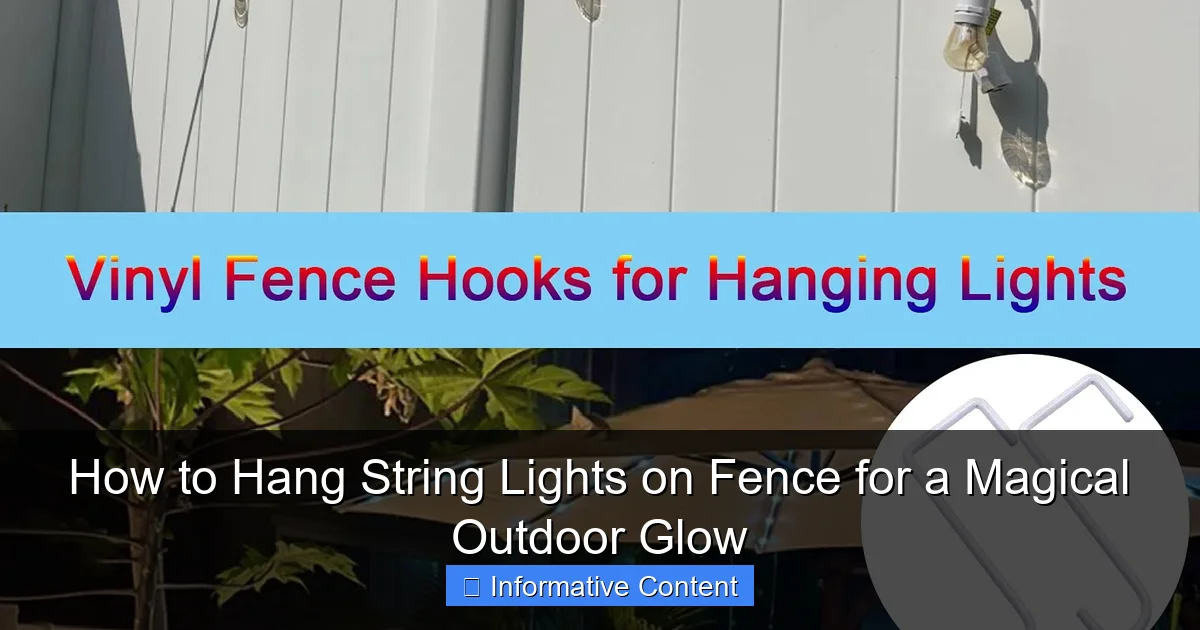
For wooden fences, stainless steel cup hooks are my go-to. They’re inexpensive, easy to install, and hold up well in weather. For vinyl or composite fences, use adhesive clips or magnetic hooks to avoid damaging the surface.
Optional but Helpful Extras
- Fence post caps with built-in hooks: No drilling needed—just slide over posts
- Light clips with adjustable arms: Great for uneven surfaces
- Outdoor extension cord cover: Protects connections from rain
- Light tester pen: Quickly identifies dead bulbs or breaks in the cord
Pro tip: Buy 10–20% more hooks than you think you’ll need. You’ll likely use them at corners, ends, and for extra support on long runs.
Where to Buy Quality Supplies
Skip the cheap dollar-store lights. Invest in reputable brands like:
- Brightech: Durable, dimmable LED strings
- Minetom: Weatherproof, long-life options
- Twinkle Star: Affordable with good customer reviews
Hardware stores (Home Depot, Lowe’s) and online retailers (Amazon, Wayfair) have wide selections. Read reviews carefully—look for mentions of “weatherproof,” “long cord,” and “easy installation.”
Step-by-Step Guide to Hanging String Lights on Fence
Step 1: Prepare the Fence and Work Area
Clear the fence of debris, leaves, or overgrown plants. Wipe down wooden or vinyl surfaces to help adhesives stick. If using hooks, mark their positions with chalk or painter’s tape. For swag styles, mark where the lowest point of each drape will be (usually 6–8 inches below the top rail).
Safety first: Turn off outdoor outlets before handling electrical cords. Use a ladder with a stabilizer bar if working on uneven ground.
Step 2: Install Hooks or Clips
For wooden fences: Screw cup hooks into posts and rails at your marked spots. Space them every 12–16 inches for straight runs, or every 24–36 inches for swags (add extra at corners). Use a drill with a small pilot hole to prevent splitting.
For vinyl/composite fences: Use heavy-duty adhesive clips (rated for outdoor use). Press firmly for 30 seconds per clip. Wait 24 hours before hanging lights for full adhesion.
For metal fences: Magnetic hooks work great. Just attach them to the posts or rails.
Step 3: Hang the Lights (The Fun Part!)
Start at the power source and work outward. This keeps excess cord near the outlet, not dangling in the middle. Here’s how:
- Loop the first bulb or socket over the first hook.
- Stretch the string to the next hook, leaving a little slack.
- For swags: Let the lights dip between hooks, then loop the lowest point over a central hook or zip-tie it to the fence.
- At corners: Wrap lights around the post, securing with a hook or zip tie.
- For post wraps: Spiral lights upward, securing every 6–8 inches with hooks or zip ties.
Pro tip: Don’t pull too tight! String lights expand and contract with temperature. A little slack prevents broken sockets in winter.
Step 4: Secure and Neaten the Installation
Once hung, use zip ties to:
- Bundle excess cord near the outlet
- Secure loose ends to the fence
- Hide cords behind posts (if visible from the front)
For a polished look, tuck zip ties under the cord or use colored ties that match the fence.
Step 5: Test and Adjust
Plug in the lights and check:
- All bulbs are working
- Swags have even drape (no one side sagging more)
- Cords aren’t stretched or kinked
Adjust hooks or zip ties as needed. If a bulb burns out, replace it immediately to avoid overloading the circuit.
Maintaining Your Glow: Care and Troubleshooting
Seasonal Care Tips
String lights can last for years with proper care:
- Winter: In snowy areas, remove lights or use weatherproof covers. Snow buildup can break sockets.
- Summer: Trim overhanging branches that might snag lights in wind.
- Spring/Fall: Wipe down bulbs and cords with a damp cloth to remove dust and pollen.
For permanent installations, consider using light clips with UV protection to prevent fading.
Common Problems and Fixes
| Issue | Likely Cause | Solution |
|---|---|---|
| Half the string is dark | Dead bulb or loose socket | Use a light tester to find the faulty bulb. Replace it. |
| Lights flicker in wind | Loosely secured cords | Add more hooks or zip ties to prevent movement. |
| Adhesive clips fall off | Dirty surface or low-quality adhesive | Clean fence with rubbing alcohol. Use heavy-duty clips. |
| Extension cord overheats | Too many strings on one outlet | Limit to 3–4 strings per outlet. Use a power strip with surge protection. |
| Swags look lopsided | Uneven hook placement | Adjust hooks or add a central support hook. |
When to Replace Your Lights
Even the best lights wear out. Signs it’s time to upgrade:
- Frequent bulb failures
- Yellowed or cracked cords
- Flickering that won’t stop
- More than 3–4 years of use (LEDs last longer, but sockets degrade)
When replacing, consider smart features like app control, color-changing bulbs, or solar power for added convenience.
Creative Ideas and Final Tips for a Stunning Display
Beyond the Basics: Unique Ways to Use Fence Lights
- Create a canopy: Hang lights diagonally from fence to trees or pergolas for a starry ceiling effect.
- Highlight pathways: Run lights along the bottom rail to illuminate walkways at night.
- Seasonal themes: Use colored bulbs (red/green for Christmas, orange for Halloween) or add decorative covers.
- Layer with other lights: Combine string lights with fairy lights in planters or lanterns for depth.
I once saw a neighbor use blue and white string lights to mimic ocean waves on their seaside fence—it was mesmerizing!
Pro Tips for Long-Term Success
- Use a timer: Set lights to turn on at dusk and off at midnight. Saves energy and ensures they’re always ready.
- Label your strings: Use colored tags or labels so you know which set is which for holidays.
- Store properly: If removing lights, wrap them around a cardboard tube or use a cord reel to prevent tangles.
- Check local codes: Some areas restrict permanent outdoor lighting. When in doubt, use removable hooks.
Embrace the Imperfections
Don’t stress over perfection. A slightly crooked swag or a bulb that’s a shade brighter than the others? That’s part of the charm. String lights are meant to feel organic, like fireflies caught in a net. As long as they bring you joy and make your yard feel welcoming, you’ve succeeded.
Hanging string lights on fence isn’t just a DIY project—it’s an invitation to slow down, step outside, and savor the magic of your own backyard. Whether you’re creating a romantic nook for two or a lively space for friends, those gentle glows will become the backdrop to countless memories. So grab your lights, call a friend (or enjoy the quiet), and let your fence shine. After all, the best outdoor spaces aren’t just seen—they’re felt.
Frequently Asked Questions
How do I hang string lights on a fence without damaging it?
Use removable hooks, adhesive clips, or zip ties to secure the lights without drilling or hammering into the fence. These methods are sturdy yet gentle on wood, vinyl, or metal surfaces.
What’s the best way to hang string lights on a fence for a professional look?
Plan your layout by measuring the fence and spacing hooks or clips evenly. Drape the lights in a zigzag, S-shape, or straight line for a polished, intentional design.
Can I use outdoor string lights on a fence in all weather conditions?
Yes, as long as the lights are rated for outdoor use (look for IP44 or higher). These are weather-resistant and safe for rain, snow, and humidity when hung on a fence.
How do I hide the cords when hanging string lights on a fence?
Route cords behind the fence panels, use cord covers, or tuck them into foliage for a seamless look. For extra concealment, choose lights with green or brown wires.
Are there solar-powered options for hanging string lights on a fence?
Absolutely! Solar-powered string lights are energy-efficient and easy to install—just place the solar panel where it gets direct sunlight. They’re ideal for fences in sunny areas.
How many string lights do I need for my fence?
Measure the length of your fence and choose lights with a matching or slightly shorter span. For a layered effect, multiply the fence length by 1.5 to account for draped patterns.

