Featured image for how hang outdoor string lights
Image source: happyhappynester.com
Transform your backyard into a magical retreat by hanging outdoor string lights with strategic planning and secure hardware—start by mapping your layout and choosing weather-resistant lights for lasting glow. Use sturdy anchor points like trees, posts, or eaves, and maintain even tension to prevent sagging for a professional, enchanting look.
Key Takeaways
- Plan your layout first: Sketch light placement to avoid mid-project changes.
- Use sturdy anchors: Secure lights to beams, poles, or tension wires safely.
- Measure twice, hang once: Ensure correct spacing and height for even glow.
- Weatherproof connections: Protect plugs with outdoor-rated covers or enclosures.
- Layer lighting: Combine string lights with lanterns for depth and ambiance.
- Test before fixing: Check bulbs and connections prior to final installation.
📑 Table of Contents
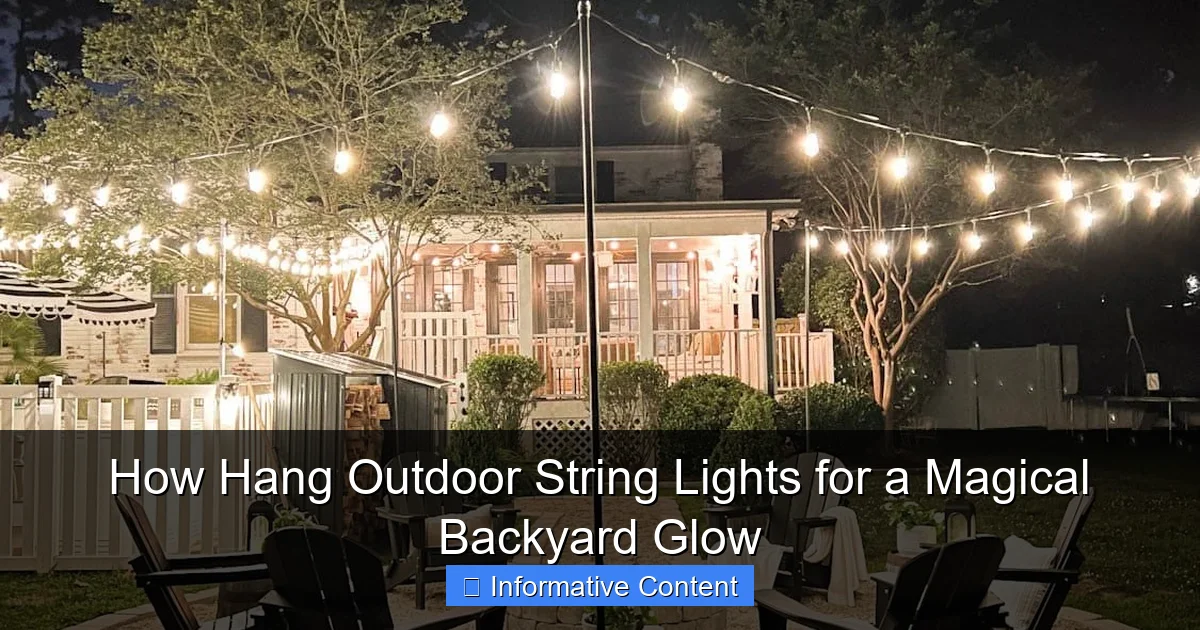
Transform Your Backyard with String Lights
There’s something undeniably magical about stepping into a backyard lit by the soft, warm glow of outdoor string lights. Whether it’s a summer evening barbecue, a quiet night with a book, or a festive holiday gathering, these lights have a way of turning an ordinary space into something extraordinary. I remember the first time I hung string lights in my own backyard—I wasn’t sure where to start, but the result was pure joy. The twinkling lights created an atmosphere that felt both cozy and inviting, like a scene from a movie. If you’ve ever wanted to replicate that feeling, you’re in the right place.
Hanging outdoor string lights isn’t just about aesthetics—it’s about crafting an experience. The right setup can make your outdoor space feel larger, more welcoming, and even a little bit whimsical. But it’s not always as simple as it looks. From choosing the right lights to figuring out the best way to hang them, there’s a bit of strategy involved. In this guide, I’ll walk you through every step of the process, sharing practical tips, relatable stories, and even a few lessons learned the hard way. By the end, you’ll be ready to transform your backyard into a glowing oasis.
Choosing the Right String Lights for Your Space
Before you start hammering nails or tying knots, it’s important to pick the right lights for your needs. Not all string lights are created equal, and the type you choose will depend on your space, budget, and how you plan to use them. Let’s break it down.
Visual guide about how hang outdoor string lights
Image source: blesserhouse.com
Types of Outdoor String Lights
There are several types of outdoor string lights, each with its own pros and cons. Here’s what to consider:
- LED String Lights: These are the most popular choice for outdoor use. They’re energy-efficient, long-lasting, and come in a variety of styles (warm white, cool white, colored, or even color-changing). I’ve used LED lights in my backyard for years, and they still look as good as new.
- Incandescent String Lights: These give off a warmer, more nostalgic glow, but they use more energy and don’t last as long as LEDs. I tried them once for a holiday party, and while the ambiance was lovely, I ended up replacing them after just two seasons.
- Edison Bulb String Lights: These feature vintage-style bulbs with exposed filaments, perfect for a rustic or industrial look. They’re great for patios or pergolas but can be a bit fragile, so handle them carefully.
- Solar-Powered String Lights: If you’re looking for an eco-friendly option, solar lights are a solid choice. They charge during the day and turn on automatically at dusk. I love using them in areas where I don’t have easy access to an outlet.
Key Features to Look For
Not all string lights are designed for outdoor use, so here’s what to check before buying:
- Weather Resistance: Look for lights rated IP44 or higher, which means they’re protected against splashes and dust. I once bought a set of lights labeled “outdoor use,” but they shorted out after a light rain—lesson learned!
- Bulb Spacing: Tighter spacing (6-12 inches) gives a denser glow, while wider spacing (18-24 inches) creates a more subtle effect. I prefer tighter spacing for my patio, but wider spacing works better for large areas like a backyard fence.
- Length and Connectability: Measure your space and choose lights that fit. Some sets are connectable, allowing you to link multiple strands for longer runs. Just be sure not to exceed the manufacturer’s recommended wattage limit.
- Plug-in vs. Battery-Operated: Plug-in lights are more reliable, but battery-operated ones offer flexibility. I use battery-powered lights for temporary setups, like a pop-up movie night in the yard.
Planning Your Layout and Design
Once you’ve chosen your lights, it’s time to plan how you’ll arrange them. A well-thought-out layout can make a huge difference in how your backyard looks and feels. Here’s how to get started.
Sketch Your Space
Grab a piece of paper or use a digital app to sketch your backyard layout. Mark key features like trees, fences, patios, and any permanent structures. This will help you visualize where the lights will go and avoid any last-minute surprises. I once skipped this step and ended up with lights that were too short for one section—don’t make the same mistake!
Decide on a Hanging Style
There are several ways to hang string lights, depending on your space and desired effect. Here are some popular options:
- Linear Layout: Hang lights in straight lines between two points (like a fence and a tree or two posts). This works well for defining spaces, like a dining area or lounge zone.
- Crisscross Pattern: Create a grid or “X” pattern between multiple points. This adds depth and is perfect for covering a large area, like a backyard patio. I used this style for a friend’s wedding reception, and it looked stunning.
- Canopy Effect: String lights overhead in a zigzag or wave pattern, like a canopy. This creates a magical, starry-night effect—ideal for romantic evenings or parties.
- Wrap Around Trees or Posts: Wrap lights around tree trunks or posts for a whimsical, organic look. Just be sure to leave some slack to accommodate tree growth.
Consider Power Sources
Think about where you’ll plug in your lights. If you’re using plug-in lights, make sure there’s an outdoor outlet nearby or plan to use an extension cord (rated for outdoor use). For solar or battery-powered lights, ensure they’ll get enough sunlight or have fresh batteries. I once forgot to check the battery level before a party, and the lights went out halfway through—not ideal!
Tools and Materials You’ll Need
Now that you’ve planned your layout, it’s time to gather your tools and materials. Having the right supplies on hand will make the process smoother and safer.
Essential Tools
- Measuring Tape: To measure distances between hanging points and ensure your lights are the right length.
- Hammer or Drill: For installing hooks, screws, or anchors. A drill is especially helpful if you’re working with wood or masonry.
- Pliers: Useful for tightening knots or adjusting hardware.
- Step Ladder or Extension Pole: For reaching high points safely. I prefer a step ladder with a tray for holding tools—it saves trips up and down.
- Outdoor Extension Cord (if needed): Choose one rated for outdoor use and long enough to reach your power source.
Hanging Hardware
- Hooks or Screws: Use outdoor-rated hooks, eye screws, or screw-in cup hooks. I like using stainless steel or galvanized hardware to prevent rust.
- Clips or Clamps: Adhesive or magnetic clips work well for temporary setups or surfaces where you can’t drill.
- Rope or Cable (for tension): If you’re hanging lights between two points without a natural anchor, use a sturdy rope or steel cable to create a tension line. I’ve used this method for a pergola, and it held up beautifully.
- Zip Ties or Velcro Straps: For securing excess cord or wrapping lights around poles.
Safety Gear
- Gloves: To protect your hands from sharp hardware or rough surfaces.
- Safety Glasses: Especially if you’re drilling or hammering overhead.
- Non-Slip Shoes: For ladder safety.
Step-by-Step Installation Guide
Now comes the fun part—hanging your lights! Follow these steps for a smooth and successful installation.
Step 1: Install Your Hardware
Start by installing hooks, screws, or anchors at your planned hanging points. If you’re using a tension line (like rope or cable), secure it first. I like to leave a little slack in the line to account for sagging over time. For trees, use soft straps or hooks designed for outdoor use to avoid damaging the bark.
Step 2: Test Your Lights
Before hanging, plug in your lights to make sure they work. There’s nothing worse than getting everything set up only to find a dead bulb or faulty strand. I once spent an hour hanging lights just to realize the plug was loose—test first!
Step 3: Hang the Lights
Start at one end and work your way to the other. If you’re using a tension line, attach the lights to the line using zip ties or clips. For straight lines, drape the lights between hooks or screws, leaving some slack to prevent strain. I recommend leaving a few inches of slack between bulbs for a more natural look.
Step 4: Secure Excess Cord
Use zip ties or Velcro straps to secure any excess cord to poles, fences, or trees. This keeps things tidy and reduces tripping hazards. I once had a guest trip over a loose cord—embarrassing!
Step 5: Adjust and Fine-Tune
Step back and look at your setup. Adjust any sagging or uneven sections. If you’re using a crisscross or canopy pattern, tweak the angles until it looks balanced. I like to do this at night to see how the lights look in the dark.
Step 6: Plug In and Enjoy
Once everything looks good, plug in your lights and bask in the glow! If you’re using a timer or smart plug, set it up now so your lights turn on and off automatically.
Maintenance and Safety Tips
Your lights will last longer and stay safer with a little maintenance. Here’s how to keep them in top shape.
Regular Inspections
Check your lights periodically for loose connections, frayed wires, or damaged bulbs. I do this every few months, especially before the holiday season. Replace any faulty strands to avoid fire hazards.
Seasonal Storage
If you live in an area with harsh winters, consider taking down your lights and storing them indoors. Wrap them around a piece of cardboard or a reel to prevent tangling. I once left my lights up all winter, and the cold cracked several bulbs—not worth the hassle!
Weatherproofing
Even weather-resistant lights can benefit from extra protection. Use silicone sealant on plugs and connections to keep moisture out. I also cover my outdoor outlets with weatherproof covers when not in use.
Energy Efficiency
LED lights are already energy-efficient, but you can save even more by using a timer or smart plug. This ensures your lights aren’t running all night, which is better for the environment and your electricity bill.
| Maintenance Task | Frequency | Notes |
|---|---|---|
| Check for loose connections | Every 3 months | Especially after storms or high winds |
| Replace damaged bulbs | As needed | Keep spare bulbs on hand |
| Clean light strands | Twice a year | Use a damp cloth to remove dust and grime |
| Store for winter | Seasonally | Only if in a harsh climate |
Final Thoughts and Inspiration
Hanging outdoor string lights is one of the easiest and most impactful ways to elevate your backyard. Whether you’re going for a cozy, intimate vibe or a festive, party-ready atmosphere, the right setup can make all the difference. I’ve shared my favorite tips and tricks, but don’t be afraid to get creative—some of the best designs come from experimenting.
Remember, the goal is to create a space where you and your loved ones can relax and enjoy the outdoors. So take your time, plan carefully, and don’t stress if things don’t look perfect right away. Even if you make a few mistakes (like I did with that too-short strand), it’s all part of the learning process. Before you know it, you’ll have a backyard that’s not just functional, but truly magical.
Now, grab your lights, gather your tools, and get started. Your glowing oasis awaits!
Frequently Asked Questions
How do I hang outdoor string lights without damaging my house or trees?
Use removable hooks, adhesive clips, or zip ties designed for outdoor use to secure lights without nails or screws. For trees, wrap lights loosely around branches or use tree-friendly mounting brackets to avoid harming the bark.
What’s the best way to hang outdoor string lights for even spacing?
Measure the area first and mark anchor points (like poles or eaves) at consistent intervals. Use a guide string or tape measure to align hooks or clips evenly before attaching the lights.
Can I hang outdoor string lights in wet weather, and are they safe?
Yes, as long as the lights are rated for **outdoor use** (look for “wet-rated” or IP65+). Always plug connections into a GFCI outlet and keep extension cords elevated to avoid water exposure.
How high should I hang outdoor string lights for optimal ambiance?
For patios or dining areas, aim for 7–9 feet high to avoid glare while walking. In larger spaces, go higher (10–12 feet) and use taller poles or trees to maintain a balanced glow.
Do I need special tools to hang outdoor string lights?
Most setups require only basic tools like a ladder, measuring tape, and a drill for permanent hooks. For renters, adhesive clips or tension rods are tool-free options for **hanging outdoor string lights**.
How can I hide the wires and power cords of my outdoor string lights?
Run cords along walls, fences, or under railings using cable clips or raceways. For a seamless look, tuck wires into planters or use decorative cord covers that match your outdoor decor.

