Featured image for how to adhere outdoor led string lights
Image source: vproyalrentals.com
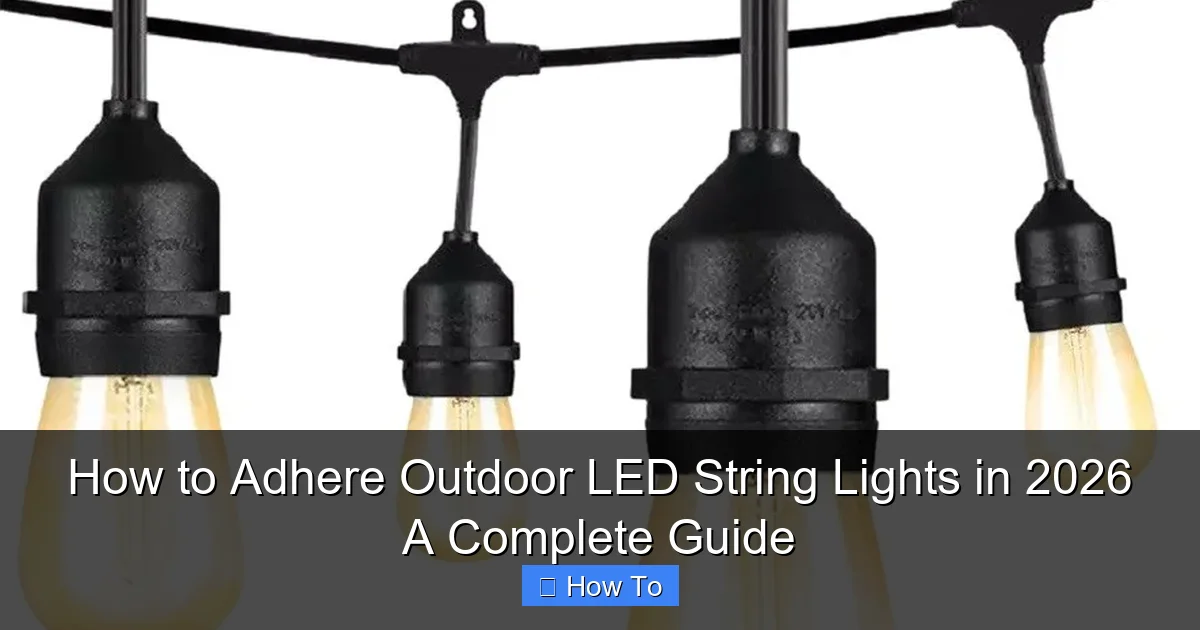
Choose durable, weather-resistant adhesive clips or mounting hardware designed specifically for outdoor use to securely install LED string lights on any exterior surface. Whether attaching to siding, fences, or eaves, prep surfaces thoroughly and follow spacing guidelines to prevent sagging and ensure long-lasting, safe illumination through all seasons.
“`html
How to Adhere Outdoor LED String Lights in 2026: A Complete Guide
Key Takeaways
- Choose weatherproof adhesive: Use outdoor-rated glue or clips for long-lasting hold.
- Plan layout first: Measure and map light placement before installation.
- Clean surfaces thoroughly: Remove dirt and moisture for better adhesion.
- Use tension support: Add hooks or cables to prevent sagging.
- Test lights pre-install: Check functionality before final mounting.
- Allow curing time: Let adhesive dry fully before exposing to elements.
Why This Matters / Understanding the Problem
Picture this: It’s a warm summer evening, you’ve got friends over, and your backyard is glowing with the soft, cozy light of your outdoor LED string lights. But then—*snap*—one of the lights pulls loose, dangling awkwardly like a forgotten holiday ornament. Sound familiar?
If you’ve ever struggled with lights falling off your fence, deck, or pergola, you’re not alone. The real issue isn’t just aesthetics—it’s about long-term durability, safety, and avoiding the hassle of re-installing every few weeks. That’s why learning how to truly adhere outdoor LED string lights in 2026 is more important than ever.
With new materials, smarter adhesives, and climate-resilient tech hitting the market, 2026 is the year to do it right. This guide—how to adhere outdoor LED string lights in 2026 a complete guide—will walk you through everything you need to know, from choosing the right tools to making your lights last through rain, wind, and sun.
Whether you’re lighting up a cozy patio, a sprawling garden, or a rental balcony, this method works. And no, you don’t need to be a handyman. Just a little patience, the right gear, and a few pro tricks.
What You Need
Before you start, gather these essentials. Don’t worry—most are things you probably already have or can pick up at any hardware store for under $30.

Visual guide about how to adhere outdoor led string lights
Image source: yardenvy.com
- Outdoor LED string lights (rated for wet locations—check the box!)
- Weather-resistant adhesive (we recommend 3M Outdoor Mounting Tape or Loctite Power Grab)
- UV-resistant zip ties (black, 8–10 inches long)
- Silicone sealant (clear, outdoor-grade)
- Measuring tape or string (to plan spacing)
- Soft-bristle brush or microfiber cloth (for cleaning surfaces)
- Rubbing alcohol or isopropyl wipes (to prep surfaces)
- Drill with small drill bit (optional)—only if you’re using clips on wood or vinyl
- Outdoor-rated adhesive hooks or clips (plastic or metal, depending on surface)
- Extension ladder (if needed)—safety first!
Pro Insight: Skip the cheap plastic clips. They crack in the sun. Spend a few extra bucks on UV-stabilized ones. Your future self will thank you.
Now, let’s talk surfaces. The method changes slightly depending on what you’re attaching to: wood, vinyl, stucco, metal, or glass. But don’t worry—we’ll cover all of them in this how to adhere outdoor LED string lights in 2026 a complete guide.
Step-by-Step Guide to How to Adhere Outdoor LED String Lights in 2026 A Complete Guide
Step 1: Plan Your Layout (Before You Touch a Light)
Don’t just start slapping lights up. Planning saves time, money, and frustration. I learned this the hard way after I once installed a 50-foot strand only to realize it didn’t reach the outlet.
- Measure the total length of your space (fence, pergola, roofline).
- Decide on spacing: 6–12 inches between bulbs is ideal for even glow.
- Map where your power source is. You don’t want a long extension cord ruining the look.
- Use string or chalk to mark attachment points. This is your “light line.”
Pro tip: If you’re wrapping around a tree, leave slack—trees expand in summer and contract in winter. Too tight, and your lights snap.
This planning phase is crucial in how to adhere outdoor LED string lights in 2026 a complete guide—because the best installations look effortless, but they’re anything but.
Step 2: Clean the Surface (Yes, Really)
Adhesives don’t stick to grime, pollen, or old paint flakes. Clean = grip. I used to skip this step, and my lights would fall off after a week. Never again.
- Use a soft-bristle brush to remove loose dirt, spiderwebs, or cobwebs.
- Wipe the surface with rubbing alcohol or an isopropyl wipe. This removes oils and residue.
- For wood: lightly sand if it’s rough or flaky.
- For stucco: use a stiff brush, then wipe with a damp cloth and let dry.
Warning: Don’t use water-based cleaners on stucco or vinyl—they can trap moisture and weaken adhesion. Stick to alcohol or mild soap and water, then fully dry.
Spend 10 minutes here, and your lights will stay put for years, not months.
Step 3: Choose the Right Attachment Method for Your Surface
Not all surfaces are created equal. Here’s how to pick the best method—this is the heart of how to adhere outdoor LED string lights in 2026 a complete guide.
For Wood (Fences, Decks, Pergolas)
- Use UV-resistant zip ties every 12–18 inches.
- For permanent setups: drill small pilot holes and use adhesive clips (like 3M Command Outdoor Strips with clips).
- Optional: Apply a dab of clear outdoor silicone at the base of each clip for extra hold.
Zip ties are cheap, invisible when pulled tight, and won’t damage the wood if removed later.
For Vinyl or PVC (Fences, Railings)
- Never use nails or screws—they can crack vinyl.
- Use adhesive-backed clips rated for plastic.
- Apply 3M Outdoor Mounting Tape to the back of each clip. Press firmly for 30 seconds.
- Let cure for 1–2 hours before hanging lights.
I once used regular tape on vinyl—big mistake. It peeled off in the first rain. The 3M tape? Still there two years later.
For Stucco or Brick (Walls, Columns)
- Clean with alcohol, then let dry completely.
- Use adhesive clips with outdoor-rated tape (3M VHB or Loctite Power Grab).
- For extra security, apply a small bead of clear silicone around the base of each clip.
- Wait 24 hours before hanging lights—silicone needs time to cure.
Stucco is porous, so surface prep is key. No shortcuts.
For Metal (Railings, Gazebos)
- Wipe with alcohol to remove oxidation or grease.
- Use magnetic clips (if metal is thick enough) or adhesive clips with metal-rated tape.
- For aluminum: avoid metal-on-metal clips—they can cause galvanic corrosion.
Metal expands and contracts with temperature, so give your lights a little slack.
For Glass (Patio Doors, Windows)
- Use suction cups with LED clips—but only for short-term or seasonal use.
- For permanent: apply clear outdoor silicone dots to the glass, then attach clips. Let cure 24 hours.
Glass is slippery, so don’t rely on tape alone. Silicone is your friend here.
Step 4: Attach the Clips or Ties
Now the fun part—putting the hardware in place.
- Start at the end closest to your power source.
- Press each clip or zip tie firmly into place. For adhesive clips, hold for 30 seconds.
- For zip ties: thread through the built-in loop on the light socket, pull tight, but don’t over-tighten (you might crack the socket).
- Trim excess zip tie tails with scissors or a zip tie cutter.
Pro Tip: Use a ladder with a tool tray. Keep your clips, tape, and scissors within reach. No more climbing up and down.
Spacing tip: For a “floating” effect, space clips 12 inches apart. For a “dense” look, go 6 inches. Adjust based on your bulb size.
Step 5: Hang the Lights (With Care)
Don’t just drape the lights—hang them properly.
- Unroll the entire strand and lay it out on the ground.
- Start at the power end. Plug it in to test—always test before you hang!
- If it works, unplug and begin attaching. Hook each bulb socket into its clip or zip tie.
- For zip ties: thread the socket through the tie’s head, then pull tight.
- For adhesive clips: snap the socket into the clip’s groove.
If a bulb doesn’t light, check the socket—sometimes it just needs a firm push.
This step is where many people rush. Take your time. A crooked light line is obvious at night.
Step 6: Secure the Power Cord
The cord is the weakest point. If it dangles, it can yank on the lights and pull them loose.
- Use outdoor-rated cord clips or zip ties every 12–18 inches.
- Route the cord along a wall, railing, or under eaves—avoid open space.
- For outlets: use a GFCI-protected outdoor outlet and a drip loop (a U-shaped bend) to keep water from running down the cord.
Safety First: Never staple or nail the cord. Use clips only. And always use a GFCI outlet—wet conditions are real.
A drip loop is simple: just let the cord hang in a small U before plugging in. Water runs down and drips off, not into the outlet.
Step 7: Final Check & Weatherproofing
Before you celebrate, do a final walk-through.
- Plug in the lights. Walk the entire line. Look for dark spots, flickering, or loose sockets.
- Adjust any sagging sections. Tighten zip ties or reposition clips.
- Apply a tiny dab of clear outdoor silicone at the base of each clip or tie. This seals against moisture and wind.
- For extra durability, wrap connections (like plug-to-cord) with self-fusing silicone tape.
This step is the difference between “it works” and “it lasts.” In this how to adhere outdoor LED string lights in 2026 a complete guide, longevity is the goal.
Step 8: Seasonal Care & Removal (If Needed)
Even the best setup needs a little love.
- Check every 3–6 months. Tighten loose zip ties, clean dust, and reapply silicone if needed.
- After storms, inspect for damage. Wind can loosen clips over time.
- For seasonal removal: cut zip ties (don’t pull—it can damage the socket). Gently peel off adhesive clips—use a hair dryer to warm the tape first.
If you’re leaving them up year-round, consider all-weather LED strips with built-in adhesive backing. They’re easier to maintain.
Pro Tips & Common Mistakes to Avoid
Pro Tip #1: Buy lights with replaceable bulbs. If one goes out, you don’t have to replace the whole strand. Look for “E26” or “E12” socket types.
Pro Tip #2: Use a smart plug with a timer. Set your lights to turn on at dusk and off at midnight. Saves energy and protects bulbs.
Pro Tip #3: For rental homes or apartments, use removable adhesive clips (like 3M Command Outdoor). No damage, no landlord drama.
Common Mistake #1: Using indoor lights outdoors. They’ll short-circuit in rain. Always check the packaging—look for “wet-rated” or “IP65.”
Common Mistake #2: Overloading circuits. A 50-foot strand can draw 5–10 amps. Check your outlet’s capacity. Use a power strip with surge protection.
Common Mistake #3: Ignoring wind load. In open areas, lights can sway and pull clips loose. Use more clips in windy spots—every 6 inches instead of 12.
Common Mistake #4: Skipping the drip loop. It’s small, but it prevents water damage and fire hazards.
And one last thing: don’t use duct tape, hot glue, or rubber bands. They degrade in UV light and fail fast. Stick to the right tools.
In this how to adhere outdoor LED string lights in 2026 a complete guide, the key is using the right product for the job—not the cheapest or fastest.
FAQs About How to Adhere Outdoor LED String Lights in 2026 A Complete Guide
Q: Can I use regular tape to hang outdoor lights?
A: No. Regular tape (like duct or masking) breaks down in sunlight and rain. Use outdoor-rated adhesive tape (3M, Loctite) or zip ties. They’re designed for UV and moisture.
Q: Will zip ties damage my wood fence?
A: Not if you use them right. Don’t overtighten—just snug. And use UV-resistant black zip ties. They won’t leave marks, and they last longer than clear ones.
Q: How do I remove adhesive clips without damaging the surface?
A: For 3M Command clips: pull the tab slowly—it stretches and releases. For other adhesives: use a hair dryer to warm the tape (30–60 seconds), then gently peel. Clean residue with rubbing alcohol.
Q: Can I leave my LED string lights up all year?
A: Yes—if they’re wet-rated and properly installed. Check for condensation inside bulbs after heavy rain. If you see moisture, the seal is compromised. Replace or reseal.
Q: What’s the best way to hang lights on a stucco wall?
A: Clean the surface, use outdoor adhesive clips with 3M VHB tape, and add a dab of clear silicone at the base. Let cure 24 hours. Avoid nails—they can crack stucco.
Q: How far apart should I space the lights?
A: For a soft glow: 12 inches. For a festive, dense look: 6 inches. Adjust based on bulb size. Larger bulbs (like vintage Edison) can be farther apart.
Q: Can I use solar-powered LED string lights?
A: Yes! They’re great for areas without outlets. But check the battery life and charge time. In winter, they may not stay lit all night. Pair with a timer for best results.
Final Thoughts
There you have it—your complete how to adhere outdoor LED string lights in 2026 a complete guide. No more dangling lights, no more frustration, no more “I’ll fix it next weekend” excuses.
This isn’t just about looks. It’s about creating a space you love—one where you can relax, host, or just enjoy a quiet night under the stars. And when your lights stay up through summer storms, winter frost, and everything in between? That’s peace of mind.
Remember: prep, plan, and use the right tools. Clean surfaces, choose the right attachment method, and don’t skip the silicone. It’s the little things that make the big difference.
So go ahead—string those lights, fire up the grill, and let your backyard shine. And if you run into a snag? Come back to this guide. We’ve got your back.
Now, grab your tools and get to work. Your perfect outdoor glow is just a few clips away.
“`

