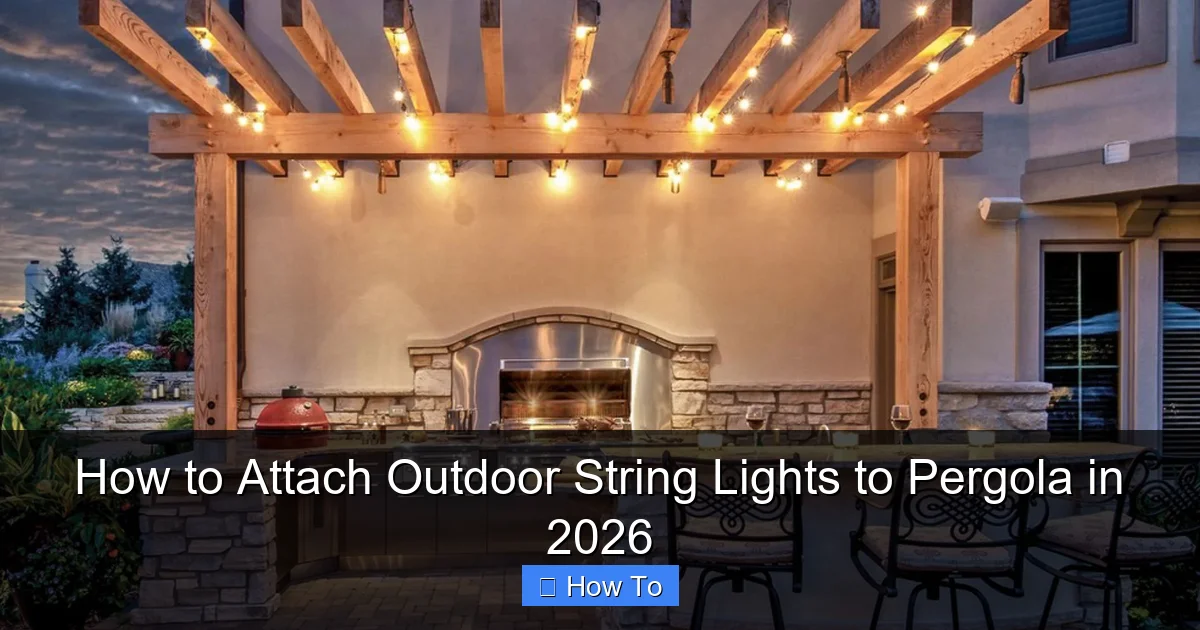
Featured image for how to attach outdoor string lights to pergola
Image source: shadefxcanopies.com
Secure outdoor string lights to your pergola in 2026 using durable, weather-resistant mounting clips or stainless steel cable ties for a clean, long-lasting look. Ensure even spacing and proper tension by running lights parallel to beams or in zigzag patterns, depending on your design—always anchor at multiple points to prevent sagging. For a seamless finish, conceal wires with raceways or clips and use LED string lights rated for year-round outdoor use.
“`html
How to Attach Outdoor String Lights to Pergola in 2026
Key Takeaways
- Plan layout first: Sketch light placement for even coverage and visual appeal.
- Use weatherproof hardware: Choose stainless steel or UV-resistant clips for durability.
- Secure anchor points: Attach lights to sturdy pergola beams or posts for safety.
- Measure spacing precisely: Keep bulbs 12–18″ apart to avoid sagging or gaps.
- Test before finalizing: Power lights temporarily to check brightness and alignment.
- Protect wiring: Run cords through conduit or raceways to prevent weather damage.
Why This Matters / Understanding the Problem
Let’s be honest—there’s something magical about a pergola lit up with soft, glowing string lights. Whether you’re hosting a backyard BBQ, enjoying a quiet evening, or just want to boost your home’s curb appeal, outdoor lighting transforms your space. But here’s the catch: if you don’t install them right, you’re stuck with drooping wires, tangled messes, or worse—lights that fall after one gust of wind.
I learned this the hard way. A few years ago, I proudly strung up my lights with flimsy zip ties. Two weeks later? They were dangling like sad tinsel. That’s why I dove deep into how to attach outdoor string lights to pergola in 2026—not just to make it work, but to make it last. Whether your pergola is wood, metal, or vinyl, the right method keeps your lights safe, secure, and stunning.
This guide isn’t just about hanging lights. It’s about creating an ambiance that lasts—through seasons, storms, and countless summer nights. And yes, we’ll cover the latest 2026 trends: solar-powered LEDs, smart controls, and weather-resistant hardware that actually holds up.
What You Need
Before you start, let’s gather your tools and materials. Don’t worry—most of this is affordable and easy to find. Think of it like prepping for a DIY date with your pergola.
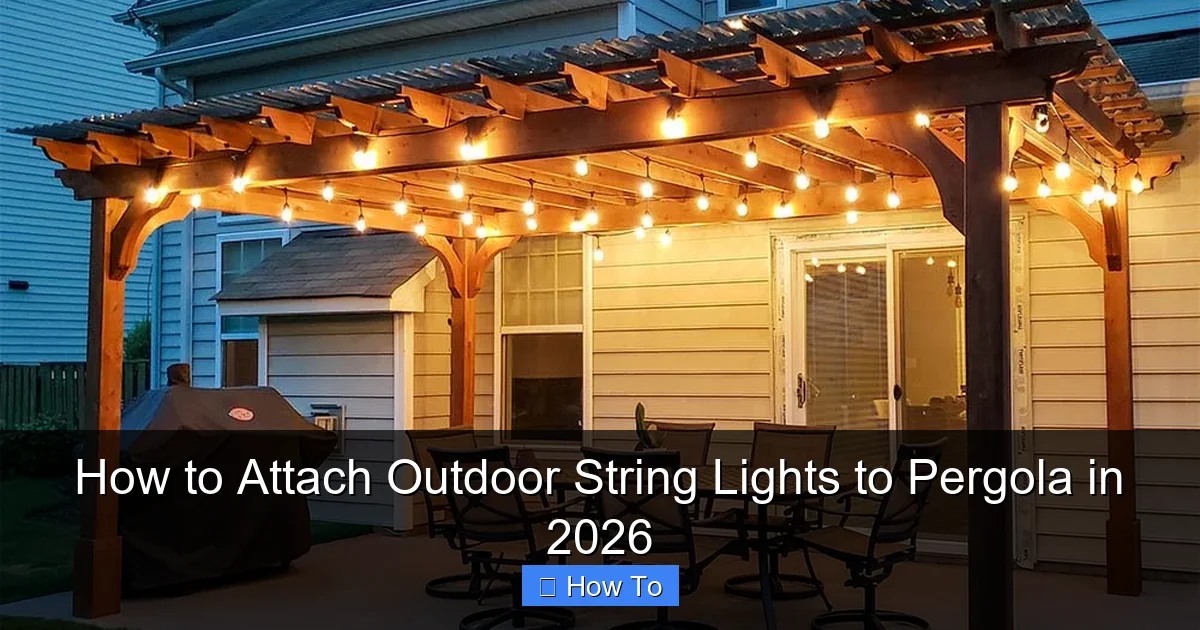
Visual guide about how to attach outdoor string lights to pergola
Image source: pergolakitsusa.com
- Outdoor-rated string lights (LED, solar, or plug-in—choose based on your power access)
- Mounting hardware:
- For wood: eye hooks or deck screws with built-in loops
- For metal: magnetic hooks or self-tapping screws with rubber washers
- For vinyl: adhesive-backed hooks (rated for outdoor use)
- Measuring tape (to space lights evenly)
- Drill with pilot bit (if using screws or eye hooks)
- Level (optional, but helps keep things straight)
- Extension ladder (if your pergola is tall)
- Zip ties (for securing loose wires—use UV-resistant ones)
- Weatherproof electrical tape (for sealing connections)
- Smart plug or timer (optional, for automatic on/off)
Pro insight: I once used regular indoor zip ties. Big mistake. They cracked in the sun within a month. Now I only use UV-stabilized ones—they last years. Also, avoid cheap plastic hooks. They warp or snap in heat.
Step-by-Step Guide to How to Attach Outdoor String Lights to Pergola in 2026
Ready to turn your pergola into a glowing oasis? Let’s walk through this together—no guesswork, no frustration. This method works for any pergola style, and it’s built for longevity.
Step 1: Plan Your Layout and Light Spacing
Before you touch a screw, sketch your design. Do you want a crisscross pattern? A straight line? A canopy effect? I like a gentle zigzag—it looks intentional, not random.
Measure your pergola’s beams and rafters. For most setups, place mounting points every 16–24 inches. This keeps the lights taut and prevents sagging. Use a measuring tape and mark spots with a pencil or painter’s tape.
Warning: Don’t eyeball it. I once spaced my hooks by “feeling,” and the lights looked uneven. A 16-inch grid keeps it professional and balanced.
Pro tip: If you’re using solar lights, place the solar panel where it gets at least 6 hours of direct sunlight. I learned this after my first set dimmed by noon.
Step 2: Choose the Right Mounting Method for Your Pergola Material
Your pergola’s material dictates your hardware. Here’s what works best in 2026:
- Wood pergola: Use stainless steel eye hooks or deck screws with built-in loops. They grip well and resist rust.
- Metal pergola: Magnetic hooks are a game-changer—no drilling. Or use self-tapping screws with rubber gaskets to prevent metal-on-metal wear.
- Vinyl or plastic pergola: Adhesive hooks (like 3M Outdoor Mounting Tape) work great. Avoid nails or screws—they can crack the material.
For wood, pre-drill pilot holes to prevent splitting. I use a 1/8-inch bit. It’s like giving the wood a “guide path” so the screw goes in smoothly.
For metal, test magnetic hooks first. I once tried them on a thin aluminum pergola—they held, but barely. Thicker steel? They’re rock-solid.
Step 3: Install the Mounting Hardware
Time to get hands-on. Start at one end and work your way across. Use your drill to install eye hooks or screws at your marked spots. Tighten until snug, but don’t overdo it—especially on wood.
If using adhesive hooks, clean the surface first with rubbing alcohol. Let it dry, then press the hook firmly for 30 seconds. I wait 24 hours before hanging lights—this ensures the bond is strong.
For magnetic hooks, just place them. But check the weight rating. Most hold up to 15 lbs—plenty for string lights, but not for heavy fixtures.
Pro tip: I label my hooks with a tiny dot of nail polish. Red for the start, blue for the end. It helps me troubleshoot if a light goes out.
Step 4: String the Lights (The Smart Way)
Now the fun part—hanging the lights. But don’t just drape them. Use a method that prevents strain on the bulbs and sockets.
Start at the power source. If you’re using plug-in lights, plug them in first (but don’t turn them on yet). This lets you test the length and reach.
Hang the lights in a zigzag, crisscross, or linear pattern—whatever fits your design. Loop each end of the string over the hooks. Don’t pull too tight. Leave a slight sag—about 2–3 inches between hooks. This absorbs wind movement and prevents stress on the wires.
For long runs, use zip ties to secure the cord every 3–4 feet. I loop the tie around the cord and the hook, then trim the excess. It keeps things neat and reduces vibration.
Common mistake: I once pulled my lights too tight. A storm hit, the wind yanked one hook loose, and half the string went dark. Slight sag = built-in flexibility.
Step 5: Secure Connections and Wires
Outdoor lights have connections—between strings, at plugs, and near power sources. These are the weakest points. Protect them.
Use weatherproof electrical tape to seal any exposed connections. Wrap it tightly in a figure-eight pattern. This keeps moisture out and prevents shorts.
For extension cords, use a weatherproof cord cover or tuck the plug into a sealed outlet box. I use an outdoor-rated outlet cover—it’s like a little umbrella for your plug.
If you’re running wires along the ground, bury them in a shallow trench (6 inches deep) and cover with mulch or gravel. Or use a cord protector ramp if they cross a walkway.
Step 6: Test, Adjust, and Automate (2026 Upgrade)
Turn on your lights. Walk around. Look for dark spots, flickering bulbs, or sagging sections. Adjust as needed.
Here’s a 2026 twist: add a smart plug or timer. I use a Wi-Fi plug that turns my lights on at sunset and off at 11 PM. No more forgetting to switch them off.
Some smart lights (like Philips Hue Outdoor) connect to apps or voice assistants. You can set scenes—“Romantic Dinner” or “Movie Night”—with just a tap.
For solar lights, check the battery life. Most last 8–10 hours. If yours dim early, the panel might be shaded or dirty. Clean it monthly with a soft cloth.
Step 7: Seasonal Maintenance and Storage
Your lights should last years—if you maintain them. Here’s what I do:
- Inspect monthly: Check for loose hooks, frayed wires, or cracked bulbs.
- Clean the bulbs: Dust and pollen block light. Wipe with a dry microfiber cloth.
- Trim vegetation: Keep vines and leaves away from the lights. They trap moisture and cause corrosion.
- Store off-season: If you live in a snowy area, take down plug-in lights in winter. Store in a dry, cool place. Coil them loosely to prevent kinks.
Personal story: I left my lights up one winter. The cold cracked the plastic sockets. Now I take them down every November. It’s a small chore for big savings.
Pro Tips & Common Mistakes to Avoid
After hanging lights on five pergolas (and fixing three disasters), here’s what I wish I knew sooner.
Pro Tip 1: Use the “Two-Person Rule” for Long Runs
Hanging lights over 20 feet? Get a helper. One person guides the string, the other secures the hooks. It’s faster and safer—no ladder wobbling.
Pro Tip 2: Mix Light Types for Depth
Don’t just use one string. Combine warm white LEDs with fairy lights or color-changing strips. I layer them—main lights on the rafters, twinkling lights on the beams. It adds dimension.
Pro Tip 3: Label Your Strings
Use colored tags or zip ties to mark each string. If one goes out, you’ll know which one to replace. I use red for the front, blue for the sides.
Common Mistake 1: Ignoring Weight Load
Not all pergolas are built the same. Check your beam’s load capacity. A typical 2×6 beam can hold 50 lbs per foot. Most string lights weigh under 5 lbs total—but add 10 strings? That’s 50 lbs. Spread the load evenly.
Common Mistake 2: Skipping the Ground Fault Check
Always use a ground fault circuit interrupter (GFCI) outlet. It cuts power if there’s a short. I plug mine into a GFCI-protected outdoor outlet. It’s saved my lights (and my house) more than once.
Common Mistake 3: Forgetting About Wind
Wind is the silent killer of outdoor lights. Use wind-resistant hooks (like spring-loaded clips) and leave that slight sag. I once used rigid hooks—a storm bent them. Now I use flexible loops.
FAQs About How to Attach Outdoor String Lights to Pergola in 2026
Let’s tackle the questions I get all the time.
Q: Can I leave outdoor string lights up year-round?
A: It depends. If you use weatherproof, commercial-grade lights and maintain them, yes. But I recommend taking down plug-in lights in harsh winters. Solar lights can stay up, but clean the panels monthly. Moisture and salt (from road spray) can corrode sockets.
Q: What if my pergola has no rafters?
A: No problem. Use ceiling hooks on the crossbeams. Or install a light track (like a curtain rod) across the top. I did this on a pergola with a solid roof—worked perfectly.
Q: How do I connect multiple light strings safely?
A: Use a multi-outlet outdoor power strip with a GFCI. Never daisy-chain more than 3 strings (check the manufacturer’s limit). I use a 4-outlet strip—one for each side of the pergola.
Q: Are solar string lights worth it?
A: Absolutely—if you get good ones. Look for high-capacity batteries (2,000+ mAh) and adjustable solar panels. I use solar lights on my west-facing pergola—they charge by noon and glow until midnight.
Q: Can I use adhesive hooks on a metal pergola?
A: Only if the surface is smooth and clean. But magnetic hooks are better. Adhesive fails in extreme heat (above 120°F) or cold (below 20°F). I tried it once—the hooks peeled off in July.
Q: How do I fix a flickering light string?
A: Check the connections first. Loose plugs or damaged wires cause flickers. If it’s the whole string, the transformer might be failing. I keep a spare on hand—replacement is faster than troubleshooting.
Q: What’s the best spacing for a crisscross pattern?
A: For a diamond crisscross, space hooks 16 inches apart vertically and 24 inches horizontally. It looks balanced and uses fewer lights. I use this on my 12×16 pergola—perfect coverage.
Final Thoughts
Hanging outdoor string lights on your pergola isn’t just a DIY project—it’s an investment in your home’s vibe. When done right, it creates a space you’ll love to use, season after season.
Remember: how to attach outdoor string lights to pergola in 2026 isn’t about flashy trends. It’s about smart choices—using the right hardware, planning your layout, and maintaining what you build. Skip the shortcuts. Take the time to do it once, and you’ll enjoy years of glowing nights.
My final advice? Start small. Hang one string first. Test it. Then expand. And don’t forget the smart plug—it’s the 2026 upgrade that makes everything easier.
Now go grab your drill, your lights, and your favorite drink. Your pergola’s transformation starts tonight.
“`

