Featured image for how to attach outdoor string lights to siding
Image source: i1.wp.com
Attaching outdoor string lights to siding in 2026 is easiest and safest using removable, damage-free clips designed for modern vinyl, wood, or fiber cement surfaces. Choose UV-resistant, weatherproof mounting clips that grip siding edges or slide under panels without nails or adhesives, ensuring a secure hold through all seasons. This method preserves your home’s exterior while delivering a professional, long-lasting glow.
“`html
How to Attach Outdoor String Lights to Siding in 2026
Key Takeaways
- Choose removable hooks for damage-free, secure attachment to siding.
- Measure spacing first to ensure even light distribution and tension.
- Use adhesive clips on smooth siding for no-drill installation.
- Avoid over-tightening to prevent warping or damaging light strands.
- Seal around fasteners to protect siding from moisture and pests.
- Test lights before final installation to confirm placement and function.
Why This Matters / Understanding the Problem
Let’s be honest: there’s something magical about twinkling outdoor string lights on a warm summer evening. Whether you’re hosting a backyard BBQ, celebrating the holidays, or just want to cozy up your patio, how to attach outdoor string lights to siding in 2026 is more than a DIY task—it’s about creating atmosphere without wrecking your home.
I learned this the hard way. A few years ago, I used nails to hang lights on my vinyl siding. The result? Cracks, leaks, and a repair bill that made my wallet weep. That’s when I realized: the way you hang lights matters. In 2026, with smarter tools, better materials, and a growing focus on home longevity, it’s time to do this right.
The problem? Most people either damage their siding or end up with droopy, uneven lights that look like a sad attempt at ambiance. The good news? With the right approach, you can hang lights that are secure, weatherproof, and won’t void your siding warranty.
This guide walks you through the safest, most effective way to attach outdoor string lights to siding—whether you have vinyl, wood, fiber cement, or aluminum. No guesswork. No damage. Just a beautiful, long-lasting glow.
What You Need
Before you start, gather your gear. Trust me, skipping a tool or two can turn a fun project into a frustrating mess.
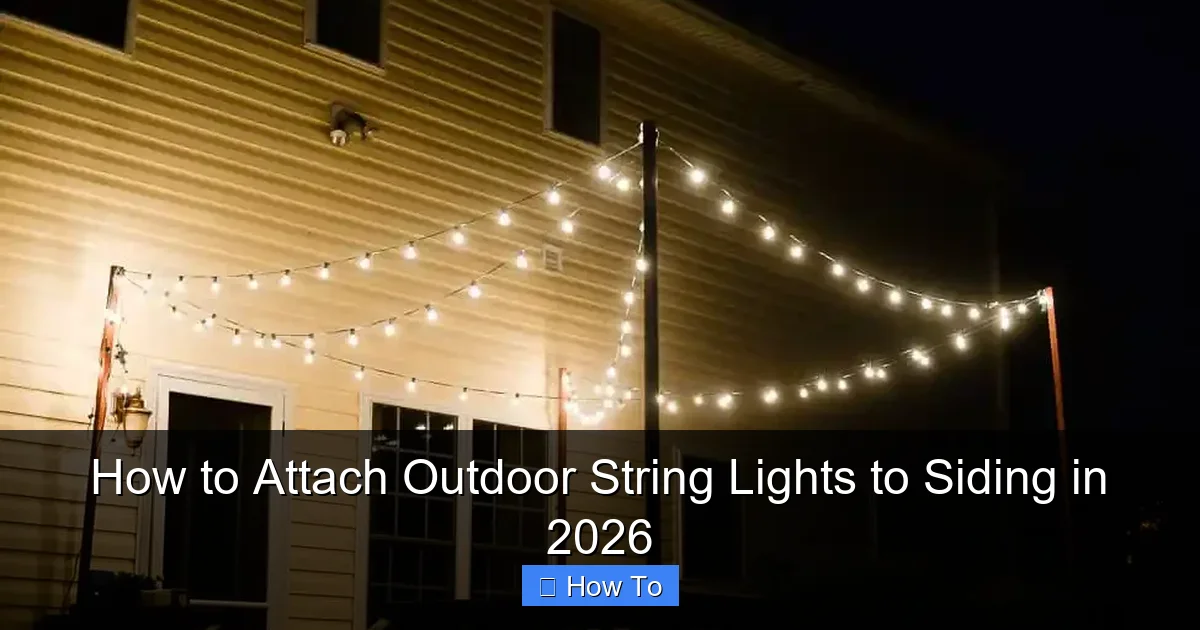
Visual guide about how to attach outdoor string lights to siding
Image source: i3.wp.com
- Outdoor-rated string lights (LED, weatherproof, with proper certifications like UL or ETL)
- Siding-specific clips (vinyl siding clips, J-channel clips, or universal siding hooks)
- Measuring tape (a laser measure is even better for long runs)
- Level (a small 6-inch level works great for tight spaces)
- Drill with a small pilot bit (only if using screws on wood or fiber cement)
- Silicone sealant (for sealing screw holes, if drilling is unavoidable)
- Extension ladder (if working above the first story)
- Work gloves (vinyl clips can be sharp!)
- Power source with GFCI outlet (safety first!)
- Zip ties (optional) – for securing loose wires
Pro Tip: If you have vinyl siding, do not use nails, screws, or glue. These can crack the material, allow water intrusion, and void warranties. Use clips designed for vinyl—they’re cheap, reusable, and slide under the siding lip like magic.
Step-by-Step Guide to How to Attach Outdoor String Lights to Siding in 2026
Step 1: Choose the Right String Lights
Not all lights are created equal. For how to attach outdoor string lights to siding in 2026, start with quality.
- Look for outdoor-rated, LED string lights with IP44 or higher weather resistance.
- Choose lights with removable sockets—they’re easier to thread through clips.
- Opt for plug-in models with a long cord (at least 15–20 feet) to avoid extension cords.
- Smart LED lights? Great for automation, but make sure the app doesn’t glitch in cold weather.
I once bought “budget” solar lights. They lasted one season. Save yourself the hassle: invest in durable, UL-listed lights. Brands like Brightown, Twinkly, and GE have proven track records.
Warning: Avoid incandescent bulbs—they get hot, use more energy, and can melt plastic clips. Stick with LEDs.
Step 2: Plan Your Layout
Measure your space before you start hanging. This step saves time, clips, and frustration.
- Sketch a rough diagram: mark where you want lights (eaves, porch, fence, etc.).
- Measure the total length needed. Add 10–15% extra for slack and curves.
- Identify power source location. You’ll want to minimize extension cord use.
- Decide on spacing: 6–12 inches between lights is ideal for even glow.
For example, my back porch is 16 feet wide. I used two 25-foot strands with 8-inch spacing. I started 12 inches from the edge to avoid overhang.
Pro tip: Use painter’s tape to mark light positions temporarily. Walk around at night to visualize the effect before committing.
Step 3: Install Siding Clips (The Right Way)
This is the heart of how to attach outdoor string lights to siding in 2026. The method depends on your siding type.
Vinyl Siding: Use Slide-Under Clips
- Find the seam between two panels (you’ll see a slight lip).
- Slide the clip under the bottom lip of the upper panel. It should click into place.
- No tools, no damage. Each clip holds 1–2 bulbs.
- Space clips every 12–18 inches for even support.
Wood or Fiber Cement Siding: Use Screw-On Hooks
- Drill a pilot hole (1/8 inch) to prevent splitting.
- Insert a plastic or metal hook screw. Don’t overtighten.
- Seal the hole with clear silicone to prevent water damage.
- Use hooks rated for outdoor use (stainless steel or coated).
Aluminum Siding: Use Magnetic or Adhesive Hooks
- Magnetic hooks work great on aluminum (if not painted).
- For painted or textured surfaces, use outdoor-rated adhesive hooks (like 3M Command Outdoor).
- Wait 24 hours before hanging lights.
Pro Tip: For long runs, use J-channel clips—they fit into the groove of vinyl or aluminum trim and hold multiple lights.
Step 4: Hang the Lights
Now the fun part: bringing your vision to life.
- Start at the power source and work outward. This avoids tangles.
- Clip each bulb or socket into the hook or clip. Don’t pull too tight—leave a slight “S” curve for expansion in heat.
- For bulbs without built-in clips, use zip ties around the socket base and secure to the hook.
- Use a level to check alignment. Nothing ruins ambiance like a crooked strand.
I like to hang one end first, then walk to the other side to adjust tension. This prevents sagging.
If you’re using multiple strands, connect them with outdoor-rated connectors—not just twisting wires together. Moisture kills connections fast.
Step 5: Secure Loose Cords and Wires
Loose cords are a tripping hazard and can pull clips loose. Tame the mess.
- Use outdoor zip ties to bundle wires every 3–4 feet.
- Secure the main cord to a gutter, railing, or post with a hook or tie.
- If running under a door or window, use a cord cover or route it along the trim.
- For ground-level cords, use cord clips (like Command Outdoor Cord Clips) to keep them off the grass.
Warning: Never run cords through doorways or under rugs—this can cause overheating and fire risk.
Step 6: Test and Adjust
Before you declare victory, test your setup.
- Plug in the lights. Check for dark spots or flickering.
- Walk around at night. Look for glare, shadows, or uneven brightness.
- Adjust spacing or add extra clips if lights sag.
- Use a timer or smart plug to automate on/off times.
I once installed lights and didn’t notice one bulb was loose. The next morning, it had fallen and cracked. A quick check at night would’ve saved it.
Step 7: Weatherproof and Maintain
Your lights will face rain, wind, snow, and UV rays. Protect them.
- Apply dielectric grease to plug connections to prevent corrosion.
- Use outdoor-rated extension cords with built-in GFCI protection.
- Trim nearby branches that could snag wires in storms.
- Inspect clips and hooks every 3–6 months. Replace any cracked or loose ones.
For winter: if you leave lights up year-round, consider removable socket covers to protect bulbs from moisture.
Pro Tips & Common Mistakes to Avoid
Pro Tip #1: Use lightweight strands (under 5 lbs per 10 feet) to avoid pulling clips loose over time.
Pro Tip #2: For a “floating” effect, install lights 1–2 inches above the siding using riser clips or small hooks.
Pro Tip #3: If you hate visible wires, run the cord behind trim or under eaves—just make sure it’s not pinched or exposed to water.
Pro Tip #4: Label your strands with color-coded tags so you know which one to unplug if one fails.
Now, the mistakes I’ve made (so you don’t have to):
- Using indoor lights outdoors: They’ll fail in weeks. Always check the rating.
- Overloading one circuit: I once blew a breaker with 5 strands. Use a power strip with surge protection.
- Ignoring wind load: In a storm, loose strands can whip around and damage siding. Secure every 12 inches.
- Forgetting the timer: Manual on/off gets old fast. A $15 smart plug saves energy and effort.
- Using glue or tape on vinyl: Adhesives can melt in heat and leave sticky residue. Clips are safer and removable.
One last thing: if you’re renting, ask your landlord before drilling. Most are cool with clips, but screws are a no-go.
FAQs About How to Attach Outdoor String Lights to Siding in 2026
Q: Can I use nails or screws on vinyl siding?
No. Nails and screws can crack vinyl, create leaks, and void warranties. Use slide-under clips instead. They’re designed for vinyl and won’t damage it. I’ve used the same clips for 5 years—still perfect.
Q: What if my siding is textured or uneven?
For uneven surfaces, use adjustable hooks or adhesive mounts with flexible bases. Brands like Siding Savers make clips with rubber pads that conform to curves. Avoid rigid hooks—they’ll pop off.
Q: How do I hang lights on a two-story house?
Use a sturdy extension ladder with a spotter. For second-story eaves, consider a pole-mounted clip installer (like the Siding Saver Pole Tool). It lets you hang clips from the ground. Safety first—don’t lean over the edge!
Q: Can I leave lights up all year?
Yes, but only if they’re rated for year-round outdoor use and properly secured. Check bulbs and connections every season. In snowy areas, brush off snow buildup to prevent sagging.
Q: What’s the best spacing for lights?
For a cozy glow: 6–8 inches apart. For a subtle accent: 12–18 inches. I use 8-inch spacing on porches and 12 inches on eaves. It’s all about the mood you want.
Q: How do I hide the power cord?
Run it behind trim, under eaves, or along a gutter. Use outdoor cord clips to keep it flush. For ground cords, bury them under mulch (not soil—it can degrade wires) or use a cord cover.
Q: Can I use smart string lights?
Absolutely! Smart lights (like Twinkly or Nanoleaf) let you change colors, set schedules, and sync with music. Just make sure your app works in cold weather—some lose connection below 32°F.
Final Thoughts
Hanging outdoor string lights shouldn’t be a gamble. With the right tools and techniques, how to attach outdoor string lights to siding in 2026 is simple, safe, and satisfying.
Remember: clips over screws, LEDs over incandescents, and planning over panic. Whether you’re lighting up a patio for summer nights or adding holiday sparkle, your lights should enhance your home—not damage it.
Start small. Test one strand. Adjust. Then expand. And don’t forget to step back, plug in, and enjoy the glow. That’s the real reward.
Now go make your house the brightest on the block—without the repair bills.
Happy hanging!
“`

