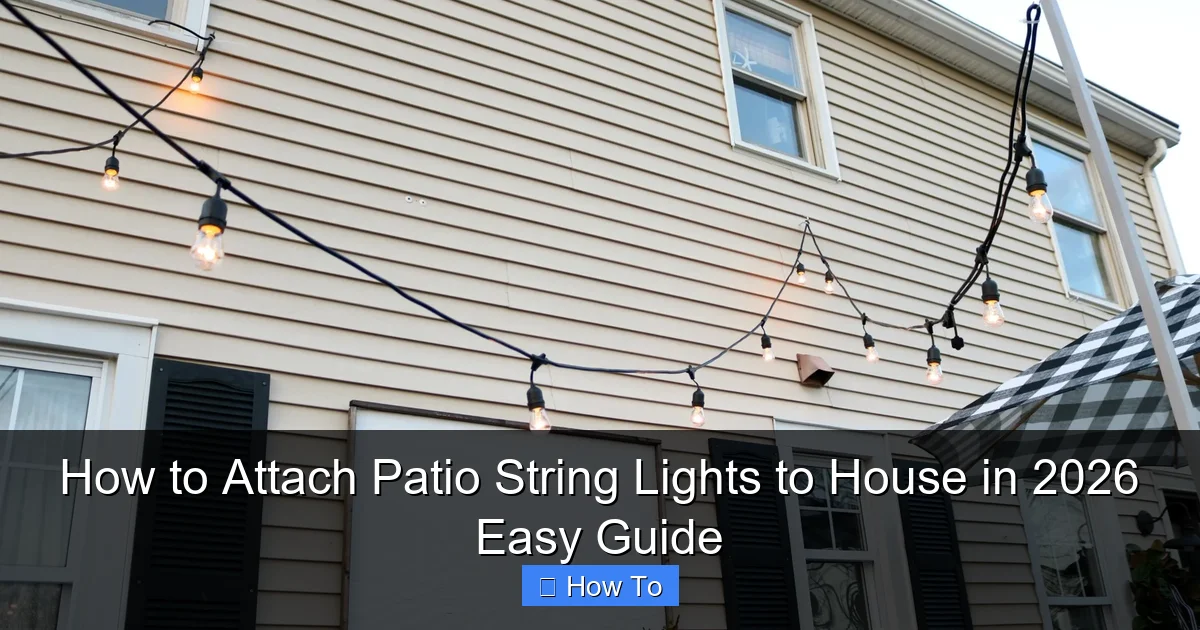
Featured image for how to attach patio string lights to house
Image source: nestingwithgrace.com
Attaching patio string lights to your house in 2026 is easier than ever with modern, damage-free solutions like adhesive-backed mounting clips and smart tension systems. Whether you’re using gutters, siding, or eaves, always start by planning your layout and measuring light spacing for a balanced, professional look. For a secure, long-lasting setup, combine UV-resistant hardware with weatherproof string lights designed for year-round outdoor use.
How to Attach Patio String Lights to House in 2026 Easy Guide
Key Takeaways
- Plan your layout first: Measure and mark light positions before installation.
- Use removable hooks: Protect your home’s exterior with damage-free mounting options.
- Secure with zip ties: Reinforce connections for windy conditions and durability.
- Check bulb spacing: Ensure even lighting and avoid overloading circuits.
- Weatherproof connections: Use outdoor-rated extensions and sealant for safety.
- Test before finalizing: Confirm lights work properly before completing installation.
Why This Matters / Understanding the Problem
Picture this: It’s a warm summer evening, you’re hosting friends on your patio, and the sun dips below the horizon. You reach for the switch, expecting a warm glow—only to find your string lights sagging, tangled, or worse, dangling dangerously close to a window.
Sound familiar?
That’s exactly why learning how to attach patio string lights to house in 2026 easy guide isn’t just about aesthetics—it’s about safety, durability, and creating a space you actually want to spend time in.
I’ve been there. I once tried taping lights to stucco with painter’s tape (don’t ask). Two days later, they were on the lawn, looking like a sad disco ball. After years of trial, error, and a few minor roof adventures, I’ve cracked the code.
Whether you’ve got vinyl siding, brick, stucco, or wood, this guide walks you through a secure, damage-free, and weatherproof way to hang your lights—without calling a handyman. We’ll cover the right tools, smart placement, and little-known tricks to make your setup last through rain, wind, and even the occasional squirrel attack.
And yes, this method works for 2026 and beyond—because the core principles haven’t changed, but the tools and materials have gotten way smarter.
What You Need
Before you start, let’s gather your gear. No need for fancy tools—just a few essentials that make the job easier and safer.
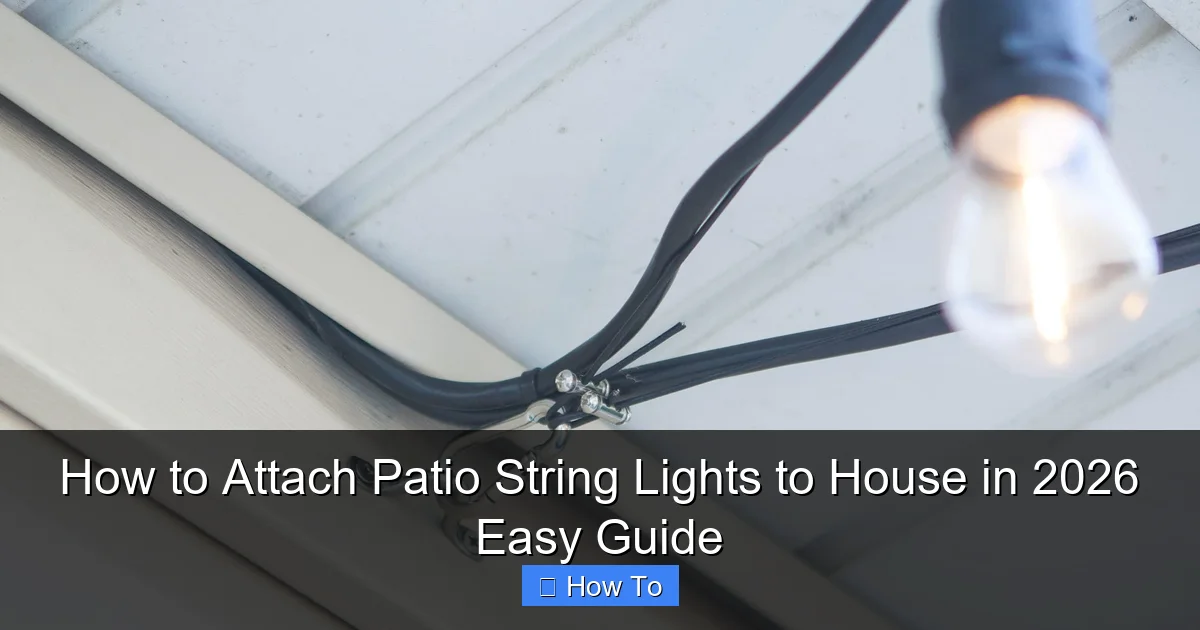
Visual guide about how to attach patio string lights to house
Image source: thediyplaybook.com
- String lights with end-to-end connectors (if you plan to extend the run)
- Outdoor-rated LED string lights (look for “wet-rated” or “IP65” for rain protection)
- Mounting hardware (choose based on your house surface—more on that below)
- Measuring tape (a 25-foot one works best)
- Ladder (a sturdy, stable one—safety first!)
- Drill with appropriate bits (if using screws or anchors)
- Level (a small bubble level or phone app helps keep things straight)
- Marker or painter’s tape (for marking spots)
- Extension cord (outdoor-rated) (if your outlet isn’t nearby)
- GFCI outlet or outdoor-rated power strip (for safety—don’t skip this!)
Mounting Options by Surface:
- Vinyl Siding: Use siding clips or zip-tie anchors (no drilling!)
- Stucco or Masonry: Use masonry anchors and plastic hooks (with a hammer drill)
- Wood or Fascia: Use stainless steel cup hooks or eye screws
- Eaves or Gutters: Use gutter hooks (gentle on metal)
- Concrete or Brick: Use toggle bolts or molly bolts for heavy loads
Pro Tip: Always check your local weather patterns. If you live in a high-wind area, double up on support points. A little extra effort now saves you from a light storm later.
Now that you’ve got your gear, let’s get into the nitty-gritty of how to attach patio string lights to house in 2026 easy guide.
Step-by-Step Guide to How to Attach Patio String Lights to House in 2026 Easy Guide
Step 1: Plan Your Layout and Measure the Run
Before you touch a ladder, sketch your layout. Decide where the lights will start and end. Are you framing the patio? Wrapping a pergola? Creating a canopy?
Grab your measuring tape and walk the path. Measure from your power source (usually an outdoor outlet) to the first mounting point, then along the entire run.
- Add 10–15% extra length to your measurement. Why? You’ll need slack for curves, corners, and safety loops.
- Check your string light specs. Most are 24–48 feet long. If your run is longer, plan for a second set (and a power connection).
- Mark where each support point will go—every 12–18 inches for straight runs, closer together for curves.
Personal Insight: I once skipped this step and ended up 3 feet short. Had to splice in a second set mid-run. It looked awkward and created a weak spot. Learn from my mistake: measure twice, hang once.
This planning phase is key to a clean, professional-looking installation. And it’s the first step in how to attach patio string lights to house in 2026 easy guide—because smart prep saves time and frustration.
Step 2: Choose the Right Mounting Method for Your Surface
Not all houses are the same. And the wrong hardware can damage your siding, leak into your walls, or just fall off.
Here’s what I use based on surface type:
Vinyl Siding: I love siding clips. They slide behind the bottom edge of each panel and grip the lip. No drilling, no damage. Just slide, snap, and hang. They’re cheap, reusable, and perfect for seasonal lights.
Stucco or Masonry: Use masonry anchors with plastic hooks. Drill a pilot hole with a masonry bit, insert the anchor, then screw in the hook. The plastic prevents rust and protects the bulb. I’ve used these for 5+ years—no rust, no sagging.
Wood Fascia or Beams: Go for stainless steel cup hooks. They’re strong, subtle, and easy to install with a hand screwdriver. Pre-drill a small hole to avoid splitting the wood.
Metal Gutters: Use gutter hooks. These clip over the front edge without scratching the finish. Just make sure they’re rated for your gutter thickness (most are 2.5–3.5 inches).
Concrete or Brick: For heavy-duty setups, I use toggle bolts. They expand behind the surface for a super-secure hold. A bit overkill for lights, but great if you’re adding a fan or speaker later.
Warning: Avoid adhesive strips on stucco or brick. They fail in heat and humidity. I tried it once—lights fell during a thunderstorm. Not fun.
Matching your hardware to your surface is a critical step in how to attach patio string lights to house in 2026 easy guide. It’s not just about looks—it’s about longevity.
Step 3: Mark and Install Support Points
Now it’s time to get physical. But go slow—this is where precision matters.
- Use your measuring tape and a marker (or painter’s tape) to mark each mounting spot. Space them every 12–18 inches for straight lines, 8–12 inches for curves.
- Double-check alignment with a level. A crooked line is obvious at night.
- For clips or hooks that need drilling, pre-drill pilot holes. This prevents cracking, especially on stucco or brick.
- Insert anchors (if needed), then screw in hooks or slide in clips.
- Test each point by gently tugging. It should feel secure, not loose.
Pro tip: Install all your supports before hanging the lights. It’s easier to adjust spacing when the lights aren’t in the way.
I once rushed this step and installed hooks 24 inches apart. The lights sagged in the middle like a hammock. Had to re-drill. Don’t be like me.
And if you’re using siding clips? Start at one end and work your way down. Slide each clip behind the bottom lip of the siding panel. They’ll click into place.
This step ensures your lights stay up, not on the lawn. A solid foundation is part of every successful how to attach patio string lights to house in 2026 easy guide.
Step 4: Test Your Lights Before Hanging
Yes, really. Plug in your string lights and test them on the ground. Look for:
- Burnt-out bulbs
- Flickering sections
- Damaged cords
- Warm (not hot) transformers
Replace any faulty bulbs or sets. It’s way easier to fix this on the patio than 10 feet in the air.
I learned this the hard way. I hung a 40-foot run, plugged it in, and half the strand was dead. Had to take it all down, replace a bulb, and re-hang. A 10-minute job turned into 2 hours.
Also, check your extension cord and outlet. Use a GFCI-protected outlet or outdoor power strip. This prevents shocks if water gets in—especially important in 2026, when we’re seeing more extreme weather.
Personal Insight: I keep a spare set of lights in a waterproof bin. If one strand fails mid-party, I swap it in seconds. No one even notices.
Testing upfront is a small step that makes the whole process smoother. It’s a core part of how to attach patio string lights to house in 2026 easy guide—because prevention beats panic.
Step 5: Hang the Lights (The Fun Part!)
Now for the main event. But don’t rush—take your time.
- Start at the power source. Leave a 2–3 foot “service loop” of cord near the outlet. This gives you room to unplug safely.
- Attach the first bulb or socket to the first hook or clip. Don’t stretch it tight—leave a gentle sag (like a catenary curve).
- Work your way along the path, attaching each bulb or socket to its support point.
- For curves or corners, use extra clips or hooks to guide the lights. Avoid sharp bends that can damage the cord.
- If using multiple strands, connect them at the end with a waterproof connector. Wrap the connection with electrical tape for extra protection.
- At the end, leave another 1–2 foot loop. This prevents tension on the last bulb.
Use a ladder with a helper if possible. It’s safer and easier to adjust spacing as you go.
I like to hang from the bottom up—start at the lowest point and work toward the peak. This keeps the lights from dragging on the ground.
And here’s a secret: don’t pull the lights tight. A little sag looks natural and prevents stress on the sockets. Think of it like a hammock—too tight, and it’s uncomfortable. Just right, and it’s perfect.
This careful hanging process is what separates a DIY job from a pro look. And it’s a key step in how to attach patio string lights to house in 2026 easy guide.
Step 6: Secure the Power Connection and Cord
The lights are up—great! But the job’s not done until the power side is safe.
- Use a weatherproof outdoor power strip or outlet box if your outlet isn’t covered.
- Elevate the plug and transformer off the ground. I use a small plastic bin or a wall-mounted cord organizer.
- Route the extension cord along the house or under the eaves, away from foot traffic. Use cord clips or zip ties to keep it tidy.
- If the cord runs across a walkway, cover it with a cord protector to prevent tripping.
- For long runs, use a timer or smart plug to automate on/off times. Saves energy and extends bulb life.
I once left a transformer on the patio floor. A sprinkler came on overnight—and the next day, the lights wouldn’t turn on. Water had seeped into the plug. Now I always elevate and cover.
This step ensures your setup is safe, clean, and ready for years of use. It’s the final piece of how to attach patio string lights to house in 2026 easy guide.
Step 7: Inspect and Adjust
Step back and admire your work. Then, inspect it with a critical eye.
- Are all bulbs lit?
- Is the line straight and evenly spaced?
- Are the hooks secure? Any sagging?
- Is the cord hidden or protected?
- Does the setup look balanced from different angles?
Make small adjustments now. Tighten a loose hook, reposition a saggy section, or add a clip for support.
I like to test the setup at night. Turn off the patio lights and see how the string lights cast shadows and highlight features. If a section looks dim, add a reflector or reposition a bulb.
And if you’re using warm white lights, they’ll look best against dark surfaces. Cool white can look harsh—save that for task lighting.
This final check ensures your lights look professional and perform well. It’s the polish on your how to attach patio string lights to house in 2026 easy guide.
Pro Tips & Common Mistakes to Avoid
After hanging lights on three different houses, here are the real-world lessons I’ve learned.
Pro Tip #1: Use zip ties for extra security. I run a zip tie through the socket loop and around the hook. Adds zero bulk but prevents accidental drops.
Pro Tip #2: Label your strands. If you use multiple sets, tag them with a waterproof label. Makes troubleshooting way easier.
Pro Tip #3: Go for smart string lights with app control. In 2026, many have color options, dimming, and schedules. I use mine to set a “sunset mode” that turns on at dusk.
Common Mistakes:
- Overloading circuits: Don’t plug too many strands into one outlet. Check the wattage—most outdoor outlets handle 15–20 amps. Use a power strip with overload protection.
- Ignoring weather ratings: Indoor-rated lights won’t survive rain. Always use wet-rated or damp-rated for outdoor use.
- Hanging in direct sunlight: UV degrades plastic sockets and cords. If possible, hang lights under eaves or awnings.
- Using nails or screws on vinyl: They can crack the siding. Use clips or anchors instead.
- Forgetting to seal connections: Wrap splices and plugs with electrical tape or use waterproof caps.
I once used a nail on vinyl siding. Big mistake. The siding cracked, and water got behind it. Cost me a repair. Now I swear by clips.
And remember: less is more. You don’t need lights on every surface. A few well-placed strands create ambiance without blinding your guests.
These tips and warnings come from real experience. They’re what make this how to attach patio string lights to house in 2026 easy guide truly useful.
FAQs About How to Attach Patio String Lights to House in 2026 Easy Guide
Q: Can I hang string lights on stucco without drilling?
Unfortunately, no. Stucco is tough and porous. Adhesive strips fail in heat and humidity. The safest, most durable option is to use masonry anchors with plastic hooks. Drill a small pilot hole, insert the anchor, and screw in the hook. It’s a one-time install that lasts years.
Q: How do I hide the extension cord?
Great question. I use a combination of cord clips (screwed into wood or anchors in stucco) and tuck the cord behind downspouts or under eaves. For ground runs, a cord cover or burying it under mulch (with a GFCI outlet) works. In 2026, I’ve seen magnetic cord clips that stick to metal siding—super clean.
Q: What if my house has no eaves or gutters?
No problem. Use standoff brackets or wall-mounted hooks on the fascia or soffit. If you have a flat roof, consider ground poles or freestanding light trees. I’ve used shepherd’s hooks in the yard to create a canopy over the patio—no house attachment needed.
Q: Are LED string lights better than incandescent?
Absolutely. LEDs use 80% less energy, last 10–25 times longer, and don’t get hot. In 2026, many have smart features (color, app control, dimming). They’re also more durable in rain and wind. I switched 5 years ago and haven’t looked back.
Q: How do I take them down for winter?
Don’t! If you used the right hardware (clips, hooks), just leave them up. They’re designed for year-round use. But if you want to remove them:
- Unplug and disconnect.
- Unhook from one end, rolling the strand as you go.
- Store in a cool, dry place—preferably the original box or a plastic bin.
- Label the strand for easy reinstallation.
I leave mine up all year. The only time I remove them is if a storm is coming or I’m repainting.
Q: Can I use a timer or smart plug with outdoor lights?
Yes! A weatherproof smart plug or outdoor timer is a game-changer. Set it to turn on at sunset and off at 11 PM. Saves energy, extends bulb life, and means you never forget to turn them off. In 2026, many integrate with Alexa or Google Home—just say, “Turn on patio lights.”
Q: What’s the best spacing for hooks or clips?
For straight runs: 12–18 inches apart. For curves or corners: 8–12 inches. The closer the spacing, the less sag. But don’t overdo it—too many hooks look cluttered. I use 16 inches for straight lines and 10 inches for bends. Works every time.
Final Thoughts
Hanging patio string lights doesn’t have to be a stressful, messy project. With the right tools, a little planning, and attention to detail, you can create a magical outdoor space that’s safe, durable, and beautiful.
Remember: how to attach patio string lights to house in 2026 easy guide is all about working with your house, not against it. Choose the right hardware for your surface, test your lights, and take your time with the install.
Don’t rush the process. A well-hung light setup lasts years, costs little to maintain, and brings joy every time you turn it on.
And when your friends ask, “Who did your lights?” you can smile and say, “I did.”
So grab your ladder, pick your favorite bulbs, and get started. Your perfect patio glow is just a few clips away.
Now go make some memories under the stars.

