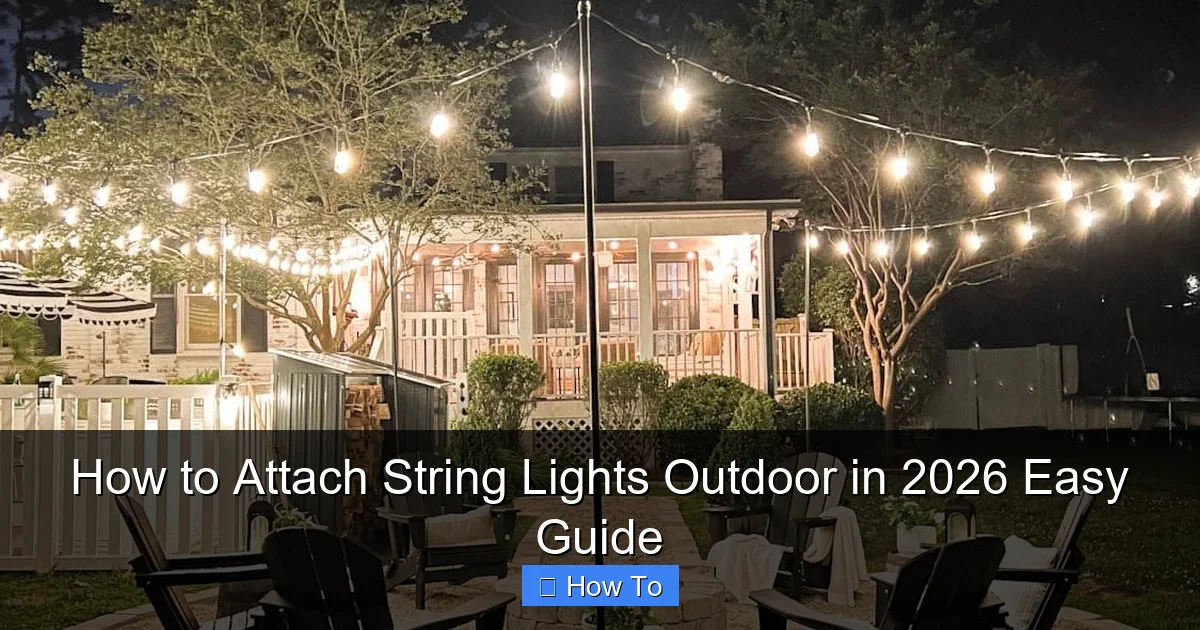
Featured image for how to attach string lights outdoor
Image source: blesserhouse.com
Transform your outdoor space in 2026 with hassle-free string light installation using durable, weather-resistant mounting hardware designed for long-lasting shine. Whether you’re wrapping trees, lining fences, or suspending lights overhead, always start with a solid anchor point and use outdoor-rated clips or hooks to avoid damage and ensure safety. This simple, step-by-step approach guarantees a professional look without the stress.
“`html
How to Attach String Lights Outdoor in 2026 Easy Guide
Key Takeaways
- Plan your layout first: Measure and sketch to avoid mid-installation changes.
- Use outdoor-rated lights: Ensure durability with weatherproof and UV-resistant models.
- Secure with proper hardware: Use hooks, clips, or zip ties designed for outdoor use.
- Check power sources: Place lights near GFCI outlets or use extension cords safely.
- Test lights before installing: Confirm functionality to avoid rework later.
- Maintain spacing: Keep bulbs evenly spaced for a polished, professional look.
Why This Matters / Understanding the Problem
Let’s be honest—nothing transforms a backyard or patio quite like string lights. They’re the secret ingredient to cozy summer nights, romantic dinners, or just making your space feel more lived-in and welcoming.
But here’s the catch: if you don’t know how to attach string lights outdoor in 2026 easy guide, you’re risking tangled cords, sagging lines, or worse—lights falling in a storm. I learned this the hard way when my first attempt looked like a spiderweb after a hurricane.
The good news? It’s actually simpler than it seems. Whether you’re hanging them across a pergola, along a fence, or between trees, this guide walks you through a safe, stylish, and long-lasting setup. And yes, we’ll cover modern tools and weatherproof tricks that weren’t even around a few years ago.
By the end, you’ll not only know how to hang them right—you’ll know how to do it once and have them last for years.
What You Need
Before you start, let’s gather your gear. No need to overcomplicate it—most of this is stuff you might already have.
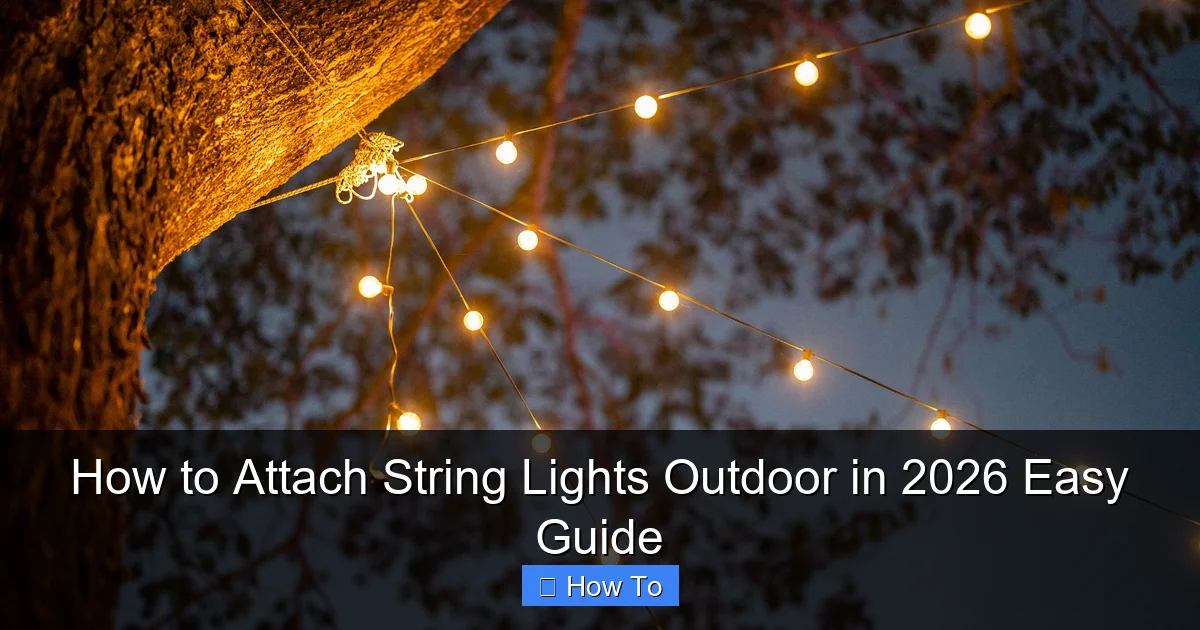
Visual guide about how to attach string lights outdoor
Image source: cdn.mos.cms.futurecdn.net
- Outdoor-rated string lights (LED, weatherproof, with a UL or ETL rating)
- Measuring tape (for spacing and layout)
- Drill and screws (if mounting to wood or pergola)
- Eye hooks, cup hooks, or screw-in hooks (stainless steel or galvanized for rust resistance)
- Zip ties (UV-resistant) or outdoor-rated clips
- Extension cords (outdoor-rated, preferably with a GFCI plug)
- Timer or smart plug (optional but highly recommended)
- Ladder (if reaching high areas)
- String light tension kit (like turnbuckles or adjustable hooks—optional but great for long runs)
- Wire cutters (for trimming zip ties)
Pro insight: Don’t skip the outdoor-rated label on lights and cords. Regular indoor string lights can short-circuit or melt when exposed to rain or humidity. Trust me—I’ve had a $40 set turn into a $40 paperweight in one thunderstorm.
Step-by-Step Guide to How to Attach String Lights Outdoor in 2026 Easy Guide
Now, let’s get into the fun part—actually hanging them. This method works for pergolas, decks, fences, trees, and even between buildings. I’ve used it in my own backyard and at friend’s parties, and it always gets compliments.
Step 1: Plan Your Layout and Measure the Space
Start by sketching a rough layout. Where do you want the lights? Across the patio? In a zigzag pattern? Around the deck railing?
- Measure the distance between mounting points (e.g., pergola beams or fence posts).
- Plan for a slight sag—about 2–4 inches between supports. This prevents tension damage and gives a soft, natural look.
- Use painter’s tape to mark where hooks or clips will go. This helps you visualize spacing before drilling.
Pro tip: If you’re spanning more than 20 feet, consider using a support wire (like a thin steel cable) to carry the weight. String lights alone can stretch and sag over time.
This step is crucial for knowing how to attach string lights outdoor in 2026 easy guide without overextending your lights or creating a droopy mess.
Step 2: Choose the Right Mounting Method
Your method depends on your surface. Here’s how to pick the right one:
- Wood (pergola, deck, fence): Use stainless steel eye hooks or cup hooks. Pre-drill holes to avoid splitting the wood.
- Concrete or brick walls: Use masonry screws with anchors or adhesive outdoor clips (like 3M outdoor hooks—great for renters).
- Trees: Use soft fabric straps (not wire!) around branches. Wire can damage bark and restrict growth.
- Metal railings: Use magnetic clips or zip ties with UV protection.
Warning: Avoid nails or screws in trees—they can harm the bark and invite pests. I once saw a friend’s lights fall because the screw loosened as the tree grew. Fabric straps are safer and more flexible.
This is where knowing how to attach string lights outdoor in 2026 easy guide means matching your tools to your surface. No one-size-fits-all here.
Step 3: Install the Mounting Points
Now it’s time to get your hands dirty—well, maybe just your gloves.
- For wood: Pre-drill holes slightly smaller than your hook’s shank. Screw in the hooks by hand first, then use pliers to tighten. Don’t over-tighten—this can strip the wood.
- For concrete: Use a masonry bit to drill pilot holes. Insert anchors, then screw in hooks.
- For trees: Wrap fabric straps around branches at desired height. Secure with a buckle or knot. Keep them snug but not tight.
- For railings: Attach magnetic clips or zip ties every 16–24 inches.
Space mounting points 4–6 feet apart. Closer spacing = less sag. Farther = more tension on the lights.
I like to install one side first, then stretch a string or fishing line across to align the opposite side. Keeps everything level.
Step 4: Test the Lights Before Hanging
Plug in your string lights before you hang them. This is the #1 mistake people skip.
- Check for dead bulbs, frayed wires, or flickering.
- Make sure the plug is on the end that reaches your outlet (not dangling in the middle).
- If using multiple strands, test each one individually.
Personal story: I once hung 30 feet of lights only to find the last 10 weren’t working. Took me an hour to take them down and test. Now I test first—always.
Testing early saves time, frustration, and ladder climbs. It’s a small step that makes the how to attach string lights outdoor in 2026 easy guide actually easy.
Step 5: Hang the Lights with Proper Tension
Now for the main event. Don’t just drape them—hang them with care.
- Start at the plug end. Hook the first bulb or socket onto the first mounting point.
- Move along, gently pulling the lights to create a soft curve—not a straight line.
- Use zip ties or clips to secure the cord to the hook. Don’t let the bulb socket bear the weight.
- For long runs: Use a turnbuckle or adjustable hook on one end to fine-tune tension.
Avoid pulling too tight. LED bulbs are fragile, and over-tension can break sockets or pull wires loose.
For a zigzag or crisscross pattern: Use a second set of hooks at staggered heights. This adds depth and avoids flat, boring lines.
Step 6: Manage Cords and Power Sources
No one wants a tangled mess of cords. Let’s keep it clean.
- Route extension cords along railings, under eaves, or behind furniture.
- Use outdoor-rated cord covers or zip ties to secure cords to surfaces.
- Keep all connections (plugs, timers) above ground and protected from rain. Use a plastic bag or cord cover if needed.
- Plug into a GFCI outlet (or use a GFCI extension cord) for safety.
Bonus: Add a smart plug or timer. I love setting mine to turn on at dusk and off at 11 PM. No more forgetting to unplug.
This step is often overlooked, but it’s key to making your how to attach string lights outdoor in 2026 easy guide look professional and last longer.
Step 7: Weatherproof and Maintain
Outdoor lights face sun, rain, wind, and snow. A little prep goes a long way.
- Use UV-resistant zip ties and weatherproof clips. Regular plastic turns brittle in sunlight.
- Inspect hooks and cords every 3–6 months. Look for rust, fraying, or loose connections.
- During winter, either take them down or use cold-weather-rated lights. Some LEDs fail in freezing temps.
- Clean bulbs gently with a damp cloth. Avoid harsh chemicals.
Pro tip: If you live in a windy area, add an extra support every 8–10 feet. I once had a storm knock down my lights because I spaced them too far. Lesson learned.
Maintenance isn’t glamorous, but it’s what turns a one-season project into a 5-year feature.
Pro Tips & Common Mistakes to Avoid
After years of hanging lights (and fixing others’ mistakes), here’s what I’ve learned:
Use a Support Wire for Long Runs
For spans over 20 feet, run a thin steel cable between mounting points. Hang the lights from the cable using S-hooks or clips. This takes the weight off the light cord—no stretching, no sagging.
I used this trick for a 30-foot pergola run, and it’s still perfect after 4 years.
Don’t Overload Outlets
Check the wattage of your lights. Most outdoor outlets can handle 1,500–1,800 watts. Too many strands = tripped breaker or fire hazard.
Use a power strip with surge protection, but don’t daisy-chain more than two.
Mind the Bulb Orientation
LED bulbs are directional. Make sure the light shines down or outward, not straight up into the sky. Otherwise, you’re wasting light and energy.
I like to angle them slightly downward—creates a warm glow on the ground and furniture.
Avoid “Spiderweb Syndrome”
Don’t just hang lights randomly. Plan a pattern—parallel lines, zigzag, or a canopy. Random = chaotic. Planned = polished.
Use painter’s tape to mock up patterns before installing hooks.
Skip the Staples
Stapling lights to wood or stucco damages the cord insulation. Use hooks, clips, or zip ties instead. I’ve seen staples cause shorts after just one season.
Test in Real Conditions
Hang them during the day, then check at night. Does the light hit where you want? Are cords visible? Adjust as needed.
This is part of truly mastering how to attach string lights outdoor in 2026 easy guide—not just hanging, but designing.
FAQs About How to Attach String Lights Outdoor in 2026 Easy Guide
Can I use indoor string lights outside?
Short answer: No. Indoor lights aren’t rated for moisture, UV, or temperature swings. They can short out, overheat, or melt. Always use outdoor-rated string lights with a UL or ETL mark. It’s not worth the risk—or the fire hazard.
How do I hang string lights without drilling?
Great for renters! Try:
- Adhesive outdoor clips (like 3M Command Outdoor Hooks)
- Zip ties around railings or trees
- Weighted bases (like sandbags on stands)
- Magnetic clips on metal surfaces
Just make sure they’re secure and won’t blow away.
What’s the best way to hang lights between trees?
Use fabric tree straps (not wire!) to protect the bark. Wrap the strap around the trunk, then attach an S-hook. Hang the lights from the hook. For long spans, add a support cable.
And never tie the lights directly to the tree—it can cut into the bark and harm the tree.
How far apart should I space my hooks?
4–6 feet is ideal for most lights. Closer spacing (3–4 ft) for heavier bulbs or long runs. Farther (6+ ft) for lightweight fairy lights. The key is a soft sag—never a tight line.
This spacing helps you follow the how to attach string lights outdoor in 2026 easy guide without overstressing the cord.
Can I leave my outdoor string lights up year-round?
It depends. If they’re rated for cold weather and you live in a mild climate, maybe. But in areas with snow, ice, or extreme temps, I recommend taking them down.
Or, use all-season LED lights with weatherproof seals and cold-weather ratings. Store them in a dry place when not in use.
How do I connect multiple strands?
Most outdoor lights have end-to-end connectors. Just plug them in. But check the total wattage—don’t exceed your outlet’s capacity. And always plug into a GFCI outlet.
For long runs, use a power-in-the-middle setup to reduce voltage drop.
What if my lights are too long?
Don’t cut the cord! Instead, loop the extra and secure it with zip ties or clips. Or, use a light reel to store the excess neatly. Cutting voids the warranty and creates a safety hazard.
Final Thoughts
Hanging outdoor string lights isn’t rocket science—but it does take a little planning and care. The key to nailing how to attach string lights outdoor in 2026 easy guide is doing it right the first time, so you don’t have to fix it later.
Start with a layout. Use the right tools for your surface. Test the lights. Hang with proper tension. And don’t forget the cords and weatherproofing.
Remember: it’s not just about function—it’s about creating a mood. Those soft glows, the warm ambiance, the way they make a simple dinner feel special—that’s the magic.
So grab your hooks, your ladder, and your favorite playlist. In an hour or two, you’ll have a space that feels like a getaway. And the best part? You did it yourself.
Now go turn on those lights. You’ve earned it.
“`

