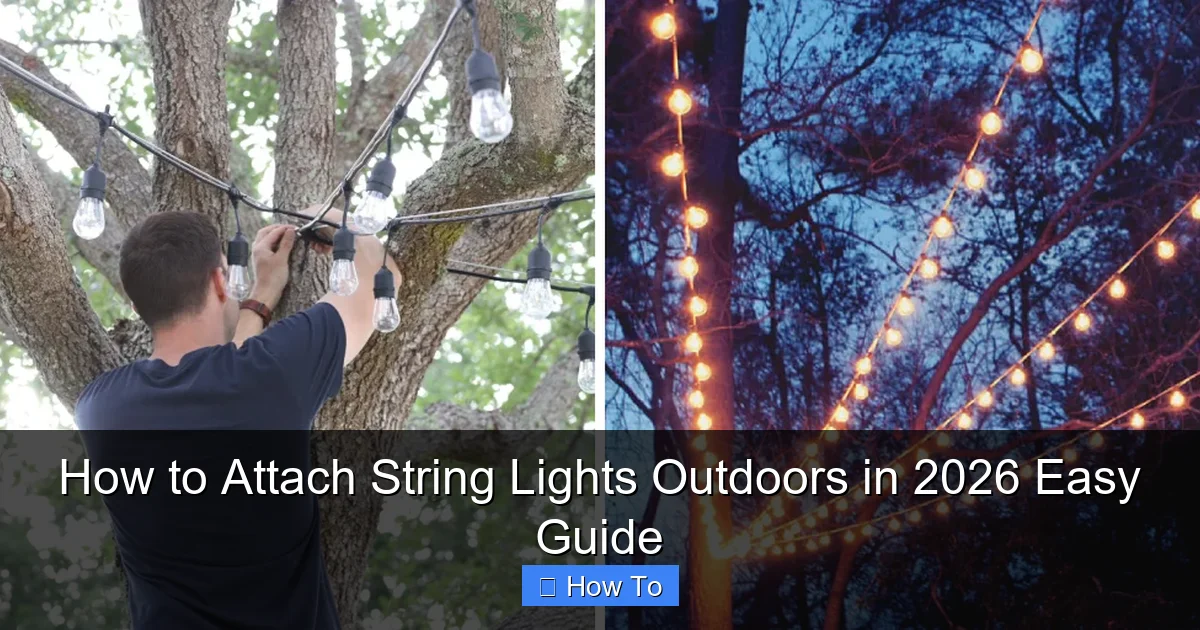
Featured image for how to attach string lights outdoors
Image source: brightlighthub.com
Transform your outdoor space in 2026 with secure, stylish string light installations using durable mounting hardware and weather-resistant lights. Whether wrapping trees, running along fences, or suspending overhead, always plan your layout, use appropriate clips or hooks, and keep connections protected from moisture. With the right tools and a few simple steps, you can create a stunning, safe ambiance that lasts all season.
How to Attach String Lights Outdoors in 2026 Easy Guide
Key Takeaways
- Plan your layout first: Measure space and sketch light placement for even coverage.
- Use weatherproof clips: Secure lights with outdoor-rated clips to prevent damage.
- Choose the right lights: Opt for LED and solar-powered for energy efficiency.
- Anchor lights properly: Use hooks, nails, or zip ties for sturdy attachment.
- Test before finalizing: Check connections and brightness before completing installation.
- Maintain regularly: Clean bulbs and inspect wires seasonally for longevity.
Why This Matters / Understanding the Problem
Let’s be honest—nothing sets the mood like twinkling string lights on a summer evening. Whether you’re hosting a backyard BBQ, celebrating a birthday, or just want to cozy up your patio, outdoor string lights instantly make any space feel magical.
But here’s the thing: if you’ve ever tried to hang them, you know it’s not as simple as it looks. I remember my first attempt—lights sagging in the middle, tangled wires, and a ladder that nearly tipped over because I misjudged the height. By the end, I had a half-hung mess and a bruised ego.
The real challenge isn’t just *how* to attach string lights outdoors in 2026 easy guide—it’s doing it safely, neatly, and in a way that lasts through wind, rain, and seasonal changes. And with more people turning to outdoor living spaces, getting this right matters more than ever.
Whether you’re lighting up a pergola, fence, or open yard, this guide walks you through the process step by step. No fluff. No overpriced “solutions.” Just practical, real-world advice—because I’ve made every mistake so you don’t have to.
By the end, you’ll know exactly how to attach string lights outdoors in 2026 easy guide—with confidence, minimal tools, and zero regrets.
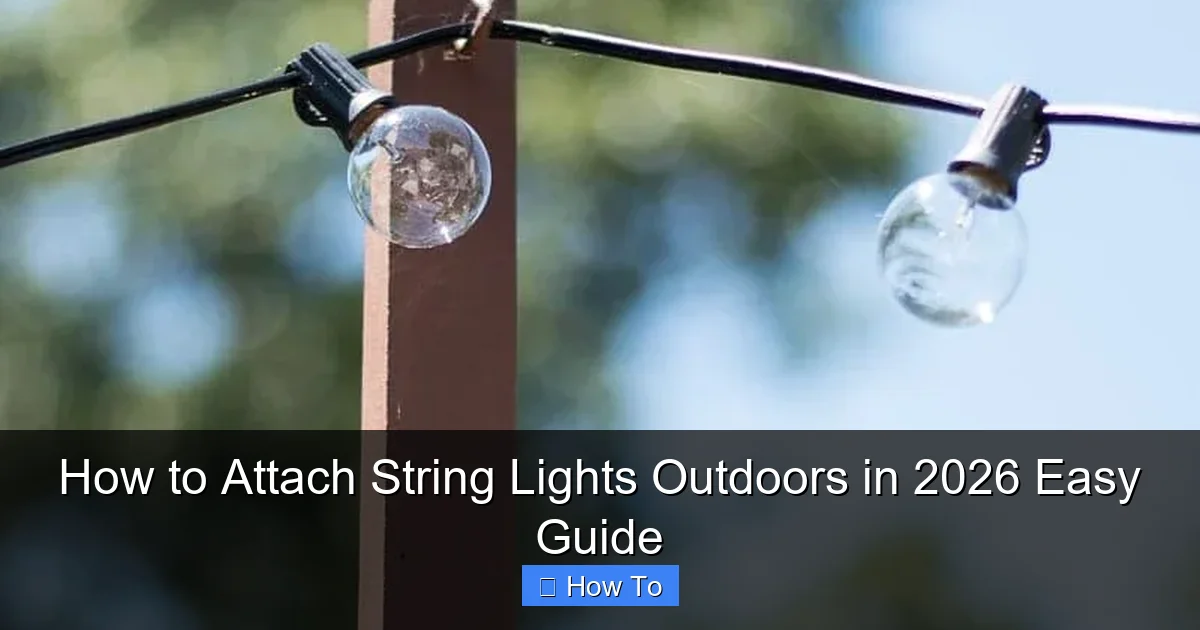
What You Need
Before you start, gather your supplies. The right tools make all the difference. Think of it like prepping for a recipe: having everything ready means fewer trips back to the garage and less frustration.
Visual guide about how to attach string lights outdoors
Image source: jennakateathome.com
- String lights (outdoor-rated) – Look for IP65 or higher waterproof rating. Solar-powered? Great for off-grid spots.
- Measuring tape – Essential for spacing and avoiding sagging.
- Drill & appropriate drill bits – For wood, masonry, or metal, depending on your mounting surface.
- Outdoor-rated mounting hardware – Think eye hooks, screw-in cup hooks, zip ties, or adhesive clips (for low-stress areas).
- Extension cord (outdoor-safe, GFCI-protected) – Never use indoor cords outside.
- Staple gun (optional, for temporary setups) – Use only on wood and avoid piercing wires.
- Level (if mounting on uneven surfaces) – Keeps your lines straight and professional.
- Ladder (sturdy, with rubber feet) – Safety first—always have someone spot you.
- Gloves – Protects hands from splinters, sharp edges, or hot drill bits.
- Zip ties or cable clips (for wire management) – Keeps everything tidy and reduces tripping hazards.
Pro Insight: I once skipped the measuring tape and eyeballed it—big mistake. My lights looked like a drunk spider’s web. Measure first. Trust me.
Bonus: If you’re planning a permanent setup, consider a smart plug or timer to automate your lights. Saves energy and gives you that “always on” vibe without the hassle.
Now, let’s get into the actual how to attach string lights outdoors in 2026 easy guide—starting with the most important step: planning.
Step-by-Step Guide to How to Attach String Lights Outdoors in 2026 Easy Guide
Step 1: Map Your Layout (Before You Buy a Single Light)
Don’t just start hammering hooks into the wall. Take 10 minutes to plan your layout. This is where most people go wrong—and why their lights end up looking like an afterthought.
- Sketch a quick diagram of your space: patio, deck, trees, pergola, etc.
- Decide on the pattern: straight lines, zigzag, canopy (crisscross), or draped over trees.
- Measure the total distance between anchor points. Add 10–15% extra for slack—this prevents tension and sagging.
- Note where power sources are. You’ll want to minimize extension cord runs (and tripping hazards).
For example, my 12-foot pergola needed three runs of 15-foot lights, with one end near an outdoor outlet. I mapped it so the plug-in end was on the low side, reducing visible cords.
Also, think about light spacing. Too close? Overwhelming. Too far? Sparse and sad. Aim for 6–12 inches between bulbs for a balanced glow.
Pro Tip: Use painter’s tape or string to mock up the layout first. Stand back and check it from different angles. Adjust before committing to hardware.
Step 2: Choose the Right Mounting Method for Your Surface
Not all walls, fences, or trees are created equal. Your mounting method depends on the surface type—and this is crucial for safety and longevity.
Here’s what works best for common surfaces:
- Wood (deck, pergola, fence): Use screw-in cup hooks or eye hooks. They’re strong, removable, and won’t damage wood if removed later. Drill pilot holes first to prevent splitting.
- Stucco or concrete (walls, pillars): Use masonry anchors with stainless steel eye hooks. Avoid cheap plastic anchors—they’ll pull out in wind.
- Metal (gutters, railings): Use magnetic clips or clamp-style hooks. No drilling needed—perfect for renters.
- Trees: Use tree-friendly zip ties (wide, flat ones) or rope clips. Never use nails or screws—they harm the tree and can cause rot.
- Fences (vinyl or composite): Use adhesive outdoor clips or fence-mounted brackets. Avoid staples—they can crack the material.
Warning: I once used regular zip ties on a cedar fence. After a year, the sun and rain weakened them, and the lights came crashing down. Use UV-resistant, outdoor-grade hardware only.
For how to attach string lights outdoors in 2026 easy guide, the key is matching the hardware to the surface. No one-size-fits-all here.
Step 3: Install Anchor Points (Evenly and Securely)
Now it’s time to put in the anchors. This is where precision pays off.
- Measure and mark where each anchor goes. Use a level if your surface is uneven.
- For wood: Drill a pilot hole slightly smaller than the hook’s shank. Screw in the hook by hand first, then use pliers for the final turn.
- For masonry: Drill the correct size hole (check anchor packaging), tap in the anchor, then screw in the hook.
- For trees: Wrap the zip tie loosely—never tight—around the trunk or branch. Leave room for growth. Trim excess after securing.
- For gutters: Slide magnetic clips under the lip. Make sure they’re secure before hanging lights.
Space anchors every 2–4 feet, depending on the weight of your lights. Heavier bulbs (like Edison-style) need closer spacing. Lighter LEDs can go farther apart.
Pro tip: Install anchors on the downhill side of your layout. This keeps the lights taut and prevents water pooling on the wire.
Real Talk: I used to rush this step. Then I learned—take your time. A loose anchor means a dangling light. And a dangling light means a frustrated homeowner.
Step 4: Hang the Lights (With Proper Slack and Tension)
Now for the fun part: hanging the lights. But don’t just drape them and call it a day. Technique matters.
- Start at the power source end. Plug in the first light and let it hang.
- Attach the first bulb or socket to the anchor point. Don’t pull it tight—leave a slight curve (about 1–2 inches of slack per foot).
- Work your way to the far end, securing each bulb or socket as you go.
- At the last anchor, leave a little extra wire—don’t stretch it to the max. This prevents tension and extends the life of the lights.
- If you’re doing a canopy (crisscross), use a zip tie or hook at the intersection to hold both lines in place.
For sag control, consider a support line (fishing line or thin cable) run between anchors. Attach the lights to it with small zip ties. This takes the weight off the wire itself—ideal for long runs.
Pro Tip: If you’re using LED string lights with a transformer, make sure the transformer is protected from rain. I keep mine in a weatherproof box or under a covered outlet.
Step 5: Manage Cords and Hide the Mess
Let’s be real—visible cords kill the vibe. A few smart tricks keep your setup looking clean.
- Run extension cords along the ground and cover with outdoor cord covers or mulch (for temporary setups).
- Use adhesive clips to run cords up walls or railings. Paint them to match the surface for near-invisibility.
- For pergolas, run cords through hollow beams or behind decorative trim.
- Use zip ties every 12–18 inches to keep cords tidy and prevent tripping.
- If you’re using a timer or smart plug, mount it near the outlet—not dangling mid-air.
I once saw a beautiful setup ruined by a bright orange extension cord snaking across the patio. Don’t let that be you.
Step 6: Test and Adjust (Then Test Again)
Before you celebrate, do a full test.
- Plug in the lights and check every bulb. Replace any that are out.
- Look for sagging, tangles, or loose anchors. Adjust as needed.
- Check from multiple angles—inside, outside, day, and night.
- Walk under them. Make sure they’re high enough (at least 7 feet) to avoid head bumps.
- If using a timer, set it to turn on at dusk and off at 11 PM (or whatever fits your schedule).
One time, I thought everything was perfect—until I noticed a bulb dangling by a single wire. A quick zip tie fix saved the night.
Step 7: Maintain for Long-Term Use
Your lights aren’t “set it and forget it.” A little upkeep keeps them shining for years.
- Inspect monthly for loose anchors, frayed wires, or water damage.
- Clean bulbs with a damp cloth (unplugged, of course).
- After storms, check for sagging or dislodged clips.
- Store properly in winter (if not leaving up): coil loosely, use a storage bin, keep dry.
- Replace bulbs or entire strings if more than 10% are out—dim lights lose their magic.
For permanent installations, consider weatherproof enclosures for plugs and timers. I use small plastic boxes with rubber seals—keeps moisture out.
Pro Tips & Common Mistakes to Avoid
After hanging lights on everything from pergolas to palm trees, here’s what I’ve learned the hard way.
Pro Tip #1: Use LED string lights—they’re cooler, last longer, and use less power than incandescent. Plus, many are dimmable and color-changing.
Pro Tip #2: For long runs (over 25 feet), use parallel wiring instead of end-to-end. This reduces voltage drop and keeps all bulbs bright.
Pro Tip #3: If you’re renting, use removable adhesive clips or freestanding poles. No damage, no hassle.
Common Mistake #1: Overloading a single outlet. Most outdoor outlets can handle 15 amps. A 100-bulb incandescent string can draw 1 amp. Add a heater or fan, and you’re tripping the breaker.
Solution: Use a power strip with overload protection or spread lights across multiple circuits.
Common Mistake #2: Hanging lights too tight. Tension stresses the wires and sockets. Over time, this causes shorts or breakage.
Solution: Aim for a gentle curve—like a relaxed smile.
Common Mistake #3: Ignoring local weather. Wind, rain, and UV exposure degrade lights and hardware.
Solution: Use UV-resistant cords and stainless steel hardware. Avoid cheap plastic clips.
Pro Insight: I once used indoor string lights outside. They lasted one rainy night. Always check the label: “Indoor Use Only” is not a suggestion.
And remember: how to attach string lights outdoors in 2026 easy guide isn’t just about the setup—it’s about doing it right so you can enjoy it for years.
FAQs About How to Attach String Lights Outdoors in 2026 Easy Guide
Q: Can I use indoor string lights outside?
Nope. Indoor lights aren’t waterproof and lack UV protection. One rainstorm can fry the wiring or create a fire hazard. Always use outdoor-rated string lights—look for “wet location” or “IP65” on the label.
Q: How high should I hang string lights?
At least 7 feet off the ground. This keeps them out of head-bumping range and looks better from a distance. For pergolas, 8–10 feet works well. If you’re using a ladder, go higher—just don’t risk a fall.
Q: What’s the best way to hang lights on a tree?
Use wide, flat zip ties or rope clips. Wrap them loosely—trees grow, and tight ties can girdle the trunk. Never use nails or screws. For a draped look, run a support line between branches and attach lights to it.
Q: How do I prevent sagging on long runs?
Use a support line (fishing line or thin cable) between anchors. Attach the lights to it with small zip ties. This takes the weight off the wire. Or, add extra anchor points every 3–4 feet.
Q: Can I leave my string lights up all year?
Yes—but only if they’re designed for year-round outdoor use. Even then, inspect them seasonally. Remove or replace any damaged wires. For harsh climates, consider taking them down in winter to extend their life.
Q: What if I don’t have a nearby outlet?
Use a solar-powered string light with a remote panel. Or, run a GFCI-protected extension cord from a safe indoor outlet. Never run cords through windows or doors—it’s a fire hazard.
Q: How many strings can I connect end-to-end?
Check the manufacturer’s label. Most outdoor LEDs let you connect 10–15 strings. Incandescents? Usually only 2–3. Overloading can cause overheating or breaker trips. When in doubt, use a power strip with overload protection.
Final Thoughts
Hanging string lights outdoors isn’t rocket science—but it does take a little planning, the right tools, and a few pro tricks. Now that you know how to attach string lights outdoors in 2026 easy guide, you can create a warm, inviting space without the frustration.
Remember: start with a layout, match your hardware to the surface, leave slack (not tension), and keep cords tidy. Test everything. Maintain it. And most importantly—enjoy the glow.
I’ve used this method on pergolas, fences, trees, and even a rooftop deck. It works. And it lasts.
So grab your lights, call a friend (for ladder duty), and get to work. Your perfect outdoor oasis is just a few hooks and a little patience away.
And hey—once you’re done, invite me over. I’ll bring the wine. 🍷✨

