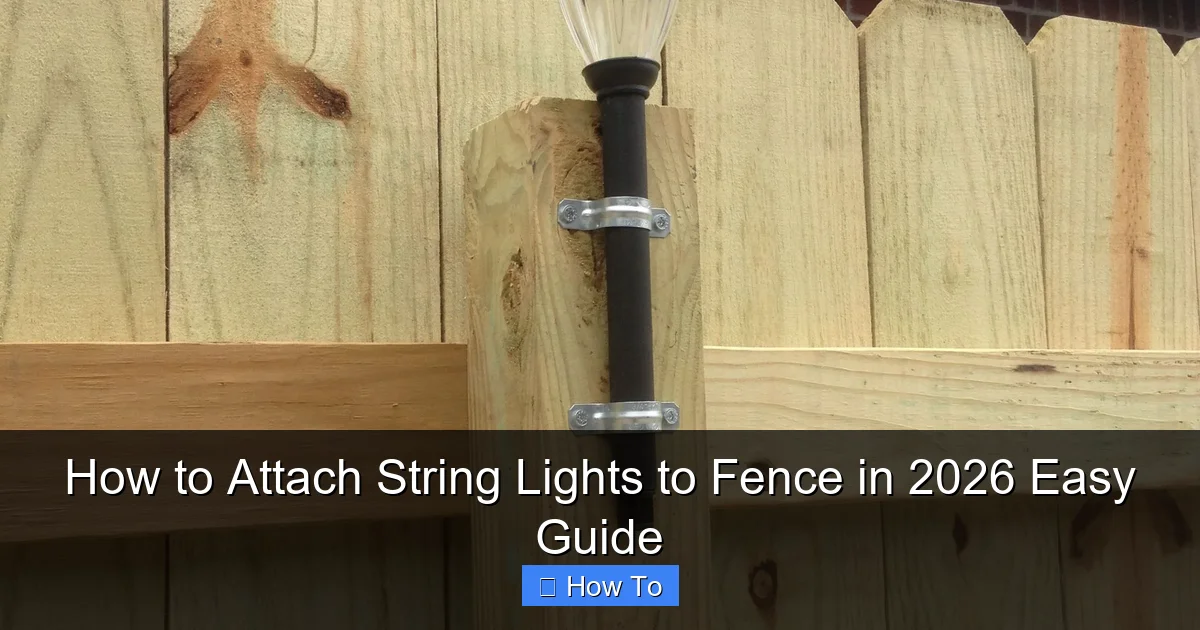
Featured image for how to attach string lights to fence
Image source: i.pinimg.com
Transform your outdoor space in 2026 by securely attaching string lights to your fence using simple, damage-free methods like zip ties, adhesive clips, or screw-in hooks—no drilling required. This easy guide walks you through step-by-step techniques to ensure a safe, weather-resistant setup that enhances ambiance and visibility all year round. Perfect for renters and homeowners alike, these pro tips guarantee a polished look in under an hour.
How to Attach String Lights to Fence in 2026 Easy Guide
Key Takeaways
- Choose weatherproof lights: Ensure durability with IP65-rated or outdoor-rated string lights.
- Measure your fence: Calculate length to buy the right number of light strands.
- Use removable hooks: Install damage-free clips or adhesive hooks for easy setup.
- Secure with zip ties: Reinforce lights on fence posts for windy conditions.
- Plan power access: Position lights near outdoor outlets or use solar-powered options.
- Test before finalizing: Check lights work properly before securing them permanently.
Why This Matters / Understanding the Problem
Let’s be honest—nothing transforms a backyard like string lights. They add warmth, charm, and a touch of magic. But here’s the catch: if you’ve ever tried to hang them on a fence, you know it can go sideways fast. Lights sag, clips break, or worse—your fence gets damaged. That’s why this How to Attach String Lights to Fence in 2026 Easy Guide is your go-to resource. I’ve been there—tried zip ties, nails, and even duct tape (don’t ask). After years of trial, error, and a few “oops” moments, I’ve cracked the code.
Whether you’re prepping for a summer BBQ, a cozy night in, or just want your yard to feel like a Pinterest board, this guide walks you through a damage-free, long-lasting, and easy-to-remove method. No special skills needed. Just a little patience and the right tools.
And don’t worry—this isn’t about perfection. It’s about getting that soft glow without stress. So, if you’ve ever asked, “How do I hang string lights without ruining my fence?” or “What’s the best way to secure outdoor lights?”—you’re in the right place.
What You Need
Before we dive in, let’s gather what you’ll need. The good news? Most of these are items you probably already have. If not, they’re cheap and easy to find at any hardware or home store.
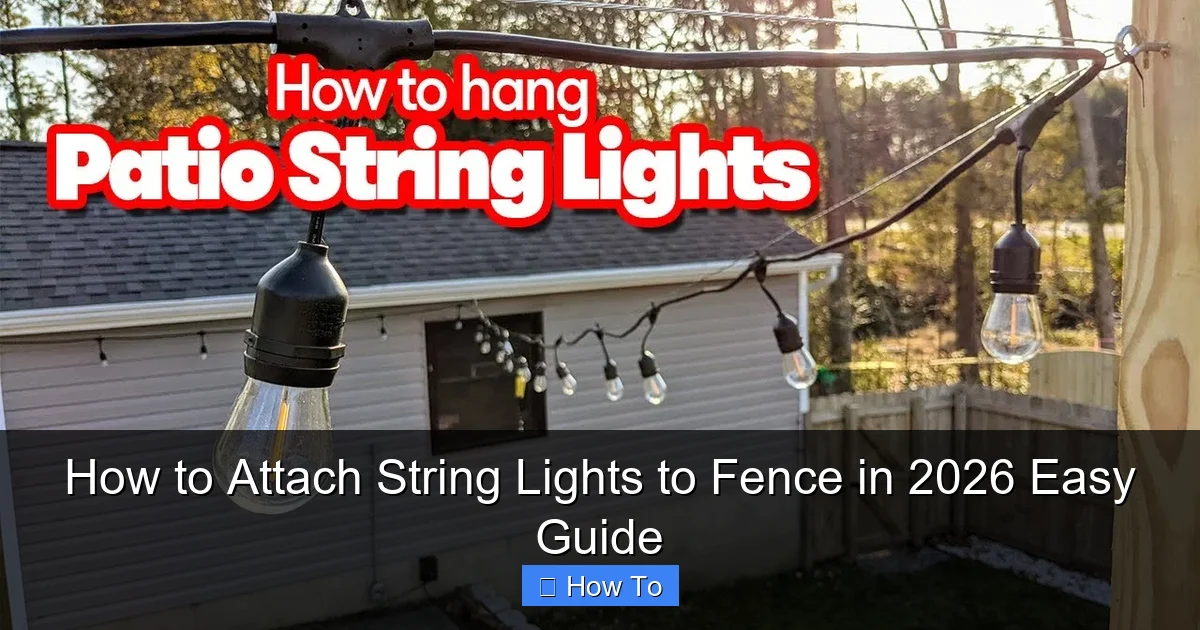
Visual guide about how to attach string lights to fence
Image source: i.ytimg.com
- String lights (LED, outdoor-rated) – Look for “weather-resistant” or “IP65” labels. LED saves energy and lasts longer.
- Fence clips or hooks – I recommend silicone-coated S-hooks or plastic fence clips. Avoid metal that can rust or scratch.
- Measuring tape – For spacing and symmetry (if you’re into that).
- Extension cord (outdoor-rated) – Make sure it’s GFCI-protected for safety.
- Zip ties (optional) – Use only if needed for extra support—don’t overdo it.
- Scissors or wire cutters – For trimming zip ties or adjusting cords.
- Ladder (if your fence is tall) – Safety first. Use a stable one with rubber feet.
- Timer (optional but awesome) – Set it and forget it. Lights turn on at dusk, off at bedtime.
Pro Insight: I once used regular indoor clips on a vinyl fence. Big mistake. They cracked the vinyl and left ugly marks. Always use fence-specific clips or non-abrasive hooks. Your fence will thank you.
With these in hand, you’re ready to follow the How to Attach String Lights to Fence in 2026 Easy Guide—a method that’s worked for wooden, vinyl, chain-link, and even metal fences.
Step-by-Step Guide to How to Attach String Lights to Fence in 2026 Easy Guide
Step 1: Choose the Right String Lights
Not all string lights are created equal. For outdoor fences, you need weatherproof and dimmable LEDs. I learned this after my first set of “outdoor” lights died in a light rainstorm. Oops.
- Look for IP65 or higher rating—this means dustproof and water-resistant.
- Choose LEDs over incandescent. They run cooler, use less power, and last 25,000+ hours.
- Pick a bulb shape and spacing you like. G40 bulbs give a classic look; mini LEDs are subtle.
- Measure your fence first. Buy 10–20% extra length to account for curves and spacing.
When in doubt, go with a plug-in set with a long cord. Battery-powered lights are great for small areas, but they don’t last as long and can be dimmer.
Real Talk: I once bought a 50-foot set for a 30-foot fence. Ended up with a tangled mess. Measure twice, buy once. And always test the lights before hanging.
Step 2: Plan Your Layout (Avoid the “Sag Zone”)
This is where most people skip and regret it later. A little planning prevents sagging, uneven spacing, and that “I gave up halfway” look.
- Decide the pattern: Straight line, zigzag, crisscross, or canopy style?
- Mark key points: Use painter’s tape to mark where lights will attach—every 12–18 inches is ideal.
- Leave slack: Don’t stretch the string tight. A little droop = more visual appeal.
- Plan power access: Where’s the outlet? Can you hide the cord? Use a timer to reduce clutter.
For a straight-line setup (easiest for beginners), measure the fence length and divide by 15 inches. That gives you your clip spacing. For example, a 30-foot fence = 24 clips.
If you’re going for a “canopy” effect (lights crisscrossing overhead), you’ll need anchors at both ends of the fence and possibly a center pole or tree. But let’s keep it simple for now—this guide focuses on fence-mounted lights.
Pro Tip: I use a piece of string to mock up the layout. It helps me visualize spacing and avoid “light deserts” in certain areas.
Step 3: Install Fence Clips or Hooks
This is the heart of the How to Attach String Lights to Fence in 2026 Easy Guide. The goal: secure, damage-free attachment.
- For wooden fences: Use plastic fence clips or silicone S-hooks. They grip the top rail or pickets without nails.
- For vinyl/pvc fences: Never use screws or nails. Use adhesive-backed hooks (rated for outdoor use) or clips that clamp over the rail.
- For chain-link fences: Use plastic zip ties or specialty chain-link clips. Wrap ties loosely—tight ones can stress the mesh.
- For metal fences: Magnetic clips work great, but only if the metal is thick enough. Otherwise, use non-marring S-hooks.
Install clips at your pre-marked spots. For wooden fences, I like to slide clips over the top rail—no tools, no holes. For vinyl, I use 3M outdoor adhesive hooks. They hold up to 5 pounds and survive rain, snow, and sun.
Space clips evenly. If your fence has pickets, attach to the top rail or every 3rd picket to avoid overcrowding.
Warning: Don’t use duct tape, super glue, or permanent adhesives. They’ll peel off paint or vinyl and leave sticky residue. Trust me—I’ve spent hours scraping it off.
Step 4: Hang the Lights (The Fun Part)
Now for the magic. Unroll the lights and plug them in to test—before you hang them. Fix any issues first.
- Start at the power end. Attach the first bulb or socket to the clip.
- Work your way down the fence, clipping every 12–18 inches. Let the lights drape slightly—don’t pull tight.
- For long runs, support the middle with an extra clip or zip tie to prevent sagging.
- If using multiple strands, connect them end-to-end (check the max wattage first—don’t overload).
- For zigzag or crisscross patterns, use a second set of clips on the opposite side of the fence or on posts.
I like to hang the lights at dusk so I can see the glow as I go. It’s oddly satisfying.
Personal Hack: If your lights have a plug at both ends, hang the male end first. That way, you can plug in and test as you go. No more “Why won’t they turn on?” at the end.
Step 5: Secure Cords and Hide Wires
Nothing ruins the vibe like a dangling cord. This step keeps things safe and tidy.
- Use outdoor-rated cord clips or zip ties to run the power cord along the fence base.
- Hide the cord: Tuck it behind a planter, run it under mulch, or use a cord cover strip.
- Elevate the plug: Don’t leave the plug on the ground. Use a weatherproof outlet cover or hang it on a hook.
- Use a timer: Set it to turn on at sunset and off after 4–6 hours. Saves energy and extends bulb life.
I once left a plug on the ground. Rain came, water pooled, and the GFCI tripped. Lesson learned: elevate and protect.
Safety Note: Never staple cords or run them under doors. Use outdoor-rated extension cords—indoor ones can overheat.
Step 6: Test, Adjust, and Enjoy
Step back and admire your work. Then test:
- Are all bulbs lit?
- Is there any sagging or tight spots?
- Are cords safe and hidden?
- Does the timer work?
Adjust as needed. Tighten loose clips, add support for sags, or reposition bulbs for even glow.
Invite a friend over. Pour a drink. Turn on the lights. That’s the moment you’ll remember. That’s what this How to Attach String Lights to Fence in 2026 Easy Guide is all about.
Step 7: Winter Storage (Optional but Smart)
If you live where winters are harsh, take the lights down. Store them properly to extend their life.
- Unplug and remove clips gently.
- Coil lights loosely (no tight loops).
- Store in a dry, cool place—like a garage or closet.
- Label clips by type (wood, vinyl, etc.) so you’re ready next year.
I leave mine up year-round in mild climates. But in snowy areas, I take them down. One year, a snowplow took out half my clips. Not fun.
Bonus Tip: Keep a small repair kit: spare bulbs, clips, zip ties, and a multimeter. Fixing a dead bulb takes 2 minutes.
Pro Tips & Common Mistakes to Avoid
After hanging lights for 10+ years (and fixing my own blunders), here’s what I’ve learned.
- Don’t overhang. One 50-foot strand per outlet is plenty. Overloading can trip breakers or burn out sockets.
- Use the right clips for your fence type. Vinyl hates metal. Wood loves silicone. Chain-link needs zip ties.
- Leave slack. Tight strings look stiff. A little droop = soft, romantic glow.
- Check local codes. Some HOA rules limit light brightness or colors. Better safe than fined.
- Go dimmable. Bright lights at 10 PM can annoy neighbors. A dimmer or timer fixes that.
- Test before you hang. A dead bulb is easier to fix on the ground than 6 feet up.
- Don’t use nails or screws. They rust, damage wood, and void warranties. Use clips or hooks instead.
Real Story: I once used 100 zip ties on a vinyl fence. They looked like a spiderweb and left marks. Now I use one zip tie per 3 clips for backup—just in case.
Also, avoid solar lights for fences. They’re great for pathways, but often too dim for full coverage. Stick with plug-in LEDs.
And remember: this isn’t about perfection. A few gaps? A bulb out? It’s part of the charm. The goal is ambiance, not a showroom.
FAQs About How to Attach String Lights to Fence in 2026 Easy Guide
Here are the questions I get most—answered honestly, like I’m talking to a friend.
Q: Can I leave string lights on the fence all year?
A: It depends. In dry, mild climates, yes—with weatherproof lights and clips. But in areas with heavy snow, ice, or salt air, I take them down. I’ve had lights survive 3 winters, but I’ve also lost sets to wind and moisture. If you leave them up, check them monthly and replace any damaged bulbs.
Q: What if my fence is too tall?
A: Use a stable ladder with a helper. Or, hang lights from lower points—like posts or planters. You can also use extension poles to reach higher clips. Safety first—no leaning or overreaching.
Q: How do I hide the power cord?
A: I use cord covers (like raceway strips) along the fence base. Or, run the cord behind a bush, under mulch, or through a PVC conduit. For a clean look, use a timer box near the outlet to reduce visible cords.
Q: Can I use adhesive hooks on a painted wood fence?
A: Yes—but only if the paint is smooth and clean. I use 3M Outdoor Mounting Tape (rated for 5 lbs). Avoid textured or flaky paint. Test one hook first. If it falls off, clean with rubbing alcohol and try again.
Q: How many lights do I need for a 20-foot fence?
A: For a straight line, I use a 30-foot strand with 30 bulbs (10-inch spacing). That gives you a little extra for curves and slack. For a crisscross pattern, double it. Measure your fence and add 10–20%.
Q: What if a bulb burns out?
A: Most LED sets are parallel-wired, so one dead bulb won’t kill the whole strand. Just replace it. Keep a few spares. If the whole strand dies, check the plug, fuses, and connections.
Q: Are there smart string lights?
A: Absolutely! I use Wi-Fi-enabled LEDs that connect to my phone. I can change colors, set scenes, and schedule on/off times. Some even work with Alexa or Google. They cost more, but the convenience is worth it for me.
Final Thoughts
Hanging string lights on a fence isn’t just about looks—it’s about creating a feeling. A place to laugh, relax, and enjoy life. And with this How to Attach String Lights to Fence in 2026 Easy Guide, you’ve got the tools to do it right—without damage, stress, or wasted money.
Start simple. Pick a small section of fence. Use the right clips. Test as you go. And don’t aim for perfection—aim for joy.
When the sun sets and your lights come on, take a moment to enjoy it. That glow? That’s your handiwork. That’s the magic of a well-lit space.
Now go grab your lights, a cup of coffee, and get started. Your backyard (and your guests) will thank you.
And if you run into issues? Don’t panic. Every pro was once a beginner. Just tweak, adjust, and try again. The best part isn’t the final look—it’s the process of making it your own.
Happy lighting!

