Featured image for how to attach string lights to metal pergola
Image source: shinymodern.com
Attaching string lights to a metal pergola is easiest and safest using magnetic clips or adhesive-backed cable hooks designed for metal surfaces—no drilling required. For a secure, weather-resistant hold in 2026, choose UV-resistant, outdoor-rated fasteners that grip tightly without scratching or slipping. This method ensures a clean, professional look while protecting your pergola and lights season after season.
Key Takeaways
- Use magnetic clips: Easily attach lights without drilling or damaging metal surfaces.
- Opt for adhesive hooks: Choose heavy-duty, weatherproof hooks for secure, no-tool mounting.
- Plan spacing first: Measure and mark light positions to ensure even, balanced coverage.
- Prioritize safety: Use outdoor-rated lights and check for frayed wires before installing.
- Hide cords neatly: Tuck wires along beams with zip ties or cord covers.
- Check weight limits: Ensure pergola can support lights’ weight, especially for long-term use.
📑 Table of Contents
- Why String Lights on a Metal Pergola Are a Game-Changer
- Choosing the Right String Lights for Your Metal Pergola
- Tools and Materials You’ll Need (No Welding Required!)
- Step-by-Step Installation Guide (For Any Pergola Layout)
- Pro Tips for a Professional-Looking Finish
- Maintenance and Longevity: Keep Your Lights Glowing for Years
- Comparison Table: Attachment Methods for Metal Pergolas
- Final Thoughts: Your Pergola, Your Glow
Why String Lights on a Metal Pergola Are a Game-Changer
Let’s be honest—there’s something magical about string lights. Whether you’re hosting a summer BBQ, enjoying a quiet evening with a book, or just trying to make your backyard feel a little more *you*, those soft, twinkling glows can transform any space. And if you’ve got a metal pergola, you’re already halfway there. But here’s the catch: metal is smooth, hard, and doesn’t play nice with most traditional hanging methods. You can’t just hammer nails into it like you would with wood. So, how do you attach string lights to a metal pergola without damaging it, risking safety, or ending up with a tangled mess?
I’ve been there. I remember standing in my backyard, lights in one hand, a hammer in the other, only to realize I had no idea where to start. I tried tape (it fell off in a week), zip ties (they looked messy), and even attempted to weld hooks (spoiler: I’m not a welder). After trial, error, and a few lessons learned the hard way, I’ve figured out a few reliable, damage-free, and aesthetically pleasing ways to hang string lights on a metal pergola. And in this guide, I’ll walk you through every step—no jargon, no fluff, just real, practical advice for 2026 and beyond. Whether you’re a DIY newbie or a seasoned pro, you’ll walk away with a lighting setup that’s secure, stylish, and ready for any season.
Choosing the Right String Lights for Your Metal Pergola
Before you even think about hanging, you need the right lights. Not all string lights are created equal—especially when your pergola is made of metal. The wrong choice can lead to flickering, poor weather resistance, or even safety hazards. Let’s break down what to look for.
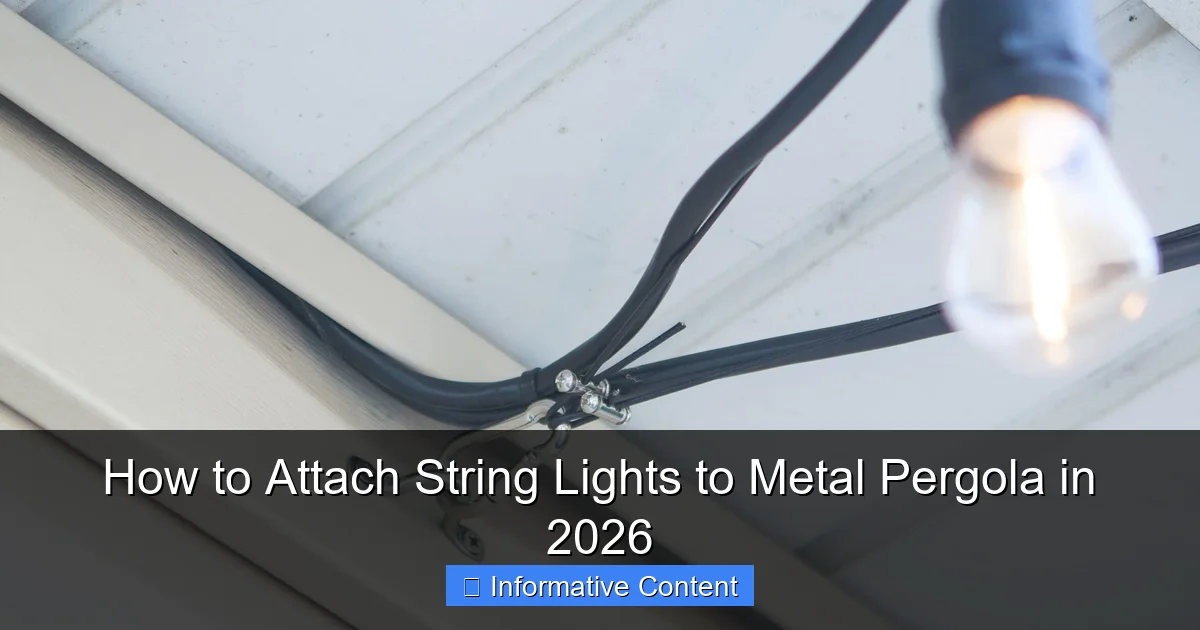
Visual guide about how to attach string lights to metal pergola
Image source: thediyplaybook.com
1. Weather-Resistant and Outdoor-Rated
Your pergola is exposed to sun, rain, wind, and maybe even snow. That means your lights need to be outdoor-rated and weather-resistant. Look for an IP rating of at least IP65—this means they’re dust-tight and protected against water jets. I learned this the hard way when I used indoor lights one year and they died after a single thunderstorm. Oops.
Pro tip: If you live in a humid area (like the Gulf Coast or the Pacific Northwest), go for IP67 or higher. These can handle temporary submersion, which is great for heavy rain or snowmelt.
2. LED vs. Incandescent: Why LED Wins
LEDs are the clear winner for pergola lighting in 2026. Here’s why:
- Energy efficient: LEDs use up to 80% less energy than incandescent bulbs. That means lower electricity bills and longer battery life if you’re using solar-powered ones.
- Longer lifespan: Most LEDs last 25,000 to 50,000 hours. Incandescent bulbs? Maybe 1,000.
- Cooler to the touch: Metal gets hot in the sun. LED lights stay cool, reducing fire risk and making them safer to touch.
- Color options: Many LED strings now offer color-changing or smart app control, so you can switch from warm white to party mode with your phone.
3. Bulb Shape and Spacing Matter
Think about the vibe you want:
- Globe bulbs give a cozy, bistro feel. Great for dining areas.
- Edison-style bulbs have that vintage charm. Perfect for a rustic or industrial look.
- Mini LEDs (like fairy lights) are subtle and elegant. Ideal for a romantic or minimalist aesthetic.
Spacing is also key. For a full, even glow, aim for bulbs spaced 4 to 6 inches apart. Too far apart, and you’ll have dark spots. Too close, and it might look cluttered.
4. Power Source: Plug-In, Battery, or Solar?
Each has pros and cons:
- Plug-in: Most reliable and bright. But you’ll need outdoor outlets nearby. Consider a weatherproof extension cord and GFCI outlet for safety.
- Battery-powered: Great for temporary setups or hard-to-reach areas. Just remember to change batteries regularly. I once forgot—lights died mid-party. Not my finest moment.
- Solar-powered: Eco-friendly and no cords. But they can be dimmer and less reliable on cloudy days. Make sure the solar panel gets 6+ hours of direct sunlight.
Tools and Materials You’ll Need (No Welding Required!)
Good news: you don’t need to be a contractor or a metalworker to hang lights on a metal pergola. With the right tools, it’s a weekend project anyone can tackle. Here’s what I keep in my “string light toolkit”:
Essential Tools
- Measuring tape: For planning spacing and length.
- Marker or chalk: To mark attachment points (use a dry-erase marker if you’re worried about residue).
- Ladder or step stool: For reaching high beams. Use a stable, non-slip one.
- Gloves: Metal can be sharp. Protect your hands.
- Scissors or wire cutters: For trimming zip ties or cords.
Attachment Hardware (No Damage, No Drilling!)
Since you can’t nail into metal, here are the best non-damaging options:
- Magnetic clips or hooks: Super easy. Just stick them to the metal beams. Best for smooth, flat surfaces. Look for ones rated for outdoor use (stainless steel or coated).
- Adhesive-backed hooks: Use heavy-duty outdoor-rated adhesive (like 3M VHB tape). Clean the metal first with rubbing alcohol for maximum stick.
- Zip ties with metal clips: These have a metal base that grips the edge of the beam. No drilling, and they’re nearly invisible once the lights are on.
- Clamp-style hooks: Like “C” clamps or spring clamps. They grip the pergola’s edges. Great for beams with lips or overhangs.
- Twist ties or twist-on hooks: Wrap around beams. Simple, but not as secure in high winds.
Bonus: Cord Management Supplies
Nobody wants a tangled mess. Keep things tidy with:
- Outdoor-rated cable clips: For running cords along beams or down columns.
- Zip tie mounts: Stick them to the metal, then run zip ties through to hold cords.
- Weatherproof cord covers: If you’re running cords across the ground, protect them from tripping hazards and weather.
What NOT to Use
Avoid:
- Duct tape or regular masking tape: They’ll peel off in heat or rain.
- Glue or super glue: Not designed for outdoor metal. It’ll fail.
- Drilling without sealing: If you *must* drill (e.g., for permanent hooks), seal the hole with rust-resistant primer and outdoor paint to prevent corrosion.
Step-by-Step Installation Guide (For Any Pergola Layout)
Now for the fun part: hanging the lights! I’ll walk you through a foolproof method that works for most metal pergola designs—whether you’ve got a simple rectangle, an arched top, or a multi-tiered setup.
Step 1: Plan Your Layout (Measure Twice, Hang Once)
Start with a sketch. Decide:
- Path of the lights: Will they run along the beams, across the top, or drape down the sides?
- Bulb spacing: Mark every 4–6 inches with a marker.
- Power source location: If using plug-in, plan how the cord will reach the outlet.
Pro tip: Lay the lights on the ground first to test length and spacing. I once bought lights that were *way* too short. Lesson learned.
Step 2: Clean the Metal Surface
Wipe down the beams with rubbing alcohol or mild soap and water. Remove dust, grease, or oxidation. This ensures adhesives and clips stick properly.
Step 3: Attach the Hardware (No Tools Needed for Most!)
Here’s how I do it:
- For magnetic clips: Just press them onto flat beams. Space them every 12–18 inches.
- For adhesive hooks: Press firmly for 30 seconds. Wait 24 hours before hanging lights (yes, really—adhesive needs time to bond).
- For clamp hooks: Open the clamp and snap it onto the beam’s edge. Tighten gently.
- For zip ties with metal clips: Slide the clip onto the beam, then zip the tie around the cord.
Pro tip: Use a level to keep hooks aligned. Crooked lights = crooked vibes.
Step 4: Hang the Lights
Start at the power source (if plug-in). Drape the lights over the hooks or clips. Don’t pull too tight—leave a little slack so they don’t strain the sockets.
For a draped look (like café lights): Let the lights sag slightly between hooks. This creates a soft, romantic glow. But don’t let them touch the ground!
For a straight, linear look: Keep the lights taut and parallel to the beams.
Step 5: Manage Cords and Hide Wires
Use cable clips or zip tie mounts to run cords along beams. If the cord runs down a column, cover it with a weatherproof cord cover or tuck it behind a plant.
Pro tip: Use black or gray cords—they blend into the pergola better than white.
Step 6: Test and Adjust
Turn on the lights. Check for:
- Even spacing: No dark spots.
- Secure attachment: No sagging or slipping.
- Weather resistance: No exposed wires or loose connections.
Adjust hooks or clips as needed. It’s easier to fix now than after a storm!
Pro Tips for a Professional-Looking Finish
Want your lights to look like they were installed by a pro? These tips will take your setup from “meh” to “wow.”
1. Use the “Rule of Thirds” for Layout
Instead of running lights in a straight line, stagger them in a zigzag or crisscross pattern. This fills more space and looks intentional. Example: Hang one set of lights along the front beam, then a second set across the back at a 45-degree angle.
2. Mix Bulb Types for Depth
Combine globe lights with fairy lights for a layered effect. Use globes along the beams and fairy lights draped between columns. It adds dimension and avoids a “one-note” look.
3. Hide the Power Source
No one wants to see a giant power brick. Tuck it behind a plant, under a bench, or in a weatherproof outlet box. If using solar, place the panel in a sunny spot—even if it’s not on the pergola itself.
4. Add Motion or Smart Controls
In 2026, smart lights are a game-changer. Try:
- Motion sensors: Lights turn on when someone walks by.
- Timers or schedules: Automatically turn on at sunset.
- Voice control: “Hey Google, turn on pergola lights.”
5. Protect Against Wind and Weather
Metal pergolas can act like sails in high winds. To prevent lights from blowing loose:
- Use double hooks at corners and ends.
- Add extra zip ties every 2–3 feet.
- For heavy-duty setups, use wire rope (like picture hanging wire) as a backbone. Hang lights from the rope instead of directly from the metal.
6. Seasonal Swaps Made Easy
Want to change lights for holidays or seasons? Use reusable clips (like magnetic hooks) so you can swap lights without reinstalling hardware. Store them in a labeled bin when not in use.
Maintenance and Longevity: Keep Your Lights Glowing for Years
Great lights are an investment. With a little care, they can last a decade. Here’s how to keep them looking and working their best.
1. Clean Lights Annually
Wipe down bulbs with a damp cloth (for plastic) or glass cleaner (for glass). Remove cobwebs, dust, or pollen. Dirty bulbs = dimmer light.
2. Check for Loose Connections
Every 6 months, inspect:
- Hooks and clips: Are they still secure? Tighten or replace as needed.
- Cords: Look for fraying, cracks, or exposed wires.
- Adhesive hooks: If they’re peeling, reapply with fresh tape.
3. Winter Care (If You Leave Lights Up)
If your pergola is in a cold climate:
- Remove snow: Use a soft broom to gently brush off snow. Never use a shovel!
- Inspect after storms: High winds can loosen hooks. Check within 24 hours of a storm.
- Store solar panels indoors: If you’re not using them in winter, store them in a dry place to extend battery life.
4. When to Replace Lights
Even the best lights eventually fail. Replace them if:
- Half the bulbs are out: This usually means the entire strand is dying.
- Cords are damaged: Frayed wires are a fire hazard.
- They’re no longer weatherproof: Cracked casings let in moisture.
5. Recycle Responsibly
Don’t toss old lights in the trash. Many retailers (like Home Depot or IKEA) offer light bulb recycling programs. Or, take them to an electronic waste facility.
Comparison Table: Attachment Methods for Metal Pergolas
| Method | Best For | Pros | Cons | Cost (per 10 ft) |
|---|---|---|---|---|
| Magnetic Hooks | Smooth, flat beams | Easy to install/remove; no tools | Can slide in high winds; limited weight capacity | $8–$12 |
| Adhesive Hooks (3M VHB) | Most surfaces | Strong bond; invisible when lights are on | Requires 24-hour cure time; not reusable | $10–$15 |
| Zip Ties with Metal Clips | Beams with edges | Secure; nearly invisible; reusable | Can look messy if overused | $5–$8 |
| Clamp Hooks | Beams with lips/overhangs | Very secure; no adhesive | Bulky; may leave marks | $12–$18 |
| Twist Ties | Temporary setups | Cheap; easy to adjust | Not wind-resistant; can slip | $3–$5 |
Final Thoughts: Your Pergola, Your Glow
Hanging string lights on a metal pergola isn’t just about adding light—it’s about creating a mood. It’s about turning your backyard into a place where memories are made, whether you’re roasting marshmallows with kids or sharing wine with friends under the stars. And the best part? You don’t need to be an expert to do it. With the right lights, the right tools, and a little patience, you’ll have a setup that’s secure, stylish, and uniquely yours.
Remember: it’s okay to start small. Try one section first, see how it looks, then expand. And if something doesn’t work? That’s fine too. I’ve had lights fall, hooks fail, and even a squirrel chew through a cord (true story). The key is to keep trying, keep learning, and—most importantly—keep enjoying the glow.
So grab your lights, head outside, and start hanging. Your perfect pergola oasis is just a few clips away. And when you’re done? Pour yourself a drink, turn on those lights, and savor the magic. You’ve earned it.
Frequently Asked Questions
How do I attach string lights to a metal pergola without drilling holes?
Use magnetic hooks or adhesive-backed cable clips designed for metal surfaces to avoid drilling. These options provide a secure hold while protecting your pergola’s finish and are easy to adjust or remove.
What’s the best way to hang string lights on a metal pergola in 2026?
In 2026, magnetic LED string light mounts and heavy-duty zip ties are popular for their durability and ease of use. Ensure the method you choose supports the weight of your lights and withstands weather conditions.
Can I use zip ties to attach string lights to a metal pergola?
Yes, UV-resistant zip ties are a sturdy option for metal pergolas, especially for temporary or seasonal setups. Wrap them around beams or rafters and trim excess for a clean look.
How to attach string lights to a metal pergola with a smooth surface?
For smooth metal surfaces, use silicone-based adhesive clips or magnetic strips to prevent slipping. Avoid abrasive fasteners to maintain the pergola’s finish and ensure long-term adhesion.
Are there solar-powered string lights for metal pergolas?
Yes, solar-powered string lights are ideal for metal pergolas, as they eliminate the need for outlets and reduce wire clutter. Place the solar panel in direct sunlight for optimal performance.
How do I secure string lights to a metal pergola in windy areas?
Opt for double-sided outdoor tape, twist ties, or magnetic clips with rubberized grips to anchor lights firmly. Regularly check connections to prevent loosening during storms or high winds.

