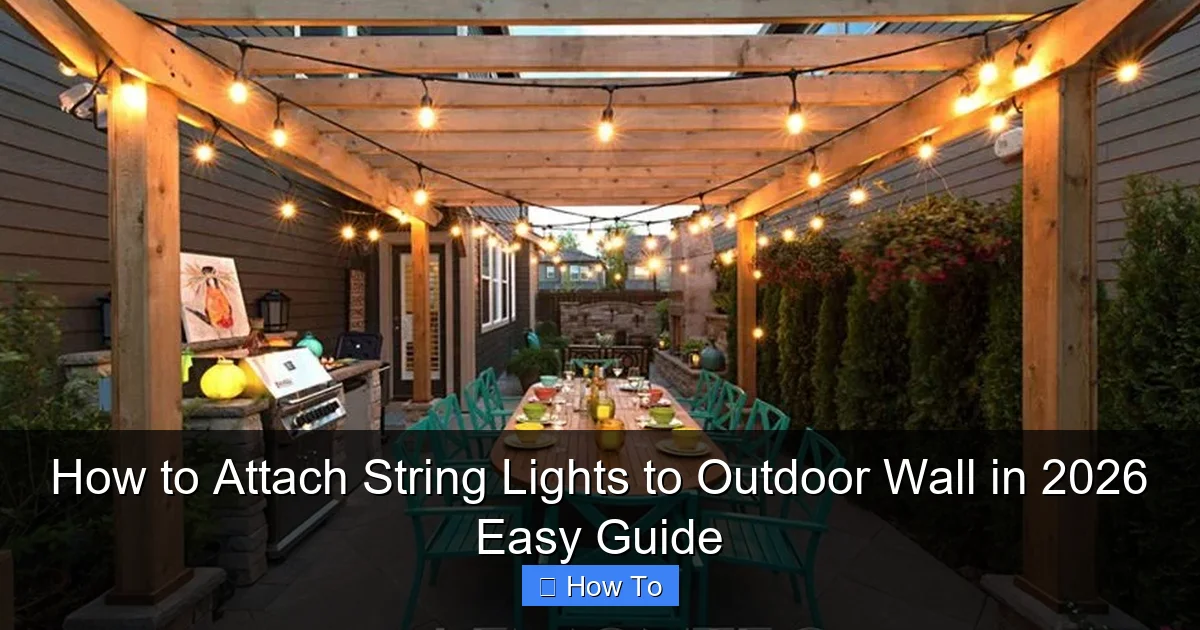
Featured image for how to attache string lights to outdoor wall
Image source: everythingbackyard.net
Transform your outdoor space in 2026 with secure, stylish string lights—no drilling required. Use weather-resistant adhesive hooks or removable mounting clips to attach lights safely to any outdoor wall, preserving surfaces while ensuring a bright, festive glow all season long.
“`html
How to Attach String Lights to Outdoor Wall in 2026 Easy Guide
Key Takeaways
- Choose weatherproof lights: Ensure durability with outdoor-rated, waterproof string lights.
- Plan layout first: Measure wall space and mark light placement before installing.
- Use removable hooks: Install adhesive or screw-in hooks for secure, damage-free mounting.
- Check power source: Verify nearby outlets or use solar-powered lights for convenience.
- Secure cords safely: Use clips or ties to prevent tripping and weather damage.
- Test before finalizing: Check light function and spacing before completing installation.
Why This Matters / Understanding the Problem
Imagine this: You’re hosting a summer barbecue, and the sun is setting. You flip on your outdoor string lights, and suddenly, the backyard transforms into a cozy, twinkling oasis. Sounds magical, right? But getting there can be tricky—especially if you’ve ever tried to hang lights only to have them sag, fall, or look like a DIY disaster.
Whether you’re dressing up a patio, framing a deck, or just adding ambiance to your garden, knowing how to attach string lights to an outdoor wall in 2026 easy guide style means you can do it right—without nails in the wrong place, tangled cords, or lights that won’t last the season.
The truth? Most people skip the prep. They rush in, use the wrong hardware, or forget weatherproofing. And that’s why their lights fail after a few weeks. This guide is here to help you avoid those mistakes—with real talk, simple steps, and a few hard-earned lessons from someone who’s hung more lights than they care to admit.
What You Need
Before we dive in, let’s gather the tools and materials. You don’t need a full workshop—just a few essentials that’ll make the job smooth and safe.
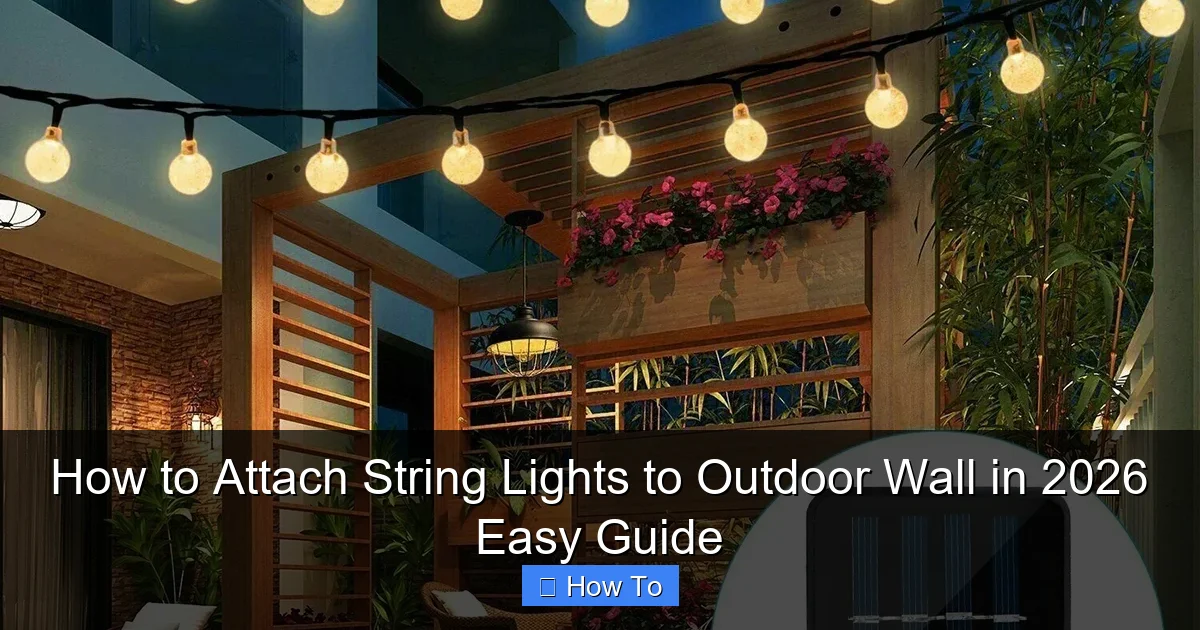
Visual guide about how to attache string lights to outdoor wall
Image source: i5.walmartimages.com
- Outdoor-rated string lights (LED, weather-resistant, preferably with a UL rating)
- Mounting hardware (screw-in hooks, adhesive clips, or gutter hooks—more on which to use later)
- Measuring tape (a 25-foot tape is perfect for most jobs)
- Pencil or erasable marker (for marking drill points)
- Drill with appropriate bits (masonry bit for brick, wood bit for siding)
- Stud finder (optional, but helpful for heavy loads)
- Level (to keep things straight—trust me, you’ll regret skipping this)
- Ladder (if you’re working above ground level)
- Weatherproof sealant (like silicone caulk, if drilling into wood or stucco)
- Extension cord (outdoor-rated, with GFCI protection)
- Zip ties or cable clips (for managing excess cord)
Pro tip: Always check your local weather forecast before starting. Windy or rainy conditions make this job harder and more dangerous—especially on a ladder.
Step-by-Step Guide to How to Attach String Lights to Outdoor Wall in 2026 Easy Guide
Step 1: Plan Your Layout and Measure Twice
Before you touch a drill, take a step back and visualize where the lights will go. Are you framing a wall? Creating a canopy? Highlighting a doorway? Sketch it out or use painter’s tape to mark the path.
Measure the distance from your power source (outdoor outlet) to the starting point. Most string lights come in 25–50 foot lengths, but you can connect multiple strands—just don’t exceed the manufacturer’s recommended wattage or strand count (usually 2–3 max).
Why this matters: I once tried to daisy-chain five strands because I was too lazy to measure. One rainy night, the circuit tripped, and I had to redo the whole thing. Learn from my mistake: plan your circuit, not just your path.
Use your measuring tape to mark anchor points every 12–16 inches. This spacing keeps the lights taut and prevents sagging. For longer runs, consider adding a center support (like a post or hook) to reduce tension.
Step 2: Choose the Right Mounting Hardware for Your Wall Type
Not all walls are created equal. The best way to attach string lights depends on your wall material. Here’s how to pick the right hardware:
- Wood or vinyl siding: Use screw-in hooks (like cup hooks or eye hooks). They grip tightly and are easy to remove.
- Brick or concrete: Use masonry anchors with screws, or adhesive hooks rated for heavy outdoor use (like 3M Outdoor Heavy Duty).
- Stucco: Use plastic anchors with screws, or adhesive clips with a strong hold (test first!).
- Metal or aluminum siding: Use magnetic hooks or adhesive clips—avoid drilling if possible to prevent rust.
For a no-drill option, outdoor adhesive clips are a game-changer. I’ve used them on stucco and vinyl, and they’ve lasted through two winters. Just make sure the surface is clean, dry, and grease-free before applying.
Warning: Don’t use nails or staples on outdoor walls—they can damage siding, create water entry points, and void warranties. And they’re just not safe for long-term use.
Step 3: Mark and Pre-Drill Anchor Points
Now it’s time to mark where your hooks or clips will go. Use your pencil and level to ensure everything is straight. For a straight line, stretch a string or use a chalk line.
If you’re drilling into wood, vinyl, or stucco, pre-drill small pilot holes. This prevents cracking and makes inserting screws easier. For brick or concrete, use a masonry bit slightly smaller than your anchor.
Drill slowly and steadily—don’t force it. If you hit a stud, great! That’s extra support. If not, the anchor will do the job. Insert the anchor (if needed), then screw in your hook or clip.
Pro tip: For stucco, I like to use a self-tapping plastic anchor—it expands as you screw, creating a tight seal without cracking the surface.
Step 4: Install the Mounting Hardware
With your pilot holes ready, install the hooks or clips. Screw them in firmly, but don’t over-tighten—especially on vinyl or stucco, which can crack under pressure.
For adhesive clips, follow the instructions: clean the surface with rubbing alcohol, press firmly for 30 seconds, and let cure for at least 24 hours before hanging lights. I’ve skipped this step before, and the clips failed in the first storm.
Use your level to double-check alignment. A crooked line is more noticeable at night when the lights are on. Take your time—this is the foundation of a professional-looking install.
Step 5: Hang the String Lights (Without the Tangle)
Now for the fun part: hanging the lights. But don’t just start at one end and work your way down. That’s how tangles happen.
Start by uncoiling the lights and laying them out loosely along the path. Then, starting from the farthest point from the outlet, loop the light strand through each hook or clip.
Use a gentle pull to keep tension, but don’t stretch the cord. The lights should hang in a slight U-shape (not straight), which allows for wind movement and prevents strain.
Real talk: I once pulled too hard and broke a socket. Now I hang lights like I’m handling a fragile necklace—firm but gentle.
If you’re connecting multiple strands, plug them in before hanging. Test each section as you go. A dead bulb or faulty connection is easier to fix now than after everything’s up.
Step 6: Secure and Manage Excess Cord
Once the lights are hung, you’ll likely have extra cord near the outlet. Don’t just leave it dangling—it’s a tripping hazard and can pull on the connections.
Use outdoor zip ties or cable clips to bundle and secure the cord along the wall. Tuck it behind plants or under furniture if possible.
For a cleaner look, run the cord behind the lights and use clips to hide it. I like to spiral the excess around a hook and tuck the end behind a planter—no one will ever know.
Make sure the plug is elevated and protected from rain. Use a weatherproof outlet cover or a small plastic box (like a junction box) if the plug will be on the ground.
Step 7: Test, Adjust, and Weatherproof
Turn on the lights and walk around. Look for sagging, uneven spacing, or flickering bulbs. Adjust hooks or clips as needed.
If you drilled into wood, vinyl, or stucco, seal the hole with a dab of silicone caulk. This prevents water from seeping in and causing rot or mold.
For adhesive clips, check their hold after a few days. If any feel loose, remove and reapply with fresh adhesive.
Finally, set up a timer or smart plug so the lights turn on at dusk and off at bedtime. This saves energy, extends bulb life, and means you don’t have to remember to flip the switch.
Pro Tips & Common Mistakes to Avoid
After hanging lights on everything from brick walls to pergolas, here are the lessons I wish I’d known sooner.
- Use LED lights. They’re cooler, more energy-efficient, and last longer than incandescent. Plus, they’re less likely to overheat or melt adhesive.
- Don’t skip the level. A crooked line is obvious at night. Take the extra minute to check alignment.
- Anchor the center of long runs. A 30-foot span will sag without a middle hook. I learned this the hard way when my lights looked like a hammock.
- Test in daylight. It’s easier to spot wiring issues or broken bulbs when you can see clearly.
- Use GFCI outlets. Outdoor circuits must have ground-fault protection. If your outlet doesn’t have a “Test” button, call an electrician.
- Store lights properly. When the season ends, unplug and coil lights loosely. Store in a dry, cool place—not a damp garage.
Biggest mistake? Using indoor lights outdoors. One storm, and they’re toast. Always check the rating: look for “damp” or “wet” location on the packaging.
And one more thing: don’t overdo it. More lights aren’t always better. A simple, well-placed strand can be more elegant than a chaotic glow.
FAQs About How to Attach String Lights to Outdoor Wall in 2026 Easy Guide
Q: Can I use nails or staples to hang outdoor string lights?
A: I wouldn’t. Nails can damage siding, create water entry points, and aren’t secure long-term. Staples are even worse—they can cut the wire insulation and cause shorts. Stick with hooks, clips, or anchors. Your wall (and your electric bill) will thank you.
Q: What if my wall is stucco or brick and I don’t want to drill?
A: Adhesive hooks are your friend. Brands like 3M and Command make outdoor-rated clips that hold up to 5–7 pounds. Just clean the surface well and let them cure for 24 hours. I’ve used them on stucco for two years with zero issues.
Q: How do I keep the lights from sagging?
A: Two words: tension and support. Use hooks every 12–16 inches, and add a center anchor for runs longer than 20 feet. A slight U-shape is fine—just don’t let it droop like a limp noodle. And never pull the cord tight; that’s a recipe for broken sockets.
Q: Can I connect multiple strands of string lights?
A: Yes, but check the packaging. Most LED strands let you connect 2–3 together. Never exceed the wattage limit (usually 200–250W for a standard outlet). And always plug into a GFCI-protected circuit. I once overloaded a circuit and blew a fuse—lesson learned.
Q: How do I hide the extension cord?
A: Tuck it behind planters, under furniture, or use cord covers. For a seamless look, run it behind the lights and secure with clips. I also like using a timer box that blends into the landscape. No one wants to see a bright orange cord.
Q: Are solar-powered string lights a good alternative?
A: They’re great for areas without outlets, but they’re not as bright or reliable. Cloudy days mean dim lights. I use them for accent lighting, but for main ambiance, I stick with wired. If you go solar, make sure the panel gets 6+ hours of direct sun.
Q: How long will my outdoor string lights last?
A: With proper installation and care, LED string lights can last 3–5 years—sometimes longer. Keep them clean, store them properly in winter, and avoid overloading circuits. Cheap incandescent lights? Maybe 1–2 seasons. Invest in quality; it pays off.
Final Thoughts
Hanging outdoor string lights isn’t just about aesthetics—it’s about creating a space where memories happen. Whether it’s a quiet evening with a book or a lively dinner party, the right lighting sets the mood.
Now that you know how to attach string lights to an outdoor wall in 2026 easy guide fashion, you can do it safely, beautifully, and with confidence. No more sagging, no more failed clips, no more “I’ll fix it later” projects.
Start small. Test one section. Use the right hardware. And don’t forget to step back and admire your work at night. That’s the best part.
And when your friends ask, “How’d you get them so perfect?”—just smile and say, “I read a really good guide.”
Happy hanging!
“`

