Featured image for how to connect flat flexible led string lights
Image source: nerdtechy.com
Connecting flat flexible LED string lights is effortless when you align the arrows on the connectors and snap them into place for a secure, weatherproof fit. Ensure the power is off during installation, then link multiple strands end-to-end—most models support up to 10 sets for seamless, customizable illumination. Always check manufacturer guidelines to avoid overloading circuits and maintain optimal performance.
How to Connect Flat Flexible LED String Lights Easily
Key Takeaways
- Inspect connectors: Ensure they’re clean and undamaged before connecting.
- Align arrows: Match polarity marks for secure, error-free connections.
- Snap firmly: Press connectors together until they click into place.
- Avoid overbending: Prevent damage by keeping bends gentle and wide.
- Test early: Check lights after each connection to catch issues fast.
- Seal outdoor links: Use waterproof covers to protect exposed connections.
Why This Matters / Understanding the Problem
Ever tried to decorate a bookshelf, a wedding arch, or a bedroom wall only to realize your flat flexible LED string lights won’t reach the power source? Or worse—you’ve connected them, but the lights flicker, dim, or stop working halfway through? You’re not alone.
Flat flexible LED string lights are popular for their slim profile, bendability, and modern look. They’re perfect for tight spaces, curved surfaces, and creative DIY lighting projects. But connecting them—especially multiple strands or extending them—can be tricky without the right know-how.
That’s where learning how to connect flat flexible LED string lights easily becomes essential. Whether you’re setting up holiday décor, accent lighting, or a cozy ambiance in your home, a reliable connection keeps your lights shining bright and your setup stress-free.
Unlike traditional string lights, flat flexible LED strips often use specialized connectors, low-voltage wiring, and sometimes even adhesive backing. This means you can’t just twist wires together and expect them to work. But with the right tools and techniques, you can link multiple strands, extend reach, and even create custom lighting layouts—safely and efficiently.
In this guide, we’ll walk you through a simple, foolproof method to connect flat flexible LED string lights. No electrical engineering degree required. Just practical, real-world steps to get your lights glowing in minutes.
What You Need
Before we dive into the steps, let’s gather your tools and materials. Having everything ready saves time and avoids mid-project trips to the hardware store.
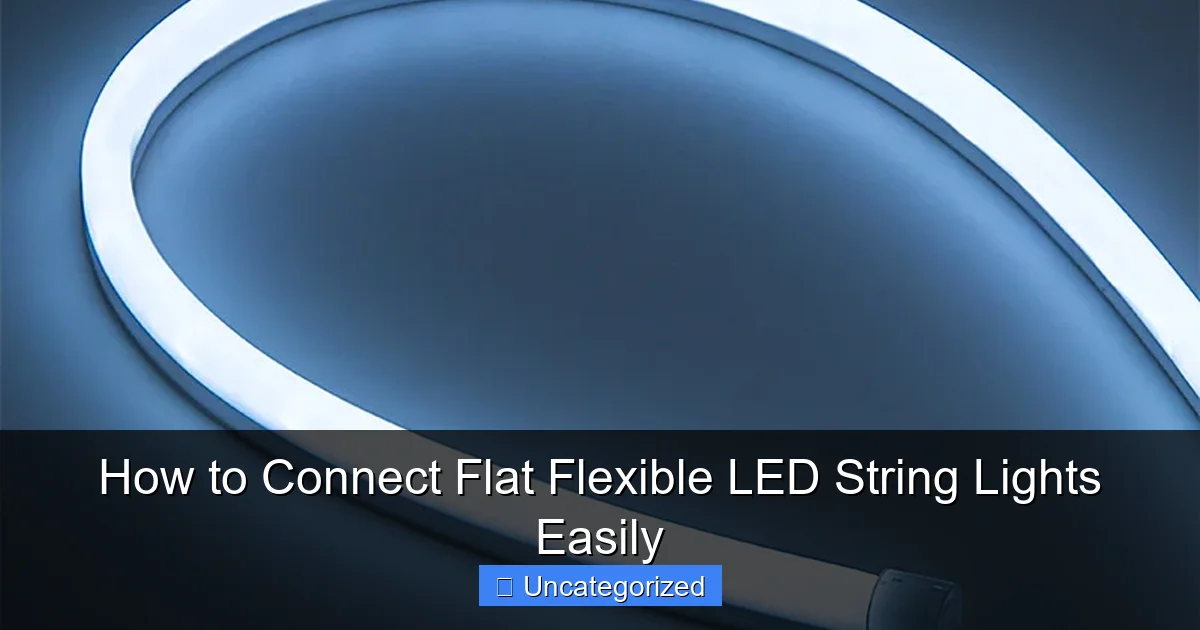
Visual guide about how to connect flat flexible led string lights
Image source: d114hh0cykhyb0.cloudfront.net
- Flat flexible LED string lights (compatible strands—check voltage and connector type)
- Extension cables or connector kits (specifically designed for flat flexible LEDs)
- Low-voltage DC power supply (matches the voltage of your lights—usually 5V, 12V, or 24V)
- Wire strippers (for DIY splicing, if needed)
- Electrical tape or heat shrink tubing (for sealing connections)
- Scissors or utility knife (for cutting tape or insulation)
- Zip ties or adhesive clips (to secure wires and prevent strain)
- Multimeter (optional, but helpful for troubleshooting)
- Connector clips or solderless connectors (if your lights don’t have built-in plugs)
Pro tip: Always check the voltage and amperage of your LED lights before buying connectors. Mismatched voltage can damage your lights or cause fire hazards. Look for the label on the power adapter or the light strip itself.
For example, if your lights are 12V, your extension cable and power supply must also be 12V. This is a common mistake that leads to dim or non-working lights.
Now, let’s get to the good part: how to connect flat flexible LED string lights easily—step by step.
Step-by-Step Guide to How to Connect Flat Flexible LED String Lights Easily
Step 1: Inspect Your Lights and Connectors
Start by laying out your flat flexible LED string lights and checking their ends. Most come with a male plug on one side and a female socket on the other—this is called a “daisy-chain” design.
Look for:
- Connector type (e.g., 2-pin, 3-pin, JST, or barrel plug)
- Voltage rating (printed on the plug or power adapter)
- Direction of current flow (some strips have arrows indicating which end connects to power)
- Cut marks or solder pads (if you plan to cut and splice)
If your lights don’t have matching connectors (e.g., one has a male plug, the other a bare wire), you’ll need a connector adapter or a solderless connector kit designed for flat flexible LEDs.
Pro Tip: Never force connectors. If they don’t fit, double-check the pin count and polarity. Forcing a 3-pin plug into a 2-pin socket can damage both the light and the power supply.
Step 2: Plan Your Layout and Measure the Distance
Before connecting anything, map out where your lights will go. Measure the total length from the power source to the last light in the chain.
Ask yourself:
- How many strands do I need to connect?
- Is there a gap between the outlet and the first light?
- Will I need to run lights around a corner or over a surface?
For example, if you’re lighting a headboard, you might need one strand for the top, another for the sides, and a third for the base. Measuring helps you avoid overloading the circuit or running out of cable.
Also, consider voltage drop. Long chains (over 15–20 feet) of low-voltage LEDs can dim at the far end. To fix this:
- Use thicker extension cables (lower gauge wire)
- Connect power from both ends (“power injection”)
- Break long chains into shorter sections
This step is key to making how to connect flat flexible LED string lights easily a reality—not just in theory, but in practice.
Step 3: Connect the First Light to the Power Source
Now, plug the first LED strand into the power adapter. Make sure the adapter is unplugged during this step.
Align the connector pins carefully. Push straight in—don’t wiggle or twist. A secure fit means no flickering or intermittent power.
If your lights use a barrel plug, ensure the center pin is the correct polarity (usually center-positive). Reversing polarity can fry your LEDs.
Once connected, plug the adapter into a wall outlet. Test the first light. If it doesn’t turn on:
- Check the outlet with another device
- Inspect the plug for bent pins
- Try a different power adapter
If the light works, great! Unplug the adapter and move to the next step.
Warning: Never leave the power on while connecting or disconnecting lights. This can cause sparks, short circuits, or damage to sensitive LED components.
Step 4: Link Multiple Strands (Daisy-Chaining)
Now it’s time to connect the next LED strand. Most flat flexible lights have a female socket on the opposite end of the male plug—this allows you to daisy-chain them.
Align the male plug of the first light with the female socket of the second light. Push gently until you hear or feel a “click.”
Repeat for each additional strand. For example:
- Light 1 (male) → Light 2 (female)
- Light 2 (male) → Light 3 (female)
- And so on…
Keep the chain neat by using zip ties or adhesive clips every 12–18 inches. This prevents sagging and reduces strain on the connectors.
If you run out of sockets (e.g., your last light has a male plug and no female), you can:
- Use a Y-splitter to connect another strand
- Cut the end and solder a new socket (advanced)
- Use a terminal block connector for bare wires
Remember: Always follow the manufacturer’s max load recommendation. Most flat flexible LED strips can handle 3–5 strands in a chain before voltage drop becomes an issue.
Step 5: Extend Reach with Extension Cables
What if your power outlet is 10 feet away from where you want the first light? That’s where extension cables come in.
Use a low-voltage extension cord that matches your LED’s voltage and connector type. For example, a 12V 3-pin JST extension cable for 12V 3-pin JST lights.
To connect:
- Plug the extension cable into the power adapter
- Connect the other end to the first LED strand
- Route the cable along baseboards, under rugs, or behind furniture
For outdoor use, choose weatherproof extension cables with IP65 or higher ratings. Indoor cables can be thinner and more flexible.
Pro tip: Coil excess cable neatly and secure it with zip ties. Loose wires are tripping hazards and can get damaged.
Step 6: Splice or Cut Lights (If Needed)
Some projects require cutting your flat flexible LED lights to size. Maybe you only need 6 feet of a 10-foot strip, or you want to create a custom shape.
Most flat flexible LEDs have cut marks—usually every 2–3 inches. These are small scissors icons or lines printed on the strip.
To cut safely:
- Locate the cut mark
- Use sharp scissors or a utility knife to cut straight across
- Don’t cut between cut marks—this damages the circuit
After cutting, you’ll have exposed copper pads. To connect the cut end to another strand:
- Use a clip-on connector (no soldering needed)
- Or solder wires and insulate with heat shrink tubing
For example, if you cut a strip and want to connect it to a new power source, attach a 2-pin or 3-pin connector to the pads using a solderless clip. Then plug it in like any other strand.
Warning: Never cut a strip that’s still connected to power. Always unplug first.
Step 7: Secure and Conceal Wires
Now that your lights are connected, it’s time to make the setup look clean and safe.
Use:
- Adhesive clips to hold wires along walls, edges, or furniture
- Zip ties for tight spaces or bundles
- Cable raceways or cord covers for floor or wall runs
- Double-sided tape to stick LED strips to surfaces
For example, if you’re lighting a bookshelf, run the wire behind the shelf and use clips to keep it hidden. For a headboard, tuck the wire under the mattress or use a fabric cover.
Also, avoid placing wires where people walk, sit, or move furniture. Friction can wear down insulation and cause shorts.
Step 8: Test and Troubleshoot
Before declaring victory, plug everything in and test the full chain.
Check for:
- Consistent brightness across all strands
- No flickering or dimming
- All LEDs lighting up (no dead spots)
If something’s wrong, here’s a quick troubleshooting checklist:
- No power? Test the outlet, adapter, and first light separately.
- Dim lights? Check for voltage drop. Use a multimeter to test voltage at the end of the chain.
- Flickering? Inspect connectors for loose fits or corrosion.
- Only part lights up? One strand may be faulty or reversed.
If you find a bad strand, disconnect it and test the rest. Replace or repair the faulty unit.
This final test ensures your method of how to connect flat flexible LED string lights easily is not just easy—but reliable.
Pro Tips & Common Mistakes to Avoid
Even with a solid plan, things can go sideways. Here are the top tips and pitfalls to keep in mind.
Pro Tip #1: Match Voltage and Connector Type
Always double-check that your power supply, extension cables, and lights use the same voltage (e.g., 12V) and connector (e.g., 2-pin JST). A mismatch can ruin your lights in seconds.
Pro Tip #2: Use Power Injection for Long Chains
For setups longer than 20 feet, don’t rely on a single power source. Instead, plug in additional power supplies at intervals (e.g., every 10 feet). This prevents voltage drop and keeps lights bright.
Pro Tip #3: Label Your Connectors
If you’re using multiple strands, label them with tape or tags. This helps during troubleshooting. “Shelf Left,” “Arch Top,” etc., save time later.
Pro Tip #4: Protect Outdoor Connections
If using lights outside, seal all connections with waterproof heat shrink tubing or silicone sealant. Use outdoor-rated extension cords and power supplies.
Pro Tip #5: Avoid Overloading the Power Supply
Check the amperage (A) of your lights. Add up the total amps of all strands. The power supply should be rated for at least 20% more than the total load. For example, 5A lights need a 6A+ supply.
Common Mistake #1: Forgetting Polarity
Many flat flexible LEDs have a + and – symbol on the solder pads. Reversing polarity can damage the circuit. Always connect + to + and – to –.
Common Mistake #2: Over-Bending the Strip
Flat flexible LEDs can bend, but not sharply. Avoid folding at 90-degree angles, especially near connectors or cut marks. This breaks internal wires.
Common Mistake #3: Ignoring Heat Buildup
LEDs generate heat, especially in enclosed spaces. Don’t cover them with insulation, thick fabric, or flammable materials. Allow airflow around the strips.
Common Mistake #4: Using Household Wire Connectors
Twisting wires with wire nuts or electrical tape works for high-voltage AC lines, but not for low-voltage DC flat flexible LEDs. Use proper low-voltage connectors to avoid loose connections and shorts.
Common Mistake #5: Skipping the Test Phase
Always test each strand individually before connecting the full chain. This helps isolate problems early.
FAQs About How to Connect Flat Flexible LED String Lights Easily
Q1: Can I connect different brands of flat flexible LED lights?
It depends. If they use the same voltage (e.g., 12V) and connector type (e.g., 3-pin JST), you can usually connect them. But check the manufacturer’s specs. Some brands use proprietary connectors or different pin layouts. When in doubt, use a universal adapter or solder the wires directly.
Q2: What do I do if my lights flicker after connecting them?
Flickering usually means a loose connection, low voltage, or a faulty strand. First, unplug and check all connectors for tightness. Then test each strand individually. If one is bad, replace it. Also, measure voltage at the end of the chain with a multimeter. If it’s significantly lower than the power supply (e.g., 12V supply, 9V at end), you have voltage drop—shorten the chain or add power injection.
Q3: Can I cut my flat flexible LED lights and still connect them?
Yes, but only at the designated cut marks. Cutting elsewhere damages the circuit. After cutting, use a solderless connector or solder wires to the exposed pads to reconnect. Never leave bare pads exposed—cover with electrical tape or heat shrink.
Q4: How many strands can I connect in a chain?
Most manufacturers recommend 3–5 strands in a daisy chain for 12V strips. Beyond that, voltage drop causes dimming. For longer runs, use power injection or break the chain into shorter sections with separate power sources. Always check the product manual for max load.
Q5: Are flat flexible LED lights safe to use in bedrooms or nurseries?
Yes, if used properly. They’re low voltage (usually 5V–24V), cool to the touch, and don’t emit UV or IR radiation. Just avoid covering them with thick fabric, ensure all connections are secure, and use a certified power supply (look for UL, CE, or ETL marks).
Q6: Can I connect flat flexible LEDs to a smart plug or dimmer?
Only if the dimmer is designed for low-voltage DC LEDs. Regular AC dimmers won’t work. Use a DC LED dimmer or a smart power adapter with a compatible app. Also, ensure your lights are dimmable—not all flat flexible LEDs are.
Q7: What’s the best way to store connected LED strands?
Disconnect them first. Coil each strand loosely (don’t kink the wires) and store in a dry, cool place. Use resealable bags or cable organizers to prevent tangles. Label them so you know the layout next time—this makes how to connect flat flexible LED string lights easily even easier in the future.
Final Thoughts
Connecting flat flexible LED string lights doesn’t have to be a headache. With the right tools, a little planning, and the steps we’ve covered, you can create beautiful, custom lighting setups in no time.
Remember: Start with inspection, plan your layout, connect safely, and always test before calling it a day. Whether you’re dressing up a room, a wedding, or a holiday display, knowing how to connect flat flexible LED string lights easily gives you the freedom to get creative—without the frustration.
And when in doubt, refer back to this guide. Bookmark it. Share it with a friend. Because great lighting starts with a solid connection.
So grab your lights, power up, and let your space shine—bright, even, and perfectly connected.

