Featured image for how to connect outdoor string lights together
Image source: ikeahackers.net
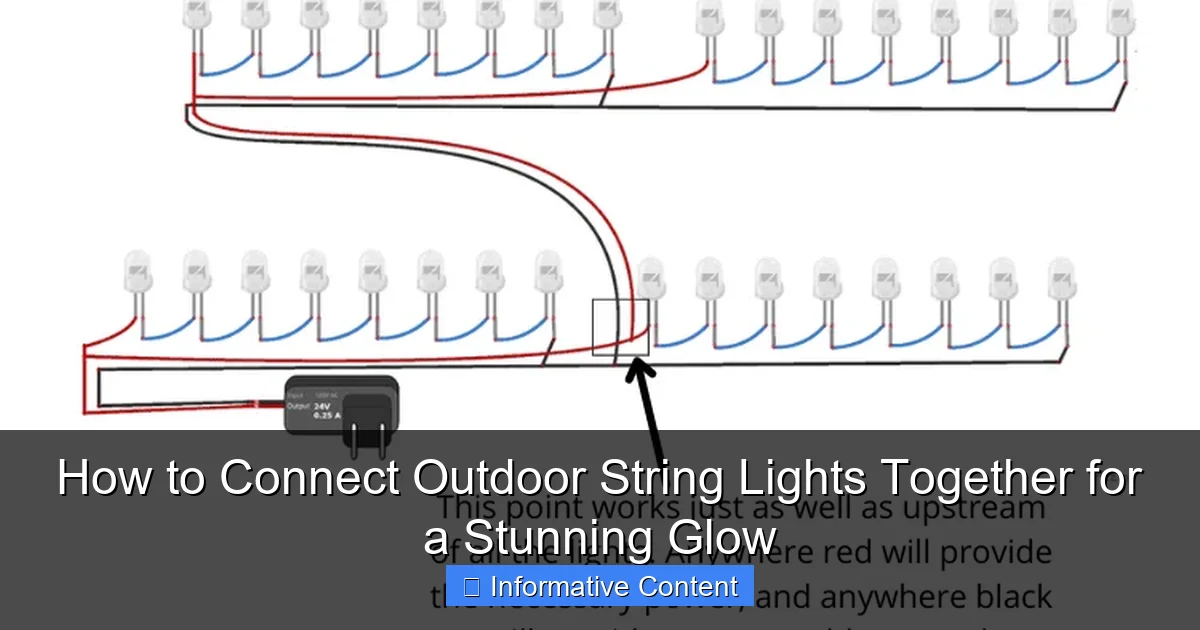
Connect outdoor string lights safely and securely by using compatible, end-to-end connectors designed for outdoor use to prevent moisture damage and electrical hazards. Always check wattage limits and use a GFCI outlet to protect against overloads and weather exposure. For a seamless glow, link no more than three strands unless using a commercial-grade power source and extension cords rated for outdoor lighting.
Key Takeaways
- Check compatibility: Ensure lights have matching voltage and plug types before connecting.
- Use end-to-end connectors: Link lights securely with manufacturer-recommended connectors for safety.
- Limit string length: Never exceed the max number of connected strands to avoid overload.
- Seal connections: Protect joints with waterproof tape or covers for long-term outdoor use.
- Plan your layout: Measure space first to avoid mid-installation shortages or excess.
- Inspect before hanging: Test each strand for damage or faults prior to installation.
📑 Table of Contents
- Why Connecting Outdoor String Lights Matters
- Understanding Your Outdoor String Lights
- Tools and Materials You’ll Need
- Step-by-Step Guide to Connecting Outdoor String Lights
- Advanced Techniques for a Professional Look
- Common Mistakes and How to Avoid Them
- Data Table: Comparing Outdoor String Light Options
- Final Thoughts: Creating Your Perfect Outdoor Glow
Why Connecting Outdoor String Lights Matters
Picture this: a warm summer evening, the sun has just dipped below the horizon, and your backyard is softly lit by a cascade of warm, twinkling lights. It’s not just about ambiance—it’s about creating a space where memories are made. Whether you’re hosting a dinner party, enjoying a quiet night with family, or just unwinding after a long day, outdoor string lights have the power to transform any outdoor area into a magical retreat. But here’s the catch: if your lights don’t connect properly, that dreamy glow can quickly turn into a frustrating mess of tangled cords, dim spots, or worse—lights that won’t turn on at all.
Connecting outdoor string lights together isn’t just a technical task; it’s an art. Done right, it can extend your lighting coverage, enhance the visual appeal, and even save energy. But it’s not always as simple as plugging one strand into another. From voltage drops to incompatible connectors, there are a few pitfalls to avoid. The good news? With the right approach, you can create a seamless, stunning glow that looks professionally installed—without spending a fortune. In this guide, I’ll walk you through everything you need to know about how to connect outdoor string lights together, sharing practical tips, real-world examples, and a few hard-earned lessons from my own backyard adventures.
Understanding Your Outdoor String Lights
Before you start connecting lights, it’s crucial to understand the type of outdoor string lights you’re working with. Not all lights are created equal, and knowing the details can save you time, money, and a lot of headaches. Let’s break it down.
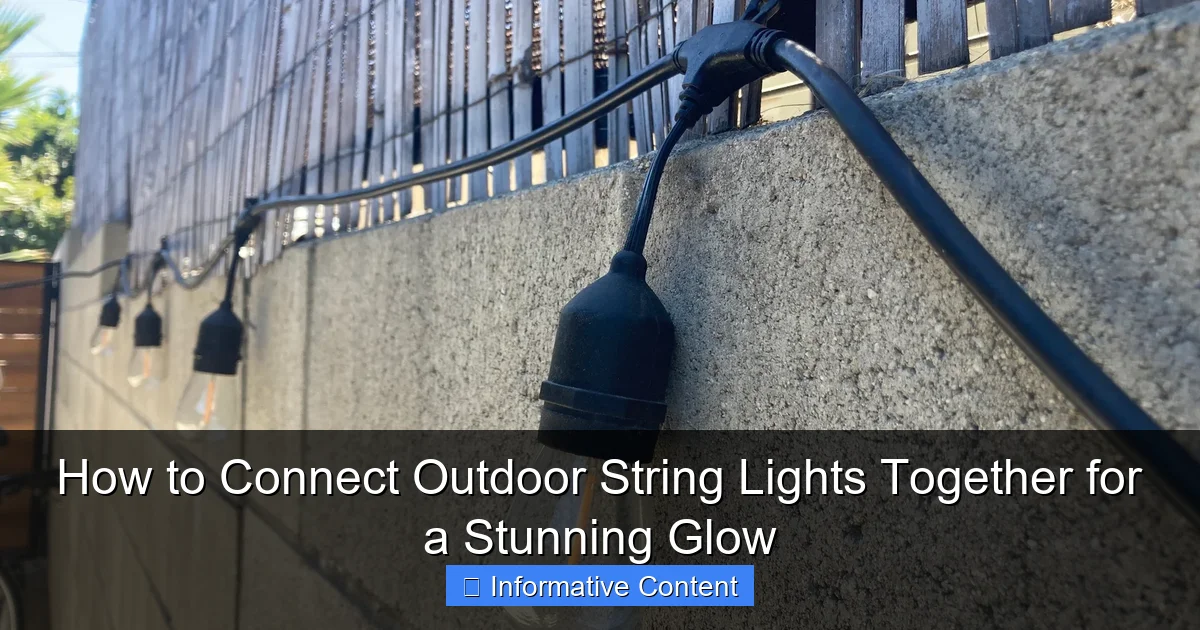
Visual guide about how to connect outdoor string lights together
Image source: cdn.thewirecutter.com
Types of Outdoor String Lights
There are several common types of outdoor string lights, each with its own pros and cons:
- Incandescent String Lights: These are the classic warm-white bulbs you might remember from childhood. They’re affordable and emit a cozy, nostalgic glow, but they use more energy and have a shorter lifespan than modern options.
- LED String Lights: Energy-efficient and long-lasting, LED lights are the go-to for most homeowners today. They come in warm or cool white, color-changing options, and even smart versions you can control via an app. While the upfront cost is higher, the savings on electricity and replacement bulbs add up over time.
- Plug-In vs. Hardwired: Most outdoor string lights are plug-in, meaning they connect to a standard outdoor outlet. Hardwired lights, on the other hand, require a direct connection to your home’s electrical system and are usually installed by a professional. For most DIYers, plug-in lights are the way to go.
- Commercial vs. Residential: Commercial-grade lights (like those used in restaurants or patios) are built for heavy use and extreme weather. They’re often more durable and have thicker cords, but they can be overkill—and expensive—for a simple backyard setup. Residential lights are more affordable and easier to install, but check the weatherproof rating before using them outdoors.
Key Features to Check Before Connecting
Here are the details you need to look for on the packaging or product description:
- Voltage and Wattage: Most outdoor string lights operate at 120V (standard U.S. household voltage), but some are designed for lower voltages (like 24V for solar-powered lights). Always check the wattage per strand to avoid overloading your circuit.
- Connectable Strands: Some lights are designed to be connected end-to-end (often labeled as “connectable” or “end-to-end”), while others aren’t. Look for a maximum number of strands you can safely connect—this is usually listed on the packaging or in the manual.
- Weatherproof Rating: Outdoor lights need to withstand rain, wind, and temperature changes. Check the IP (Ingress Protection) rating: IP44 or higher is ideal for outdoor use.
- Connector Type: Most plug-in lights use a standard two-prong plug, but some have proprietary connectors (like twist-lock or bayonet-style). If you’re mixing brands, make sure the connectors are compatible.
For example, I once bought two strands of LED lights from different brands, thinking they’d connect seamlessly. Turns out, one had a twist-lock plug and the other had a standard plug—no adapter in sight. It was a lesson learned: always check the connector type before buying.
Tools and Materials You’ll Need
You don’t need a full toolbox to connect outdoor string lights, but having the right tools on hand makes the job much smoother. Here’s what I recommend:
Essential Tools
- Measuring Tape: To plan your layout and ensure your lights reach where you need them.
- Extension Cords (Outdoor-Rated): If your outlet isn’t close enough, use a heavy-duty outdoor extension cord. Avoid daisy-chaining multiple cords, as this can create a tripping hazard and reduce voltage.
- Weatherproof Electrical Tape: For sealing connections in wet conditions. Regular tape won’t cut it—outdoor tape is thicker and more durable.
- Zip Ties or Cable Clips: To secure lights to trees, fences, or railings. Look for UV-resistant zip ties if they’ll be exposed to sunlight.
- Voltage Tester: A simple tool to check if your outlet is working and if the lights are receiving power. This can save you from troubleshooting in the dark.
Optional (But Helpful) Extras
- Timer or Smart Plug: Automate your lights to turn on and off at sunset or a set time. A smart plug lets you control them remotely via your phone.
- Light Hooks or Hangers: If you don’t want to use zip ties, these can be a cleaner way to mount lights on surfaces like wood or stucco.
- Adapter Kits: If you’re mixing connector types (e.g., twist-lock to standard), an adapter kit can bridge the gap. Just make sure it’s rated for outdoor use.
Pro tip: Before you start, sketch out your lighting plan on paper or use a garden planning app. This helps you calculate how many strands you’ll need and where to place them. I once skipped this step and ended up with a half-lit patio because I miscalculated the distance to the outlet. A quick sketch would’ve saved me a lot of frustration.
Step-by-Step Guide to Connecting Outdoor String Lights
Now for the fun part: connecting your lights! Here’s a clear, step-by-step process to get it right the first time.
Step 1: Plan Your Layout
Start by measuring the area you want to illuminate. Decide where the lights will go—around a pergola, along a fence, in a zigzag pattern across a patio, or wrapped around trees. Mark key points with stakes or tape to visualize the layout.
Example: If you’re lighting a 12-foot pergola and each strand is 24 feet long, you’ll need at least two strands (one for each side). But if the strands are 12 feet long, you’ll need four—and that means connecting them end-to-end.
Step 2: Check the Maximum Connectable Strands
Every set of lights has a limit on how many strands can be safely connected. Exceeding this can cause voltage drop (making the last lights dim or flicker) or even trip your circuit breaker.
For example, many LED string lights can connect up to 450 watts total. If each strand uses 10 watts, you can safely connect 45 strands. But if you’re using incandescent lights (which use 50 watts per strand), the limit drops to just 9 strands. Always check the manufacturer’s guidelines.
Step 3: Connect the Strands
Here’s how to connect them properly:
- Unroll the first strand and lay it along your planned path. Plug it into the outlet to test that it works.
- Take the second strand and plug it into the end of the first strand. You should hear a click or feel a secure connection.
- Repeat until all strands are connected. If you’re using more than three strands, plug them into a power strip (outdoor-rated) to avoid voltage drop.
- For long runs, consider using a “T” or “Y” splitter to branch off in multiple directions. This reduces strain on a single connection point.
Tip: If your lights don’t have built-in connectors, you can use outdoor-rated extension cords or adapter kits. Just avoid splicing wires yourself unless you’re experienced with electrical work.
Step 4: Secure the Lights
Once the lights are connected, secure them to avoid sagging or damage from wind. Use zip ties, light hooks, or adhesive clips (for smooth surfaces like stucco). Don’t pull the wires too tight—this can damage the connections.
Example: I once used regular zip ties on a metal fence, but they corroded after a few months. Switching to UV-resistant, stainless-steel zip ties solved the problem.
Step 5: Test and Troubleshoot
Turn on the lights and check for:
- Brightness: If the last strand is dim, you might have a voltage drop. Try reducing the number of connected strands or using a shorter extension cord.
- Flickering: This could mean a loose connection. Double-check all plugs and secure them with electrical tape if needed.
- No Power: If the lights don’t turn on, use a voltage tester to check the outlet. If it’s working, the issue might be a blown fuse in the plug (common in older strands).
Advanced Techniques for a Professional Look
Want to take your lighting setup to the next level? These advanced techniques can make your outdoor space look like it was designed by a pro.
Creating Layers of Light
Instead of just hanging one set of lights, combine different heights and styles for depth. For example:
- Hang a row of string lights along a pergola for ambient lighting.
- Wrap fairy lights around tree trunks for a whimsical touch.
- Use path lights or solar stake lights along walkways for safety and accent lighting.
This layered approach creates a dynamic, inviting space. I did this for a friend’s backyard wedding, and the effect was stunning—like stepping into a fairy tale.
Using Smart Lights for Customization
Smart LED string lights (like those from Philips Hue or Twinkly) let you change colors, patterns, and brightness via an app or voice control. You can:
- Set a warm white glow for a cozy evening.
- Switch to blue and white for a winter wonderland theme.
- Create a dynamic color-changing effect for a party.
The downside? Smart lights are more expensive, and they require a stable Wi-Fi connection. But for special occasions or tech-savvy homeowners, they’re worth it.
Managing Long Runs with Power Injectors
If you’re lighting a large area (like a long fence or a spacious patio), voltage drop can be a real issue. A power injector (also called a booster) adds extra power to the line, keeping the lights bright from start to finish. It’s like giving your lights a second battery.
For example, I used a power injector to light a 50-foot fence. Without it, the last 10 feet were barely visible. With it, the whole fence glowed evenly.
Common Mistakes and How to Avoid Them
Even the best-laid plans can go wrong. Here are the most common mistakes—and how to fix them.
Overloading the Circuit
Connecting too many strands can overload your outdoor circuit, causing the breaker to trip. To avoid this:
- Check the wattage of each strand and the total load.
- Use a dedicated outdoor outlet (not one shared with other appliances).
- If you’re unsure, plug a single strand into the outlet and turn on other outdoor devices (like a fountain or grill) to test the circuit.
Ignoring Weatherproofing
Outdoor lights need to withstand the elements. Common issues include:
- Wet Connections: Always use weatherproof covers or electrical tape on plugs and splices.
- UV Damage: Cheap zip ties or plastic clips can crack in the sun. Use UV-resistant materials.
- Wind Damage: Secure lights tightly, but don’t pull the wires taut. Leave a little slack to absorb wind movement.
Neglecting Maintenance
Outdoor lights need occasional upkeep. Every few months, check for:
- Frayed cords or loose connections.
- Burnt-out bulbs (especially in incandescent strands).
- Dirt or debris blocking the bulbs (which can cause overheating).
I learned this the hard way when a strand of lights caught fire after being covered in leaves for months. A quick wipe-down with a damp cloth can prevent this.
Data Table: Comparing Outdoor String Light Options
| Type | Wattage per Strand | Max Connectable Strands | Weatherproof Rating | Best For |
|---|---|---|---|---|
| LED (Residential) | 5-15 watts | 10-25 strands | IP44 or higher | Backyards, patios, porches |
| LED (Commercial) | 15-25 watts | 5-10 strands | IP65 | Restaurants, event spaces |
| Incandescent | 50-100 watts | 3-5 strands | IP44 | Short-term use, vintage aesthetic |
| Solar-Powered | 1-5 watts | Not connectable | IP65 | Off-grid areas, eco-friendly setups |
Final Thoughts: Creating Your Perfect Outdoor Glow
Connecting outdoor string lights together isn’t just about plugging things in—it’s about crafting an experience. With the right tools, a bit of planning, and attention to detail, you can create a space that feels warm, inviting, and uniquely yours. Whether you’re going for a cozy cottage vibe or a sleek modern look, the key is to work with your lights, not against them.
Remember, the best lighting setup is one that feels effortless. If you’re constantly adjusting bulbs or dealing with flickering strands, it’s not quite right. But when you step back and see your backyard glowing softly under a canopy of lights, you’ll know it was worth the effort.
So go ahead—grab your lights, sketch out your plan, and start connecting. With these tips in hand, you’re well on your way to creating a stunning glow that will impress your guests and delight your family for years to come. And if you run into a snag? Don’t worry—everyone does at first. Just take a deep breath, troubleshoot step by step, and remember: the magic is in the journey, not just the destination.
Frequently Asked Questions
How do I safely connect multiple outdoor string lights together?
To safely connect outdoor string lights, ensure the total wattage doesn’t exceed the circuit or extension cord rating. Use waterproof connectors and avoid daisy-chaining more than the manufacturer’s recommended number of strands to prevent overheating.
Can I connect different brands of outdoor string lights?
While possible, mixing brands may cause voltage inconsistencies or damage. Always check compatibility (e.g., plug types, wattage) and prioritize lights with similar specifications for a seamless connection.
How to connect outdoor string lights without cutting or splicing?
Use plug-and-play extensions or multi-outlet adapters designed for outdoor lights. Look for end-to-end connectors or T-shaped splitters to join strands without permanent modifications.
What’s the best way to connect solar-powered string lights?
Solar-powered lights usually can’t be connected directly due to battery dependencies. Instead, use a solar-powered hub or connect individual strands to a central solar panel with a splitter.
How many outdoor string lights can I connect in one circuit?
Most manufacturers allow 2–3 strands per circuit, but always check the product manual. For LED lights, you may connect more (e.g., 5–10), as they consume less power than incandescent bulbs.
How to hide or organize cords when connecting string lights?
Use zip ties, cord clips, or raceways to secure and conceal wires along fences or walls. Opt for low-profile connectors and match cord colors to your outdoor décor for a tidy look.

