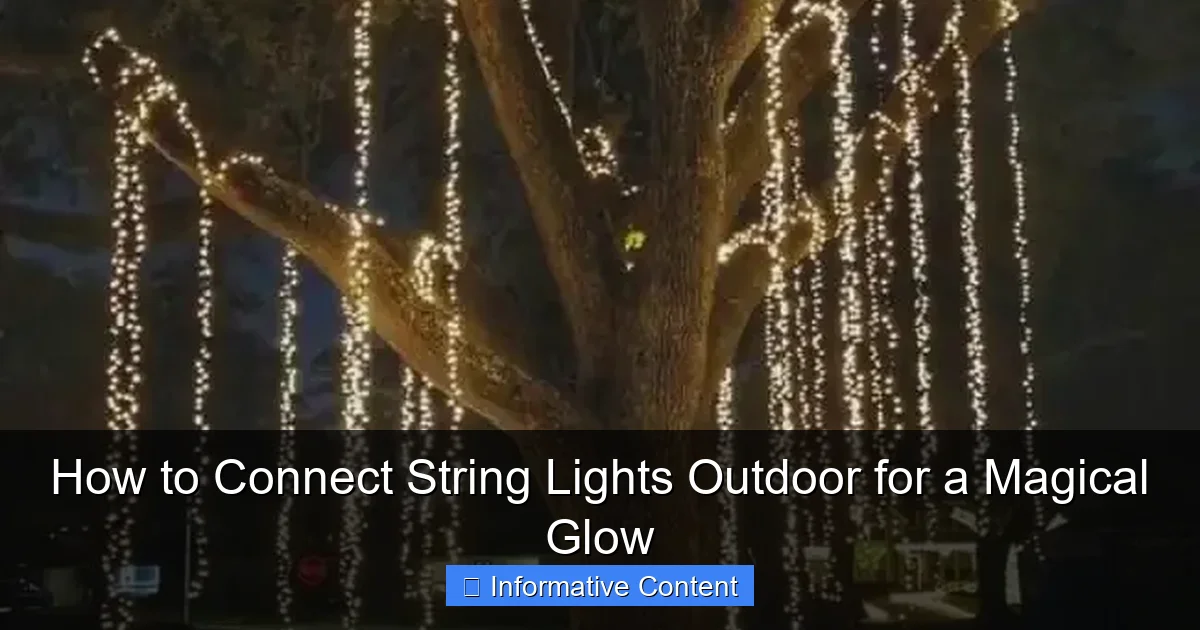
Featured image for how to connect string lights outdoor
Image source: i1.wp.com
Transform your outdoor space into a magical retreat by securely connecting string lights with waterproof connectors and a durable, outdoor-rated power source. Always plan your layout first, spacing lights evenly and using clips or hooks designed for outdoor use to prevent sagging and damage. For a seamless glow, choose LED string lights with end-to-end connectors and a timer function to automate the ambiance effortlessly.
Key Takeaways
- Plan your layout: Sketch light placement before installation to avoid gaps or overhangs.
- Use outdoor-rated lights: Ensure lights are waterproof and designed for exterior use.
- Secure with hooks or clips: Mount lights on walls, trees, or fences for stability.
- Connect end-to-end safely: Link no more than 3 strands unless manufacturer allows more.
- Test before finalizing: Check connections and brightness prior to permanent mounting.
- Hide cords strategically: Tuck wires under eaves or landscaping for a clean look.
📑 Table of Contents
- How to Connect String Lights Outdoor for a Magical Glow
- 1. Choosing the Right String Lights for Your Outdoor Space
- 2. Planning Your Layout and Measuring Your Space
- 3. Installing and Connecting the Lights
- 4. Power Solutions and Safety Tips
- 5. Creative Ideas and Troubleshooting
- 6. Final Tips for a Stunning Outdoor Glow
How to Connect String Lights Outdoor for a Magical Glow
Imagine this: it’s a warm summer evening, the sun has dipped below the horizon, and your backyard transforms into a dreamy oasis. Twinkling lights drape across trees, outline your deck, and cast a soft glow over your patio furniture. The atmosphere feels magical, almost like you’ve stepped into a fairytale. That’s the power of outdoor string lights. They don’t just illuminate—they set the mood, spark joy, and turn ordinary spaces into something extraordinary.
But here’s the thing: connecting string lights outdoor isn’t always as simple as plugging them in and calling it a day. I’ve been there—fumbling with tangled cords, realizing I’ve run out of power outlets, or worse, dealing with lights that flicker out after a few weeks. Whether you’re decorating for a party, creating a cozy nook, or just adding year-round charm, getting the setup right makes all the difference. In this guide, I’ll walk you through every step, from choosing the right lights to troubleshooting common hiccups, so you can create that perfect glow—without the stress.
1. Choosing the Right String Lights for Your Outdoor Space
Types of Outdoor String Lights
Not all string lights are created equal. When you’re shopping, you’ll come across several types, each with its own pros and cons. Let’s break them down:
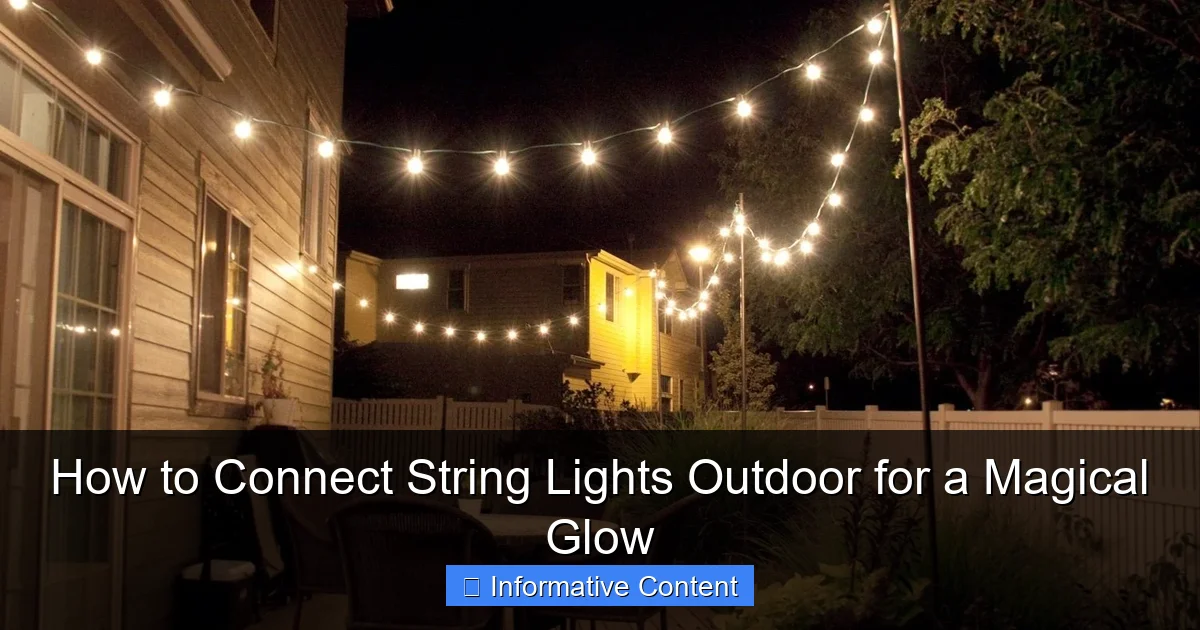
Visual guide about how to connect string lights outdoor
Image source: themprojects.com
- LED String Lights: These are the gold standard for outdoor use. They’re energy-efficient, last up to 25,000 hours (that’s over 10 years with 6 hours of use per night!), and stay cool to the touch. Plus, many are dimmable and come in warm white, cool white, or even color-changing options.
- Incandescent String Lights: These give off that classic, warm glow you might remember from childhood holidays. But they use more energy, get hot, and typically last only 1,000–3,000 hours. Not ideal for year-round outdoor use, but great for short-term events.
- Solar-Powered String Lights: These are perfect if you’re in a sunny area and want to avoid extension cords. They charge during the day and turn on automatically at dusk. Just keep in mind that their brightness can vary, and they may not last all night in winter or cloudy climates.
- Plug-In String Lights: Reliable and bright, these need access to an outdoor GFCI outlet. They’re great for permanent or semi-permanent installations, especially if you want consistent performance.
I once tried using cheap incandescent lights for a summer party. They looked lovely at first, but within two hours, the bulbs started popping—one after another. Lesson learned: invest in quality LED lights for durability and safety.
Key Features to Look For
When shopping, keep these features in mind:
- Weather Resistance (IP Rating): Look for lights with an IP65 or IP67 rating. This means they’re dust-tight and protected against water jets or immersion. Even if it rains, your lights should survive.
- Bulb Type and Spacing: Edison-style bulbs (with visible filaments) give a vintage vibe, while globe or fairy lights offer a softer, modern look. Bulb spacing (usually 12–24 inches) affects coverage—closer spacing gives a denser glow.
- Connectable (End-to-End) vs. Non-Connectable: If you plan to run multiple strands, choose connectable lights. These have male and female connectors at each end, letting you daisy-chain them. Just check the max number you can link (often 3–5 strands).
- Length and Power Source: Measure your space first. A 48-foot strand might sound long, but if your patio is 60 feet wide, you’ll need two. And don’t forget: solar lights work best in full sun, while plug-in models need nearby outlets.
Matching Lights to Your Aesthetic
Think about the mood you want to create:
- Romantic & Cozy: Warm white Edison bulbs strung between trees or along a pergola.
- Festive & Fun: Color-changing LEDs or multicolored fairy lights for a party vibe.
- Minimalist & Modern: Small white globe lights in straight lines across a fence.
- Rustic Charm: Vintage-style bulbs with black or brown cords, hung from wooden beams.
Pro tip: Take a photo of your space and use a free app like Canva to mock up different light styles. It’s a game-changer for visualizing the final look.
2. Planning Your Layout and Measuring Your Space
Sketch Your Design First
Before buying a single light, grab a pen and paper (or use your phone’s notes app) to sketch your space. Mark key points:
- Where you want the lights to go (e.g., between two trees, along a fence, across a deck).
- Where your power source is (outlet, solar panel location).
- Any obstacles (trees, furniture, roof overhangs).
For example, I once wanted to string lights across my 40-foot backyard. I sketched the area and realized I’d need three 15-foot strands connected together. But then I noticed my outlet was on one side—so I planned a “zigzag” pattern to avoid long, droopy sections.
Measure Accurately
Use a tape measure to get exact distances. Here’s how:
- For Straight Lines (e.g., fence, railing): Measure the total length. Add 10–15% extra for draping or slack.
- For Canopy or Web Patterns (e.g., between trees): Measure the distance between anchor points. If you’re creating a crisscross pattern, multiply the number of lines by the average length.
- For Circular or Oval Areas (e.g., around a fire pit): Use the formula: Circumference = π × diameter (or estimate by walking around with a string and measuring it).
Example: My deck is 12 feet wide. I wanted lights to run along the railing and up the posts. I measured 12 feet for the railing, then 6 feet for each post (two posts = 12 feet). Total: 24 feet. I bought two 15-foot connectable strands—just enough with a little slack.
Power and Extension Cord Planning
Nothing ruins a lighting plan like running out of outlets. Here’s how to avoid it:
- Count Your Outlets: Most outdoor GFCI outlets can handle 15–20 amps. Check the total wattage of your lights (usually listed on the box). For example, 10 strands of 10W lights = 100W total—well under the limit.
- Use Outdoor-Rated Extension Cords: If your outlet is far away, use a heavy-duty, outdoor-rated cord. Look for “SJTW” on the label (rated for -40°F to 140°F). Never use indoor cords outside—they can overheat and become a fire hazard.
- Consider a Timer or Smart Plug: These let you schedule lights to turn on/off automatically. No more running outside to plug/unplug! I use a smart plug with a sunset-to-sunrise schedule—it’s a lifesaver.
Pro tip: If you’re using multiple strands, connect them *before* running cords. This way, you only need one extension cord to the outlet.
3. Installing and Connecting the Lights
Choosing the Right Hardware
The key to a professional-looking install is using the right anchors and hooks. Here are the best options:
- Outdoor Screw Hooks: Perfect for wood (decks, pergolas, fences). Use stainless steel or galvanized hooks to prevent rust. Drill a pilot hole first to avoid splitting the wood.
- Cup Hooks or Eye Screws: Great for trees or metal railings. For trees, use wide, flat hooks to avoid damaging the bark. I like the “tree-safe” hooks that spread the weight.
- Adhesive Hooks (for smooth surfaces): Use outdoor-rated, waterproof adhesive hooks for glass, stucco, or painted wood. Make sure they can hold at least 2–3 pounds per hook.
- Clips or Clamps: Some lights come with built-in clips. Or use plastic zip ties (UV-resistant) for a temporary fix.
Example: I hung lights across my pergola using stainless steel screw hooks spaced every 3 feet. The lights stayed taut and looked clean—no sagging.
Connecting the Strands
Now for the fun part: connecting your lights! Here’s how:
- For Connectable Lights: Plug the male end of one strand into the female end of the next. Twist the connector slightly to lock it in place. Always do this before hanging—it’s much easier on the ground.
- For Non-Connectable Lights: Use an outdoor-rated power tap or “Y-splitter” to join multiple strands to one outlet. Never splice cords—it’s unsafe and can void warranties.
- Use a Power Distribution Box: If you’re running 4+ strands, a distribution box (with 4–6 outlets) keeps cords tidy and reduces strain on your GFCI outlet.
Pro tip: If you’re connecting 5+ strands, check the total wattage. Most manufacturers recommend a max of 3–5 strands per outlet to avoid overloading.
Hanging the Lights
Now, hang the connected strands:
- Start at the Power Source: Hang the first strand near the outlet, then work outward. This ensures the plug is accessible.
- Use a Ladder or Pole: For high areas (like trees or pergolas), use a telescoping pole with a hook attachment. I use a 30-foot extendable pole—it’s saved me so many ladder trips.
- Leave a Little Slack: Don’t pull the lights too tight. A slight “swoop” between hooks looks more natural and reduces strain on the cord.
- Secure the End: Use a hook or zip tie to anchor the last strand. This prevents wind from yanking the lights.
Example: For my backyard “canopy,” I used 15 hooks spaced 4 feet apart. I connected three 24-foot strands, then draped them in a gentle “wave” pattern. The result? A magical, floating effect.
4. Power Solutions and Safety Tips
Extension Cords and Power Strips
Outdoor cords are a safety must. Here’s what to look for:
- Heavy-Duty (14- or 16-gauge): Thicker wires handle more power without overheating. For long runs (30+ feet), use 12-gauge.
- Weatherproof: Look for “SJTW” or “SJTOW” ratings. These cords have thick, UV-resistant jackets.
- Right Length: Don’t use multiple short cords—they create weak spots. Use one long cord instead.
I once used a 25-foot cord for a 40-foot run. The voltage drop made the lights dim at the end. Lesson: match the cord length to your needs.
GFCI Outlets and Surge Protection
Outdoor outlets must be GFCI (Ground Fault Circuit Interrupter) to prevent shocks. Here’s how to check:
- Press the “Test” button on the outlet. If it trips, the GFCI is working.
- Use a GFCI-protected power strip if your outlet isn’t GFCI.
Also, plug your lights into a surge protector. Lightning storms can fry electronics—even if the lights survive, the surge might damage your home’s wiring.
Weatherproofing and Maintenance
Outdoor lights face rain, wind, and UV rays. Protect them:
- Seal Connections: Use electrical tape or silicone sealant on plug connections. I wrap mine in a “rain cap” (a small plastic bag secured with tape).
- Inspect Regularly: Check for frayed cords, loose bulbs, or rusted hooks every few months.
- Clean Bulbs: Wipe off dirt and debris with a dry cloth. Avoid water—it can cause short circuits.
- Store in Winter: If you live in a cold climate, take down lights before snowfall. Store in a dry, temperature-controlled space.
Pro tip: For permanent installations, consider hardwired LED strips (installed by an electrician). They’re more durable but require professional help.
5. Creative Ideas and Troubleshooting
Unique Installation Ideas
Beyond the basics, try these creative touches:
- Hanging from Trees: Use a “web” pattern (crisscrossing lines) for a fairy-tale effect.
- Along a Fence: Create a “zigzag” or “wave” pattern for visual interest.
- Under an Eaves: Outline your roofline for a cozy, cottage vibe.
- Floating Canopy: Hang lights between two poles or trees at different heights for a 3D effect.
- Table Centerpieces: Drape lights over a pergola or umbrella for intimate dining.
I once used color-changing LEDs on my deck for a birthday party. I set them to “slow fade” mode—it felt like the whole space was breathing!
Common Problems and Fixes
Even with planning, issues happen. Here’s how to troubleshoot:
- Lights Won’t Turn On: Check the outlet (use a lamp to test). If the outlet works, unplug all strands and reconnect them one by one to find the faulty one.
- Flickering Lights: Loose bulb? Tighten it. Or, a bad connection? Reseat the plug or replace the strand.
- One Section Out: Most LED lights have “shunt” technology—if one bulb dies, the rest stay on. But if a whole section is out, the cord might be damaged. Replace the strand.
- Sagging Lights: Add more hooks or use a tension wire (like a clothesline) behind the lights for support.
- Too Bright/Dim: Use a dimmer (if compatible) or add a sheer curtain for softness.
Example: My lights flickered after a storm. I found a loose connection under the eaves—sealed it with silicone, and it’s been perfect since.
Table: Recommended Light Types by Use Case
| Use Case | Recommended Light Type | Key Features | Pros | Cons |
|---|---|---|---|---|
| Permanent Year-Round | LED, Connectable | IP65 rating, 25,000+ hours | Energy-efficient, durable | Higher upfront cost |
| Seasonal/Events | Incandescent or Solar | Classic glow or no cords | Low cost or eco-friendly | Short lifespan or variable brightness |
| No Outlet Nearby | Solar-Powered | Automatic on/off | No wiring, easy install | Less bright, needs sun |
| High-Wind Area | LED with Clips | UV-resistant, secure clips | Stays put, weatherproof | Clips may need frequent checks |
6. Final Tips for a Stunning Outdoor Glow
Creating a magical outdoor space with string lights is all about the details. Start with quality lights that match your aesthetic and climate. Plan your layout with care—measure twice, hang once. Use the right hardware to keep lights secure and safe, and don’t forget power solutions that work for your space. Whether you’re going for cozy, festive, or elegant, the key is consistency: even spacing, taut lines, and a thoughtful power setup.
But here’s the real secret: don’t overthink it. I’ve seen the most beautiful setups that started with a simple sketch and a few hooks. The magic isn’t in perfection—it’s in the feeling the lights create. So grab your lights, invite a friend to help, and enjoy the process. Before you know it, you’ll have a backyard that feels like a dream. And when you’re sipping coffee under that glow at sunset? You’ll know it was worth every step.
Frequently Asked Questions
How do I connect string lights outdoor without overloading the circuit?
To safely connect outdoor string lights, check the wattage or amperage rating of each strand and ensure the total doesn’t exceed your circuit’s capacity (usually 80% of max load). Use a power strip with overload protection for added safety.
Can I connect different brands of string lights together?
Yes, but ensure they have the same voltage (e.g., 120V) and plug type. Avoid mixing LED and incandescent lights, as they may have different power requirements. Always test a few strands first.
What’s the best way to connect string lights outdoor for a seamless look?
Use extension cords or connector cables designed for outdoor use to link strands end-to-end. For gaps, hide cords under outdoor-rated cord covers or use zip ties to secure them along railings or fences.
How many string lights can I safely connect in one line?
Most manufacturers specify a maximum number (e.g., 3–5 strands). Exceeding this can cause overheating. Always check the packaging or manual for the recommended limit when connecting outdoor string lights.
Do I need special tools to connect outdoor string lights?
No special tools are needed—most outdoor string lights use plug-and-play connectors. For permanent setups, you may use a staple gun (with care) or hooks to secure lights without damaging wires.
Can I connect solar-powered string lights to regular plug-in ones?
No, avoid mixing solar and plug-in lights, as they operate on different power systems. Doing so could damage the solar controller or cause inconsistent performance.

