Featured image for how to fix wire in solar led string lights
Image source: images.nexusapp.co
Repairing the wire in solar LED string lights is quick and simple with basic tools and a little patience. Most breaks occur near connectors or bends—inspect carefully, then strip, reconnect, and seal the damaged section using solder and heat shrink tubing for a durable, weatherproof fix that restores full functionality.
How to Fix Wire in Solar LED String Lights Easily
Key Takeaways
- Inspect wires first: Check for visible damage or loose connections before attempting repairs.
- Use waterproof tape: Seal splices with electrical tape to prevent moisture damage.
- Test continuity: Verify circuit integrity with a multimeter before rewiring.
- Secure connections: Solder wires and cover with heat-shrink tubing for durability.
- Protect joints: Position repaired areas away from tension or bending zones.
- Clean solar panel: Ensure optimal charging to avoid future electrical issues.
- Replace if needed: Discard lights with frayed insulation or multiple damaged sections.
Why This Matters / Understanding the Problem
You’ve spent the evening hanging your solar LED string lights, only to find one section flickering or completely dark. You tug gently on the wire—and it breaks. Now what? This is a common frustration, especially during holidays or outdoor gatherings. The good news? Learning how to fix wire in solar LED string lights easily can save you money, time, and the hassle of replacing the whole set.
Solar-powered LED string lights are great for patios, gardens, and holiday décor. But their thin wires, outdoor exposure, and constant movement (from wind or animals) make them prone to damage. A broken wire often means a dead section, but it doesn’t have to mean the end of the line. With the right tools and a little patience, you can repair the damage and get your lights shining again.
Unlike traditional plug-in lights, solar string lights rely on a small solar panel that charges a battery during the day. If the wire breaks between the panel and the LEDs, the whole system can fail. That’s why understanding how to fix wire in solar LED string lights easily isn’t just about aesthetics—it’s about restoring function and extending the life of your investment.
Whether you’re dealing with a frayed connection, a cut wire, or a loose solder joint, this guide walks you through a simple, repeatable process. No electrical engineering degree needed. Just a few tools and a willingness to try.
Pro Insight: Most wire issues in solar LED lights happen near the solar panel, at the battery box, or where the wire bends (like around a hook). These are your first inspection points.
What You Need
Before diving into the repair, gather your tools and materials. Having everything ready saves time and avoids mid-process frustration. Here’s what you’ll need to fix wire in solar LED string lights easily:
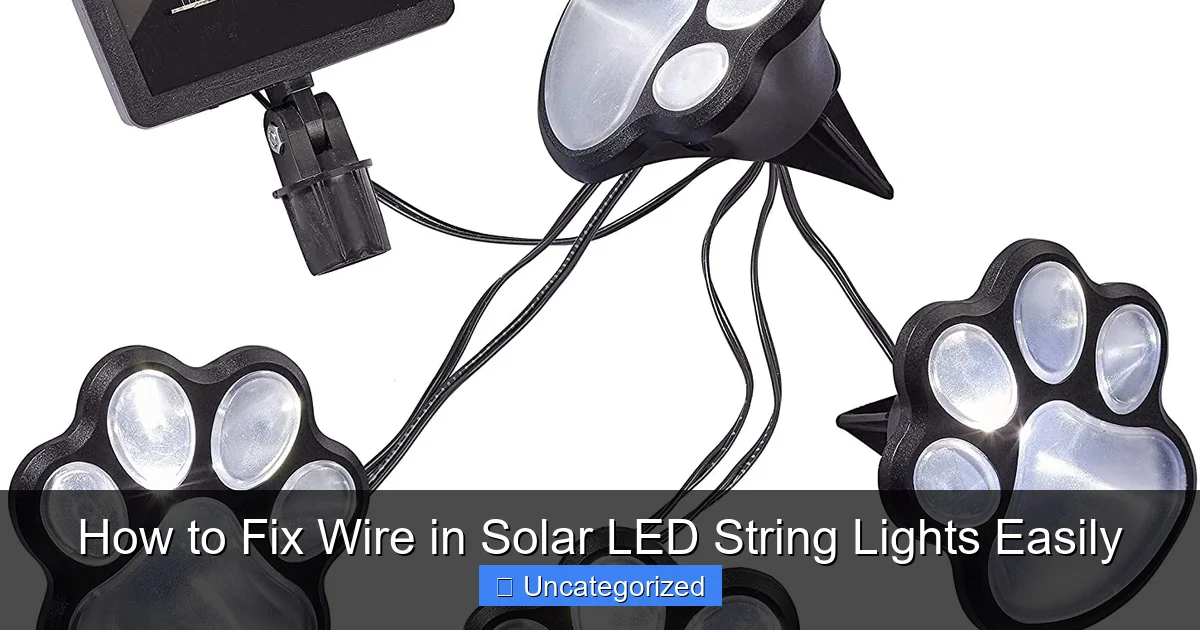
Visual guide about how to fix wire in solar led string lights
Image source: i5.walmartimages.com
- Wire strippers (or small scissors if you don’t have strippers)
- Heat shrink tubing (1/8” or 3/16” diameter, 1–2 inches long)
- Heat source (hairdryer, lighter, or heat gun)
- Soldering iron and rosin-core solder (optional, but recommended for a durable fix)
- Electrical tape (as a backup if you don’t have heat shrink)
- Multimeter (to test continuity and voltage—highly recommended)
- Needle-nose pliers (for bending and holding small wires)
- Small screwdriver (if the solar panel or battery box has screws)
- Sandpaper or emery cloth (to clean tarnished wire ends)
- Small container (to hold screws and small parts)
- Work surface with good lighting (a table or bench works best)
You don’t need all of these to get started. If you’re in a pinch, electrical tape and wire strippers can handle a temporary fix. But for a long-lasting repair, invest in heat shrink tubing and a basic soldering iron. These are affordable and reusable for future projects.
Pro tip: Buy a small heat shrink kit online—it includes multiple sizes and colors, and costs under $10. It’s a game-changer for anyone who loves DIY lighting repairs.
Safety Note: Always disconnect the solar panel from direct sunlight before working on the wire. Even a small battery can carry a charge, and you don’t want surprises.
Step-by-Step Guide to How to Fix Wire in Solar LED String Lights Easily
Step 1: Identify the Problem Area
Start by inspecting the entire length of the wire. Look for visible damage—kinks, fraying, cuts, or exposed copper. Gently wiggle the wire near the solar panel, battery box, and along the string. If the lights flicker or turn off when you move a section, that’s likely where the break is.
Use your fingers to feel for weak spots. Sometimes, the insulation looks fine, but the internal wire is cracked. This is common near bends or where the wire connects to the solar panel.
If you can’t find a visual issue, use a multimeter set to continuity mode. Touch one probe to the positive wire (usually red or marked) and the other to the negative (black or unmarked). If the meter doesn’t beep or show continuity, there’s a break.
Pro Tip: Mark the damaged area with a piece of tape so you don’t lose track of it. A simple “X” on the wire helps during repairs.
Step 2: Disconnect and Expose the Damaged Wire
Once you’ve located the break, disconnect the solar panel from sunlight. Flip it upside down or cover it with a cloth to stop charging. This prevents any electrical flow while you work.
Use a small screwdriver to open the battery box (if applicable). Remove the batteries. This ensures no power runs through the circuit, reducing the risk of shock or short circuits.
Now, cut out the damaged section. Use wire strippers or scissors to remove about 1–2 inches of wire on both sides of the break. Be careful not to cut too much—you want enough wire to work with, but not so much that you shorten the string unnecessarily.
Strip about 3/8 inch of insulation from each end of the wire using wire strippers. If the wires are tarnished or dirty, lightly sand them with emery cloth to expose clean copper. This helps the solder stick better.
Warning: Don’t strip more than 3/8 inch. Too much exposed wire increases the chance of a short circuit if the wires touch.
Step 3: Prepare the Heat Shrink Tubing
Before you connect the wires, slide a piece of heat shrink tubing over one end of the wire. This is a crucial step—many people forget it and have to start over.
Choose a piece of heat shrink that’s 1–2 inches long and wide enough to fit over the wire. Slide it onto the wire now, before you solder. Position it far enough away from the stripped end so it won’t shrink prematurely.
Why heat shrink? It creates a waterproof, insulated seal that protects the connection from moisture, vibration, and corrosion—essential for outdoor lights. It’s far more reliable than electrical tape alone.
Pro Tip: If you don’t have heat shrink, wrap the finished connection with 2–3 layers of electrical tape, overlapping each wrap by 50%. But heat shrink is better for long-term durability.
Step 4: Solder the Wires Together (Recommended)
Twist the stripped ends of the wires together. Match positive to positive and negative to negative. Use needle-nose pliers to hold them if needed. The goal is a tight, secure connection.
Heat your soldering iron (set to medium heat, around 600°F). Touch the tip to the twisted wires for a few seconds, then feed a small amount of rosin-core solder into the joint. The solder should flow smoothly, coating the wire completely. Avoid blobs or cold joints (dull, lumpy solder).
Once the joint is shiny and solid, remove the iron and let it cool for 10–15 seconds. Don’t blow on it—this can cause a weak joint.
Soldering isn’t mandatory, but it’s the best way to ensure a strong, lasting connection. If you don’t have a soldering iron, you can twist the wires and secure them with a wire nut (if available). But for outdoor use, soldering + heat shrink is the gold standard.
Pro Tip: Practice on scrap wire first if you’re new to soldering. A clean, smooth joint makes all the difference.
Step 5: Slide and Shrink the Heat Shrink Tubing
Now slide the heat shrink tubing over the soldered joint. Center it so it covers at least 1/4 inch of insulation on both sides of the connection.
Use a hairdryer, heat gun, or even a lighter to shrink the tubing. Hold the heat source 2–3 inches away and move it back and forth. The tubing will shrink and form a tight, snug fit around the wire. It should look smooth and wrinkle-free.
Don’t hold the heat too close—this can burn the tubing or damage the wire. If using a lighter, keep the flame moving and use a metal spoon or foil to diffuse the heat.
Once shrunk, press gently on the tubing with pliers (not the wire) to ensure it’s fully sealed. This step is key to preventing water from seeping into the connection.
Warning: Never skip heat shrink if your lights are outdoors. Moisture is the #1 enemy of repaired wires.
Step 6: Test the Connection
Before reassembling, test your fix. Reinsert the batteries and place the solar panel in sunlight (or shine a bright lamp on it). Wait 5–10 minutes for the battery to charge slightly.
Check if the lights turn on. If they do, gently wiggle the repaired area. The lights should stay on without flickering. This confirms your connection is solid.
If the lights don’t turn on, use your multimeter to check:
- Voltage at the battery box (should be 2–3V for most solar sets)
- Continuity across the repaired wire
- Connections at the solar panel and LED string
If you find a break, re-solder or re-strip the wire. Sometimes, the original break wasn’t fully removed, or the solder joint is weak.
Pro Tip: Test in low light. Solar lights often won’t turn on in bright sun, but they should activate in dim conditions.
Step 7: Reassemble and Secure the Repair
Once the test passes, reassemble the battery box and close any screws. Tuck the heat-shrunk connection into a safe spot—avoid sharp edges or places where it might get pinched.
If possible, use a small zip tie or adhesive clip to secure the repaired section. This reduces strain on the joint from wind or movement. For example, clip it to a nearby hook or the solar panel housing.
Rehang your lights. Make sure the solar panel faces south (in the Northern Hemisphere) and gets at least 6 hours of direct sunlight per day. Clean the panel with a damp cloth if it’s dusty.
Your lights should now work as good as new—and you’ve just mastered how to fix wire in solar LED string lights easily.
Pro Tip: Label the repaired section with a waterproof tag. If it fails later, you’ll know where to start.
Pro Tips & Common Mistakes to Avoid
Even simple repairs can go wrong if you’re not careful. Here are the top pro tips and pitfalls to avoid when learning how to fix wire in solar LED string lights easily.
- Don’t skip the multimeter. A visual inspection isn’t enough. A broken wire might look fine but have internal fractures. A multimeter confirms continuity.
- Match wire colors. Solar lights usually have red (positive) and black (negative) wires. Connecting them backward won’t damage the LEDs, but it might prevent them from working. Always match colors.
- Use heat shrink, not just tape. Electrical tape can peel over time, especially outdoors. Heat shrink creates a permanent, weatherproof seal.
- Don’t overheat the solder joint. Too much heat can melt the wire insulation or damage the battery. Keep the iron moving and use a low-to-medium setting.
- Check the battery and solar panel. Sometimes, the wire isn’t the problem. A dead battery or dirty solar panel can mimic wire issues. Test both before assuming the wire is broken.
- Work in good light. Poor visibility leads to mistakes. Use a headlamp or work under a bright lamp.
- Label your tools. Keep a small kit just for light repairs. Include heat shrink, solder, and a multimeter. You’ll use it again.
Common Mistake: Cutting too much wire. If you remove more than 2 inches, you might not have enough slack to reconnect. Always cut conservatively.
Another frequent error? Forgetting to slide the heat shrink on before soldering. Once the wires are joined, you can’t slide tubing over the joint. It’s a simple mistake, but it ruins the repair.
Also, avoid using household glue or super glue to secure the connection. It doesn’t insulate properly and can conduct electricity, causing a short.
Finally, don’t assume all solar lights are repairable. Some are sealed in plastic or use non-standard connectors. If the wire is molded into the battery box, it may not be fixable without advanced tools. In that case, consider replacing the set—but for 90% of models, the method above works perfectly.
FAQs About How to Fix Wire in Solar LED String Lights Easily
1. Can I fix a cut wire in solar lights without soldering?
Yes, but it’s less reliable. You can twist the wires together and use a wire nut (if the wires are thick enough) or wrap them tightly with electrical tape. However, for outdoor use, soldering + heat shrink is far more durable. Without soldering, the connection may loosen over time due to temperature changes or wind.
2. Why do solar LED lights stop working even if the wire looks fine?
The wire might have an internal break or corrosion. Also, check the battery—most solar lights use NiMH or Li-ion batteries that degrade after 1–3 years. A dead battery won’t power the lights, even with a perfect wire. Clean the solar panel too; dust or leaves block sunlight.
3. Is it safe to use heat shrink with a lighter?
Yes, but do it carefully. Keep the flame 2–3 inches away and move it constantly. Use a metal spoon or foil to diffuse the heat. Avoid holding the lighter too close, as it can burn the tubing or damage the wire. A hairdryer or heat gun is safer for beginners.
4. How long will the repaired wire last?
If done correctly (soldered + heat shrunk), the repair can last 2–5 years—longer than many cheap solar sets. The key is sealing the connection against moisture and strain. A well-repaired wire is often stronger than the original.
5. Can I repair multiple breaks in one string?
Yes, but it’s time-consuming. Each break needs its own repair. If you have more than 2–3 breaks, consider replacing the string. The cost of tools and time may outweigh the value of the lights.
6. Do I need to replace the batteries when repairing the wire?
Not necessarily. Test the battery with a multimeter. If it holds a charge (2–3V), it’s fine. But if the lights still don’t work after the wire repair, replace the batteries. Old batteries are a common cause of failure.
7. What if the wire is damaged near the solar panel?
This is trickier but doable. You may need to open the solar panel housing (usually held by screws or glue). Be careful not to damage the solar cells. If the wire is soldered to the panel, re-solder it. If it’s glued, use a small amount of epoxy to secure the heat-shrunk connection.
Final Thoughts
Learning how to fix wire in solar LED string lights easily is a skill every homeowner and DIYer should have. It saves money, reduces waste, and keeps your outdoor spaces lit and inviting. With just a few tools and a little patience, you can repair most wire issues in under 30 minutes.
Remember: the key steps are identify the break, strip and clean the wire, solder (or twist), add heat shrink, and test thoroughly. Don’t skip the heat shrink—it’s the difference between a temporary fix and a lasting repair.
Keep your repair kit handy. Store heat shrink, solder, and a multimeter in a small box. You’ll use it again—maybe for holiday lights, garden sensors, or other solar gadgets.
And if you’re ever unsure, start simple. A temporary tape fix can get your lights through the season while you gather tools for a permanent repair. But don’t wait too long—moisture and movement can turn a small break into a major problem.
So next time your solar lights go dark, don’t toss them. Grab your tools, follow this guide, and bring them back to life. You’ll be amazed at how easy it is to master how to fix wire in solar LED string lights easily—and how good it feels to save a set of lights with your own hands.
Now go fix those wires and light up your night!

