Featured image for how to hang a string of outdoor lights
Image source: blesserhouse.com
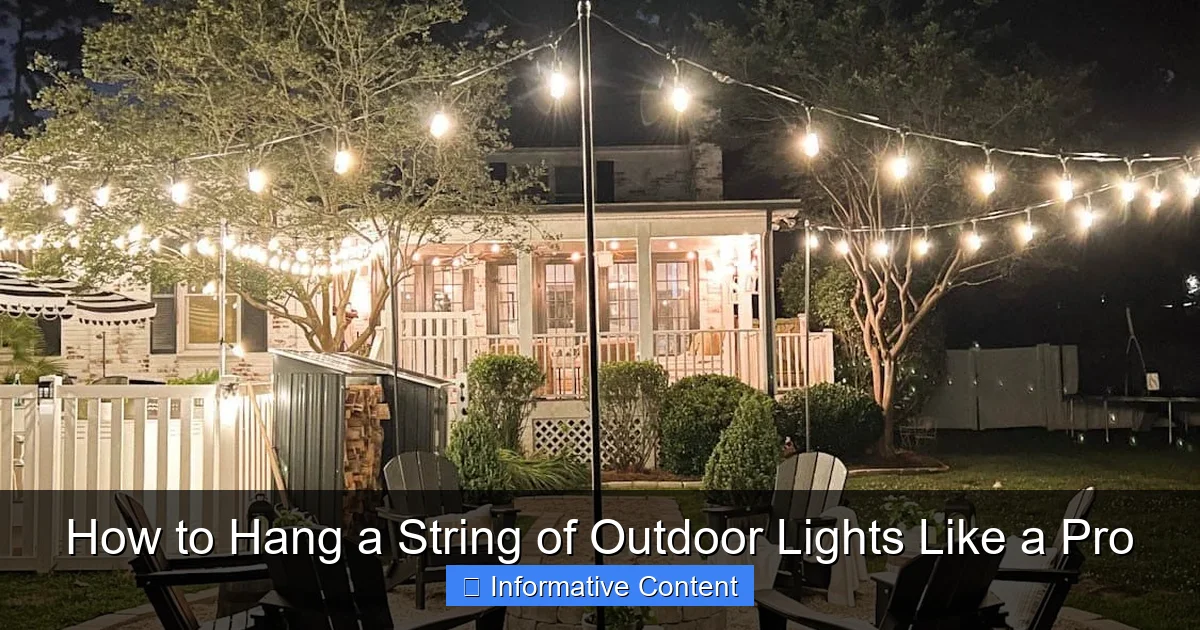
Plan your layout and measure the space before hanging outdoor lights to ensure even spacing and avoid overloading circuits. Use sturdy clips or hooks designed for outdoor use to secure lights safely along eaves, fences, or trees—never nails or staples. This method prevents damage and creates a polished, professional look.
Key Takeaways
- Plan your layout first: Measure and mark anchor points for even spacing.
- Use proper hardware: Install hooks or clips rated for outdoor use.
- Check light spacing: Align bulbs with anchor points to avoid sagging.
- Secure tightly: Fasten ends and midpoints to prevent wind damage.
- Test before finalizing: Plug in lights to ensure they work properly.
- Weatherproof connections: Use outdoor-rated extension cords and sealant for safety.
📑 Table of Contents
- Why Hanging Outdoor Lights Is More Than Just Decor
- Step 1: Choose the Right Lights and Tools
- Step 2: Plan Your Layout (The Secret to a Pro Look)
- Step 3: Install Hooks, Clips, and Anchors
- Step 4: Hang the Lights (With Safety and Style)
- Step 5: Maintain and Store Your Lights
- Bonus: Creative Ideas and Pro Tips
Why Hanging Outdoor Lights Is More Than Just Decor
There’s something magical about stepping into a backyard lit by the soft glow of string lights. Maybe it’s the way they twinkle above a summer barbecue, or how they turn a simple patio into a cozy evening retreat. I remember the first time I tried to hang outdoor lights—excited, armed with a pack of fairy lights and zero plan. After tangling myself in cords and nearly falling off a ladder, I realized: there’s a better way.
Whether you’re setting the mood for a party, creating a year-round outdoor oasis, or just trying to make your porch feel more inviting, hanging a string of outdoor lights is one of the easiest ways to elevate your space. But it’s not just about draping lights wherever they fit. Done right, it’s a mix of planning, safety, and a little bit of artistry. And the good news? You don’t need to be an electrician or a DIY expert to do it like a pro.
Step 1: Choose the Right Lights and Tools
Before you even think about climbing a ladder, take a breath and ask yourself: What kind of lights do I really need? Not all outdoor lights are created equal, and the wrong choice can lead to frustration—or worse, a fire hazard.
Visual guide about how to hang a string of outdoor lights
Image source: cdn.christmaslightsetc.com
Types of Outdoor String Lights
- LED Edison bulbs: Classic, warm glow. Energy-efficient and long-lasting. Great for patios and pergolas. They’re slightly bulkier but add vintage charm.
- Mini LED string lights: Delicate and versatile. Perfect for wrapping around trees, railings, or draping across a fence. Use them for a subtle, twinkling effect.
- Smart string lights: App-controlled, color-changing, and sometimes even voice-activated. Ideal if you love tech and want to adjust the ambiance on the fly.
- Solar-powered lights: Eco-friendly and easy to install (no wiring!). Best for areas with direct sunlight. Keep in mind they may not be as bright or consistent in cloudy climates.
When I first started, I bought a 50-foot LED string with Edison bulbs for my pergola. It looked amazing—until I realized the plug end was on the wrong side and I had to stretch an extension cord across my yard. Lesson learned: always check the plug placement and total length before buying.
Essential Tools and Supplies
You don’t need a full workshop, but a few tools make a big difference:
- Measuring tape: Know your space. Measure the area where you’ll hang the lights. Add 10–15% extra for draping or wrapping.
- Extension cords (outdoor-rated): Look for “SJTW” or “SJOW” ratings—these are weather-resistant. Never use indoor cords outside.
- Outdoor-rated hooks or clips: Plastic-coated S-hooks, adhesive clips (for gutters or vinyl), or screw-in hooks for wood or stucco.
- Ladder (stable and tall enough): A 6-foot step ladder is usually sufficient for most homes. For two-story homes, use a taller extension ladder with a stabilizer.
- Gloves: Protect your hands from sharp edges, splinters, or hot bulbs (if using incandescent).
- Voltage tester: Optional, but smart if you’re dealing with existing wiring or outlets.
Pro tip: Buy lights with a built-in fuse. If one bulb goes out, the rest stay on. It’s a small detail that saves a lot of hassle.
Step 2: Plan Your Layout (The Secret to a Pro Look)
Here’s where most people skip ahead—and regret it later. Planning your layout isn’t just about where the lights go; it’s about how they connect, where power comes from, and how they look from every angle.
Sketch Your Space
Grab a piece of paper or use a free app like SketchUp Free or RoomSketcher. Draw your yard, deck, or patio. Mark:
- Existing structures (pergola, trees, eaves, railings)
- Power sources (outlets, GFCI-protected boxes)
- Traffic areas (you don’t want lights blocking a walkway)
- Focal points (a seating area, dining table, or fire pit)
I once hung lights over my dining table without realizing the plug was 15 feet away. I ended up with a zigzag of extension cords that tripped guests. Now, I always map outlets first.
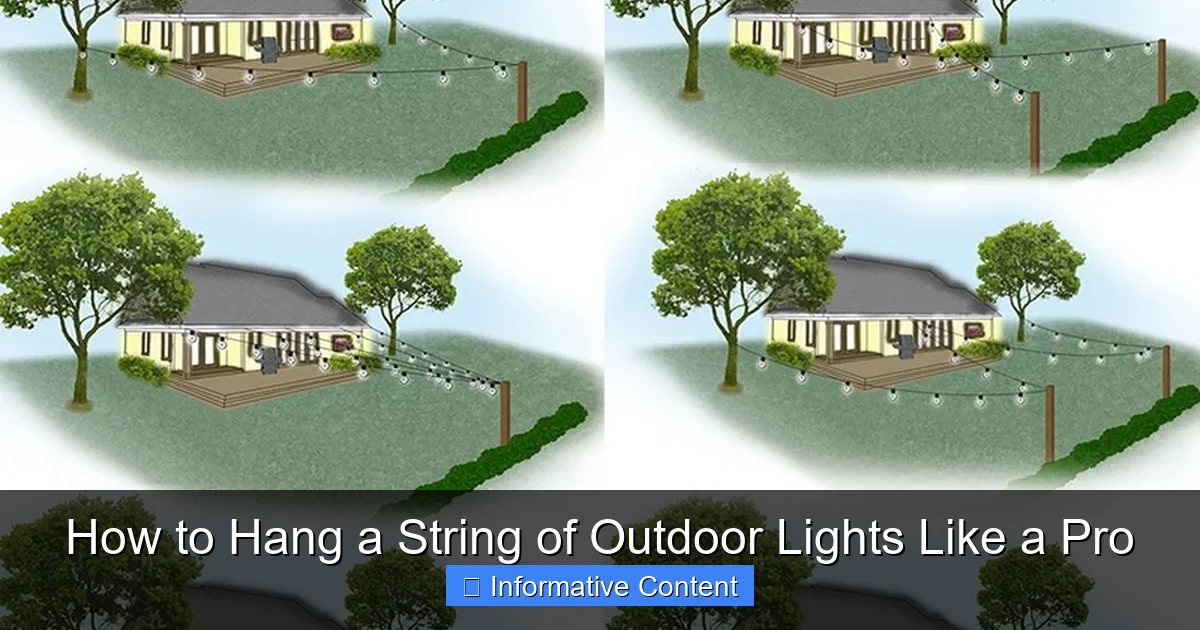
Decide on a Hanging Style
The way you hang lights changes the vibe:
- Straight lines: Clean and modern. Use for pergolas, eaves, or along a fence. Gives a structured, architectural feel.
- Zigzag or crisscross: Fun and dynamic. Great for covering large areas or creating a canopy effect.
- Draped (catenary style): Soft and romantic. Ideal for patios or between trees. Use tension cables or heavy-duty hooks.
- Wrapped: Wrap around tree trunks, railings, or columns. Use mini lights for a subtle glow.
For my backyard, I went with a zigzag between two trees over the seating area. It created a cozy “room” effect and made the space feel more intimate.
Test the Power Path
Before hanging anything, test your power setup:
- Plug in the lights and run the cord to where you plan to hang them.
- Check if the cord reaches without stretching or dangling.
- Use a GFCI outlet (or adapter) for safety. These cut power if there’s a ground fault—common in wet conditions.
Remember: outdoor outlets must be GFCI-protected. If your outlet isn’t, install a GFCI adapter or have an electrician upgrade it. It’s a small step that prevents big problems.
Step 3: Install Hooks, Clips, and Anchors
Now comes the physical work. But don’t rush—take your time. A well-installed anchor means your lights stay up for years, not weeks.
Choose the Right Anchor for Your Surface
Different surfaces need different hardware:
- Wood (eaves, pergola, deck): Use outdoor-rated screw hooks or eye screws. Pre-drill holes to avoid splitting.
- Stucco or concrete: Use plastic anchors with screws or tapcon screws. A masonry bit is a must.
- Vinyl or aluminum siding: Use adhesive clips (3M outdoor-rated) or vinyl siding hooks (they hook under the siding without nails).
- Gutters: Use gutter clips—they snap on and won’t damage the metal.
- Trees: Use tree-safe hooks or zip ties with felt padding. Never nail into a living tree. It can cause disease or rot.
I learned this the hard way when I nailed a hook into an oak tree. A year later, the bark was peeling around the hole. Now I use tree-friendly methods—and the tree (and my conscience) are happier.
Spacing and Tension Matter
For straight lines or zigzags, space hooks every 12–18 inches. For draped styles, go every 24–36 inches to allow for natural sagging.
Use a level to keep lines straight. Even a slight tilt becomes obvious at night. For catenary styles, use a tension cable (like a steel wire with turnbuckles) to support the lights. This prevents sagging and keeps the look clean.
Pro tip: Install hooks slightly higher than needed. You can always lower them, but raising them is a pain.
Weatherproof Your Connections
Outdoor lights face rain, snow, and UV rays. Protect them:
- Use outdoor-rated extension cords with rubber or vinyl jackets.
- Seal plug connections with electrical tape or weatherproof cord covers.
- Elevate cords off the ground with cord clips or hooks to avoid water pooling.
I once left a plug on the grass during a storm. The next morning, the outlet sparked. Now I always use a weatherproof outlet box or keep connections under eaves.
Step 4: Hang the Lights (With Safety and Style)
Now for the fun part—hanging the lights. But safety first. A fall from a ladder can ruin your whole project.
Ladder Safety 101
- Set the ladder on level ground. Use ladder levelers if needed.
- Have someone spot you. Even if you’re careful, an extra set of hands helps.
- Wear non-slip shoes. Avoid sandals or flip-flops.
- Don’t overreach. Move the ladder instead of stretching.
- Work during daylight. Poor visibility increases risk.
I once hung lights at dusk and nearly lost my balance reaching for a hook. Now I only work in the morning or early afternoon.
Hanging Techniques by Style
For straight lines or zigzags:
- Start at the power source. Plug in the lights and test them.
- Hang one end, then stretch the string to the next hook. Clip it in place.
- Work your way down, keeping tension even.
- Use zip ties or twist ties to secure extra cord (but don’t cut it—you’ll need it for storage).
For draped styles:
- Install a tension cable first (if using).
- Hang the lights loosely, allowing a gentle sag. Too tight looks stiff; too loose looks messy.
- Use S-hooks to attach the lights to the cable or hooks.
For wrapped lights:
- Start at the base and wrap upward. Overlap bulbs slightly for even coverage.
- Use felt-padded zip ties every 2–3 feet to secure.
- For trees, go around the trunk, not the branches (they grow and can damage the cord).
Test and Adjust
Once hung, step back and look at your work. Turn on the lights and check:
- Are all bulbs lit?
- Are the lines straight (or intentionally curved)?
- Is the glow even? (No dark spots or overly bright areas)
- Are cords hidden or secured?
I always do a “night test” before finalizing. The lighting at dusk reveals flaws you can’t see in daylight.
Step 5: Maintain and Store Your Lights
Good installation is just the start. Maintenance keeps your lights shining for years.
Seasonal Maintenance
- Spring: Inspect for damage. Replace burnt-out bulbs or frayed cords.
- Summer: Clean bulbs with a damp cloth. Remove spider webs or debris.
- Fall: Check for loose hooks or sagging. Tighten or re-secure as needed.
- Winter: If you leave lights up, use weatherproof covers for plugs. Remove if in a heavy snow or ice area (weight can damage cords or hooks).
I leave my pergola lights up year-round. I check them monthly and replace bulbs as needed. They’ve lasted five years so far—with no major issues.
Safe Storage Tips
If you take lights down seasonally:
- Unplug and let bulbs cool.
- Wrap lights around a cardboard reel or light storage reel. Avoid tangling.
- Store in a plastic bin with silica gel packs to prevent moisture.
- Keep hooks and clips in a labeled bag inside the bin.
Never coil lights tightly or toss them in a box. Tangled cords are a nightmare to untangle—and often damaged.
When to Replace Lights
Even the best lights wear out. Replace if:
- More than 10% of bulbs are out (and can’t be replaced).
- Cord is frayed, cracked, or has exposed wires.
- Plugs are loose or spark.
- LEDs flicker or dim unexpectedly.
LEDs last 25,000–50,000 hours. That’s 6–10 years with regular use. But cheap cords or poor installation can shorten that lifespan.
Bonus: Creative Ideas and Pro Tips
Now that you’ve got the basics down, let’s level up. These ideas turn ordinary lighting into something special.
Ideas for Every Space
- Deck or patio: Zigzag between posts or railings. Add lanterns for extra glow.
- Backyard: Drape between trees or use a tension wire over a seating area.
- Front porch: Wrap columns or hang in a U-shape above the door.
- Garden: Wrap around arbors or line a pathway with mini lights.
- Pool area: Use waterproof LED strips under handrails or along coping.
Pro Tips for a Polished Look
- Use dimmers: Many LED strings work with outdoor dimmers. Set the mood from bright to soft.
- Layer your lighting: Combine string lights with path lights, lanterns, or candles.
- Hide the cords: Run them along eaves, behind railings, or under deck boards.
- Go for symmetry: Even spacing and balanced drapes look intentional, not random.
- Try color: White is classic, but warm amber, soft pink, or even blue can create a unique vibe.
I love using fairy lights in mason jars on my patio. They’re portable, safe, and add a rustic touch.
Data Table: Outdoor Light Comparison
| Type | Best For | Avg. Lifespan | Energy Use | Weather Resistance | Cost (per 50 ft) |
|---|---|---|---|---|---|
| LED Edison | Pergolas, patios | 25,000 hrs | Low | High (IP44+) | $30–$50 |
| Mini LED | Trees, railings, wrapping | 30,000 hrs | Very Low | Medium (IP44) | $20–$35 |
| Smart LED | Tech lovers, color changes | 20,000 hrs | Low | High (IP44+) | $40–$70 |
| Solar | Sunlit areas, eco-friendly | 15,000 hrs | None (solar) | Medium (IP65) | $25–$45 |
Note: IP ratings indicate dust and water resistance. IP44 = splash-resistant. IP65 = dust-tight and jet-water resistant.
Hanging a string of outdoor lights isn’t just about flipping a switch. It’s about creating a feeling—warmth, safety, joy. And with the right plan, tools, and a little patience, you can do it like a pro. Whether you’re lighting up a cozy nook or transforming your whole backyard, remember: the best lighting is the kind that feels effortless. So take your time, test your setup, and enjoy the glow. After all, you’re not just hanging lights—you’re building memories under the stars.
Frequently Asked Questions
How do I hang a string of outdoor lights without damaging my house?
Use removable adhesive hooks, gutter clips, or plastic molding hooks designed for outdoor lights. These options provide a secure hold while protecting your siding, paint, or gutters from damage.
What’s the best way to hang outdoor string lights on a patio or pergola?
Anchor lights to beams, posts, or railings using zip ties, S-hooks, or eye screws spaced 12–16 inches apart. For a professional look, plan a zigzag or crisscross pattern and keep bulbs evenly spaced.
How far apart should I space hooks when hanging outdoor lights?
Place hooks or anchors every 12–16 inches to prevent sagging and ensure even tension. For longer runs, use a support wire or cable to maintain stability and reduce strain on your outdoor lights.
Can I leave my outdoor string lights up year-round?
Only if the lights are rated for permanent outdoor installation and weatherproof. Most seasonal lights should be taken down in winter to avoid damage from snow, ice, and wind.
How do I hang string lights on a fence without nails?
Use fence clips, zip ties, or magnetic hooks for a no-drill solution. These tools attach securely to wood, vinyl, or metal fences and make seasonal removal easy.
How do I avoid overloading circuits when installing outdoor lights?
Check the manufacturer’s wattage rating and never exceed 80% of your outlet’s circuit capacity. Use a GFCI outlet and consider splitting long runs across multiple circuits for safety.

