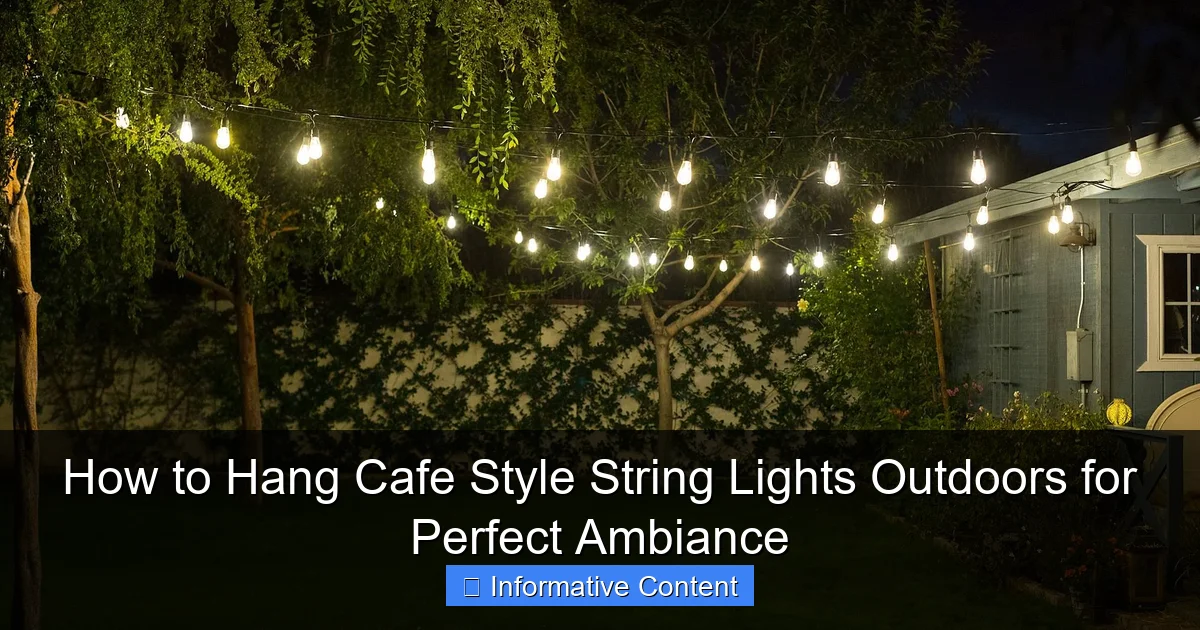
Featured image for how to hang cafe style string lights outdoors
Image source: dianaelizabethblog.com
Transform your outdoor space into a cozy retreat by hanging cafe-style string lights with strategic planning and the right hardware. Use durable, weather-resistant lights and secure them between sturdy anchor points—like walls, poles, or trees—for a safe, professional look that enhances ambiance all year round.
Key Takeaways
- Plan your layout first: Sketch the area to ensure even spacing and avoid last-minute adjustments.
- Use durable hardware: Install weatherproof hooks or anchors to safely support light weight.
- Hang at consistent height: Maintain 7–8 feet above ground for optimal visibility and safety.
- Secure with tension: Stretch lights taut to prevent sagging and wind damage over time.
- Connect safely: Use outdoor-rated extension cords and GFCI outlets to prevent electrical hazards.
- Test before finalizing: Power on lights to check placement, brightness, and spacing before permanent installation.
📑 Table of Contents
- Why Cafe String Lights Are the Secret to Outdoor Magic
- Understanding Cafe Style String Lights: What You Need to Know
- Planning Your Layout: Designing the Perfect Glow
- Tools, Materials, and Installation Techniques
- Creative Layout Ideas for Different Outdoor Spaces
- Maintenance, Safety, and Longevity Tips
- Data Table: Cafe Light Comparison Guide
Why Cafe String Lights Are the Secret to Outdoor Magic
There’s something undeniably enchanting about walking into a backyard, patio, or garden lit by soft, glowing cafe style string lights. Maybe it’s the way they mimic the warm ambiance of a Parisian bistro, or how they transform a simple outdoor space into a cozy, inviting retreat. I remember the first time I hung them in my backyard—after a long day of work, I stepped outside, flipped the switch, and felt like I’d stumbled into a hidden oasis. The kids laughed under the glow, my partner sipped wine with a smile, and for a moment, everything felt right.
Cafe style string lights—also known as bistro lights, Edison string lights, or globe string lights—have become a staple in outdoor decor for good reason. They’re not just pretty; they’re practical. Whether you’re hosting a summer BBQ, enjoying a quiet evening with a book, or celebrating a special occasion, these lights add warmth, depth, and character. But here’s the thing: hanging them right is the difference between “wow” and “meh.” Too tight, and they look like a utility line. Too loose, and they sag like a tired hammock. The good news? With a little planning, the right tools, and a few clever tricks, you can create a stunning, Instagram-worthy setup that lasts for years.
Understanding Cafe Style String Lights: What You Need to Know
Types of Cafe Lights and Their Features
Before you start hammering nails or tying knots, it’s important to know what kind of lights you’re working with. Not all cafe style string lights are created equal, and choosing the right type sets the foundation for a successful installation.
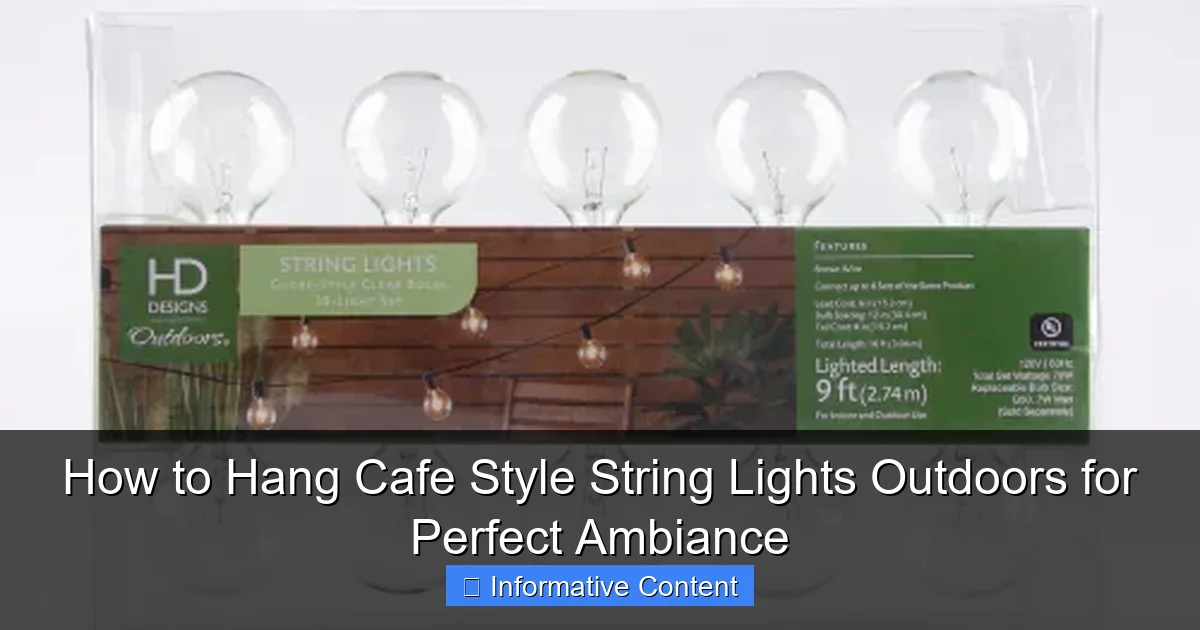
Visual guide about how to hang cafe style string lights outdoors
Image source: kroger.com
- Bulb Shape & Size: The classic look uses round, globe-shaped bulbs (usually 1.5 to 2 inches in diameter). Some feature Edison-style filament bulbs for a vintage feel, while others use smooth, frosted globes for a softer glow. Larger bulbs (2.5+ inches) create more drama but require stronger support.
- Light Source: LED is the gold standard for outdoor use. They’re energy-efficient, last 25,000+ hours, and stay cool to the touch. Incandescent bulbs give a warmer, yellowish hue but burn out faster and use more power.
- Spacing: Standard spacing is 12–18 inches between bulbs. Closer spacing (6–12 inches) creates a denser, more intimate feel—perfect for small patios. Wider spacing (24+ inches) works well for large yards or when you want to highlight specific areas.
- Length & Connectivity: Most strings are 24–48 feet long. Look for end-to-end connectors so you can link multiple strings. Just make sure your total wattage doesn’t exceed the circuit or extension cord rating.
Weather Resistance & Safety Ratings
Outdoor lights must withstand rain, wind, UV rays, and temperature swings. Always check the IP (Ingress Protection) rating. For outdoor use, aim for IP44 or higher. IP44 means protected against splashing water from any direction. IP65 is even better—resistant to dust and low-pressure jets. Also, look for UL or ETL certification for electrical safety. These labels mean the product has passed rigorous testing.
Pro tip: If you live in a humid or coastal area, choose lights with corrosion-resistant sockets and wiring. Salt air and moisture can degrade cheap components fast.
Choosing the Right Color Temperature
Color temperature affects mood. Measured in Kelvin (K), it ranges from warm to cool:
- 2200K–2700K: Warm white (yellowish), cozy, intimate. Ideal for dining areas and seating nooks.
- 3000K: Soft white, balanced. Great for general ambiance.
- 4000K+: Cool white (bluish), bright and modern. Best for workspaces or modern patios—but can feel too clinical for relaxation.
For most outdoor settings, I recommend 2200K–2700K. It’s the same warm glow you’d find in a restaurant patio—inviting, not harsh.
Planning Your Layout: Designing the Perfect Glow
Assess Your Space and Define the Purpose
Start by standing in your yard and asking: What do I want this space to feel like? Is it for dining? Entertaining? A quiet reading corner? Your answer shapes the layout.
- Dining Area: Hang lights directly above the table in a straight line or a gentle arc. Aim for 7–8 feet high so people can see each other.
- Entertainment Zone: Create a canopy effect by crisscrossing strings between trees, posts, or pergolas. This adds depth and drama.
- Pathway or Entry: Line walkways with lights on one or both sides. Use ground stakes or low-hanging strings to guide guests.
- Pool or Hot Tub: Hang lights around the perimeter, but keep them at least 10 feet from the water. Use waterproof fixtures and GFCI outlets.
I once helped a friend light up her 20×30-foot backyard. She wanted a mix of dining, lounging, and a small dance area. We mapped it out with painter’s tape on the ground, then used a ladder to simulate string height. It took an hour, but it saved us from costly mistakes.
Sketch a Simple Diagram
Grab graph paper or use a free app like SketchUp or Canva. Sketch your yard, mark anchor points (trees, walls, posts), and draw light paths. Include:
- Distance between anchor points
- String height (7–9 feet is ideal)
- Number of strings needed
- Power source locations
This helps you buy the right length of lights and avoid mid-project surprises.
Calculate String Length and Spacing
Measure the distance between anchor points. For a straight run, use the full length. For a canopy (X-pattern), you’ll need more—roughly 1.5x the straight-line distance per string.
Example: A 20-foot span with a gentle X-pattern might need two 30-foot strings. Also, plan for 10–15% extra length to account for sagging and connections.
Spacing between strings? For a full canopy, space them 2–4 feet apart. Closer = denser light. Wider = more open feel.
Tools, Materials, and Installation Techniques
Essential Tools and Supplies
Here’s your checklist. Most are common household items, but a few specialty tools make life easier:
- Measuring tape (laser is great for long distances)
- Ladder or step stool (extendable for high spots)
- Drill & drill bits (for wood, masonry, or metal)
- Hammer & nails (for wood)
- Screwdrivers (Phillips and flathead)
- Outdoor-rated extension cords (14-gauge or thicker)
- GFCI outlet or outdoor power strip
- Anchor points: Eye hooks, J-hooks, screw eyes, or heavy-duty zip ties
- Turnbuckles or tensioners (for long runs)
- Weatherproof electrical tape
- String light clips or adhesive hooks (for temporary or renter-friendly setups)
Choosing the Right Anchor Points
Where you attach the lights matters. Here are the best options:
- Wooden Posts or Beams: Use eye screws or J-hooks. Pre-drill holes to avoid splitting. For pergolas or decks, attach to the underside.
- Brick or Stucco Walls: Use masonry anchors or concrete screws. Tapcon screws work great. Avoid nails—they’ll crack the surface.
- Metal Fences or Railings: Use heavy-duty zip ties or magnetic hooks (if the metal is ferrous). For permanent setups, weld or bolt eyelets.
- Trees: Use tree-friendly straps (not wire or rope). Wrap the strap around the trunk or a large limb. Avoid damaging bark.
- No Permanent Fixtures? Use freestanding poles or umbrella stands with hooks. I’ve seen people repurpose old lamp posts or install temporary metal poles in ground sleeves.
Step-by-Step Installation Guide
Let’s walk through a typical setup:
- Install anchor points first. Drill and screw in eye hooks or anchors. Space them evenly. For long runs, add intermediate support (e.g., a center pole).
- Attach turnbuckles (optional). If your span is over 30 feet, use turnbuckles at one or both ends. They let you adjust tension later.
- Unroll the lights. Lay the string along the path to check fit. Plug it in to test bulbs before hanging.
- Hang the first end. Use a carabiner, S-hook, or tie a secure knot to the anchor. Don’t just loop it—it can slip.
- Run the string to the next anchor. Keep it taut but not stretched. For canopies, cross strings at a 45–60 degree angle.
- Secure intermediate points. Use clips or small zip ties every 3–5 feet to prevent sagging.
- Connect to power. Plug into a GFCI outlet. Use outdoor-rated extension cords. Keep connections off the ground (use a waterproof box or hang them).
- Test and adjust. Turn on the lights. Look for sags, gaps, or flickering. Tighten turnbuckles or add more clips.
Real-world tip: I once hung lights between two trees 40 feet apart. I used turnbuckles and adjusted them over a week. The lights settled slightly as the trees swayed, and the turnbuckles let me re-tighten them easily.
Creative Layout Ideas for Different Outdoor Spaces
Backyard Patio or Deck
For a classic bistro feel, run strings in parallel lines above your dining table. Add a second layer crisscrossing above a lounge area. Use dimmable LED lights to adjust brightness for different moods.
Pro move: Hang a fabric canopy (like a sail shade) and attach lights to the edges. The fabric diffuses the light beautifully.
Pergola or Gazebo
Attach lights to the rafters in a zigzag or grid pattern. For a romantic touch, drape strings from the center peak outward like rays. Use warm white bulbs and frosted globes to soften the glow.
Pool or Hot Tub Area
Hang lights around the perimeter, 8–10 feet high. Use waterproof strings and outdoor-rated fixtures. For a floating effect, suspend lights from a pergola or trees above the water.
Safety note: Keep all electrical components at least 10 feet from the water. Use GFCI outlets and check cords monthly for wear.
Front Porch or Entryway
Line the roofline or porch columns with lights. Use smaller bulbs (1.5 inches) to avoid overwhelming the space. Add a motion sensor so the lights turn on when guests arrive.
Large Yard or Garden
Create a “starry sky” effect by hanging lights between trees in an X-pattern. Use long strings (48+ feet) and intermediate poles for support. For pathways, use ground-level lights or low-hanging strings on stakes.
Balcony or Rooftop
Use adhesive hooks or magnetic clips for renter-friendly setups. Hang lights along railings or from the ceiling. For small spaces, a single string in an S-shape can add charm.
Maintenance, Safety, and Longevity Tips
Regular Inspection and Cleaning
Check your lights every 3–6 months:
- Look for flickering bulbs or dark spots—replace bad bulbs promptly.
- Inspect wiring and sockets for fraying, cracks, or corrosion.
- Clean bulbs with a dry cloth or soft brush. For stubborn dirt, use a mild soap and water solution, but unplug first.
- Remove leaves, spider webs, or debris that block light.
Weatherproofing and Storage
Even weather-resistant lights need care:
- Use weatherproof electrical tape on connections.
- For long-term storage, unplug and coil lights loosely. Store in a cool, dry place (not a damp garage).
- If you live in a snowy climate, remove lights in winter or use snow-resistant strings rated for freezing temps.
Smart Features and Automation
Take your setup to the next level:
- Smart plugs: Control lights with your phone or voice (Alexa, Google Assistant).
- Timers: Set them to turn on at sunset and off at bedtime.
- Dimmers: Adjust brightness for different events.
- Color-changing LEDs: Use RGB strings for holidays or parties (but keep them warm white for everyday use).
Common Mistakes to Avoid
From experience, here’s what not to do:
- Overloading circuits: Never plug more than 2–3 strings into one outlet. Check the wattage on the packaging.
- Using indoor lights outdoors: They’ll fail fast and could be a fire hazard.
- Tying knots directly around anchors: It weakens the wire. Use S-hooks or carabiners instead.
- Ignoring sagging: It looks sloppy and strains the lights. Add support every 10–15 feet.
Data Table: Cafe Light Comparison Guide
| Feature | LED String Lights | Incandescent String Lights | Smart RGB Lights |
|---|---|---|---|
| Lifespan | 25,000+ hours | 2,000–3,000 hours | 20,000+ hours |
| Energy Use | 80% less than incandescent | High (15–20W per string) | Moderate (10–15W per string) |
| Color Temp | 2200K–2700K (warm) | 2700K (very warm) | Adjustable (1800K–6500K) |
| Weather Resistance | IP44 or IP65 (most models) | IP44 (limited models) | IP44 or IP65 (varies) |
| Cost | $20–$60 per string | $15–$40 per string | $40–$100 per string |
| Best For | Everyday use, energy savings | Vintage look, short-term events | Parties, holidays, smart homes |
Remember: LED is the smart long-term choice. Incandescent is cheaper upfront but burns out fast. Smart RGB is fun but overkill for daily use.
Hanging cafe style string lights isn’t just about lighting up your yard—it’s about crafting moments. It’s the laughter under the glow, the quiet conversations, the way the light dances on your wine glass. With the right plan, tools, and a little creativity, you can turn your outdoor space into a place where memories are made. So grab a string, pick your spot, and let the magic begin. Your perfect ambiance is just a few hooks away.
Frequently Asked Questions
How do I hang cafe style string lights outdoors without damaging my walls?
Use removable adhesive hooks, gutter clips, or tension rods to secure the lights without nails or screws. For stucco or brick, consider using masonry anchors or outdoor-rated mounting putty for a damage-free hold.
What’s the best way to hang cafe style string lights for a patio or backyard?
Anchor the lights between sturdy points like trees, posts, or eaves using guide wire or zip ties. Ensure the bulbs face downward for a classic cafe ambiance and maintain a 6–8-foot clearance for safety.
Can I leave outdoor cafe style string lights up year-round?
Only if the lights are labeled “weatherproof” or “all-season” and properly secured. For longevity, disconnect them during extreme weather like storms or heavy snow to prevent damage.
How do I power cafe style string lights outdoors without visible cords?
Use an outdoor-rated extension cord routed along walls or fences, hiding it with cord covers or landscaping. For a cleaner look, install a GFCI outlet nearby or use solar-powered string lights.
What spacing should I use when hanging cafe style string lights?
Space bulbs 6–12 inches apart for a balanced glow, depending on the bulb size. For longer runs, use a guide wire to prevent sagging and maintain consistent tension.
How do I hang cafe style string lights on a rental property?
Opt for non-permanent methods like magnetic hooks, removable adhesive strips, or freestanding poles. Always get landlord approval and avoid drilling holes or altering structures permanently.

