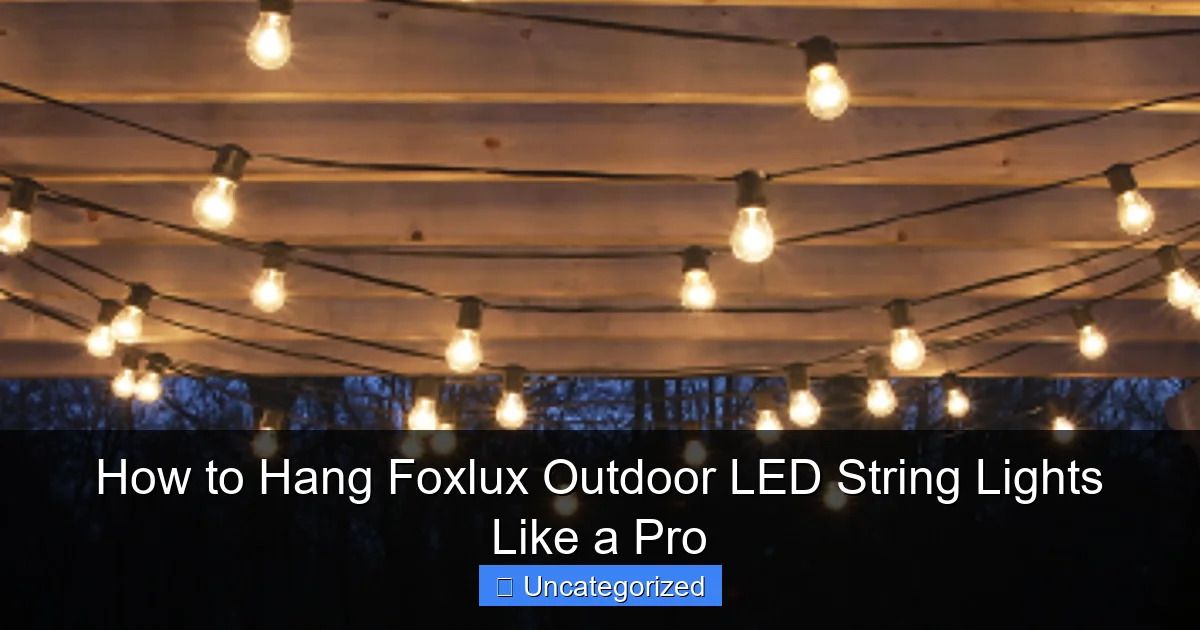
Featured image for how to hang foxlux outdoor led string lights
Image source: houseilove.com
Hang Foxlux Outdoor LED String Lights securely and stylishly by planning your layout and using durable, weather-resistant mounting hardware like screw-in hooks or zip ties. Ensure even spacing and proper tension for a professional look that enhances your outdoor space with safe, energy-efficient illumination.
How to Hang Foxlux Outdoor LED String Lights Like a Pro
Key Takeaways
- Plan your layout first: Measure space and sketch light placement for even coverage.
- Use sturdy anchors: Secure hooks or screws into solid surfaces like wood or masonry.
- Check bulb spacing: Ensure lights hang evenly without overstretching the cord.
- Test before hanging: Verify all bulbs work and connections are waterproof.
- Hide cords discreetly: Run wires along edges or under fixtures for a clean look.
- Weatherproof connections: Use electrical tape or covers to protect outdoor outlets.
Why This Matters / Understanding the Problem
Transforming your outdoor space into a cozy, inviting oasis doesn’t have to be complicated—or expensive. One of the easiest ways to do it? Hanging Foxlux Outdoor LED String Lights. These energy-efficient, weather-resistant lights instantly elevate patios, backyards, and even porches with warm, ambient glow. But if you’ve ever tried to hang outdoor string lights and ended up with tangled wires, sagging lines, or lights that fall after one windy night, you know it’s not always as simple as it seems.
The key to success lies in planning, the right tools, and knowing how to hang Foxlux Outdoor LED String Lights like a pro. Whether you’re hosting summer barbecues, enjoying a quiet evening with family, or creating a romantic atmosphere for a special occasion, professionally hung lights make all the difference. A well-installed setup not only looks great but also lasts longer and stays safe in all weather conditions.
Many people skip essential steps—like measuring the area or using the wrong anchors—leading to frustration and wasted time. Others try to “wing it” and end up with uneven spacing or lights that flicker due to poor connections. That’s why learning the proper method is crucial. When you follow a systematic approach, you avoid common pitfalls and create a stunning, long-lasting lighting display.
From choosing the right mounting points to ensuring your lights are secure and evenly spaced, this guide walks you through every detail. You’ll learn how to plan your layout, pick the best hardware, and install your Foxlux lights with confidence. And yes—this method works whether you’re hanging them on a pergola, between trees, along a fence, or across a rooftop edge.
By the end of this article, you’ll have all the knowledge you need to tackle the project yourself and truly understand how to hang Foxlux Outdoor LED String Lights like a pro—without needing an electrician or expensive tools. Let’s get started!
What You Need
Before you start, gather all the necessary tools and materials. Having everything on hand saves time and prevents mid-project trips to the hardware store. Here’s what you’ll need to successfully complete your Foxlux string light installation:
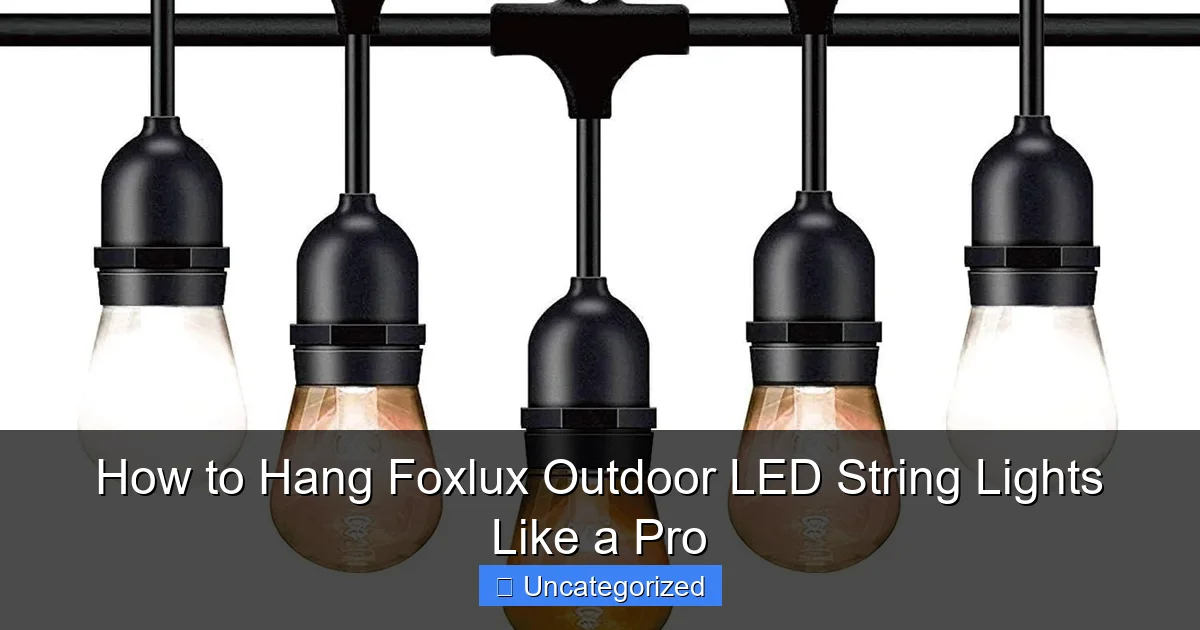
Visual guide about how to hang foxlux outdoor led string lights
Image source: m.media-amazon.com
- Foxlux Outdoor LED String Lights (check length and bulb spacing—most are 25–50 feet with 12–24-inch spacing)
- Measuring tape (for accurate distance planning)
- Drill with appropriate bits (for wood, masonry, or metal surfaces)
- Outdoor-rated mounting hardware:
- Galvanized screw hooks or eye screws (for wood, pergolas, or fascia boards)
- Plastic wall anchors + screws (for vinyl siding or stucco)
- Concrete anchors (for brick or stone walls)
- J-hooks or cable clips (for fences or metal railings)
- Level (to keep lines straight and even)
- Extension ladder (if working at height; use a spotter for safety)
- String or twine (for temporary layout testing)
- Zip ties or outdoor-rated cable clips (for managing extra cord and securing connections)
- Weatherproof electrical tape (to seal plug connections if needed)
- Outdoor-rated extension cord (if your outlet is far from the installation zone)
- GFCI-protected outdoor outlet (mandatory for safety—never use indoor outlets)
- Optional: Timer or smart plug (for automatic on/off control)
Pro Tip: Always buy 10–20% more lights than you think you’ll need. It’s better to have extra than to run short and have to splice in another strand (which can cause voltage drop and uneven brightness).
Make sure your Foxlux lights are rated for outdoor use (look for IP65 or higher). These are designed to withstand rain, snow, and UV exposure—critical for longevity. Also, check if they’re dimmable or come with a remote/timer feature, which can enhance usability.
Lastly, plan your power source. You’ll need an accessible outdoor GFCI outlet. If your yard lacks one, consider hiring a licensed electrician to install one—it’s worth the investment for safety and convenience. Now that you’re equipped, let’s dive into the step-by-step process of how to hang Foxlux Outdoor LED String Lights like a pro.
Step-by-Step Guide to How to Hang Foxlux Outdoor LED String Lights Like a Pro
Step 1: Plan Your Layout and Measure the Area
Start by visualizing where you want your lights to go. Are you outlining a pergola? Creating a canopy over a seating area? Wrapping around trees? Sketch a quick diagram or use masking tape to mark start and end points.
Measure the total distance between your anchor points. For example, if you’re hanging lights from a house eave to a tree 30 feet away, write down that measurement. Then, divide it by the spacing of your bulbs (usually 12–24 inches). This tells you how many bulbs will fit and helps avoid awkward gaps or overcrowding.
Use string or twine to simulate the light path. Tie it between your proposed anchor points and adjust until the line looks natural—not too tight, not too loose. This “mock run” helps you spot obstacles like branches, vents, or uneven surfaces before drilling.
Also, plan where the plug will go. The first bulb should be within 3–6 feet of your outdoor outlet. If it’s farther, use a heavy-duty outdoor extension cord (rated for 16+ AWG). Avoid daisy-chaining too many cords—this can overload circuits and cause flickering.
Warning: Never run extension cords under rugs, furniture, or through doorways where they can be damaged. Keep them elevated and visible.
Once you’re happy with the layout, mark each mounting point with a pencil. Use a level to ensure horizontal lines (especially on eaves or railings). A perfectly straight line makes your lights look polished and professional.
This planning phase is essential for how to hang Foxlux Outdoor LED String Lights like a pro. Skipping it often leads to rework, wasted materials, and frustration.
Step 2: Choose the Right Mounting Hardware
Different surfaces require different anchors. Using the wrong hardware is a common mistake—and one that can lead to lights falling during storms or high winds.
For wood (e.g., pergolas, fascia boards, deck rails): Use galvanized screw hooks or eye screws. They’re strong, rust-resistant, and easy to install. Drill a pilot hole first to prevent splitting, especially in older wood.
For vinyl siding: Avoid nailing directly into the material—it can crack. Instead, use plastic snap-in anchors designed for siding. These clip into the J-channel and hold securely. Alternatively, install a small wooden block behind the siding and screw into that.
For brick or concrete: Use masonry screws or concrete anchors. Drill a hole with a masonry bit, insert the anchor, then screw in the hook. These hold up to 50+ pounds, perfect for heavy-duty lighting runs.
For fences (wood or metal): Use J-hooks or adjustable cable clips. These clamp onto the top rail and don’t require drilling. They’re great for renters or temporary setups.
For trees: Use tree-friendly methods. Wrap a soft rubber strap (like a tree guard) around the trunk and attach a screw hook to it. Avoid driving screws directly into bark—this damages the tree and creates weak anchor points.
Always choose outdoor-rated hardware. Look for labels like “weather-resistant,” “galvanized,” or “stainless steel.” Cheap indoor hooks will rust and fail within months.
Pro Tip: Buy a mix of hooks—some for straight runs, others for corners or turns. Having variety makes it easier to adapt to your space.
With the right hardware selected, you’re ready to install your anchors. Remember: proper hardware is half the battle in how to hang Foxlux Outdoor LED String Lights like a pro.
Step 3: Install Mounting Points
Now it’s time to put those anchors in place. Start with the highest point (usually the house or pergola) and work your way down. This keeps you from having to re-climb the ladder multiple times.
Drill pilot holes first—especially in wood. This prevents cracking and ensures straight insertion. Then, screw in your hooks or anchors by hand until snug. Don’t over-tighten, or you might strip the threads.
For masonry, use a hammer drill with a masonry bit. Insert the anchor, then gently tap it in with a hammer. Once seated, screw in the hook. Test each anchor by pulling firmly. It should feel solid, not wobbly.
For trees, wrap the rubber strap tightly around the trunk (about 6–8 feet high for optimal visibility). Attach the hook, then test by hanging a small weight (like a water bottle) to simulate the light load.
Use a level to double-check alignment. Even a 2-degree tilt can make your lights look crooked. Adjust hooks as needed before moving on.
Install all anchors along your planned path. If you’re creating a grid (like a canopy), install hooks at each corner and every 4–6 feet along the sides. This prevents sagging in the middle.
Warning: Never use nails or staples to hang string lights—they can damage the wire insulation and create fire hazards. Always use proper hooks or clips.
Once all anchors are installed, do a final visual check. Walk around the area and imagine the lights in place. Make adjustments now—it’s much easier than fixing them later.
This step is critical for a safe, long-lasting installation. When done right, it sets the foundation for how to hang Foxlux Outdoor LED String Lights like a pro.
Step 4: Hang the Lights and Test the Path
Now comes the fun part—hanging the lights! Start at the end farthest from the power source. This prevents dragging the cord through wet grass or dirt.
Unroll your Foxlux string lights and inspect them. Look for damaged bulbs, frayed wires, or loose connections. Replace any faulty strands before installation.
Hang the first bulb on the anchor point. Then, gently drape the string over each hook as you move toward the power source. Don’t pull tightly—leave a slight sag (about 6–12 inches) between hooks. This allows for expansion in heat and prevents stress on the wire.
If you’re creating a canopy, run the lights in a zig-zag or crisscross pattern. Attach each “V” to a hook. For a straight line, simply loop the string over each anchor.
When you reach the plug end, plug it in—but don’t turn it on yet. First, walk the entire path and check for:
- Bulbs touching branches or gutters (risk of shorting)
- Cords dragging on the ground
- Excessive tension on any hook
Adjust as needed. Then, plug into your GFCI outlet and turn on the lights. Watch for flickering, dim bulbs, or sudden outages—these signal voltage drop or connection issues.
If lights flicker, try:
- Using a shorter extension cord
- Avoiding daisy-chaining more than 2–3 strands
- Checking plug connections for moisture
Pro Tip: Plug in a timer or smart plug before the lights. This lets you automate on/off times and control brightness remotely.
Once everything works, you’re ready for the final touches. This step ensures your lights are functional and safe—key to mastering how to hang Foxlux Outdoor LED String Lights like a pro.
Step 5: Secure and Manage Cables
Even the best layout can look messy if cords aren’t managed. Loose wires create tripping hazards and can get damaged by lawn equipment or pets.
Use outdoor-rated zip ties or cable clips to bundle excess cord near outlets and connections. Attach them to the mounting hooks or nearby surfaces. Don’t over-tighten—you don’t want to pinch the wire.
For long runs, use cable clips every 12–18 inches to prevent sagging. These small plastic clips snap over the wire and attach to wood or metal. They’re cheap, easy to install, and keep your lights looking neat.
Seal any outdoor plug connections with weatherproof electrical tape. Wrap it tightly around the plug and cord to prevent water intrusion. This is especially important if the plug is near sprinklers or gutters.
If your lights have a transformer box (common on plug-in models), mount it to a wall or post using screws or zip ties. Keep it off the ground and under cover (like an eave) to protect it from rain.
For trees, wrap the cord loosely around the trunk using soft Velcro straps. Avoid tight loops—they can cut into the bark over time.
Finally, tuck any dangling ends into gutters (if safe) or use decorative cord covers. Some people use fake vines or LED-lit garlands to hide cords while adding extra charm.
Good cable management isn’t just about looks—it’s about safety and longevity. A clean, organized setup is a hallmark of how to hang Foxlux Outdoor LED String Lights like a pro.
Step 6: Weatherproof and Maintain
Foxlux lights are weather-resistant, but a little extra protection goes a long way—especially in harsh climates.
Apply a thin layer of silicone sealant around plug connections and bulb sockets (if exposed). This adds a waterproof barrier without damaging the lights. Let it cure for 24 hours before turning on.
Install a small drip loop near the plug. This means letting the cord hang in a “U” shape before it reaches the outlet. Water runs down the loop instead of flowing into the plug.
After heavy rain or snow, inspect your lights. Look for:
- Water inside sockets (dry with a hairdryer on low)
- Loose hooks (tighten or replace)
- Damaged cords (replace immediately)
During winter, consider removing lights if you get heavy snow or ice. The weight can snap wires or pull hooks loose. If you leave them up, use heavier-duty anchors and check weekly.
Clean bulbs annually with a damp cloth. Dust and pollen can dim the light output over time.
Store spare bulbs and extra cord in a waterproof container. This saves you from last-minute replacements during holiday setups.
Pro Tip: Take photos of your installed lights. They’re invaluable for future maintenance or if you need to troubleshoot later.
Regular maintenance keeps your lights shining bright for years. This final step ensures your investment lasts—and proves you truly know how to hang Foxlux Outdoor LED String Lights like a pro.
Pro Tips & Common Mistakes to Avoid
Even experienced DIYers make mistakes. Here are insider tips and pitfalls to watch out for:
- Use a template: Cut a cardboard piece the same length as your bulb spacing. Slide it along the line to ensure even placement.
- Go slow: Rushing leads to misaligned hooks and tangled cords. Take your time—especially when working at height.
- Test before finalizing: Always plug in and check lights before securing everything. Fix issues early.
- Mind the voltage drop: Long runs (over 50 feet) with multiple strands can dim bulbs at the end. Use shorter runs or higher-wattage transformers.
- Respect the GFCI: If the outlet trips, don’t just reset it. Check for moisture or damaged cords first.
Common Mistake: Using indoor extension cords outdoors. These aren’t rated for UV exposure or moisture—leading to fraying and fire hazards.
Common Mistake: Hanging lights too tight. This stresses the wire and can break connections. Always allow slight sag.
Common Mistake: Ignoring local codes. Some areas require permits for permanent outdoor electrical work. When in doubt, consult an electrician.
For renters or temporary setups, use removable hooks or tension rods. These leave no damage and are perfect for apartments or condos.
Want extra flair? Add dimmers, motion sensors, or color-changing remotes. These smart upgrades enhance ambiance without extra effort.
Remember: a professional look comes from attention to detail. Every hook, cord, and connection matters. That’s what separates a DIY job from how to hang Foxlux Outdoor LED String Lights like a pro.
FAQs About How to Hang Foxlux Outdoor LED String Lights Like a Pro
Q: Can I leave Foxlux lights up all year?
A: Yes, but only if they’re rated for outdoor use (IP65 or higher). In areas with heavy snow or ice, consider removing them in winter to prevent damage. Otherwise, they can stay up year-round with proper maintenance.
Q: How many strands can I connect together?
A: Most Foxlux lights can be connected up to 3–5 strands, depending on total wattage. Check the manufacturer’s label—never exceed the max load. Overloading causes overheating and fire risks.
Q: What if my outlet is too far from the installation area?
A: Use a heavy-duty outdoor extension cord (14 or 16 AWG). For distances over 50 feet, consider installing a new GFCI outlet. Hire a licensed electrician for permanent wiring.
Q: Can I cut the string lights to fit?
A: No. Cutting voids the warranty and creates unsafe electrical conditions. Instead, buy the right length or use a shorter run with a plug-in extension.
Q: Are these lights dimmable?
A: Some Foxlux models are dimmable—check the packaging or website. Use a compatible dimmer switch or remote. Non-dimmable lights can overheat if used with a dimmer.
Q: How do I hang lights on a sloped roof?
A: Use adjustable hooks or install a wooden cleat along the slope. Attach the cleat to the roof with roofing screws (seal with caulk). Then hang hooks on the cleat for even spacing.
Q: What’s the best way to store lights during off-seasons?
A: Coil them loosely and store in a breathable bag or plastic bin. Keep in a dry, cool place. Avoid folding or knotting—this damages internal wires.
Final Thoughts
Hanging outdoor string lights doesn’t have to be stressful. With the right tools, a little planning, and attention to detail, you can create a magical atmosphere that lasts for years. Now that you know how to hang Foxlux Outdoor LED String Lights like a pro, you’re ready to transform your space into a warm, welcoming retreat.
Start by measuring and planning—don’t skip this step. Choose weather-resistant hardware, install anchors securely, and test your lights before finalizing. Manage cords neatly, weatherproof connections, and maintain your setup seasonally.
Remember: safety comes first. Use GFCI outlets, avoid overloading circuits, and never use damaged cords. When in doubt, consult a pro.
Whether you’re lighting a cozy patio, a backyard party zone, or a romantic garden nook, Foxlux lights add charm and functionality. And with this guide, you’ve got the skills to do it right.
So grab your tools, invite a friend for help, and get started tonight. Your perfect outdoor lighting is just a few hooks away. Now go show off your handiwork—and enjoy the glow!

