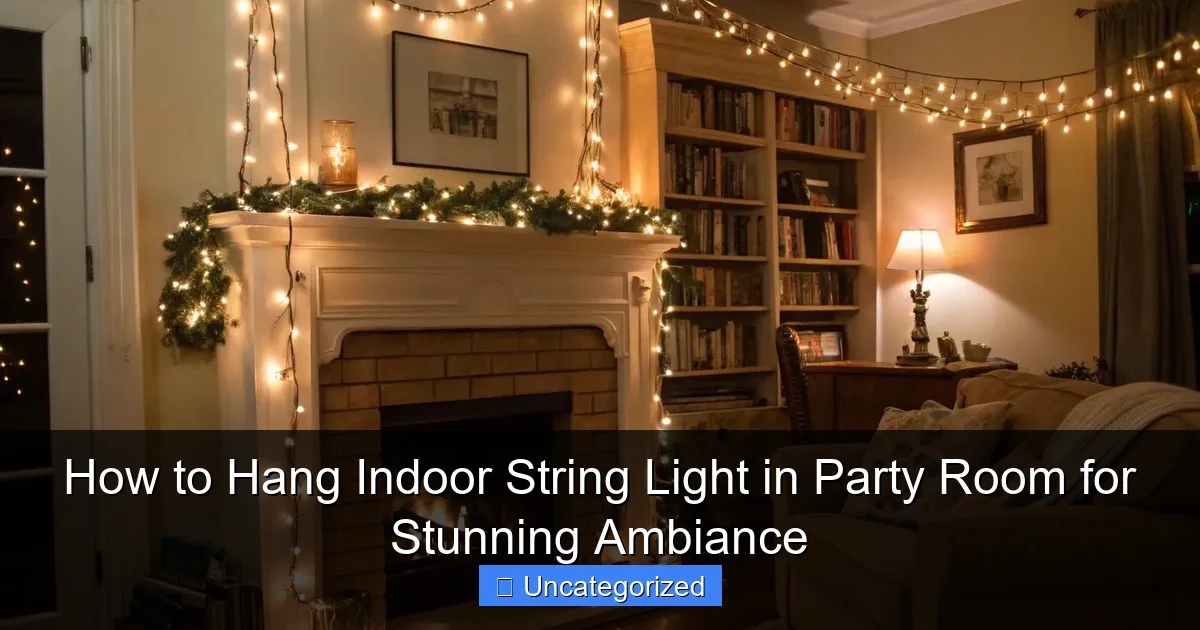
Featured image for how to hang indoor string light in party room
Image source: casolia.com
Transform your party room with indoor string lights by choosing a strategic layout—like draping them along walls, ceilings, or around focal points—for maximum visual impact. Use adhesive hooks, tension rods, or removable clips to secure lights safely without damaging surfaces, ensuring a seamless, professional look. Layer lights at varying heights and combine warm white or colorful bulbs to create a dynamic, inviting ambiance that wows guests.
Key Takeaways
- Plan your layout first: Sketch light placement to ensure even coverage and avoid overhangs.
- Use removable hooks: Secure lights without damaging walls or ceilings for easy removal.
- Layer lights creatively: Combine string lights with sheer curtains for added depth and texture.
- Test lights before hanging: Check bulbs and connections to avoid mid-setup surprises.
- Anchor at multiple points: Prevent sagging by spacing hooks every 2-3 feet for stability.
- Dim the lights: Use a dimmer switch to adjust ambiance for different party moods.
📑 Table of Contents
- How to Hang Indoor String Light in Party Room for Stunning Ambiance
- Choosing the Right String Lights for Your Party Room
- Planning the Layout and Measuring Your Space
- Best Tools and Hardware for Hanging String Lights
- Step-by-Step Installation Techniques
- Safety, Energy Efficiency, and Maintenance
- Creative Ideas and Pro Tips for Maximum Impact
How to Hang Indoor String Light in Party Room for Stunning Ambiance
There’s a certain magic that happens when string lights transform an ordinary party room into a captivating space. Whether you’re hosting a birthday celebration, a romantic dinner, a baby shower, or a festive holiday gathering, indoor string lights have the power to elevate the mood, add warmth, and create an unforgettable atmosphere. The soft, twinkling glow of lights can turn even the simplest room into a dreamy, Instagram-worthy setting. But achieving that perfect ambiance isn’t just about buying the right lights—it’s about how you hang indoor string lights in a party room to maximize their visual impact and ensure they’re safe, functional, and aesthetically pleasing.
From choosing the right type of lights and measuring your space to selecting the best hanging techniques and avoiding common pitfalls, this guide will walk you through every step of the process. Whether you’re a seasoned decorator or a first-time party planner, you’ll find practical advice, creative ideas, and expert tips to help you master the art of indoor string light installation. We’ll cover everything from layout planning and hardware options to energy efficiency and safety precautions, ensuring your party room shines—literally and figuratively. Get ready to learn how to hang indoor string lights in a party room like a pro and create a stunning ambiance that your guests will remember long after the last song plays.
Choosing the Right String Lights for Your Party Room
Types of Indoor String Lights
Before you begin hanging lights, it’s essential to select the right kind for your party room. Not all string lights are created equal—each type offers different aesthetics, brightness levels, and functionalities. Here are the most popular options:
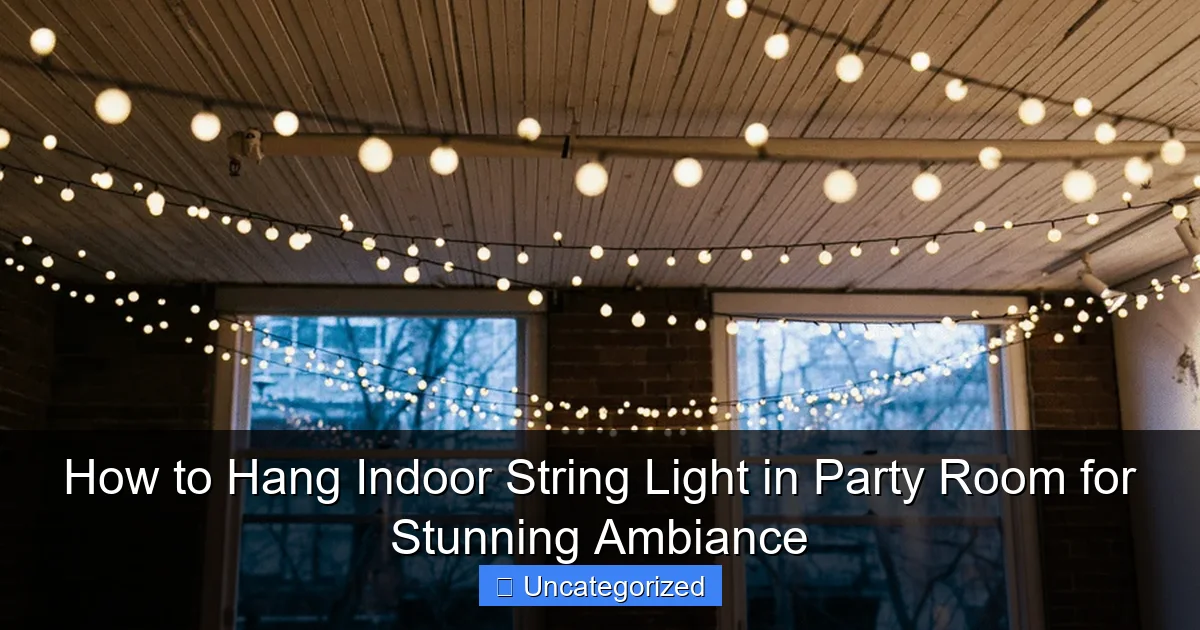
Visual guide about how to hang indoor string light in party room
Image source: earnspendlive.com
- Incandescent Bulbs: These classic warm-white bulbs emit a soft, cozy glow reminiscent of vintage cafes. They’re perfect for intimate, romantic settings but consume more energy and generate heat. Use them sparingly in enclosed spaces.
- LED String Lights: Energy-efficient, long-lasting, and cool to the touch, LED lights are ideal for party rooms. They come in a variety of colors (white, warm white, multicolor, RGB), shapes (globe, Edison, fairy, icicle), and even smart versions with app control.
- Fairy Lights (Micro LED): Tiny, delicate lights on ultra-thin wire. These are excellent for draping over furniture, wrapping around pillars, or weaving through garlands. They create a magical, ethereal effect.
- Edison Bulb Strings: Featuring vintage-style bulbs with visible filaments, these add industrial charm and work well in rustic, boho, or modern-chic decor.
- Smart String Lights: Wi-Fi or Bluetooth-enabled lights that allow remote control of color, brightness, and patterns via smartphone or voice assistant. Great for themed parties or dynamic lighting effects.
Key Features to Consider
When selecting string lights, consider the following features to ensure they meet your party needs:
- Length: Measure your room’s perimeter, ceiling height, and key focal points (e.g., above a buffet, around a dance floor) to determine how many feet of lights you’ll need. Always buy 10–20% extra for overlap and mistakes.
- Bulb Spacing: Closer spacing (e.g., 4 inches) creates a denser, brighter look; wider spacing (6–8 inches) offers a more subtle, twinkling effect.
- Connectivity: Some strings can be connected end-to-end (up to 24–48 feet depending on the model), allowing for longer runs without multiple outlets.
- Indoor-Only vs. Indoor/Outdoor: Even if you’re hanging indoors, indoor/outdoor lights are often more durable and weather-resistant—perfect for accidental spills or high-humidity areas like kitchens.
- Timer and Remote Options: Built-in timers or remote controls add convenience, letting you turn lights on/off without reaching for a switch.
Matching Lights to Party Theme
Your choice of lights should complement your party’s theme:
- Romantic Dinner: Warm white fairy lights draped over a dining table or around a chandelier.
- Festival/Bohemian: Multicolor LED strings with tassels or woven into macramé backdrops.
- Winter Wonderland: Cool white icicle lights or snowflake-shaped LEDs on the ceiling.
- Retro/Vintage: Edison bulb strings hung in a zigzag pattern across the ceiling.
- Modern Glam: Gold or copper-colored LED strings with geometric shapes or mirrored bulbs.
Planning the Layout and Measuring Your Space
Assess the Room Layout
Before you buy or hang any lights, take time to analyze your party room. Consider:
- Ceiling Height: High ceilings (9+ feet) allow for dramatic draping, while low ceilings (8 feet or less) may require more horizontal or wall-based lighting.
- Furniture Placement: Identify key areas—dance floor, bar, dining table, photo backdrop—where lighting will have the most impact.
- Architectural Features: Exposed beams, crown molding, windows, door frames, and columns can serve as natural anchors for lights.
- Electrical Outlets: Map out nearby outlets to avoid overloading circuits or using long extension cords. Use a circuit checker to ensure outlets are safe and grounded.
Create a Lighting Plan
Sketch a simple layout of your room (or use digital tools like Canva or SketchUp) and mark where you want to hang lights. Here are popular layout ideas:
- Perimeter Lighting: Run lights along the baseboards, ceiling edges, or top of walls to outline the room and create a “frame” of light.
- Ceiling Canopy: Hang lights in a grid, zigzag, or spiral pattern from the ceiling using hooks or tension rods. This creates a “starry sky” effect.
- Wall Draping: Drape lights vertically down walls, especially behind a stage, DJ booth, or photo area. Use clips or adhesive hooks to secure.
- Furniture Accents: Wrap lights around table legs, chair backs, or the base of a bar to add subtle glow.
- Overhead Swags: Create soft swags between two points (e.g., from a chandelier to a wall hook) for a romantic, draped effect.
Pro Tip: For a dynamic look, combine multiple layouts. For example, run a perimeter line of warm white LEDs and add a ceiling canopy of fairy lights above the dance floor.
Measure and Calculate
Use a measuring tape to determine the exact length needed for each section. For example:
- Room perimeter: 40 feet → Buy 48 feet of lights (with 8 feet for swags and overlap).
- Ceiling grid: 10×10 feet → You’ll need 100 feet of lights for a 1-foot grid (10 horizontal + 10 vertical lines).
- Wall draping: 3 walls, 8 feet tall → 24 feet total, but add 10% for sagging → 26.4 feet.
Test Before Hanging
Unroll and plug in your lights before installation. Check for:
- Dead bulbs (common in cheap sets)
- Flickering or dim sections
- Overheating after 15 minutes of use
- Remote or app functionality (for smart lights)
Best Tools and Hardware for Hanging String Lights
Essential Hanging Tools
Having the right tools makes the process faster, safer, and more professional. Here’s what you’ll need:
- Measuring Tape: For precise placement.
- Level: Ensures lights are straight, especially for ceiling grids.
- Ladder or Step Stool: For reaching high ceilings or tall walls.
- Drill and Drill Bits: For installing permanent hooks or anchors (if needed).
- Stud Finder: Locate wall studs for heavy-duty mounting.
- Extension Cord (UL-Listed): Use only heavy-duty, indoor-rated cords. Avoid daisy-chaining more than 3 cords.
Hanging Hardware Options
Choose the right hardware based on your wall/ceiling type and desired permanence:
- Adhesive Hooks (e.g., 3M Command™): Ideal for temporary setups on smooth surfaces (drywall, wood, glass). Holds up to 0.5–5 lbs depending on the model. Best for: Rentals, delicate walls, quick installations.
- Push Pins or Nails: Low-cost and effective for lightweight strings. Use finish nails for a cleaner look. Best for: Wooden trim, crown molding, or temporary events.
- Ceiling Hooks (Screw-in or Adhesive): Screw-in metal hooks provide strong support for heavier strings or ceiling canopies. Adhesive ceiling hooks work for lighter loads. Best for: Permanent installations or high-traffic areas.
- Tension Rods: Install between walls to create a “ceiling” for draping lights. Great for rooms without ceiling hooks. Best for: Temporary backdrops or dividing spaces.
- Zip Ties or Cable Clips: For securing lights to furniture, railings, or existing fixtures. Use clear zip ties for a discreet look.
- Picture Wire or Fishing Line: For suspending lights between two hooks without visible wires.
Wall and Surface Considerations
Different surfaces require different approaches:
- Drywall: Use adhesive hooks for light strings; screw-in hooks for heavier loads. Avoid over-tightening to prevent wall damage.
- Plaster: Use anchors or toggle bolts for screw-in hooks. Plaster can crack easily.
- Concrete or Brick: Requires masonry drill bits and plastic anchors. Not recommended for temporary setups.
- Windows and Mirrors: Use removable adhesive clips or suction cups. Avoid drilling into glass.
- Ceilings: For drop ceilings, use grid clips. For flat ceilings, adhesive or screw-in hooks work best.
Step-by-Step Installation Techniques
Installing Perimeter Lighting
Perimeter lighting is the most popular and beginner-friendly method. Here’s how to do it:
- Measure the room’s perimeter and cut your lights to length (if non-connectable).
- Start at an outlet and work clockwise. Attach adhesive hooks every 12–16 inches along the top edge of the wall or baseboard.
- Hang the lights by threading the wire through the hooks. Keep tension even to avoid sagging.
- For corners, bend the wire gently at a 45-degree angle to maintain a smooth curve.
- Plug in and test. Adjust hooks if lights are too tight or loose.
Pro Tip: For a “floating” effect, hang lights 6–8 inches below the ceiling. This creates a soft glow that bounces off the ceiling.
Creating a Ceiling Canopy
For a starry-night effect, install a ceiling grid:
- Mark grid points on the ceiling (e.g., every 12 inches) using a pencil and level.
- Install adhesive or screw-in hooks at each point. For large rooms, use a ladder and partner for accuracy.
- Start at one corner and run the lights horizontally, then vertically, to form a grid.
- Secure each intersection with a zip tie or clip.
- For a spiral pattern, start at the center and work outward in concentric circles.
Safety Note: Never hang lights directly from ceiling fixtures (chandeliers, fans) without manufacturer approval. Use independent hooks.
Wall Draping and Swags
Draping lights vertically adds drama to walls:
- Install hooks at the top and bottom of the wall (e.g., 6 inches from ceiling and 12 inches from floor).
- Hang the lights with a slight sag (1–2 inches) between hooks for a soft, flowing look.
- For multiple swags, stagger the height or add a third hook in the middle for a “W” shape.
- Use zip ties to secure the wire to hooks and prevent slipping.
Furniture and Accent Lighting
Enhance furniture with subtle glow:
- Tables: Wrap lights around the table legs or run them along the underside of the tabletop.
- Chairs: Drape fairy lights over chair backs or weave through chair slats.
- Bar Area: Hang lights behind the bar or wrap around liquor bottles for a “glow-in-the-dark” effect.
Safety, Energy Efficiency, and Maintenance
Electrical Safety Tips
Indoor string lights are generally safe, but follow these precautions:
- Avoid Overloading: Never connect more than 24–48 feet of incandescent lights or 100+ feet of LEDs to one outlet. Use a circuit breaker if needed.
- Use GFCI Outlets: If near water (e.g., kitchen, bathroom), plug into a GFCI outlet to prevent shocks.
- Check for Damage: Inspect wires for fraying, exposed copper, or melted insulation before use.
- Keep Away from Heat Sources: Don’t place lights near radiators, stoves, or direct sunlight (can melt plastic bulbs).
- Unplug When Not in Use: Especially for incandescent lights, which generate heat.
Energy Efficiency and Cost Savings
LED lights use up to 80% less energy than incandescent and last 25,000+ hours. To save energy:
- Use a timer to turn lights on only during the party (e.g., 6–10 PM).
- Choose warm white LEDs (2700K–3000K) for a cozy glow with lower wattage.
- Turn off lights in unused areas (e.g., bathroom, hallway).
Maintenance and Storage
Proper care extends the life of your lights:
- After the Party: Unplug, let cool, then carefully remove hooks. Avoid yanking wires.
- Cleaning: Wipe bulbs with a dry microfiber cloth. For sticky residue from adhesive hooks, use rubbing alcohol.
- Storage: Wrap lights around a cardboard tube or use a string light reel. Store in a cool, dry place. Label boxes by type (e.g., “Warm White LEDs – 25ft”).
Creative Ideas and Pro Tips for Maximum Impact
Layer Your Lighting
Combine string lights with other light sources for depth:
- Pair fairy lights with a dimmable chandelier.
- Add LED candles to tables for a warm, flickering glow.
- Use colored spotlights (e.g., blue, purple) to enhance string light effects.
Use Reflective Surfaces
Mirrors, metallic decor, and glass tables amplify light. Hang lights near mirrors to create a “double glow” effect.
Incorporate Themed Accessories
- Weave lights through garlands, tassels, or paper flowers.
- Hang lights around a photo backdrop with props (hats, signs).
- Attach lights to a canopy over a bed or seating area.
Table: Recommended String Light Types by Party Theme
| Party Theme | Recommended Light Type | Best Layout | Pro Tip |
|---|---|---|---|
| Romantic Dinner | Warm White Fairy Lights | Table Draping + Ceiling Swags | Use dimmable lights for mood control. |
| Festival/Boho | Multicolor LED Strings | Wall Draping + Furniture Wrap | Add tassels or beads to light strands. |
| Winter Wonderland | Cool White Icicle Lights | Ceiling Grid + Window Swags | Pair with fake snow or glitter decor. |
| Retro/Vintage | Edison Bulb Strings | Perimeter + Zigzag Ceiling | Use copper or black hooks for contrast. |
| Modern Glam | Gold LED Strings | Geometric Ceiling Pattern | Combine with mirrored furniture. |
Mastering how to hang indoor string lights in a party room is about blending creativity with practicality. From selecting the perfect lights to planning a thoughtful layout and ensuring safety, every step contributes to a space that feels magical and inviting. Whether you’re creating a cozy corner for conversation or a dazzling dance floor under a canopy of stars, the right lighting transforms your party room into an experience. Remember to measure carefully, use the right hardware, and always prioritize safety. With these tips, your next party won’t just be memorable—it will be unforgettable. So plug in, step back, and watch your vision come to life, one twinkle at a time.
Frequently Asked Questions
How do I hang indoor string lights in a party room without damaging the walls?
Use removable adhesive hooks, tension rods, or ceiling-mounted clips to avoid nails or screws. These options provide sturdy support while keeping walls intact, making them ideal for rentals or delicate surfaces.
What’s the best way to arrange string lights for a party room ambiance?
Create a layered look by draping lights along walls, ceilings, or around furniture, mixing straight lines with cascading loops. For a stunning effect, combine overhead “canopy” patterns with vertical drops near windows or doorframes.
Can I hang indoor string lights without existing fixtures like hooks or beams?
Yes! Use adhesive-backed wall anchors, removable mounting strips, or freestanding floor-to-ceiling poles. For large spaces, consider tension wire systems to create anchor points for your indoor string lights.
How many string light strands do I need for a party room?
Measure the room’s perimeter and multiply by 1.5 to account for draping effects. For a 10×12 ft room, 30-40 ft of lights (2-3 strands) typically creates balanced coverage.
Are there safety tips for using indoor string lights in a party room?
Always check for UL certification, avoid overloading circuits, and keep bulbs away from flammable materials like curtains. Use LED lights—they stay cool and reduce fire risks during long events.
How do I hide the cords and plugs for a clean look with my party room lights?
Run cords along baseboards or ceiling edges using cord covers, or tuck them behind furniture. For a pro finish, use twist ties or zip clips to bundle excess cords and secure them discreetly.

