Featured image for how to hang led battery light string in tent canopy
Image source: lookourway.com
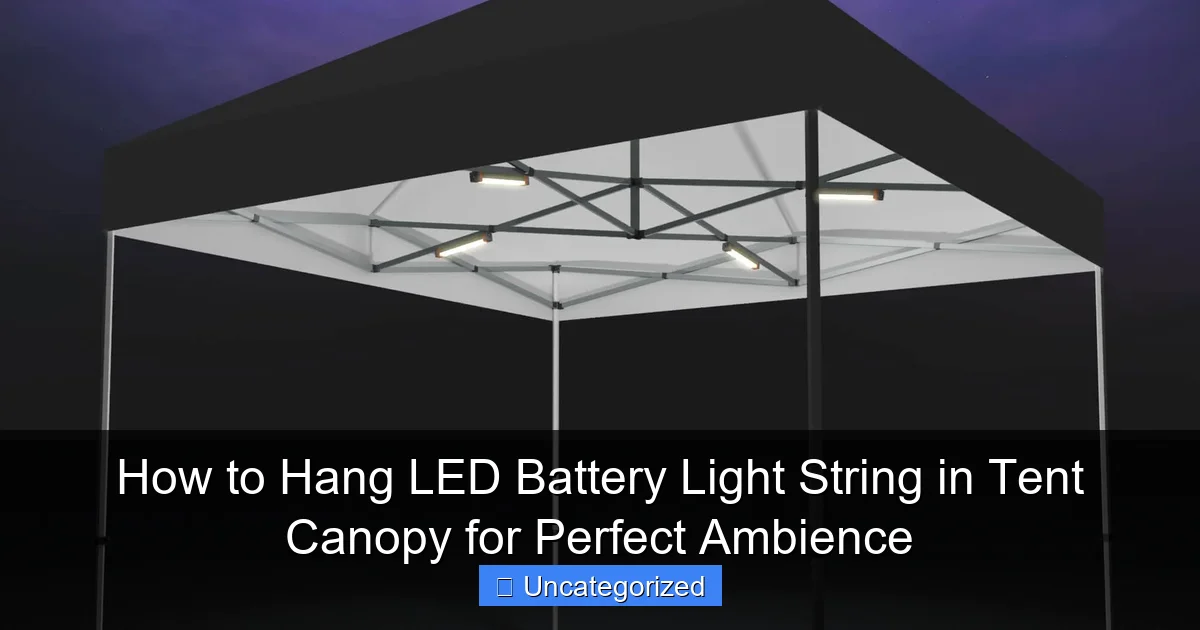
Hang LED battery light strings in your tent canopy effortlessly using adhesive hooks or zip ties for a secure, damage-free setup. Drape the lights along the tent’s support beams or edges, spacing them evenly to create a warm, inviting glow. Ensure the battery pack is tucked safely inside a waterproof pouch to maintain ambience and safety all night long.
How to Hang LED Battery Light String in Tent Canopy for Perfect Ambience
Key Takeaways
- Plan layout first: Map light placement before hanging to avoid uneven spacing.
- Use adhesive hooks: Secure battery box and strings without damaging canopy fabric.
- Weave lights strategically: Drape along support poles for balanced, ambient glow.
- Test before finalizing: Check brightness and coverage after each adjustment.
- Secure loose wires: Tuck cords safely to prevent tripping or damage.
- Choose warm tones: Opt for soft white lights to enhance cozy ambience.
Why This Matters / Understanding the Problem
You’ve set up your tent for a backyard movie night, a romantic glamping trip, or a family camping weekend. The weather’s perfect, the snacks are ready, but something’s missing—the ambience. That’s where how to hang LED battery light string in tent canopy for perfect ambience comes in.
Without proper lighting, even the coziest tent feels cold and uninviting. Harsh flashlights or headlamps ruin the mood. But with soft, warm LED string lights, you can transform your tent into a magical retreat. Whether you’re hosting a kids’ sleepover, a stargazing date, or a festival camping trip, the right lighting sets the tone.
Many people struggle with where and how to hang these lights without damaging the tent, tangling the cords, or making the space feel cluttered. Others worry about battery life, safety, or whether the lights will stay up all night. That’s why this guide focuses on a simple, secure, and stylish method using battery-powered LEDs—no outlets, no wires, no stress.
By learning how to hang LED battery light string in tent canopy for perfect ambience, you’ll create a warm, inviting space that feels like home—even under the stars. Let’s make your next outdoor adventure unforgettable.
What You Need
Before you start, gather these supplies. Most are easy to find and budget-friendly.
Visual guide about how to hang led battery light string in tent canopy
Image source: asrentall.com
- LED battery string lights (warm white or color, 10–20 ft recommended)
- AA or AAA batteries (check light requirements; rechargeable are eco-friendly)
- Command hooks or adhesive clips (clear, removable, 10–15 pieces)
- Mini carabiners or plastic zip ties (optional, for extra grip)
- Soft measuring tape or string (to plan layout)
- Small ladder or step stool (if tent is tall)
- Scissors (to trim zip ties or adjust cords)
- Rubber bands or velcro straps (to bundle excess wire)
- Flashlight or headlamp (to see while setting up in the dark)
Pro tip: Choose warm white LED lights (2700K–3000K) for cozy, relaxing vibes. Avoid cool white (5000K+)—it feels clinical, not campy. For themed events (birthdays, holidays), colored or RGB lights work great, but stick to one or two colors for balance.
All of these tools are reusable, so once you master how to hang LED battery light string in tent canopy for perfect ambience, you’ll be ready for every future trip.
Step-by-Step Guide to How to Hang LED Battery Light String in Tent Canopy for Perfect Ambience
Step 1: Choose the Right LED String Lights
Not all battery-powered lights are created equal. Look for ones with:
- Weather resistance (IP44 or higher) if you’re camping in damp areas
- Long battery life (8–12+ hours on a single set)
- Timer or remote control (so you don’t have to reach inside the tent to turn them on/off)
- Flexible wire (easier to shape and tuck)
For most 8–10 ft tents, a 16–20 ft string works best. It’s long enough to wrap around the ceiling and create layers, but not so long it gets tangled.
Warning: Avoid cheap lights with thin wires—they break easily and can short out. Test the lights before leaving home. Nothing worse than setting up in the dark only to find they don’t work.
This step is crucial because the right lights make the entire process smoother. You’re not just buying lights—you’re buying ambience insurance.
Step 2: Plan Your Layout (Before Hanging)
Before sticking anything to your tent, plan the route your lights will take. This prevents overuse of clips and keeps the look balanced.
- Stand inside the tent and visualize the light path. Most people prefer a ceiling perimeter (around the edges) or a zigzag pattern across the top.
- Use a soft measuring tape or a piece of string to mark key points: corners, center poles, doorways.
- Sketch a quick layout on paper or use your phone to take a photo and draw on it.
For example: In a 10×10 ft dome tent, you might run the lights around all four sides, then add a diagonal “X” from corner to corner. This creates depth and even glow.
Pro tip: Use the rule of thirds—don’t center everything. A slightly off-center “X” or a spiral from the door feels more natural and inviting than perfect symmetry.
Planning now saves time and adhesive later. This is a key part of how to hang LED battery light string in tent canopy for perfect ambience—because good lighting starts with good design.
Step 3: Prepare the Tent Surface
Your tent’s canopy is likely made of nylon, polyester, or ripstop fabric. These materials can be sensitive to heat, glue, and pressure. You need a clean, dry surface for adhesive clips to stick.
- Wipe down the inside of the canopy with a dry microfiber cloth.
- Remove dust, dirt, or condensation. Even a small amount of moisture reduces adhesive strength.
- Let it air dry for 5–10 minutes if it’s damp.
Never use alcohol wipes or sprays—they can weaken the fabric or leave residue.
Warning: Avoid hanging lights on the outside of the tent. Rain, wind, and UV exposure can damage both the lights and the tent. Plus, interior lighting creates a soft, diffused glow—perfect for ambience.
Clean, dry fabric = strong adhesive = no falling lights at 2 a.m. This small step makes a huge difference.
Step 4: Install Adhesive Clips Strategically
Now it’s time to attach the clips. Use clear, removable adhesive hooks or clips (like 3M Command Mini Hooks). They’re strong, leave no residue, and are safe for tent fabric.
- Start at the door or one corner—your “anchor point.”
- Press each clip firmly for 30 seconds to ensure a strong bond.
- Space clips every 12–18 inches along your planned path.
- For curves or angles (like over a support pole), add a clip at the bend to prevent sagging.
For extra security on high-stress points (corners, poles), use a zip tie through the clip’s loop and around the fabric. Just don’t pull too tight—you don’t want to tear the tent.
Pro tip: If your tent has a mesh ceiling, use fabric-safe clips or small rubber bands to loop around the mesh and hold the light wire. Avoid poking holes.
Clips are the backbone of your setup. Take your time—this is where how to hang LED battery light string in tent canopy for perfect ambience really begins to shine.
Step 5: Hang the Lights (Start from the Battery Pack)
Always start hanging the lights from the battery pack. This keeps tension even and reduces stress on the wire.
- Place the battery pack in a central, accessible spot—like near the tent door or under a small shelf.
- Use a clip or a rubber band to secure the pack so it doesn’t swing.
- Begin running the lights along your first clip, threading the wire through the hook.
- Work your way around the tent, following your layout. Gently pull the wire taut—don’t stretch it.
- At corners, let the wire bend naturally. Use a clip at the turn to guide it.
If your lights have a switch, position it so you can reach it without crawling on the floor. A small clip near the door is perfect.
Pro tip: For a “starry sky” effect, leave small sections of wire loose and let them drape slightly. Just don’t let them touch the floor—moisture or tripping hazards are real.
This step is where the magic happens. As the lights go up, your tent transforms from basic shelter to cozy retreat.
Step 6: Secure the End and Manage Excess Wire
Most string lights have 1–2 feet of extra wire after the last bulb. Don’t just leave it dangling. Tidy it up.
- Wrap the excess wire into a loose loop.
- Use a rubber band or velcro strap to secure it.
- Attach the bundle to the last clip or a nearby pole.
- Hide it behind a sleeping bag, pillow, or tent wall.
For longer strings (25+ ft), you might need to double back—run the lights around the tent twice. Just make sure the second loop is slightly lower or offset so it doesn’t look crowded.
Warning: Never tie knots in the wire. They can damage the internal circuits and cause flickering or failure. Always use soft loops and gentle bends.
A clean finish makes your setup look intentional, not haphazard. This attention to detail is what separates a good ambience from a great one.
Step 7: Test and Adjust the Lighting
Now the fun part: turn on the lights!
- Flip the switch and step outside (or to the tent door).
- Look for dark spots, glare, or uneven brightness.
- If a corner is too dark, add a small loop of lights or reposition a clip.
- If the lights are too bright, use a diffuser—a piece of white tissue paper or sheer fabric taped lightly over a bulb.
- For colored lights, test combinations. Red + white = cozy, blue + white = cool, etc.
Let the lights run for 5–10 minutes to check for flickering, dimming, or overheating. If anything feels off, turn them off and troubleshoot.
Pro tip: Use the “golden hour test”—set up your lights during dusk. The natural light fades as the LEDs come on, so you’ll see exactly how they look in real conditions.
This final check ensures your ambience is perfect—not just pretty, but practical.
Step 8: Optimize for Battery Life and Safety
Even the best lights won’t help if the batteries die at midnight. Here’s how to keep them glowing all night.
- Use fresh batteries—don’t rely on old or partially drained ones.
- Switch to timer mode if available (e.g., 4 or 6-hour auto-off).
- Keep a spare set of batteries in a waterproof bag inside the tent.
- Turn off lights when not in use (like during meals or games).
- Store lights in a cool, dry place when not camping—heat kills batteries.
Safety note: Never leave lights on unattended if you’re sleeping with them. While LED lights don’t get hot, a short circuit or damaged wire can be a fire risk. Always supervise.
Warning: Avoid using high-drain devices (like fans or speakers) on the same battery pack. They can drain power too fast and ruin your ambience.
Smart power management means more light, less hassle. This is the final piece of how to hang LED battery light string in tent canopy for perfect ambience.
Pro Tips & Common Mistakes to Avoid
Even with the best plan, things can go wrong. Here are insider tips and pitfalls to dodge.
- Don’t overload one side: Balance the lights around the tent. One bright wall looks awkward.
- Use multiple small strings: Instead of one long 30-ft string, try two 15-ft ones. They’re easier to manage and create layered lighting.
- Try a “canopy crown”: Hang lights just below the peak of a dome tent. It mimics a chandelier and spreads light evenly.
- Use glow-in-the-dark clips: Some brands offer clips that glow, so you can find the battery pack at night.
- Add fairy lights to gear: Wrap a small strand around your backpack or cooler for extra sparkle.
Common mistake: Using tape (duct, masking, or electrical). It leaves sticky residue, damages fabric, and can’t be reused. Always choose removable adhesives.
Another mistake: Hanging lights too low. They should be above head height (6+ ft) to avoid shadows and tripping.
Pro tip: For romantic settings, dim the lights slightly and add a scented candle (battery-powered, of course). The combo of soft light and gentle fragrance is unbeatable.
For kids’ tents, use color-changing lights with a remote. Let them pick the color—it’s fun and keeps them engaged.
Remember: ambience is about feeling, not just brightness. The goal is comfort, not a light show.
FAQs About How to Hang LED Battery Light String in Tent Canopy for Perfect Ambience
Q1: Can I use solar-powered lights instead?
Yes! Solar string lights work great—if you have sunlight during the day. Place the solar panel outside the tent (on a rock or tree) and run the wire inside. Just make sure the panel gets 6+ hours of sun. For cloudy trips, stick with battery-powered.
Q2: Will the adhesive clips damage my tent?
No—if you use removable adhesive hooks (like 3M Command). They’re designed for fabric and peel off cleanly. Just avoid cheap knockoffs. Test on a small spot first if you’re unsure.
Q3: How do I hang lights in a tent with no ceiling poles?
Use the door frame or side walls. Run lights along the top edge of the tent, just below the zipper. Or hang a small net or fabric panel from the ceiling and attach lights to it. It’s like a DIY canopy.
Q4: What if my tent is damp or rainy?
Use IP44 or IP65-rated lights and keep the battery pack inside a sealed plastic bag or waterproof case. Hang it low (near the floor) where it’s drier. Avoid touching wet fabric with the wire.
Q5: Can I leave the lights on all night?
It’s not recommended. Most battery lights last 8–12 hours, but continuous use drains power fast. Use a timer or turn them off when you’re asleep. Safety first.
Q6: How do I pack the lights without tangling?
After use, wrap the lights around your hand (like a lasso), then secure with a rubber band. Store in a small bag. Never stuff them loose in a backpack—tangles happen fast.
Q7: Are there eco-friendly options?
Absolutely! Use rechargeable batteries and energy-efficient LEDs. Some brands offer solar + battery combo lights. You get the best of both worlds.
Final Thoughts
Creating the perfect ambience in your tent isn’t about spending a fortune—it’s about thoughtful setup and smart choices. Now that you know how to hang LED battery light string in tent canopy for perfect ambience, you can turn any camping trip into a memorable experience.
From backyard sleepovers to mountain retreats, soft, warm lighting makes people feel welcome, safe, and relaxed. It’s not just decoration—it’s mood magic.
Start with the right lights, plan your layout, use safe adhesives, and test before you go. Keep spare batteries, tidy up the wires, and enjoy the glow. And when your friends say, “Wow, your tent feels like a fairy tale,” you’ll know it was worth the effort.
So next time you pack your tent, don’t forget the lights. Because the best memories aren’t made in the dark—they’re made under a canopy of soft, twinkling stars.
Your next adventure is brighter than ever.

