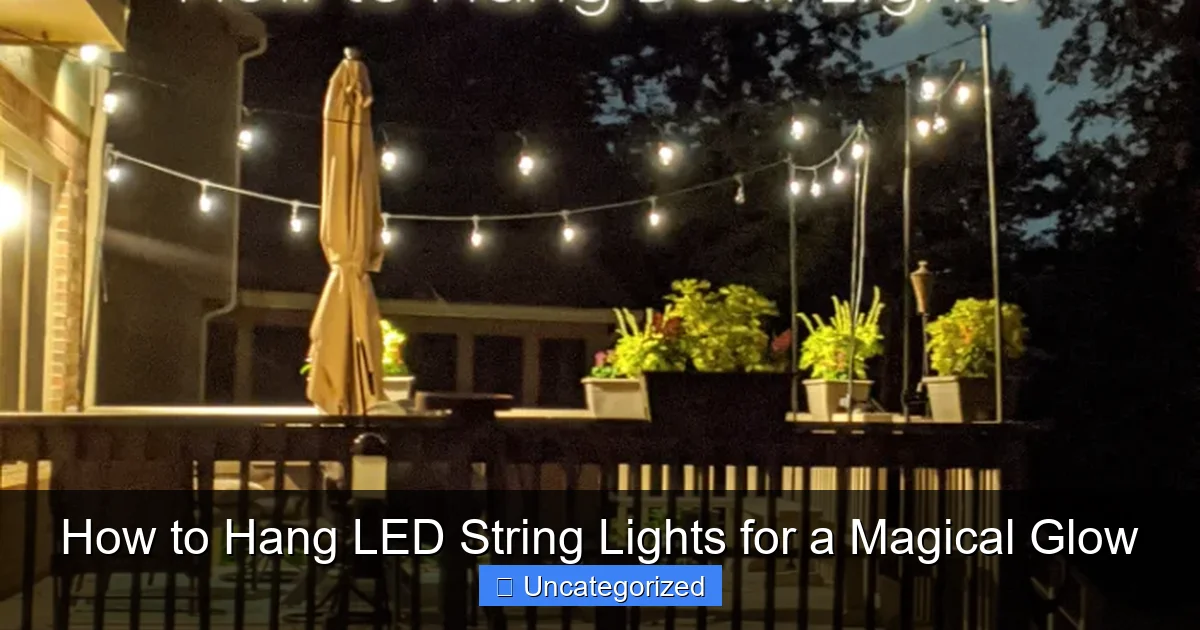
Featured image for how to hang led string lights
Image source: chaosisbliss.com
Choose the right hanging method based on your space—indoor or outdoor—to ensure safety and maximum glow. Use adhesive hooks, clips, or guide wires to secure LED string lights along walls, ceilings, or railings without damaging surfaces. Plan your layout first and test lights before installation for a seamless, magical effect.
How to Hang LED String Lights for a Magical Glow
Key Takeaways
- Plan your layout first: Sketch light placement to avoid gaps or overhangs.
- Use proper hardware: Choose hooks, clips, or adhesive mounts for secure installation.
- Check power source proximity: Ensure outlets are accessible or use battery-powered lights.
- Test lights before hanging: Confirm functionality to prevent mid-installation failures.
- Space evenly for balance: Maintain consistent gaps for a uniform, professional look.
- Weatherproof for outdoors: Seal connections and use outdoor-rated lights in exposed areas.
Why This Matters / Understanding the Problem
Imagine this: it’s a summer evening, the sun has just dipped below the horizon, and you’re sitting outside with friends. You hit the switch—nothing happens. Or worse, half the lights flicker and die. Frustrating, right?
That’s the problem many face when they try to how to hang LED string lights for a magical glow without a plan. Whether it’s for a patio, balcony, backyard, or bedroom, poorly installed lights can ruin the mood, waste time, and even pose safety risks.
But here’s the good news: with the right approach, you can create a warm, inviting atmosphere that feels like a dream—without the headaches. This guide walks you through every step, from planning to powering up, so your space shines beautifully and safely.
We’ll cover everything from choosing the right lights to avoiding common pitfalls. By the end, you’ll know exactly how to hang LED string lights for a magical glow that lasts all season—or all year.
What You Need
Before you start, gather these tools and materials. Having them ready saves time and prevents last-minute trips to the hardware store.
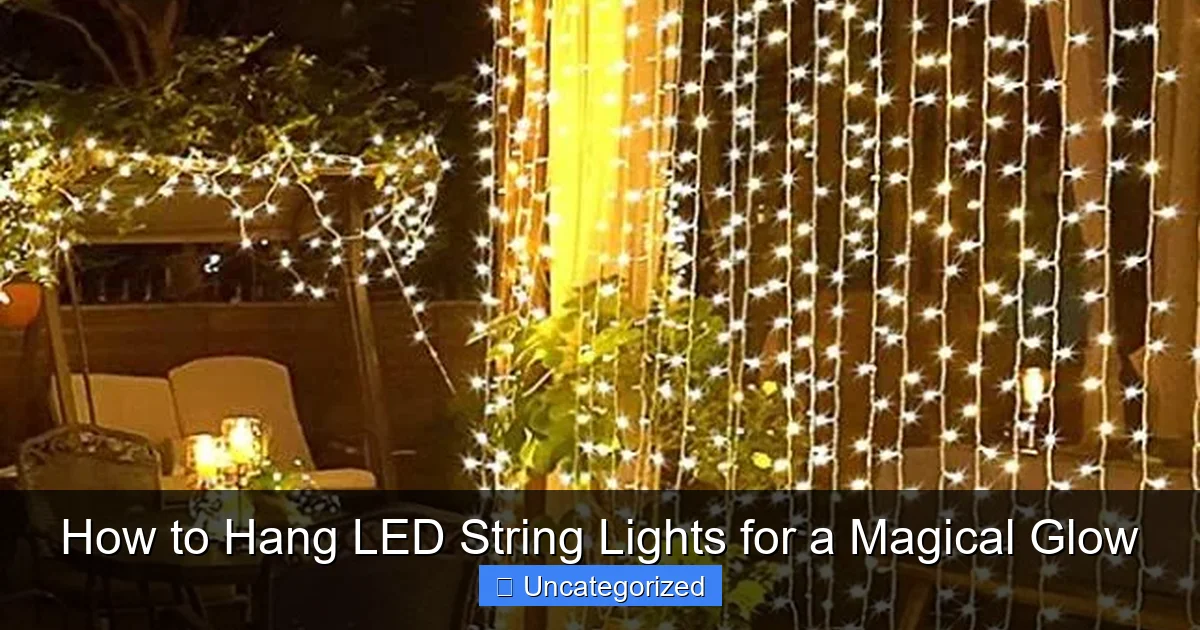
Visual guide about how to hang led string lights
Image source: oillampman.com
- LED string lights (outdoor-rated if used outside)
- Measuring tape (to map your space)
- Pencil or chalk (for marking anchor points)
- Drill and drill bits (if mounting on wood, stucco, or masonry)
- Hooks, screws, or clips (screw-in hooks, adhesive clips, or gutter hooks)
- Extension cords or power strips (with outdoor rating)
- Timer or smart plug (optional, for automatic control)
- Ladder (for high areas)
- Zip ties (for securing loose cords)
- Weatherproof sealant (for outdoor electrical connections)
- Voltage tester (to check outlets and cords)
Pro tip: Buy lights with end-to-end connectors if you plan to link multiple strands. This makes it easy to customize length and avoid overloading circuits. And always check the wattage or amperage of your lights to match your power source.
Step-by-Step Guide to How to Hang LED String Lights for a Magical Glow
Step 1: Plan Your Layout (Before You Hang a Single Light)
The secret to a stunning display starts with planning. Don’t just start hammering in hooks—take a few minutes to map your space.
First, decide where you want the glow. Do you want a canopy over the patio? A frame around the deck railing? Twinkling lights in trees? Or a soft halo above a bedroom headboard?
Use your measuring tape to calculate the total distance the lights need to cover. Then, check the length of your LED string lights. Most are 20 to 50 feet long. If your space is longer, you can connect multiple strands—but don’t exceed the manufacturer’s limit (usually 3–5 strands).
Sketch a simple diagram on paper or use your phone to mark anchor points. For example, if you’re hanging lights between two trees, mark where each end will attach. If it’s a rectangular patio, plan for corner hooks and mid-span supports.
Pro Tip: Use painter’s tape to temporarily mark anchor spots. This lets you visualize the layout and adjust before drilling or hammering.
Remember: the goal of how to hang LED string lights for a magical glow is balance. Avoid sagging in the middle or uneven spacing. Aim for even tension and a natural flow.
Step 2: Choose the Right Hanging Method
Not all surfaces are the same. Your hanging method depends on the material you’re attaching to.
For Wood (Decks, Fences, Pergolas)
Use screw-in cup hooks or eye screws. They’re strong, easy to install, and blend in when painted. Drill a pilot hole first to prevent splitting, especially with hardwood.
Spacing: Place hooks every 12–18 inches for even weight distribution.
For Brick, Stucco, or Concrete Walls
Use masonry anchors with screws or adhesive outdoor hooks (like 3M Command Outdoor). For permanent setups, anchors are best. For temporary or renter-friendly setups, heavy-duty adhesive works great.
Drill a pilot hole, insert the anchor, then screw in the hook. Let adhesive hooks cure for 24 hours before hanging lights.
For Gutters or Metal Frames
Use gutter hooks—they clip over the edge of the gutter without drilling. Ideal for eaves or metal pergolas. They’re also removable and reusable.
For Trees
Use zip ties or tree-friendly clips (designed not to damage bark). Avoid nails or screws—they can harm the tree and loosen over time.
Wrap the light strand in a spiral around the trunk or branches for a whimsical effect. Or run it from one tree to another using a tension wire or paracord for support.
Warning: Never use staples or nails on trees. They damage the bark and can lead to disease. Use soft, flexible ties instead.
Each method ensures your lights stay secure and look intentional—key to achieving that magical glow you’re after.
Step 3: Install the Hooks or Clips
Now it’s time to put those anchors in place.
Start at one end of your layout. Use your pencil or chalk to mark each hook location. For straight runs, measure and mark every 12–18 inches. For curves or arches, go every 6–12 inches to maintain shape.
Drill pilot holes for screws (especially in wood or masonry). This prevents splitting and makes installation smoother. Then, screw in the hooks by hand or with a screwdriver. Don’t overtighten—hooks should spin freely.
For adhesive hooks, clean the surface with rubbing alcohol first. This removes dust and grease, ensuring a strong bond. Press firmly and hold for 30 seconds. Wait 24 hours before hanging lights.
If you’re using gutter hooks, simply snap them over the edge. Make sure they’re seated securely and won’t slip when weighted.
Double-check your marks and spacing. Misplaced hooks can ruin the symmetry and make your lights look lopsided.
Pro Tip: Use a level for horizontal runs (like along a fence or roofline). A slight tilt can be noticeable when the lights are on.
This step is the foundation of how to hang LED string lights for a magical glow—take your time. A well-placed hook makes all the difference.
Step 4: Hang the Lights (The Fun Part!)
Now, bring in the lights. Start at the end closest to the power source. This minimizes cord clutter and reduces the risk of overloading.
Unroll the string lights and lay them out on the ground near your first hook. Plug them in briefly to test—make sure all bulbs are working. Replace any faulty strands now, not later.
Begin hanging from one end. Hook the light strand’s built-in hanging loops or clips onto the first anchor. Work your way along, securing each loop to the next hook.
For longer runs, don’t pull the lights too tight. Leave a slight sag (about 2–4 inches) between hooks. This prevents strain on the wire and creates a soft, flowing look—especially important for that magical glow.
If your lights don’t have built-in loops, use small S-hooks or zip ties to attach them to your anchors. Or, wrap the cord around the hook and secure with a twist tie.
For trees or irregular shapes, drape the lights loosely. Let them follow the natural curves of branches or railings. Avoid sharp bends—they can damage the wire.
Warning: Never stretch LED strings to their limit. This can break internal wires or connectors, leading to flickering or dead sections.
As you go, keep the power cord organized. Run it along the ground or under furniture, and secure with zip ties or clips. This prevents tripping and keeps your setup looking clean.
Step 5: Manage Power and Cords
Nothing kills the vibe like a tangled mess of cords. Power management is crucial—especially for outdoor setups.
Plug your lights into a GFCI (Ground Fault Circuit Interrupter) outlet. These outlets cut power if they detect a fault, protecting you from shocks—especially important in wet areas.
Use an outdoor-rated extension cord if your outlet is far from the lights. Choose one with a weatherproof cover and enough length to reach without stretching.
For multiple strands, use a power strip with surge protection (also outdoor-rated). Plug the strip into the outlet, then connect your lights. Avoid daisy-chaining more than 3–5 strands—check the packaging for limits.
To hide cords, run them behind furniture, under rugs, or through planters. Use cord clips or adhesive channels to keep them flush against walls.
For a cleaner look, consider solar-powered LED string lights in areas without easy access to outlets. They charge during the day and turn on automatically at dusk.
Pro Tip: Use a smart plug or outdoor timer to automate your lights. Set them to turn on at sunset and off at 10 PM. No more forgetting to unplug!
Good power management is a big part of how to hang LED string lights for a magical glow—safely and beautifully.
Step 6: Weatherproof and Secure
If your lights are outdoors, they need protection from the elements.
Seal all plug connections with weatherproof electrical tape or a weatherproof cord cover. Wrap the tape in a “figure-8” pattern over the plug and socket. This keeps moisture out and prevents short circuits.
Elevate cords off the ground. Use stakes, clips, or hooks to keep them dry. Puddles and damp soil can damage insulation over time.
For permanent installations, consider running cords through conduit or burying them in landscape wire covers (at least 6 inches deep).
Inspect your setup after rain or wind. Check for loose hooks, frayed cords, or water in plugs. Address issues early to prevent bigger problems.
Warning: Never leave indoor-rated lights outside. They aren’t built for moisture or temperature swings. Always use outdoor-rated LED string lights for exterior use.
Weatherproofing ensures your lights last for years—and keeps that magical glow shining through every season.
Step 7: Test and Adjust
Once everything’s up, plug it in and step back. Watch the entire display.
Look for:
- Flickering or dead sections
- Sagging in the middle
- Uneven spacing
- Cords in walkways
If a section flickers, unplug it and check the connections. A loose plug or damaged wire is often the culprit. Replace or repair as needed.
For sagging, add an extra hook in the middle. Or, adjust the tension slightly—just don’t over-tighten.
Step back 10–15 feet and view the lights from different angles. Does the glow feel balanced? Is it too bright or too dim? You can add a dimmer switch or swap in warmer bulbs (like 2700K) for a softer feel.
Take photos at night. This helps you spot issues you might miss in person.
Adjusting now means fewer headaches later. A well-tuned setup is the final touch in how to hang LED string lights for a magical glow.
Pro Tips & Common Mistakes to Avoid
Even the best plans can go sideways. Here’s how to stay on track.
- Don’t skip the test run. Always plug in your lights before hanging. A dead strand is much easier to replace on the ground than 8 feet in the air.
- Use warm white or amber LEDs. Cool white (5000K+) can feel harsh. Warm white (2700K–3000K) creates a cozy, inviting glow—perfect for patios and bedrooms.
- Layer your lighting. Combine string lights with lanterns, candles, or path lights. This adds depth and makes the space feel richer.
- Mind the weather. If a storm is coming, unplug outdoor lights. Wind can pull them down; rain can damage plugs.
- Store properly. When taking down lights, wind them around a piece of cardboard or a cord reel. This prevents tangles and extends their life.
Common Mistake: Hanging lights in straight, rigid lines. Nature isn’t perfect—your lights don’t have to be. A slight curve or wave adds charm and hides imperfections.
Pro Tip: For a “starry sky” effect, hang lights at different heights. Use shorter strands on lower railings and longer ones on eaves. This creates depth and dimension.
Avoiding these pitfalls makes the process smoother and the results more magical. Remember: the goal isn’t perfection—it’s ambiance.
FAQs About How to Hang LED String Lights for a Magical Glow
Q: Can I leave LED string lights on all night?
A: Yes, most LED lights are safe to leave on overnight. They use very little power and don’t get hot. But for safety, use a timer or smart plug to turn them off after a few hours. This also saves energy and extends bulb life.
Q: How do I hang lights on a rental apartment balcony?
A: Use adhesive outdoor hooks or gutter clips. These don’t require drilling and leave no damage. For railings, wrap lights around with zip ties or use magnetic hooks (if the railing is metal). Always check your lease first.
Q: Can I connect different brands of LED string lights?
A: Not usually. Different brands have different voltage, plug types, and wiring. Mixing them can cause flickering, overheating, or damage. Stick to one brand and model for the best results.
Q: What if my lights keep flickering?
A: First, unplug and check the connections. Loose plugs or damaged cords are common causes. Try replacing the strand or using a new extension cord. If the outlet is old, test it with another device. A voltage tester can help identify power issues.
Q: How long do outdoor LED string lights last?
A: Quality outdoor LEDs last 25,000 to 50,000 hours—that’s 5–10 years with regular use. Store them properly and weatherproof connections to maximize lifespan.
Q: Can I use solar-powered string lights for a permanent setup?
A: Yes, but they need direct sunlight for at least 6–8 hours a day. Place them where they won’t be shaded by trees or structures. Also, check the battery life—replace every 2–3 years.
Q: How do I hang lights on a concrete wall without drilling?
A: Use heavy-duty adhesive hooks (rated for outdoor use). Brands like 3M Command Outdoor can hold up to 5 lbs. Clean the surface first and let the adhesive cure for 24 hours. For extra security, use a combination of adhesive and zip ties.
Final Thoughts
Hanging LED string lights isn’t just about decoration—it’s about creating moments. A warm glow over dinner, a quiet evening under the stars, a surprise birthday setup—these are the memories that stick.
Now you know exactly how to hang LED string lights for a magical glow: plan, prepare, install, and protect. With the right tools and a little patience, you can transform any space into a dreamy oasis.
Start small—maybe just one corner of your patio. Once you see how easy it is, you’ll want to light up the whole yard (or bedroom, or balcony).
And remember: safety first. Use outdoor-rated lights, weatherproof your connections, and never overload circuits. A beautiful setup is only magical if it’s safe.
So grab your lights, your hooks, and your ladder. The night is waiting. Go create that glow.

