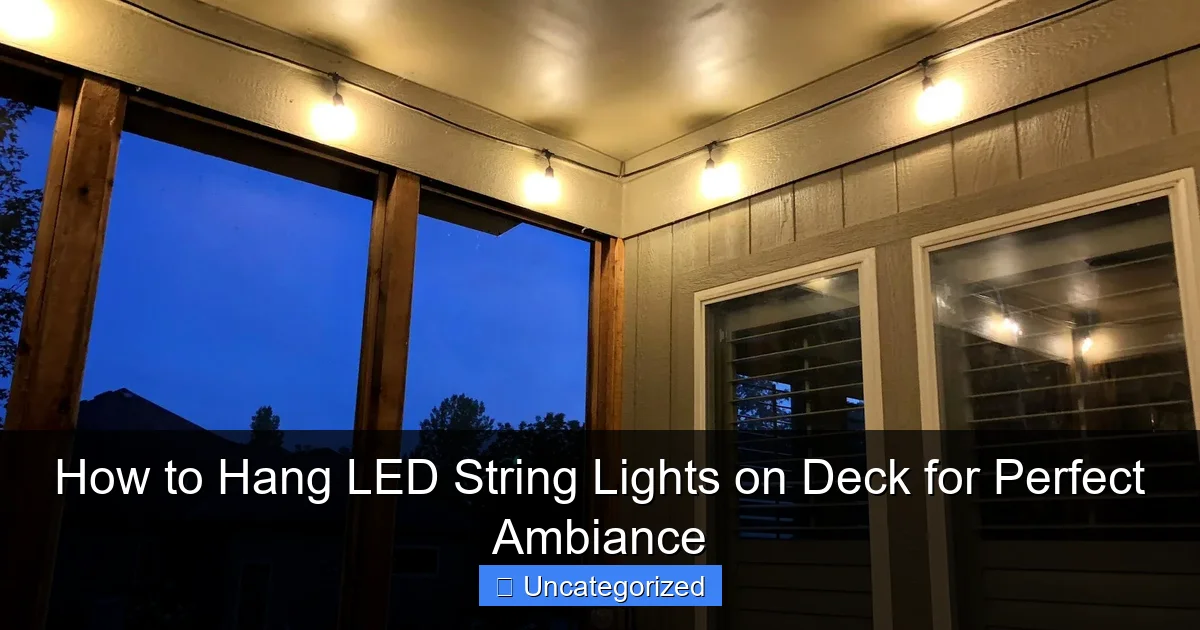
Featured image for how to hang led string lights on deck
Image source: sengerson.com
Transform your deck into a stunning nighttime retreat by securely mounting LED string lights along railings, posts, or overhead beams using weather-resistant hooks or clips. Ensure even spacing and a balanced glow by measuring your layout first and connecting lights to a timer or dimmer for effortless ambiance control. Always use outdoor-rated, waterproof lights and check electrical safety to enjoy a safe, magical atmosphere all season long.
“`html
How to Hang LED String Lights on Deck for Perfect Ambiance
Key Takeaways
- Plan your layout first: Sketch light placement to avoid gaps and ensure even coverage.
- Use outdoor-rated clips: Secure lights with weatherproof clips to protect your deck and lights.
- Anchor to sturdy structures: Attach lights to railings, posts, or eaves for maximum stability.
- Measure twice, hang once: Confirm spacing and length before installing to prevent rework.
- Hide cords creatively: Tuck wires under railings or use cord covers for a clean look.
- Test lights before hanging: Check bulbs and connections to avoid mid-installation failures.
- Use dimmers or timers: Set the mood and save energy with smart lighting controls.
Why This Matters / Understanding the Problem
You’ve just finished grilling dinner on your deck, the sun’s setting, and the mood is perfect—until the darkness hits. Suddenly, your cozy outdoor space feels cold and unwelcoming. That’s where knowing how to hang LED string lights on deck for perfect ambiance comes in.
LED string lights aren’t just for holidays. They transform your deck into a warm, inviting retreat for summer nights, parties, or quiet evenings with a book. But hanging them wrong? That can lead to sagging wires, tripping hazards, or a chaotic mess that ruins the vibe.
Whether you’re lighting up a small balcony or a spacious backyard deck, the right setup ensures safety, longevity, and that magical glow you’re after. This guide walks you through every step—simple, practical, and designed for real homeowners.
Pro Insight: LED string lights use 80–90% less energy than incandescent bulbs and last up to 25,000 hours. That’s over 10 years of nightly use—making them a smart, sustainable choice for deck lighting.
What You Need
Before you start, gather these tools and materials. Having everything ready saves time and prevents mid-project trips to the hardware store.
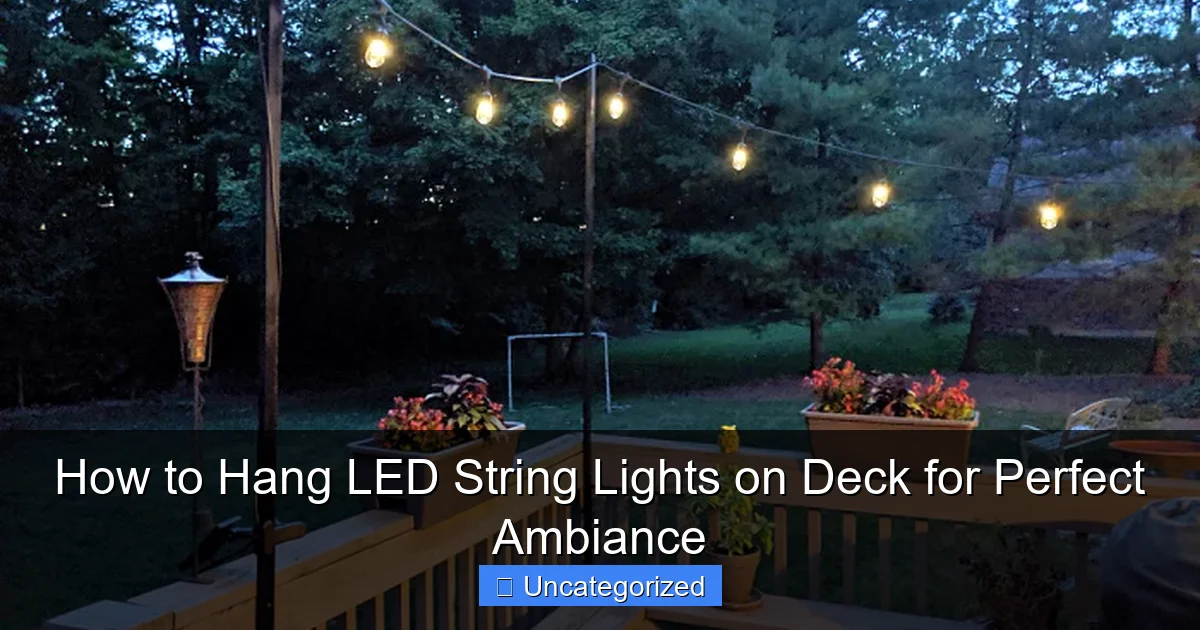
Visual guide about how to hang led string lights on deck
Image source: chaosisbliss.com
- LED string lights (choose outdoor-rated, waterproof, and with a plug or battery option)
- Measuring tape (to plan spacing and coverage)
- Drill and drill bits (for wood or composite decks)
- Eye hooks or cup hooks (stainless steel or weather-resistant; 1–2 inches long)
- Zip ties or plastic cable clips (for railings or tight spaces)
- Extension cord (outdoor-rated, with GFCI protection)
- Ladder or step stool (for reaching high areas)
- Level (optional, but helps keep lines straight)
- Weatherproof silicone sealant (to seal screw holes if needed)
- Garden stakes or ground anchors (if running lights along the deck perimeter)
Bonus: Use a smart plug to control lights with your phone or voice assistant. It’s a game-changer for setting the mood without leaving your chair.
Warning: Always check your deck’s material (wood, composite, vinyl) before drilling. Composite and vinyl require special drill bits and lower torque to avoid cracking.
Step-by-Step Guide to How to Hang LED String Lights on Deck for Perfect Ambiance
Step 1: Plan Your Layout and Choose the Right Lights
Start by deciding where you want the lights. Do you want a canopy over the seating area? A perimeter glow along the railing? Or a zigzag pattern for drama?
Sketch a simple diagram of your deck. Mark where you’ll hang lights, where the power source is, and how many strings you’ll need. Most LED string lights are 25–50 feet long. Measure your deck’s perimeter or overhead span to avoid gaps or overbuying.
When choosing lights, look for:
- IP44 or higher waterproof rating (protects against rain and splashes)
- Connectable ends (lets you link multiple strings without extra plugs)
- Warm white or soft color tones (creates cozy ambiance; avoid bright white or neon for relaxation)
- Low heat output (LEDs stay cool, reducing fire risk near wood)
Real-Life Example: Sarah, a homeowner in Portland, hung 3 strings of 40-foot warm-white LEDs in a zigzag pattern above her deck. She spaced them 10 feet apart and used a smart plug. “Now, I just say, ‘Alexa, turn on deck lights,’ and the whole space lights up like a café,” she says.
Step 2: Map Power Access and Extension Cords
LED string lights need power. But you don’t want extension cords snaking across the deck where guests can trip.
Find the closest outdoor GFCI outlet. If none is within 10 feet, install one (hire an electrician for this). Use an outdoor-rated, heavy-duty extension cord (14-gauge or thicker) with GFCI protection. This prevents shocks and tripped breakers during rain.
Plan the cord path:
- Run it along the deck edge, under a rug, or behind furniture.
- Use cord covers or raceways to protect it from foot traffic.
- Never bury cords in mulch or soil—they degrade fast.
For longer runs, use a power distribution box (a weatherproof hub that splits power to multiple strings). This keeps your setup clean and safe.
Pro Tip: Test your extension cord with a simple plug before connecting lights. You’ll catch frayed wires or loose connections early.
Step 3: Install Mounting Hardware (Hooks, Clips, or Tracks)
Now it’s time to anchor your lights. The method depends on your deck’s structure.
For Wooden Decks:
- Use stainless steel eye hooks (1–2” long) every 10–15 feet.
- Drill a pilot hole first (prevents wood splitting).
- Screw hooks in at a slight upward angle (helps keep lights taut).
For Composite or Vinyl Decks:
- Use self-tapping deck screws with plastic clips or adhesive-backed cable clips.
- Avoid drilling into composite—it can crack. Use clips on railings or posts.
For Metal Railings or Posts:
- Use zip ties (UV-resistant) or magnetic hooks.
- Loop zip ties around posts and trim excess.
For overhead canopies, install hooks on roof eaves, pergola beams, or tall posts. Use a ladder and have someone spot you for safety.
Warning: Don’t use nails or staples—they can pierce wires and create fire hazards. Always use hooks or clips designed for outdoor lighting.
Step 4: Hang the Lights with Proper Tension
Now the fun part—hanging the lights! Start at the power source and work outward.
- Attach the first string to the hook nearest the outlet.
- Unroll the string as you go, but don’t stretch it tight yet.
- At each hook, loop the light’s wire (not the bulb socket) through the hook.
- Keep a slight sag (like a “smile” curve) to prevent tension on bulbs and wires.
For zigzag or crisscross patterns:
- Use a measuring tape to mark equal distances between hooks.
- Hang the first string in a straight line, then cross the second string at a 45-degree angle.
- Use a level to keep lines straight—eyeballing leads to wavy lights.
If using multiple strings, connect them end-to-end before hanging. Most LED strings have male/female plugs—just twist and lock. Avoid daisy-chaining more than 3–4 strings (check manufacturer’s limit).
Pro Tip: Hang lights 8–10 feet above ground. Low lights create glare; too high, and they lose intimacy.
Step 5: Secure Cords and Manage Excess Length
Loose cords are a tripping hazard and look messy. Tame them with:
- Zip ties every 2–3 feet along railings or posts.
- Cable clips for vertical runs (e.g., down a post to the outlet).
- Coil excess cord behind furniture or in a weatherproof box.
For long runs, use conduit sleeves (flexible plastic tubes) to protect cords from UV damage and rodents.
If your lights have a long “tail” (the unlit wire from plug to first bulb), tuck it behind a railing or under a planter. Or, use a plug cover to keep it dry.
Real-Life Example: Mark in Austin used zip ties and a coiled cord behind his grill. “Now, my deck looks clean, and I don’t worry about kids tripping,” he says.
Step 6: Test and Adjust for Ambiance
Plug in your lights and turn them on. Walk around and check:
- Are all bulbs working? Replace any that are out (most LEDs are replaceable).
- Is the glow even? Adjust hooks to fix dark spots.
- Do cords dangle or sag? Tighten or re-secure.
- Is the ambiance right? Dim lights create warmth; bright lights feel like a party.
For extra ambiance, add:
- Fairy lights in glass jars on tables.
- Path lights along deck steps.
- Uplighting on plants or sculptures.
Pro Tip: Use a dimmer switch (if your lights support it) to adjust brightness. A 50% dim level often feels cozier than full brightness.
Step 7: Weatherproof and Maintain for Longevity
Outdoor lights face rain, wind, and UV rays. Protect them:
- Seal screw holes in wood with weatherproof silicone (prevents rot).
- Use UV-resistant zip ties (they won’t crack in sunlight).
- Check connections every 3 months. Tighten loose hooks or replace frayed cords.
- Remove debris (leaves, dirt) from sockets—it can cause shorts.
In winter, if you live in a cold climate:
- Take down battery-powered or delicate lights.
- Leave plug-in strings up but unplug them during storms.
Warning: Never leave lights on unattended for long periods. Even LEDs can overheat if faulty. Use a timer or smart plug to auto-shut off after 4–6 hours.
Pro Tips & Common Mistakes to Avoid
Even simple projects have pitfalls. Here’s how to nail how to hang LED string lights on deck for perfect ambiance—without the headaches.
Pro Tips
- Use a template: Cut a cardboard strip to match your hook spacing. Hold it up to mark drill spots—no measuring tape needed.
- Go for symmetry: Even spacing (every 10–12 feet) looks balanced. Odd gaps draw the eye.
- Mix light types: Combine string lights with solar path lights or lanterns for layered lighting.
- Choose the right color: Warm white (2700K–3000K) feels cozy. Cool white (4000K+) feels clinical—save it for task areas.
- Label your strings: Use colored tape to mark the first and last string. Makes troubleshooting easier.
Common Mistakes
- Overloading circuits: Don’t plug 10 strings into one outlet. Use a power strip with overload protection.
- Ignoring weather ratings: Indoor lights fail fast outdoors. Always check for IP44 or IP65.
- Stretching lights too tight: Bulbs can pop out or wires break. A gentle sag is better than a taught line.
- Skipping GFCI: Outdoor outlets must have GFCI to prevent shocks. Test it monthly.
- Hanging near flammable items: Keep lights 12+ inches from curtains, plants, or furniture.
Expert Insight: “I see homeowners hang lights with tape or nails. That’s a disaster waiting to happen. Use proper hardware—it’s cheap insurance,” says Mike Chen, a licensed electrician in Seattle.
FAQs About How to Hang LED String Lights on Deck for Perfect Ambiance
Q: Can I leave LED string lights up year-round?
A: Yes, if they’re outdoor-rated and you maintain them. Check cords monthly and unplug during storms. In snowy areas, remove lights in winter to avoid ice damage.
Q: How many strings can I connect together?
A: Most brands limit to 3–4 strings (about 150–200 watts total). Check your manual. Overloading can melt plugs or trip breakers.
Q: What if my deck has no overhead structure?
A: Use tall poles (like shepherd’s hooks) or attach lights to railings. Or, install a pergola or gazebo—it’s a great excuse to upgrade your deck!
Q: Are battery-powered LED lights good for decks?
A: They’re great for small areas or renters (no drilling). But they need frequent battery changes. Use rechargeable batteries or a solar-powered model.
Q: How do I hide the power cord?
A: Run it along the deck edge, under a rug, or behind furniture. Use cord covers or paint it to match your deck color. For a clean look, install an outdoor outlet nearby.
Q: What’s the best height to hang deck lights?
A: 8–10 feet above ground. High enough to avoid glare, low enough to feel intimate. Adjust based on your seating height.
Q: Can I use smart LED lights on my deck?
A: Absolutely! Smart lights let you control color, brightness, and schedules via app or voice. Just ensure they’re outdoor-rated (e.g., Philips Hue Outdoor or LIFX).
Final Thoughts
Knowing how to hang LED string lights on deck for perfect ambiance isn’t just about lighting—it’s about crafting memories. Whether you’re hosting a BBQ, reading under the stars, or just enjoying a quiet night, the right glow makes all the difference.
Start small. Try one string over your seating area. Once you see the magic, you’ll want to expand. And remember: safety first. Use weatherproof gear, GFCI outlets, and proper hardware.
Your deck isn’t just an outdoor space. It’s your personal oasis. With these steps, you’ll create a warm, inviting atmosphere that lasts for years. Now go grab those lights, plug in, and let the ambiance begin!
Actionable Tip: Take a photo of your setup. Share it online with #DeckAmbiance. You might inspire a neighbor—and get a few compliments too.
“`

