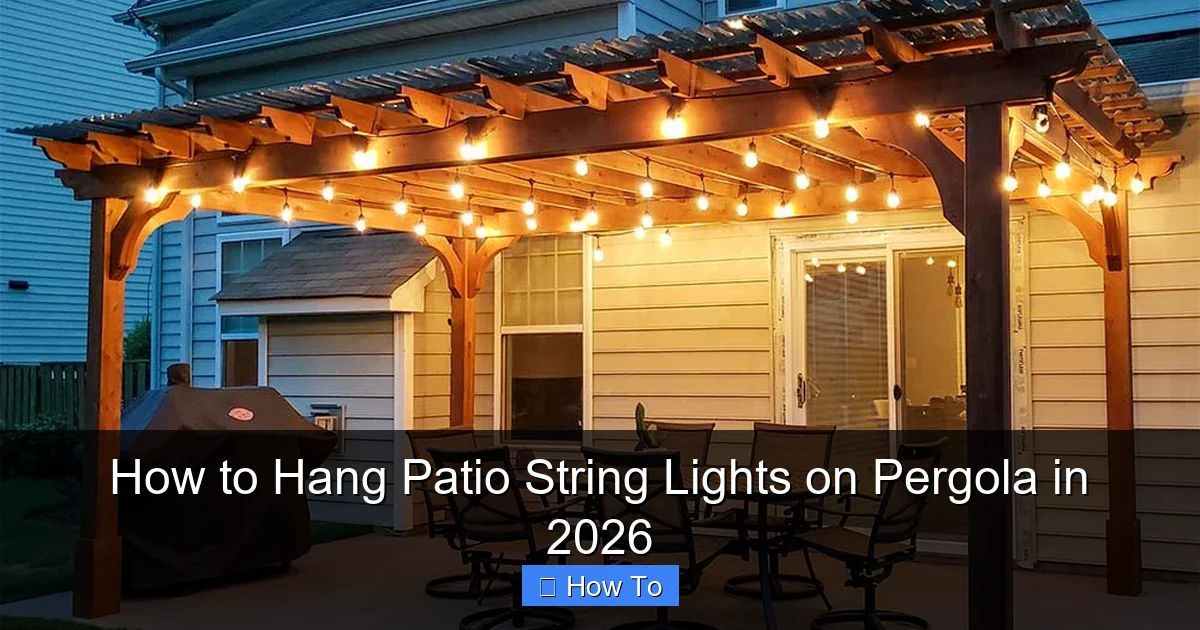
Featured image for how to hang patio string lights on pergola
Image source: pergolakitsusa.com
Transform your pergola into a magical evening retreat by securely mounting patio string lights using weather-resistant hooks or zip ties spaced every 12–18 inches for optimal support. For a clean, professional look in 2026, plan your layout first, use LED string lights for energy efficiency, and ensure bulbs face downward to minimize glare. Always anchor lights to pergola beams—not vines or railings—for safety and long-lasting ambiance.
“`html
How to Hang Patio String Lights on Pergola in 2026
Key Takeaways
- Plan your layout first: Sketch light placement to avoid gaps and ensure even coverage.
- Use weather-resistant lights: Choose LED or solar-powered for durability in outdoor conditions.
- Secure with proper hardware: Install hooks, clips, or zip ties rated for outdoor use.
- Measure spacing accurately: Keep lights 12-18 inches apart for optimal brightness and balance.
- Hide cords safely: Tuck wires along beams or use cord covers for a clean look.
- Test before finalizing: Check functionality and adjust positioning before permanent installation.
Why This Matters / Understanding the Problem
Let’s be honest—there’s something magical about a pergola draped in soft, glowing lights. It turns your backyard into a cozy retreat, perfect for summer dinners, late-night chats, or just unwinding with a glass of wine. But if you’ve ever tried how to hang patio string lights on pergola in 2026, you know it’s not as simple as just draping them and calling it a day.
I learned this the hard way. A few years ago, I bought the prettiest Edison-style lights, climbed up on a wobbly ladder, and spent hours looping them across the beams. By the end, they sagged in the middle, one side pulled loose after a light breeze, and the whole thing looked… sad. Not exactly the Instagram-worthy ambiance I was going for.
That’s why I’m writing this guide. Whether you’re setting up for the first time or redoing a setup that didn’t quite work, this is how to hang patio string lights on pergola in 2026 the smart, stress-free way. No sagging, no loose ends, and no regrets.
The good news? With a few simple tools, some planning, and a little patience, you can get a professional-looking result without hiring a pro. And the best part? You’ll enjoy your lights for years—rain or shine.
What You Need
Before you start, gather your supplies. Trust me, having everything ready saves a ton of time (and ladder trips). Here’s your quick checklist:
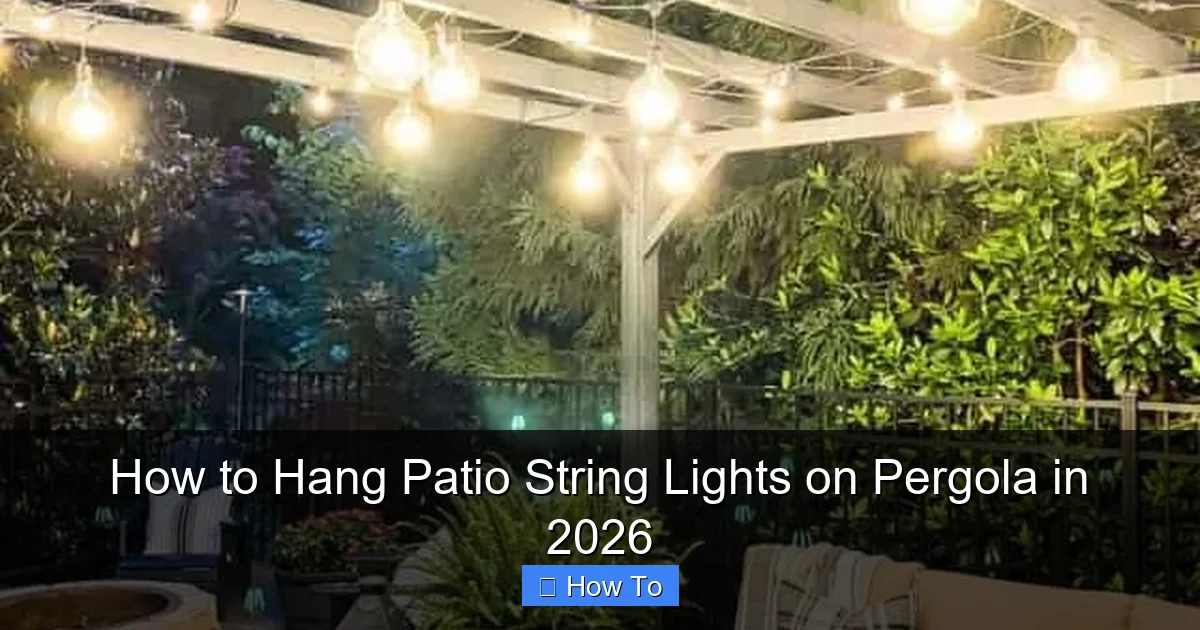
Visual guide about how to hang patio string lights on pergola
Image source: simply2moms.com
- String lights (LED, weatherproof, with a plug or battery option—more on this later)
- Measuring tape (to plan spacing and avoid running out)
- Drill & drill bits (for pilot holes if needed)
- Screws or hooks (stainless steel or outdoor-rated; eye hooks or cup hooks work great)
- Zip ties or outdoor-rated cable clips (for securing wires)
- Ladder (sturdy, with rubber feet)
- Level (optional but helpful for alignment)
- Extension cord (if using plug-in lights—outdoor-rated, GFCI-protected)
- Timer or smart plug (optional, but a game-changer for automation)
- Work gloves (to protect your hands)
Pro insight: Don’t skimp on the hooks. I once used cheap plastic ones that cracked in the sun within a year. Spend a few extra bucks on stainless steel—they last longer and look better.
Step-by-Step Guide to How to Hang Patio String Lights on Pergola in 2026
Step 1: Plan Your Layout (The Secret to Success)
Before you touch a single hook, sketch out your pergola. Think of it like drawing a map. You want to know exactly where each light will go and how the wires will run.
Ask yourself: Do you want a crisscross pattern (like a web) or a straight-line drape across the beams? Crisscross gives more coverage but uses more lights. Straight lines are simpler and often look cleaner.
Use your measuring tape to mark key points. For a crisscross design, plan anchor points at the corners and every 18–24 inches along the beams. For straight lines, space anchor points every 3–4 feet to prevent sagging.
Pro tip: Use painter’s tape to mark spots on the beams. It leaves no residue and helps you visualize the final look. This step alone makes how to hang patio string lights on pergola in 2026 feel much less overwhelming.
Step 2: Choose the Right String Lights
Not all string lights are created equal. For pergolas, you need lights that can handle the elements. Here’s what to look for:
- Weatherproof rating (IP65 or higher) – essential for rain and UV exposure
- LED bulbs – energy-efficient, cooler, and last longer than incandescent
- Plug-in vs. battery – plug-in gives consistent brightness; battery offers flexibility but needs frequent charging
- Length – measure your pergola and buy lights that are 10–20% longer than needed (allows for draping and plug reach)
I prefer plug-in LED lights with a timer. They’re bright, reliable, and I don’t have to think about turning them on—my smart plug does it at sunset. But if your pergola is far from an outlet, battery-powered or solar string lights are a great alternative.
One thing I learned: avoid lights with bulbs that dangle too far below the wire. They catch wind, swing around, and can break easily. Go for shatterproof or enclosed bulbs—they’re safer and more durable.
Step 3: Install Anchor Points (Hooks or Screws)
This is where the structure happens. Anchor points keep your lights secure and prevent sagging. Here’s how:
Start at one corner. Drill a small pilot hole (about 1/8 inch) into the pergola beam. This prevents splitting, especially with hardwood. Then, screw in an eye hook or cup hook by hand—tight, but don’t over-torque.
Space hooks every 3–4 feet for straight runs, or every 18–24 inches for crisscross patterns. Use your level to make sure they’re aligned horizontally and vertically. A crooked hook = crooked lights = sad ambiance.
For metal pergolas, you can use magnetic hooks or heavy-duty zip ties. Just make sure they’re rated for outdoor use and won’t scratch the finish.
Warning: If your pergola is made of softwood (like pine), avoid overtightening the hooks. It can strip the wood. Use shorter screws or switch to adhesive hooks rated for outdoor use.
Step 4: Hang the Lights (Start at the Power Source)
Now the fun part. Always start hanging at the end closest to your power source. Why? So you don’t run out of wire before reaching the plug.
Loop the first bulb or socket around the first hook. Don’t tie a knot—just a loose loop so it can flex in wind. Then, gently stretch the string to the next hook, creating a gentle drape (not a tight line). The sag should be about 6–12 inches in the middle—this prevents tension and looks more inviting.
For crisscross patterns, use a zigzag motion. Start at one corner, go to the opposite corner, then back to the next point. Think of it like weaving a web. Use zip ties or cable clips to secure the wire every few feet, but don’t over-tighten. You want flexibility, not stress.
When you reach the end, leave a few extra feet of wire. Coil it neatly and tuck it behind a beam or use a cable clip. This gives you room to adjust later and makes plugging in easier.
Step 5: Secure the Wiring (No Tripping Hazards)
Exposed wires are a tripping hazard and look messy. Here’s how to hide and protect them:
- Use outdoor-rated cable clips to run the wire along the beam edge
- Zip ties work well for short runs, but cut the excess so it doesn’t snag
- If the wire runs down to an outlet, use a wire loom or conduit to protect it
- For battery-powered lights, place the battery pack in a waterproof bag or box (I use a small plastic container with a lid)
I once left the wire dangling down to an outlet—my dog chewed through it within a week. Lesson learned: always protect the power source.
Step 6: Test & Adjust (The Final Check)
Plug in the lights and step back. Turn them on. Walk around the pergola. Look for:
- Sagging or overly tight spots
- Loose hooks or wiggly wires
- Uneven spacing or gaps
If a section sags too much, add an extra hook or tighten the loop. If it’s too tight, loosen it slightly. The goal is a soft, even glow—no harsh lines or dark spots.
Use your timer or smart plug to automate the lights. I set mine to turn on 30 minutes before sunset and off at midnight. It’s one less thing to think about, and the lights come on like magic every night.
Step 7: Maintain & Enjoy (Long-Term Care)
Your lights will last longer if you take care of them. Here’s how:
- Wipe down bulbs and wires with a dry cloth every few months
- Check hooks annually for rust or looseness
- Remove lights during extreme weather (hurricanes, blizzards) if possible
- Store lights loosely coiled (not tightly wound) to prevent wire damage
I leave mine up year-round, but I do a quick inspection every spring. It takes 10 minutes and saves me from mid-summer surprises.
Pro Tips & Common Mistakes to Avoid
Pro tip #1: Use a light meter app on your phone to check brightness. I use it to make sure all bulbs are working—especially helpful for long strings.
Pro tip #2: For a layered look, hang two sets of lights—one at the top beam, one slightly lower. It adds depth and feels more luxurious.
Common mistake: Over-tightening the lights. I’ve seen people pull them so tight the wire stretches or hooks bend. Remember: gentle drape = better look + longer life.
Common mistake: Ignoring the power source. If your outlet is far away, use a heavy-duty extension cord (rated for outdoor use, 14-gauge or thicker). Avoid daisy-chaining cords—it’s a fire hazard.
Pro insight: If your pergola has no beams (just rafters), use adhesive outdoor clips or zip ties to the rafters. Just make sure they’re UV-resistant—sun exposure can weaken them over time.
One last thing: don’t rush. I once tried to hang lights during a party setup. Big mistake. I missed a hook, the lights sagged, and I had to fix it in front of guests. Take your time. Do it once, do it right.
FAQs About How to Hang Patio String Lights on Pergola in 2026
Q: Can I leave string lights up year-round?
Yes, if they’re weatherproof (IP65 or higher). I’ve had the same set for 3 winters with no issues. But if you live in an area with heavy snow or ice, consider taking them down in winter to prevent damage.
Q: What if my pergola doesn’t have beams?
No problem. Use adhesive outdoor clips on the rafters, or install small wooden blocks (painted to match) to attach hooks. I did this on a client’s pergola—looked seamless and held up great.
Q: How many lights do I need?
Measure the perimeter of your pergola. For straight lines, you’ll need one light string per side. For crisscross, multiply the length by 1.5–2 to account for the zigzag pattern. Always buy 10% extra—better to have a little leftover than run short.
Q: Can I use solar lights?
Absolutely. Solar string lights are great for pergolas without easy outlet access. Just make sure the solar panel gets 6+ hours of direct sun. I use them on a side patio—no wires, no plugs, just sun-powered glow.
Q: What’s the best spacing for hooks?
For straight runs: every 3–4 feet. For crisscross: every 18–24 inches. The tighter the spacing, the less sag—but too tight looks stiff. Aim for a soft, natural drape.
Q: How do I hide the power cord?
Run it along the beam with cable clips, tuck it behind lattice, or use a decorative cord cover. I painted mine to match the pergola—almost invisible at night.
Q: Can I mix light styles?
Yes! I love combining globe lights with fairy lights for a layered, cozy look. Just make sure they’re the same color temperature (warm white vs. cool white) to avoid a mismatched glow.
Final Thoughts
Hanging patio string lights on your pergola isn’t just about adding light—it’s about creating a mood. A place where stories unfold, laughter lingers, and time slows down. And now, you know how to hang patio string lights on pergola in 2026 the right way: with planning, the right tools, and a little patience.
Don’t stress about perfection. Some of the best outdoor spaces have a touch of “lived-in” charm. A little sag, a slightly crooked hook—it’s part of the story. But with this guide, you’ll avoid the big mistakes and end up with lights that look great and last for years.
So grab your tools, sketch out your layout, and get to it. Your perfect backyard oasis is just a few hooks away. And when those lights come on for the first time? Trust me, it’s worth every minute.
Happy hanging—and enjoy those golden evenings.
“`

