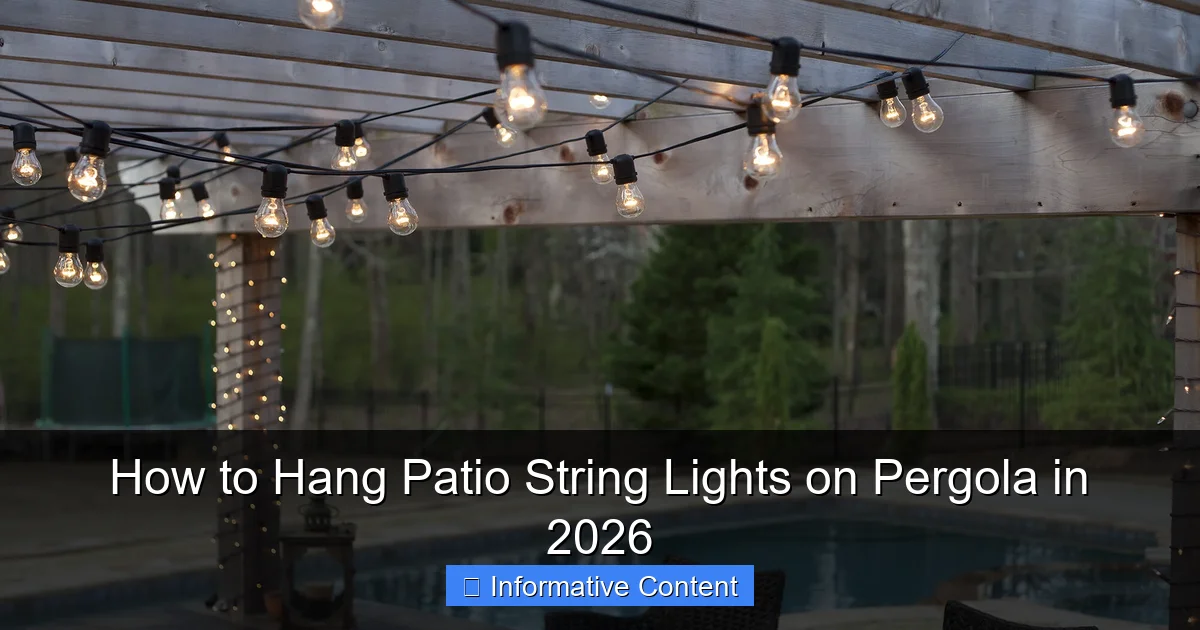
Featured image for how to hang patio string lights on pergola
Image source: img.yardenvy.com
Transform your pergola into a stunning nighttime retreat by securely mounting patio string lights using heavy-duty hooks or adjustable zip ties designed for outdoor use. For a clean, professional look in 2026, plan your layout first—spacing lights evenly across beams and ensuring bulbs drape slightly for visual depth—then connect to a weatherproof power source. Always prioritize safety by using LED, outdoor-rated lights and avoiding overloaded circuits for a dazzling, worry-free ambiance.
Key Takeaways
- Plan spacing first: Measure and mark light placement for even coverage and visual balance.
- Use durable hooks: Install stainless steel or weather-resistant hardware to support light strands securely.
- Choose the right lights: Opt for LED, outdoor-rated string lights for energy efficiency and longevity.
- Secure with zip ties: Reinforce connections on pergola beams to prevent sagging or wind damage.
- Hide cords neatly: Run wires through beams or use clips for a clean, professional look.
- Test before finalizing: Power on lights after installation to check for gaps or malfunctions.
📑 Table of Contents
- Why Hanging Patio String Lights on Your Pergola Is a Game-Changer
- Choosing the Right Patio String Lights for Your Pergola
- Preparing Your Pergola: Safety, Layout, and Tools
- Mounting Options: Secure, Safe, and Stylish
- Step-by-Step Installation Guide
- Creative Ideas and Maintenance Tips for Long-Term Beauty
- Data Table: Comparing Patio String Light Options
- Final Thoughts: Light Up Your Life—Literally
Why Hanging Patio String Lights on Your Pergola Is a Game-Changer
Picture this: a warm summer evening, the sun dipping below the horizon, and your backyard transformed into a cozy, glowing retreat. All it takes is a few well-placed patio string lights strung across your pergola. Whether you’re hosting a barbecue, enjoying a quiet cup of coffee at dusk, or just unwinding after a long day, these lights add magic to any outdoor moment. I remember the first time I hung string lights on my pergola—what started as a DIY experiment turned into the most used feature of my backyard. The ambiance? Unmatched. The effort? Surprisingly simple.
But let’s be real: hanging patio string lights on a pergola isn’t just about draping them and hoping for the best. There’s a sweet spot between “Instagram-worthy glow” and “lights that fall in a storm.” In this guide, I’ll walk you through everything you need to know—from choosing the right lights to securing them safely and beautifully. Whether you’re a first-timer or a seasoned DIYer, by the end of this post, you’ll have a clear, step-by-step plan to hang patio string lights on pergola spaces with confidence and style. We’ll cover tools, techniques, safety tips, and even some creative ideas to make your outdoor space shine in 2026 and beyond.
Choosing the Right Patio String Lights for Your Pergola
Before you grab a ladder and start wrapping wires, it’s crucial to pick the right kind of string lights. Not all lights are created equal, and the wrong choice can lead to dim glows, frequent bulb burnouts, or even safety hazards. Here’s what to consider when selecting the best lights for your pergola setup.
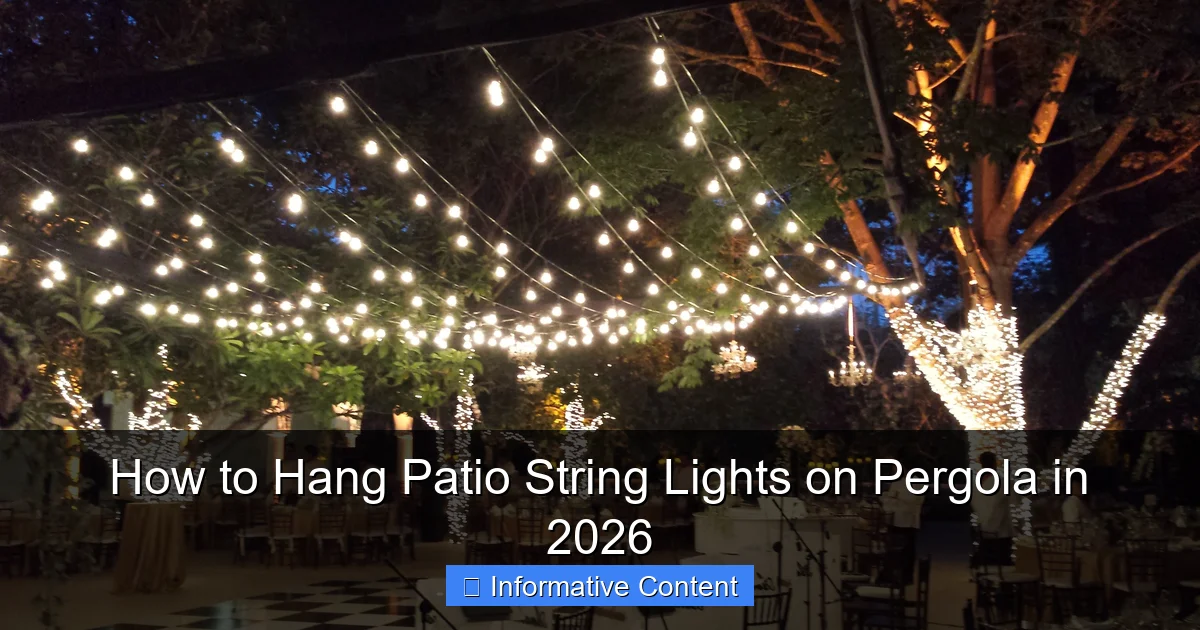
Visual guide about how to hang patio string lights on pergola
Image source: img.yardenvy.com
Types of Patio String Lights: LED vs. Incandescent
LED lights are the clear winner for most pergola installations. They’re energy-efficient, last up to 25,000 hours (that’s over 20 years with 3 hours of use per night!), and generate very little heat—ideal for wooden pergolas. Incandescent bulbs, while offering a warm, nostalgic glow, consume more power, get hot, and have shorter lifespans. For long-term use and safety, LED patio string lights are the way to go.
I once used incandescent lights on a small pergola—great ambiance, but after two summers, half the bulbs were dead. Swapping to LEDs made a huge difference. Plus, I saved on electricity and didn’t worry about scorching the wood.
Bulb Shape and Spacing
Bulbs come in various shapes: globe, Edison, mini, and fairy. Globe and Edison bulbs give a classic, vintage look—perfect for rustic or farmhouse-style pergolas. Mini and fairy lights offer a delicate, twinkling effect, great for a romantic or modern vibe.
Spacing matters too. Standard spacing is 6 to 12 inches. Closer spacing (6–8 inches) gives a denser, brighter glow—ideal for entertaining areas. Wider spacing (10–12 inches) creates a more subtle, ambient effect. I prefer 8-inch spacing for my pergola: bright enough to see, soft enough to feel cozy.
Length and Power Source
Measure your pergola before buying. You’ll want lights that cover the full span with a little slack for draping or looping. For a standard 10-foot pergola, 24 to 30 feet of lights works well. If your pergola is larger or you want a cascading effect, go longer.
Power source is another key factor. Plug-in lights are reliable but require an outdoor outlet. Solar-powered lights are great for off-grid areas but may dim in winter or after cloudy days. Battery-operated lights offer flexibility but need frequent charging. I use a mix: solar for one side, plug-in for the main area, with a timer to automate the whole setup.
Weather Resistance and IP Rating
Always check the IP (Ingress Protection) rating. For outdoor use, look for IP44 or higher. IP44 means the lights are protected against splashing water—perfect for pergolas. IP65 or IP67 is even better, especially if your area gets heavy rain or snow. Avoid anything labeled “indoor use only.”
Pro tip: Store lights in a dry place during winter, even if they’re rated for outdoor use. It extends their lifespan significantly.
Preparing Your Pergola: Safety, Layout, and Tools
Now that you’ve picked your lights, it’s time to prep. A little planning goes a long way in ensuring your lights stay up, look great, and don’t damage your pergola. Let’s break it down.
Inspect Your Pergola for Stability
Before hanging anything, check your pergola’s structure. Look for loose beams, cracked wood, or rusted metal. If you notice any damage, fix it first. You don’t want your lights pulling down a weak beam during a windstorm.
I once skipped this step and ended up with a sagging crossbeam after a storm. A $20 repair turned into a $200 fix. Lesson learned: always inspect before installing.
Plan Your Light Layout
Sketch a quick layout on paper or use painter’s tape to mark where lights will go. Common patterns include:
- Straight runs: Parallel lines across the pergola beams—simple and clean.
- Crisscross (X-pattern): Lights form an X between opposite corners—great for visual interest.
- Cascading (zigzag): Lights drape down in loops—perfect for a romantic or bohemian look.
- Canopy (grid): A full grid of lights—ideal for large pergolas or event spaces.
I love the crisscross pattern because it adds depth without being overwhelming. For a 12×12 ft pergola, I use 40 feet of lights in an X, with a small loop in the center for a “star” effect.
Gather the Right Tools and Materials
Here’s what you’ll need:
- Ladder (preferably a stable A-frame)
- Measuring tape
- Painter’s tape or chalk (for marking)
- Outdoor-rated mounting hardware (see next section)
- Extension cord (if using plug-in lights)
- Timer or smart plug (optional but highly recommended)
- Gloves (to protect your hands)
Don’t forget a helper! Even a small pergola can feel wobbly when you’re on a ladder. Having someone hold it or pass tools makes the job safer and faster.
Check Local Codes and Permits
In some areas, outdoor electrical installations may require permits—especially if you’re running wires through walls or using heavy-duty transformers. Most plug-in string lights are fine, but if you’re hardwiring or using high-voltage setups, check with your local building department. Better safe than fined!
Mounting Options: Secure, Safe, and Stylish
Now comes the fun part: actually hanging patio string lights on pergola beams. The key is using the right mounting hardware—something that holds tight, won’t damage your pergola, and blends in visually.
Outdoor-Grade Hooks and Screws
For wooden pergolas, use stainless steel or zinc-plated hooks. These resist rust and won’t stain the wood. I recommend:
- Cup hooks: Small, discreet, and perfect for light wires. Drill pilot holes first to avoid splitting the wood.
- Eye screws: Larger and stronger, ideal for heavy-duty lights or windy areas.
- J-hooks: Open at the top, so you can hang and remove lights easily.
Space hooks every 2 to 3 feet for even weight distribution. For a 10-foot span, use 4–5 hooks per line.
Adhesive Clips and Tape (For Temporary or Light Use)
If you don’t want to drill, try outdoor-rated adhesive clips (like 3M Command Outdoor Light Clips). They hold up to 2 pounds per clip and work great for lightweight LED strands. I use these for seasonal lights—easy to remove and leaves no marks.
Downside: They can fail in extreme heat, cold, or heavy rain. Not ideal for year-round installations.
Zip Ties and Cable Clips
For metal pergolas, zip ties are a lifesaver. Use UV-resistant, heavy-duty ties (at least 8 inches long). Wrap them around beams and secure the light wires. Tuck the ends in for a clean look.
Cable clips (like those from CableWhiz) attach to metal beams with screws or magnets. They’re reusable and perfect for renters or temporary setups.
Using Rope or Wire for a Floating Look
Want a more elegant, “floating” effect? Run a thin, weather-resistant nylon rope or stainless steel cable across the pergola, then clip lights to it. This spreads the weight and gives a professional look. I used this method for my friend’s wedding pergola—looked like it was done by a pro!
Tip: Use turnbuckles to tighten the rope and prevent sagging. Anchor both ends to sturdy posts or beams.
Avoid These Common Mounting Mistakes
- Nailing or stapling wires: This can damage insulation and cause shorts or fire hazards.
- Overloading beams: Don’t hang too many strands in one spot. Distribute weight evenly.
- Using indoor clips outdoors: They’ll rust or fall off in a month.
When in doubt, go for overkill on support. It’s better to have too many hooks than too few.
Step-by-Step Installation Guide
Let’s walk through the actual process of hanging your lights. This method works for most pergola types—wood, metal, or vinyl.
Step 1: Mark Mounting Points
Using your layout plan, mark where each hook or clip will go. Use painter’s tape or a pencil. For a crisscross pattern, mark diagonal lines from corner to corner. For straight runs, mark parallel lines every 2–3 feet.
Step 2: Install Mounting Hardware
Drill pilot holes for cup hooks or eye screws. Insert them by hand or with a screwdriver. For adhesive clips, clean the surface with rubbing alcohol first. Press firmly for 30 seconds.
For rope/cable systems, anchor the ends with eye bolts or heavy-duty hooks. Tighten with turnbuckles.
Step 3: Unpack and Test Your Lights
Before hanging, plug in your lights to make sure they work. I’ve had strands with dead bulbs right out of the box—better to find out now than after you’ve climbed the ladder!
If using multiple strands, connect them on the ground first. Most LED sets are end-to-end connectable. Never exceed the manufacturer’s maximum connection limit (usually 3–5 strands).
Step 4: Hang the Lights
Start at one end and work your way across. For straight runs, drape the lights over the hooks or clips. For crisscross or cascading patterns, loop them between hooks.
Keep tension even—too tight, and the wire may stretch or break; too loose, and they’ll sag or blow around.
Use zip ties or small clips to secure any loose wires or connectors. Tuck them behind beams for a clean look.
Step 5: Connect and Power Up
Run an extension cord to a GFCI-protected outdoor outlet. Use a timer or smart plug to automate on/off times. I set mine to turn on at sunset and off at 11 PM—perfect for evening use.
For solar lights, place the panel in direct sunlight, ideally facing south.
Step 6: Adjust and Fine-Tune
Step back and look. Adjust any sagging spots or uneven loops. Use additional clips or zip ties to fix droops. Trim excess zip tie ends with wire cutters.
Pro tip: Take a photo at dusk to see the full effect. You might spot areas that need more light or a different angle.
Creative Ideas and Maintenance Tips for Long-Term Beauty
Once your lights are up, it’s time to make them shine—literally and figuratively. A little creativity and regular care keep your pergola glowing for years.
Enhance with Decor and Layers
String lights alone are beautiful, but layering adds depth. Try:
- Fairy lights in glass jars: Hang them from the beams or place on tables.
- Outdoor rugs and cushions: Define the space and make it inviting.
- Plants in hanging baskets: Add greenery that frames the lights.
- Curtains or sheer fabric: Attach to the sides for privacy and a soft glow.
I added sheer white curtains to my pergola—when the wind blows, the lights shimmer through like stars in a dream.
Use Smart Controls for Convenience
Smart plugs let you control lights with your phone or voice (Alexa, Google Home). Set schedules, dim brightness, or change colors (if using RGB lights). I use a smart plug to turn on the lights when motion is detected—great for late-night snacks!
Seasonal Adjustments
Winter: If you live in a cold climate, consider taking lights down or using weatherproof covers. Or, embrace the season—add snowflake-shaped covers or blue-tinted bulbs for a winter wonderland.
Summer: Use brighter, warmer bulbs for entertaining. Add fans or misting systems to keep cool under the glow.
Maintenance: Keep Them Glowing
- Inspect annually: Check for frayed wires, loose hooks, or burnt-out bulbs.
- Clean bulbs: Wipe with a damp cloth to remove dust and pollen.
- Trim nearby branches: Prevent leaves or twigs from damaging wires.
- Store properly: Coil lights gently and store in a dry, temperature-controlled place.
I keep my lights in a labeled storage bin with silica gel packets to prevent moisture damage.
Data Table: Comparing Patio String Light Options
| Feature | LED String Lights | Incandescent String Lights | Solar String Lights |
|---|---|---|---|
| Lifespan | 25,000+ hours | 1,000–2,000 hours | 10,000+ hours (bulb), 2–3 years (battery) |
| Energy Use | Very low (5–10 watts per strand) | High (50–100 watts per strand) | Zero (solar-powered) |
| Heat Output | Minimal | High (can burn skin or wood) | Minimal |
| Best For | Long-term, year-round use | Short-term, decorative use | Off-grid, eco-friendly spaces |
| Weather Resistance | IP44 or higher (outdoor-rated) | IP44 (limited) | IP44, but panel placement matters |
| Cost (20 ft strand) | $15–$30 | $10–$20 | $20–$40 |
Final Thoughts: Light Up Your Life—Literally
Hanging patio string lights on your pergola isn’t just a home improvement project—it’s an investment in joy. That soft glow at dusk, the way it transforms your backyard into a private oasis, the smiles it brings to your guests’ faces… it’s worth every minute of effort. And the best part? You don’t need to be an electrician or a DIY expert. With the right tools, a little planning, and these step-by-step tips, anyone can do it.
As you hang patio string lights on pergola structures in 2026, remember: it’s not about perfection. It’s about creating a space where memories happen. Whether you go for a simple straight run or a dazzling crisscross canopy, let your personality shine through. Add your favorite plants, cozy furniture, or even a hammock. Make it yours.
And don’t forget to enjoy the process. I still smile every time I flip the switch and see my pergola light up. It’s not just about the lights—it’s about the moments they help create. So go ahead, grab your lights, and start building your dream outdoor space. Your future self (and your guests) will thank you.
Frequently Asked Questions
How do I hang patio string lights on a pergola without damaging the wood?
Use adhesive hooks, zip ties, or eye screws designed for outdoor use to avoid drilling into the wood. These options provide secure mounting while preserving the pergola’s structure and finish.
What’s the best way to hang string lights on a pergola for even spacing?
Measure and mark equal intervals along the pergola beams before installing hooks or clips. Use a level to ensure straight lines and consistent spacing between each light bulb for a professional look.
Can I install patio string lights on a pergola without existing anchor points?
Yes, you can add anchor points using removable adhesive hooks, tension rods, or zip ties around the pergola’s beams. For a more permanent solution, install weather-resistant eye bolts or screw hooks.
How to hang patio string lights on a pergola in a zigzag pattern?
Start by attaching hooks or clips diagonally across the pergola’s cross beams, then weave the lights back and forth between them. Secure each bend with a hook to maintain the zigzag shape.
Do I need special tools to hang string lights on a pergola?
Basic tools like a ladder, measuring tape, and a drill (for permanent hooks) are helpful, but many methods—like using adhesive clips or zip ties—require no tools at all for a quick setup.
How can I hide the cords when hanging patio string lights on a pergola?
Route cords behind beams or use cable clips to tuck them out of sight. For a cleaner look, choose lights with dark or clear cords that blend into the pergola’s structure.

