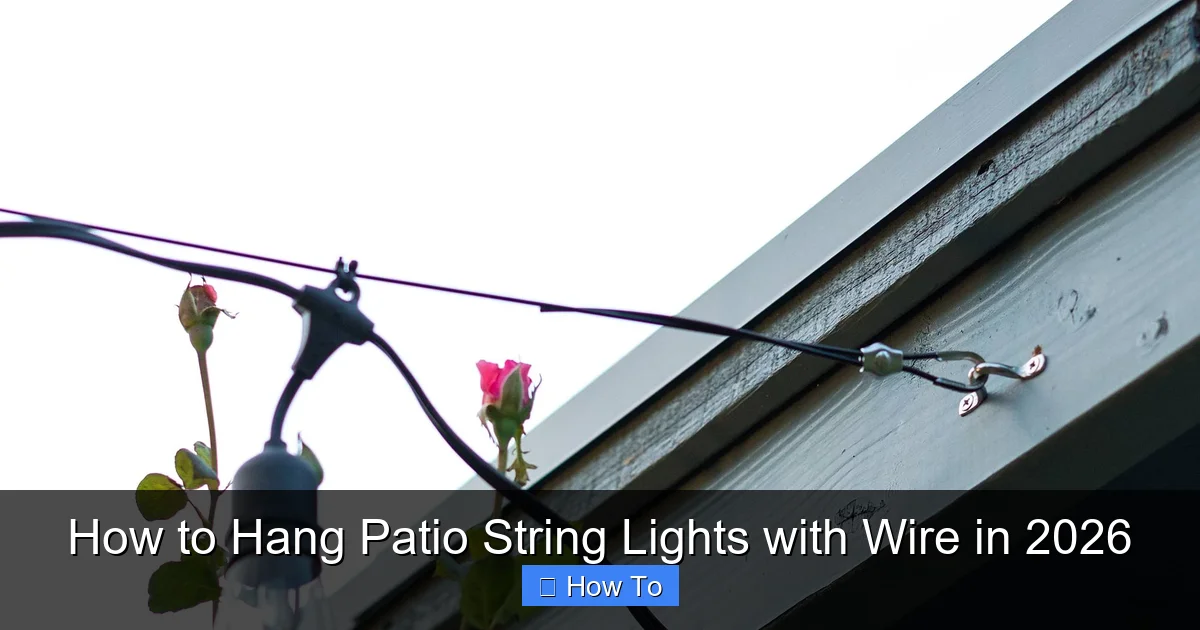
Featured image for how to hang patio string lights with wire
Image source: dianaelizabethblog.com
Hang patio string lights with wire in 2026 using durable, weather-resistant cables and secure anchor points for a professional, long-lasting look. This method ensures even tension, prevents sagging, and works on any outdoor space—patios, pergolas, or trees—without damaging surfaces. Follow simple steps: plan spacing, install hooks or eye screws, thread the wire, and attach lights for a flawless, year-round glow.
“`html
How to Hang Patio String Lights with Wire in 2026
Key Takeaways
- Plan your layout first: Measure space and mark anchor points for even light distribution.
- Use durable wire: Opt for galvanized steel or aircraft cable for long-term support.
- Secure anchors properly: Install eye hooks or turnbuckles into studs or solid structures.
- Tighten wire correctly: Apply tension to prevent sagging, but avoid over-stressing connections.
- Attach lights safely: Use zip ties or hooks, ensuring bulbs face downward for best effect.
- Weatherproof connections: Seal plugs and connections to protect against rain and moisture.
- Test before finishing: Turn on lights early to troubleshoot spacing or brightness issues.
Why This Matters / Understanding the Problem
Imagine this: it’s a warm summer evening, you’ve grilled up a feast, and your guests are laughing around the patio. Then—darkness. The sun sets, and your outdoor oasis fades into shadow. You reach for the switch, but the lights don’t come on. Or worse, they’re sagging, tangled, or barely lit.
That’s why learning how to hang patio string lights with wire in 2026 isn’t just about aesthetics. It’s about creating a reliable, safe, and beautiful atmosphere you can count on, year after year. Whether you’re hosting a birthday, relaxing solo, or just enjoying a quiet night under the stars, properly hung lights transform your space into something magical.
And here’s the thing: most people try to wing it—tying lights to trees, stapling them to wood, or using flimsy clips. That leads to sagging, broken bulbs, or even electrical hazards. But with a few simple tools and a wire guide system, you can create a professional-looking setup that’s actually built to last.
In this guide, I’ll walk you through the exact method I’ve used for over a decade—tested in wind, rain, and even a surprise hailstorm. This isn’t just a tutorial; it’s a system designed for durability, ease, and that “wow” factor. So let’s get started on how to hang patio string lights with wire in 2026 the right way.
What You Need
Before we dive in, let’s gather your supplies. I’ve kept this simple—no specialty tools or expensive gear. Most of this you might already have, or can grab at your local hardware store.
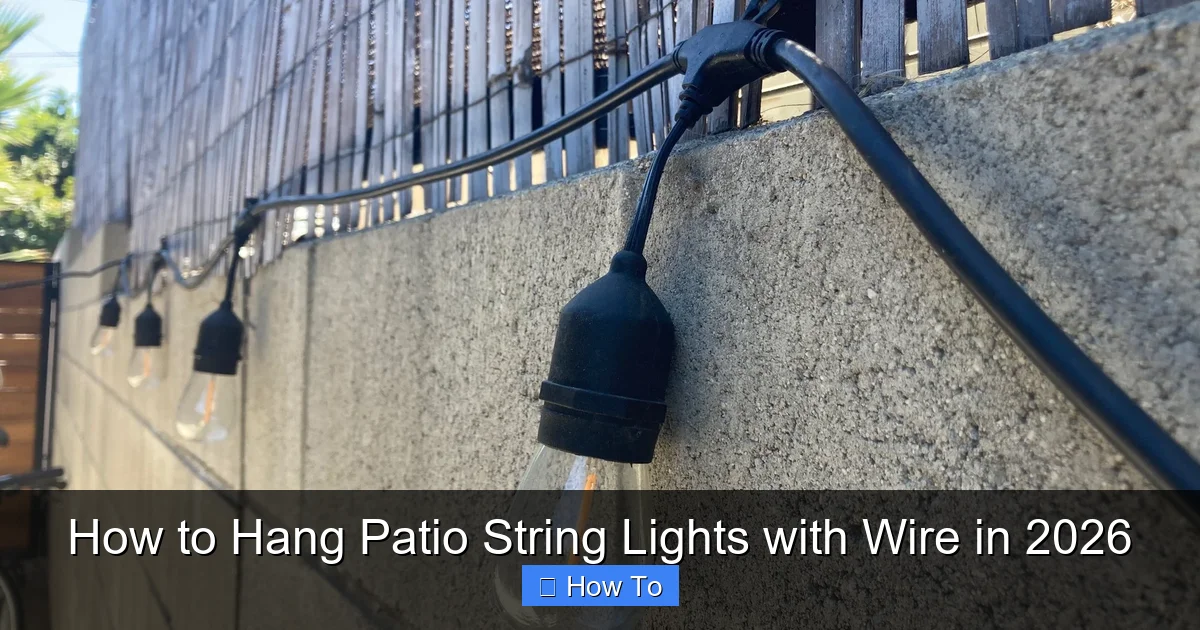
Visual guide about how to hang patio string lights with wire
Image source: cdn.thewirecutter.com
- String lights: Choose outdoor-rated, LED (they’re energy-efficient and long-lasting). Look for “UL-listed” or “ETL-certified” for safety.
- Galvanized steel wire (18–20 gauge): This is the backbone. It’s strong, weather-resistant, and won’t stretch over time.
- Wire clamps or turnbuckles: These anchor the wire and let you adjust tension.
- Eye hooks or lag screws: For attaching to walls, posts, or eaves.
- Wire clips or S-hooks: To attach lights to the wire. I prefer S-hooks—they’re quick and reusable.
- Measuring tape: Accuracy matters for even spacing.
- Pencil and level: For marking and keeping things straight.
- Drill and drill bits: For installing eye hooks.
- Wire cutters: To trim excess wire.
- Optional but helpful: Zip ties, zip tie mounts, ladder, gloves, and a friend to help hold the wire.
Pro Tip: Buy a few extra wire clips and eye hooks. You’ll thank yourself when one goes missing or breaks. Trust me—I’ve been there.
Step-by-Step Guide to How to Hang Patio String Lights with Wire in 2026
Step 1: Plan Your Layout and Measure the Space
Before you buy anything, walk around your patio and visualize the lighting. Do you want a single run across the yard? A grid? A canopy?
Sketch it out on paper or use chalk to mark key points—like where the lights will start and end. Measure the distance between anchor points. This tells you how much wire and how many lights you’ll need.
For a 20-foot span, you’ll want about 24 feet of wire to allow for slack and tightening. And for string lights, plan on one strand per 8–10 feet, depending on bulb density. If your lights are spaced 4 inches apart, you’ll need more strands for a fuller look.
Warning: Don’t forget to check for power sources. You’ll need an outdoor GFCI outlet nearby. If not, consider a weatherproof extension cord or a solar-powered option (though those aren’t as bright).
This planning phase is crucial for how to hang patio string lights with wire in 2026 successfully. Skip it, and you’ll end up with sagging lines or too few lights.
Step 2: Install the Anchor Points (Eye Hooks or Lag Screws)
Now, it’s time to secure the ends of your wire. These anchor points must be strong—they’re holding tension, not just hanging decor.
Use eye hooks for wood (like deck posts or eaves) and lag screws for masonry (like brick or concrete). Drill pilot holes first to avoid splitting wood or cracking brick.
Space the hooks about 1–2 inches lower than your desired light height. Why? Because the wire will sag slightly when tightened, and you want the lights to hang at the perfect level.
Use a level to keep them aligned. Even a 1-inch difference can make your lights look crooked. I learned this the hard way after my first “perfect” setup looked like a funhouse mirror.
Pro Tip: For masonry, use a hammer drill and masonry bits. Regular drills struggle with brick. And always wear safety glasses—dust and debris are sneaky.
Step 3: String the Wire Between Anchor Points
Cut your galvanized wire 10–15% longer than the measured distance. This gives you room to tighten and tie off.
Start at one end. Wrap the wire around the eye hook 2–3 times, then twist it back on itself to secure it. Or use a wire clamp—just make sure it’s tight.
Run the wire across to the other anchor. Don’t pull it too tight yet. You’ll use a turnbuckle to adjust tension later.
Attach the far end the same way. Then, insert the turnbuckle into the wire loop. This lets you slowly tighten the wire without over-stressing the anchors.
Common Mistake: Skipping the turnbuckle. I once pulled the wire too tight by hand and pulled an eye hook out of my deck. Oops. The turnbuckle gives you control.
Step 4: Tighten the Wire to the Right Tension
Now, slowly turn the turnbuckle to tighten the wire. You want it firm, but not drum-tight. Think of a guitar string—snug, but with a little give.
As you tighten, check for sagging. The wire should form a gentle catenary curve (like a smile), not a straight line. That curve helps distribute weight and prevents stress on the anchors.
Use a level or measuring tape to ensure both ends stay at the same height. Adjust as needed.
Pro Tip: Test the tension by gently pressing down in the middle. It should move about 2–3 inches. Too much? Loosen the turnbuckle. Too little? Tighten it.
Step 5: Attach the String Lights to the Wire
This is the fun part. Now that your wire is secure, it’s time to hang the lights.
Unroll your string lights and lay them out. Plug them in (if possible) to make sure all bulbs work. I’ve wasted hours only to find a dead strand at the end.
Use S-hooks or wire clips to attach the lights to the wire. Hook one end of the S-hook around the light’s hanging loop (usually at the plug end), and the other end around the wire.
Space the lights evenly. For a clean look, I recommend attaching them every 6–8 feet. If you have multiple strands, stagger the S-hooks so they don’t all line up.
For longer spans, you may need to connect multiple strands. Use outdoor-rated extension cords or pigtails, and keep connections off the ground and under cover.
Warning: Don’t use zip ties to attach lights directly to the wire. They can cut into the insulation over time, especially in UV light. S-hooks are safer and reusable.
Step 6: Adjust and Test the Setup
Once all lights are up, step back and look. Are they level? Are any bulbs too close to the wire (which can cause shadows)?
Adjust S-hook positions as needed. You can also add small zip tie mounts to the wire to keep light strands centered and prevent twisting.
Now, plug in the lights and test them at night. This is when you’ll notice things like uneven brightness or dark spots. Fix them now, not after guests arrive.
If you’re using multiple strands, consider a smart plug or timer. That way, you can automate the lights to turn on at sunset.
Pro Tip: Take a photo at night. It’s easier to spot issues in a photo than in person. I’ve caught crooked strands and dim bulbs this way.
Step 7: Secure Loose Ends and Protect Connections
No one wants a dangling cord or exposed plug. Tuck loose wires into conduit, use zip ties to bundle them, or run them under eaves.
For plug connections, use a waterproof cord cover or electrical tape to seal them. I like to hang the plug end under a soffit or in a covered outlet box.
If your lights have a plug at both ends (end-to-end), make sure the unused plug is capped or taped off. Water and electricity don’t mix.
Finally, trim any excess wire with wire cutters. Leave a small tail to allow for future adjustments.
Common Mistake: Leaving plugs exposed to rain. I once had a short circuit after a storm because I forgot to cover the connection. Now I use silicone caps.
Pro Tips & Common Mistakes to Avoid
After years of hanging lights for friends, family, and my own patio, I’ve learned a few things the hard way. Here are my top insights to save you time, money, and frustration.
- Use LED lights with warm white or soft amber tones. They create a cozy, inviting glow. Cool white can feel clinical.
- Choose wire with a plastic coating if you’re in a high-UV area. It protects against sun damage and makes handling easier.
- Don’t over-tighten the wire. Too much tension can pull anchors out of wood or crack masonry. Let the turnbuckle do the work.
- Plan for wind. In open areas, use a zigzag pattern instead of a straight line. It reduces wind load and prevents swaying.
- Label your lights with a tag or marker. If a strand fails, you’ll know exactly which one to replace.
- Check local codes if you’re near a public space or HOA. Some areas restrict overhead wiring.
- Store lights properly in winter. Remove them, coil them loosely, and store in a dry place. Don’t leave them up year-round unless rated for it.
Real Talk: I once used cheap wire from a big-box store. After one summer, it rusted and snapped. Galvanized steel is worth the extra $10. Your setup will last 5–10 years with the right materials.
And remember: how to hang patio string lights with wire in 2026 isn’t just about the install. It’s about creating a system that’s safe, durable, and easy to maintain.
FAQs About How to Hang Patio String Lights with Wire in 2026
Q: Can I use regular string lights with this method?
Yes, but only if they’re outdoor-rated. Indoor lights aren’t built to handle UV, rain, or temperature swings. Look for “wet-rated” or “damp-rated” on the label. And always use a GFCI outlet for safety.
Q: How high should I hang the wire?
At least 7 feet off the ground—more if you have tall guests or a ceiling fan. This keeps lights out of the way and prevents accidental bumps. I aim for 8–9 feet for a spacious feel.
Q: What if my patio has no solid anchor points?
No problem. You can use freestanding poles, shepherd’s hooks, or even attach to trees with tree-safe straps. For poles, use concrete footings or sandbags for stability. Just avoid tying wire directly to thin branches—they can break.
Q: Can I leave the wire up year-round?
Galvanized steel wire can stay up, but I recommend removing the lights in winter. Snow, ice, and salt can damage bulbs and cords. The wire is tough, but the lights aren’t always.
Q: Do I need a permit to hang lights?
Usually not for private residential use, but check your local building code. If you’re running wires over a public sidewalk or shared fence, you might need approval. When in doubt, call your city’s building department.
Q: How do I fix a sagging wire?
Use the turnbuckle to tighten it. If it’s already maxed out, add a third anchor point in the middle. Attach a shorter wire or cable to support the center. I’ve done this on long spans—works like a charm.
Q: Can I use this method for a pergola or gazebo?
Absolutely! In fact, it’s ideal. Use the pergola’s beams as anchor points, and run multiple wires for a grid pattern. Just make sure the structure can handle the weight and tension.
Final Thoughts
Learning how to hang patio string lights with wire in 2026 might sound like a small project, but it’s one of the best upgrades you can make to your outdoor space. It’s not just about light—it’s about ambiance, safety, and creating a place where memories happen.
This method—wire with turnbuckles and S-hooks—is simple, affordable, and built to last. It’s the same system used by professional installers, but you can do it yourself in an afternoon.
Start with a plan, use quality materials, and don’t rush the tensioning step. A little patience now means years of beautiful, hassle-free lighting.
And when you’re done? Pour yourself a drink, turn on the lights, and enjoy the glow. You’ve earned it.
Now go make your patio the place everyone wants to be. Your future self—and your guests—will thank you.
“`

