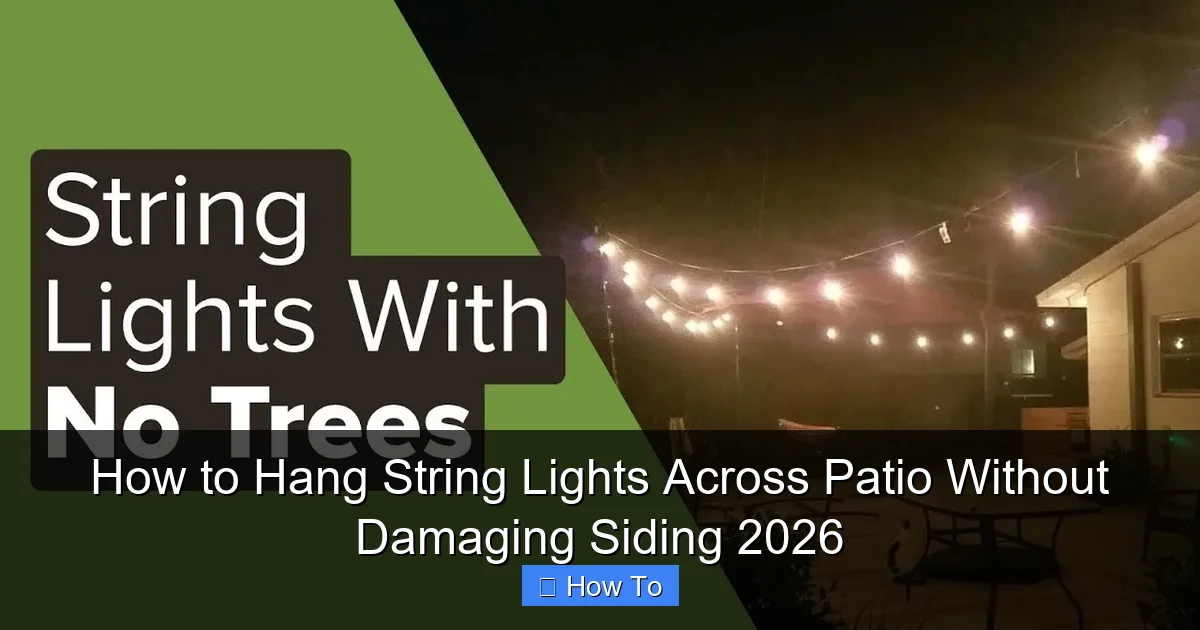
Featured image for how to hang string lights across patio without damagin siding
Image source: i.ytimg.com
Hang string lights securely across your patio without harming your siding by using removable, damage-free solutions like adhesive-backed hooks, tension rods, or freestanding poles designed for outdoor use. Choose weather-resistant, low-profile hardware and follow spacing guidelines to ensure a safe, stylish setup that preserves your home’s exterior in 2026 and beyond.
“`html
How to Hang String Lights Across Patio Without Damaging Siding 2026
Key Takeaways
- Use removable hooks: Install damage-free adhesive or suction hooks for easy, safe string light setup.
- Opt for tension rods: Stretch lights between walls without nails or drilling.
- Try clip-on hangers: Secure lights with siding clips designed for gutters or shingles.
- Choose weighted bases: Anchor lights with freestanding stands for no-wall-contact setup.
- Inspect siding first: Check for weak spots to avoid accidental damage during installation.
- Use LED string lights: Lightweight and low-heat, they reduce strain on hanging hardware.
Why This Matters / Understanding the Problem
Let’s be real—nothing beats the cozy, magical glow of string lights on a summer night. Whether you’re hosting a backyard barbecue or just enjoying a quiet evening with a glass of wine, those twinkling lights instantly transform your patio into a personal retreat.
But here’s the catch: if you’re not careful, installing them can leave unsightly holes, cracked vinyl siding, or even water damage behind. I learned this the hard way after my first attempt left my vinyl siding with permanent screw marks and a few choice words from my HOA. Oops.
That’s why how to hang string lights across patio without damaging siding 2026 isn’t just a handy skill—it’s a must. The good news? With the right tools and a little know-how, you can achieve a stunning, professional-looking setup without harming your home’s exterior. No drilling. No damage. Just beautiful light.
This guide walks you through the entire process—from planning to plugging in—so your patio glows without a single scratch on your siding.
What You Need
Before you start, gather your supplies. The key to hanging string lights across patio without damaging siding 2026 is using non-invasive, removable hardware. Here’s your shopping list:
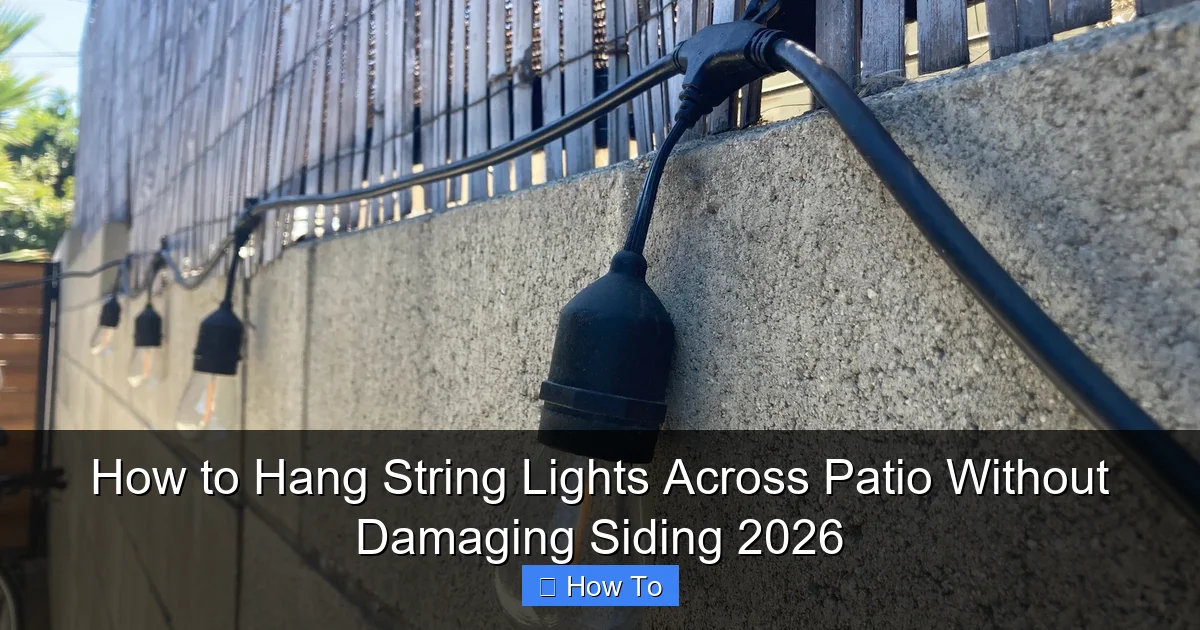
Visual guide about how to hang string lights across patio without damagin siding
Image source: cdn.thewirecutter.com
- String lights (LED, outdoor-rated): Choose weatherproof, shatterproof bulbs. Solar-powered ones are great for low-power areas.
- Adhesive outdoor mounting clips or hooks: Look for 3M outdoor-rated, removable adhesive clips (e.g., Command Outdoor, Gorilla Mounting Squares).
- Adjustable tension rods or telescoping poles: For spanning gaps between structures (e.g., house to pergola).
- Zip ties (UV-resistant): Use for securing lights to poles or railings.
- Extension cord (outdoor-rated, GFCI-protected): Always prioritize safety.
- Measuring tape: Helps plan spacing and avoid overstretching.
- Ladder (if needed): Use a stable, non-slip step ladder.
- Optional: Gutter hooks, S-hooks, or magnetic mounts: Handy for metal siding or gutters.
Pro tip: Skip the nails, screws, or staple guns. They might seem faster, but they’re the #1 cause of siding damage—and they’re not worth the risk.
Step-by-Step Guide to How to Hang String Lights Across Patio Without Damaging Siding 2026
Step 1: Plan Your Layout (The Secret to a Flawless Setup)
Before touching a single clip, sketch your patio layout. Decide where the lights will go: from house to pergola, between two trees, or in a zigzag pattern above your dining area.
Use your measuring tape to calculate the total distance. Most string lights come in 24- or 48-foot lengths, so you may need to connect multiple strands. Just remember: don’t exceed the manufacturer’s recommended max connection length (usually 3–5 strands). Overloading circuits is a fire hazard.
Mark key anchor points—where the lights will start and end. For example:
- From the side of your house (near an outdoor outlet) to the corner of a pergola.
- From a fence post to a nearby tree.
Pro tip: Use painter’s tape to temporarily mark anchor points. This helps you visualize the layout and adjust before committing.
Step 2: Choose the Right Mounting Method (Match Your Siding Type)
Not all siding is created equal. The how to hang string lights across patio without damaging siding 2026 method depends on your home’s exterior. Here’s how to pick the best approach:
- Vinyl siding: Use adhesive clips with removable, outdoor-rated adhesive. Avoid anything that requires drilling. I love the 3M Outdoor Heavy Duty clips—they hold up to 5 lbs and come off cleanly.
- Wood or stucco: Adhesive clips still work, but you can also use small, removable hooks (like S-hooks) on gutters or trim. Just make sure they’re not too tight.
- Metal or aluminum siding: Try magnetic clips or adhesive hooks. Magnetic mounts are a game-changer if your siding is magnetic (test with a fridge magnet first).
- No siding? (e.g., brick, stone): Use tension rods, freestanding poles, or zip ties on railings. For brick, adhesive clips with high-strength adhesive (like Gorilla Mounting Squares) can work—just clean the surface first.
Warning: Never use double-sided tape, duct tape, or glue. They leave residue or fall off in rain.
Step 3: Install Anchor Points (Start with the House Side)
Begin by installing the first anchor point near your power source. This is usually the side of your house, close to an outdoor GFCI outlet.
Here’s how to attach the clip:
- Clean the siding with rubbing alcohol and a lint-free cloth. Let it dry.
- Remove the adhesive backing from the clip. Press it firmly onto the siding for 30 seconds.
- Wait 1 hour before hanging the light (this ensures the adhesive bonds properly).
For vinyl siding, place the clip just above the seam (not on it). This prevents stress on the panel. If you’re using an S-hook on a gutter, loop it gently—don’t force it.
Repeat this for the second anchor point (e.g., pergola, tree, or pole).
Step 4: Span the Distance (Use Tension or Poles)
If your patio has a gap (e.g., house to pergola), you’ll need a way to span it without sagging. Here are two options:
Option A: Adjustable Tension Rod
Ideal for gaps under 10 feet. Place a telescoping tension rod between two structures (e.g., house and pergola). Tighten it until it’s secure. Then, hang the string lights on the rod using zip ties or clips.
Option B: Freestanding Pole or Shepherd’s Hook
For wider gaps or uneven terrain, use a metal or wooden pole. Drive it into the ground (if allowed) or use a weighted base. Attach a hook at the top and hang the lights from there.
Pro tip: Add a third anchor point in the middle for long runs (over 15 feet). This prevents sagging and keeps the lights taut.
Step 5: Hang the Lights (Go Slow, Stay Taut)
Now for the fun part! Start at the power source and work your way to the other end.
Here’s how to hang the lights without damaging anything:
- Attach the first bulb socket to the house-side clip. Use a small zip tie or the built-in hook.
- Unroll the lights slowly, keeping them taut. Don’t pull too hard—LED strands can break if stretched.
- Secure the lights every 12–18 inches with adhesive clips. Place clips on the cord (not the bulb) to avoid stress.
- For curves or corners, use extra clips to guide the lights smoothly.
- At the end, attach the final socket to the last anchor point.
For a draped or “twinkle” effect, let the lights hang in gentle curves. But don’t let them touch the ground—moisture and debris can damage them.
Warning: Never hang lights directly on siding without clips. The weight can cause warping or discoloration over time.
Step 6: Connect and Test (Safety First)
Before you celebrate, test the lights. Plug in the extension cord and flip the switch.
If the lights don’t turn on:
- Check the outlet (use a lamp to test).
- Inspect connections—make sure plugs are fully seated.
- Look for damaged bulbs or frayed cords.
For multiple strands, connect them end-to-end. Use waterproof connectors if they’ll be exposed to rain.
Pro tip: Use a smart plug or timer to automate the lights. Set them to turn on at sunset and off at bedtime—no more forgetting to unplug!
Step 7: Weatherproof and Secure (For Year-Round Use)
If you want to keep the lights up year-round, add extra protection:
- Wrap connections with electrical tape or use weatherproof caps.
- Use UV-resistant zip ties and clips to prevent brittleness.
- Trim nearby branches to avoid rubbing.
- During storms, unplug the lights or use a surge protector.
For seasonal setups, take them down after the holidays. Store them in a dry, cool place—coiled loosely in a box.
Pro Tips & Common Mistakes to Avoid
Pro Tip #1: Test adhesive clips on a hidden area first. Some vinyl siding reacts poorly to adhesives. If it lifts, switch to a tension rod or pole.
Pro Tip #2: Use “floating” anchors for tricky spots. For example, hang a small hook from a gutter or use a magnetic clip on metal trim.
Pro Tip #3: Buy extra clips. You’ll need them for corners, curves, or future repairs.
Common Mistake #1: Overstretching the lights. This can break wires or pop bulbs. Always leave a little slack.
Common Mistake #2: Ignoring weight distribution. Heavy bulbs (like Edison-style) need more support. Use clips every 6–8 inches.
Common Mistake #3: Using indoor lights outdoors. They’re not rated for moisture or UV exposure. Stick to outdoor-rated, shatterproof LED strands.
Common Mistake #4: Hanging lights too low. Aim for 7–8 feet above the ground. This keeps them out of the way and reduces tripping hazards.
One last thing: if your siding is old or brittle, play it safe. Use freestanding poles or hang lights from trees or railings. It’s better to have a slightly different layout than damaged siding.
FAQs About How to Hang String Lights Across Patio Without Damaging Siding 2026
Q: Can I use nails or screws to hang string lights on vinyl siding?
A: No. Nails and screws can crack or warp vinyl siding. They also create entry points for water, which can rot the underlying structure. Stick to adhesive clips, tension rods, or poles. The how to hang string lights across patio without damaging siding 2026 rule is: if it requires drilling, skip it.
Q: Will adhesive clips damage my siding when I remove them?
A: Not if you use the right ones. Look for “removable” or “clean-release” adhesive (like 3M Outdoor Command). To remove, gently warm the adhesive with a hairdryer (low heat) and peel slowly. Never pull straight off—this can leave residue or lift the siding.
Q: How do I hang lights on a patio with no nearby structures?
A: Use freestanding poles, shepherd’s hooks, or tension rods between trees. You can also install a small pergola or arbor for a permanent anchor point. For open patios, consider ground-mounted poles with weighted bases.
Q: Can I connect multiple strands of string lights?
A: Yes, but check the manufacturer’s max connection limit. Most outdoor LED strands can be connected 3–5 times. Exceeding this can overload the circuit and cause overheating. Always use outdoor-rated extension cords.
Q: What if my patio has uneven terrain?
A: Use adjustable poles or tension rods with height flexibility. For sloped areas, hang lights from trees, railings, or install a series of poles at different heights. The key is keeping the lights taut and evenly spaced.
Q: Are solar-powered string lights a good option?
A: Yes, for low-power areas like small patios or shaded spots. They’re eco-friendly and don’t need outlets. But they’re dimmer than plug-in lights and may not work well in cloudy climates. Use them for ambiance, not task lighting.
Q: How do I prevent sagging in long light runs?
A: Add a third anchor point in the middle. Use a tension rod, pole, or tree as a support. You can also hang a lightweight cable (like picture wire) between the two main anchors and attach the lights to it with small clips.
Final Thoughts
Hanging string lights across your patio shouldn’t mean sacrificing your siding’s integrity. With the right approach, you can create a stunning, damage-free setup that lasts for years.
The secret? Plan your layout, use non-invasive hardware, and take your time. Whether you’re using adhesive clips, tension rods, or freestanding poles, the how to hang string lights across patio without damaging siding 2026 method is all about working with your home, not against it.
So grab your lights, clean those clips, and get ready for magical evenings under the stars. Just remember: safety first, aesthetics second, and never—ever—drill into vinyl siding.
Now go light up that patio. Your future self (and your guests) will thank you.
“`

