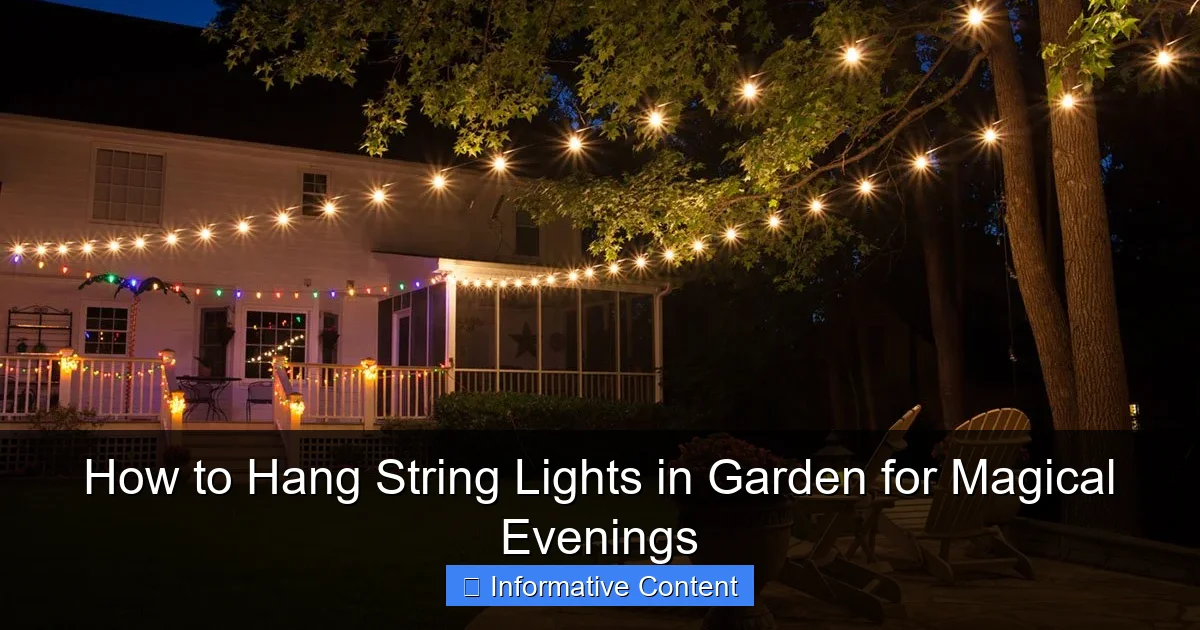
Featured image for how to hang string lights in garden
Image source: houseilove.com
Transform your garden into a magical retreat by securely anchoring string lights to trees, fences, or poles using weather-resistant hooks or zip ties. Plan a balanced layout with even spacing and connect lights to outdoor-rated extension cords for safety and ambiance. For a professional finish, conceal wires and use dimmers or timers to control the mood effortlessly.
Key Takeaways
- Plan your layout first: Sketch light placement to avoid over- or under-lighting key areas.
- Use durable fixtures: Choose weatherproof hooks or poles for long-lasting, safe installations.
- Anchor securely: Drive stakes deep into soil or use zip ties on sturdy branches.
- Keep cords hidden: Tuck wires along paths or under mulch for a clean look.
- Opt for LEDs: Energy-efficient bulbs last longer and reduce fire risk in dry gardens.
- Test before finalizing: Check brightness and connections while adjusting for perfect ambiance.
📑 Table of Contents
- The Magic of Garden String Lights
- Choosing the Right String Lights for Your Garden
- Planning Your Layout for Maximum Impact
- Tools and Materials You’ll Need
- Step-by-Step Guide to Hanging String Lights
- Common Mistakes and How to Avoid Them
- Lighting Ideas and Inspirations
- Final Thoughts: Light Up Your Life
The Magic of Garden String Lights
Picture this: It’s a warm summer evening. You’re outside, barefoot on the grass, sipping a cool drink as the sun dips below the horizon. Suddenly, your garden transforms—tiny glowing orbs appear among the trees, along the fences, and above your patio. The soft, warm light casts a golden glow over everything, turning your outdoor space into a dreamy, intimate retreat. That’s the magic of hanging string lights in your garden.
String lights aren’t just for the holidays. When used thoughtfully, they can elevate your outdoor living experience all year round. Whether you’re hosting a backyard barbecue, enjoying a quiet night with your partner, or simply unwinding after a long day, the right lighting sets the mood. But let’s be honest—how you hang them matters. Done poorly, they can look messy, saggy, or even unsafe. Done right? They create a scene straight out of a fairy tale.
In this guide, I’ll walk you through every step of the process—from choosing the right lights to securing them safely and beautifully. I’ve made plenty of mistakes (like that time I used duct tape on a tree and left sticky residue for months), so you don’t have to. Whether you have a sprawling backyard or a cozy balcony garden, this guide will help you create a magical ambiance with confidence.
Choosing the Right String Lights for Your Garden
Before you start hammering nails or tying knots, take a moment to pick the right kind of string lights. Not all lights are created equal, and choosing the wrong type can lead to frustration, wasted money, and a less-than-stellar result. Here’s what to consider.
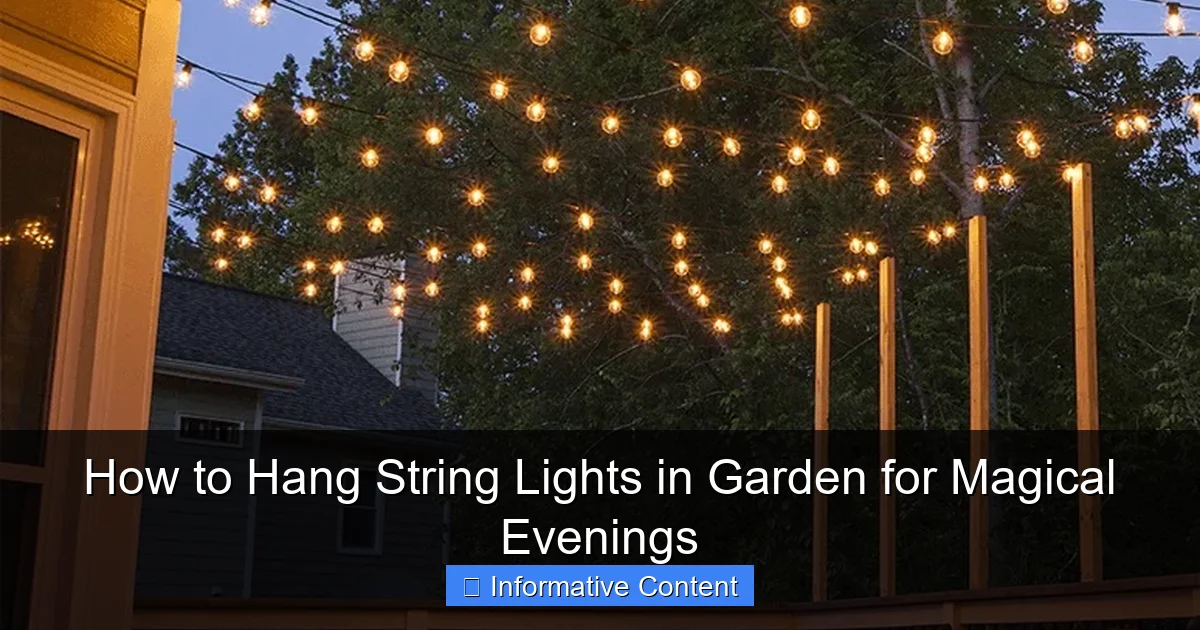
Visual guide about how to hang string lights in garden
Image source: kanglight.com
Types of String Lights
- LED String Lights: These are the most popular for gardens—and for good reason. They’re energy-efficient, last up to 25,000 hours, produce very little heat, and come in a wide range of styles. Look for warm white (2700K–3000K) for a cozy, inviting glow. Cool white can feel clinical; avoid it unless you’re going for a modern, minimalist look.
- Solar-Powered Lights: Great for off-grid areas or places without outdoor outlets. They charge during the day and turn on automatically at dusk. However, they’re often dimmer than plug-in models and may not last all night in winter. Ideal for accent lighting or short-term setups.
- Plug-In (Mains-Powered) Lights: Brighter and more reliable than solar. Perfect for large installations or areas where you want consistent, long-lasting light. Just make sure you have access to an outdoor-rated GFCI outlet.
- Fairy Lights (Micro LEDs): Tiny, delicate, and perfect for wrapping around branches or draping over shrubs. They’re subtle and romantic—ideal for creating a whimsical atmosphere.
- Edison-Style Bulbs: These vintage-style bulbs with exposed filaments give off a warm, industrial-chic glow. They’re heavier and more expensive, but they’re stunning when hung over a dining area or pergola.
Weather Resistance and Durability
Your garden lights need to survive rain, wind, UV exposure, and temperature swings. Look for:
- IP Rating: Aim for IP44 or higher. This means the lights are protected against splashing water and dust. IP65 is even better for exposed areas.
- UV-Resistant Casing: Prevents yellowing and cracking from sun exposure.
- Heavy-Duty Wire: Thicker cords are less likely to fray or break. Avoid thin, flimsy wires—they’re a recipe for tangles and frustration.
Length, Spacing, and Brightness
Measure your space first. You don’t want to end up with a 10-foot strand for a 30-foot run. Most string lights come in 25, 50, or 100-foot lengths. Consider:
- Bulb Spacing: Closer bulbs (every 3–6 inches) create a denser, more dramatic effect. Wider spacing (8–12 inches) feels more relaxed and natural.
- Lumens: For ambient garden lighting, 100–200 lumens per bulb is plenty. More than that can be overkill and wash out the cozy vibe.
- Connectable Strands: Many brands allow you to link multiple strands end-to-end. Just don’t exceed the manufacturer’s recommended total length (usually 2–3 strands) to avoid overloading the circuit.
Pro Tip: Buy one extra strand. You’ll inevitably miscalculate or need a little extra for a tight corner. It’s better to have too much than not enough.
Planning Your Layout for Maximum Impact
Great lighting starts with a great plan. You wouldn’t build a house without blueprints—don’t hang lights without a vision. A well-thought-out layout ensures your lights enhance the space, not overwhelm it.
Assess Your Garden’s Structure
Walk around your garden and note:
- Existing Features: Trees, fences, pergolas, railings, walls, and posts are natural anchor points. These are your best friends when hanging lights.
- Open Spaces: If you have a large open area with no structures, you’ll need to create support points (more on that later).
- Traffic Flow: Avoid placing lights where people walk or sit. You don’t want guests ducking under low-hanging strands or getting tangled in cords.
Choose a Hanging Style
Different layouts create different moods. Here are a few popular options:
- Canopy Effect: Hang lights horizontally between trees or posts to create a “ceiling” of light. This works beautifully over a dining table or seating area. Use a zigzag or crisscross pattern for added depth.
- Vertical Draping: Hang lights from the top of a pergola, fence, or tree down to the ground. This creates a curtain of light—perfect for defining a space or adding drama.
- Wrapped Around Trees: Wrap lights around trunks and branches for a magical, forest-like feel. Start at the base and work upward in a spiral. Use zip ties or garden wire to secure (more on that below).
- Along Pathways: Line garden paths with low-hanging lights or stake-mounted fairy lights. This adds safety and charm.
- Fence or Wall Accents: Hang lights along a fence or wall in a grid or wave pattern. This is great for small gardens or urban backyards.
Sketch It Out (Yes, Really)
Grab a piece of paper or use a garden planning app (like SketchUp Free or iScape) and sketch your layout. Include:
- Where each strand starts and ends
- How many strands you need
- Where the power source is
- Any obstacles (e.g., a grill, planter, or swing set)
Real-Life Example: In my backyard, I have two mature maple trees about 15 feet apart, with a pergola in the center. I decided on a canopy layout: I ran three parallel strands between the trees, then added a crisscross pattern over the pergola. The result? A cozy, intimate dining area that feels like a secret garden at night.
Test Before You Install
Once you’ve mapped it out, lay the lights out on the ground (or temporarily hang them with clips or tape) to see how they look. Adjust spacing, height, and direction. This saves you from making costly mistakes later.
Tools and Materials You’ll Need
You don’t need a full workshop, but having the right tools makes the job easier and safer. Here’s my go-to list for hanging string lights in your garden:
Essential Tools
- Measuring Tape: To confirm distances and ensure even spacing.
- Stakes or Markers: Use garden stakes or flags to mark anchor points before installation.
- Drill and Drill Bits: For installing hooks or screws into wood or masonry.
- Ladder: A sturdy, non-slip ladder—especially for reaching high branches or pergolas.
- Work Gloves: Protect your hands from rough surfaces and sharp tools.
- Outdoor Extension Cord (if needed): Use a heavy-duty, weatherproof cord rated for outdoor use. Never use indoor cords outside.
- GFCI Outlet Tester: Ensures your outdoor outlet is properly grounded and safe.
Fastening Hardware
- Outdoor Hooks: S-hooks, cup hooks, or eye hooks work well for wood, fences, and pergolas. Look for stainless steel or galvanized to resist rust.
- U-Shaped Staples or Cable Clips: For securing lights to wooden fences or posts. Choose ones designed for outdoor use.
- Zip Ties (Releasable): Great for trees, railings, and temporary setups. Use black or green to blend in.
- Garden Wire or Paracord: For wrapping lights around trees or creating custom supports. Choose UV-resistant options.
- Concrete Anchors and Screws: For masonry walls or brick. Use plastic anchors for lighter loads.
- Turnbuckles or Tensioners: These help keep long horizontal runs taut and prevent sagging. A game-changer for canopy setups.
Optional (But Helpful) Extras
- Light Clips: Special clips designed for string lights. They’re easy to install and remove.
- Remote Timer or Smart Plug: Automate your lights to turn on at dusk and off at bedtime. Saves energy and adds convenience.
- Light Hangers or Pulleys: For very high installations. They let you raise and lower lights without a ladder.
Pro Tip: Buy a few extra hooks, clips, and zip ties. You’ll need them for adjustments or repairs.
Step-by-Step Guide to Hanging String Lights
Now for the fun part—actually hanging the lights! Follow these steps for a clean, safe, and beautiful installation.
Step 1: Install Anchor Points
Start by installing your fastening hardware. This is the foundation of your lighting setup.
- For Trees: Use zip ties or garden wire to attach hooks or loops to strong, stable branches. Avoid drilling into live wood—it can damage the tree. If you must, use a small pilot hole and stainless steel hardware.
- For Fences and Pergolas: Screw in S-hooks or eye hooks every 6–8 feet. Space them evenly for a clean look. Use a level to keep them straight.
- For Walls or Masonry: Drill pilot holes and insert plastic anchors. Screw in hooks or brackets. Use a stud finder for wood-framed walls.
- For Open Spaces: Install temporary or permanent posts (like 4×4 pressure-treated wood or metal poles). Bury them at least 18 inches deep for stability.
Step 2: Run the Lights
Now, attach the lights. Work from one end to the other.
- Start at the power source. Plug in the first strand to test it before hanging.
- Hang each bulb or socket into the hook, clip, or loop. For canopy layouts, use turnbuckles at the ends to keep the line taut.
- For wrapped trees, start at the base and spiral upward. Secure every 6–8 inches with zip ties or wire.
- For draping styles, hang the top end first, then let the strand hang freely before securing the bottom.
Step 3: Secure and Tidy Cords
Messy cords ruin the magic. Keep them organized.
- Use cable clips or zip ties to secure excess cord along the anchor points.
- Coil and store any leftover cord in a waterproof box or under a deck.
- Use outdoor-rated cord covers or conduit for cords that run across the ground.
- For long runs, use a cord reel or spool to prevent tangles.
Step 4: Adjust and Test
Step back and look at your work. Make adjustments.
- Check for sagging, uneven spacing, or bulbs that aren’t seated properly.
- Use turnbuckles or extra clips to tighten loose sections.
- Turn on the lights and walk around. Do they cast the right shadows? Are there dark spots?
- Trim any excess zip ties or wire ends.
Real-Life Tip: I once hung lights on a windy night and woke up to a tangled mess. Now I always install on a calm evening and double-check all fasteners.
Step 5: Automate and Enjoy
Set up a timer or smart plug to turn the lights on at dusk and off at midnight. This saves energy and ensures you never forget to turn them off.
Common Mistakes and How to Avoid Them
Even with the best intentions, things can go wrong. Here are the most common pitfalls—and how to dodge them.
Sagging Lights
Sagging is the #1 complaint. It looks messy and can damage the cord.
- Why it happens: Long runs without support, heavy bulbs, or weak anchor points.
- How to fix: Use turnbuckles, add extra anchor points, or switch to lighter-weight lights.
Using the Wrong Fasteners
Don’t use nails, screws, or duct tape on trees. They can harm the bark and leave ugly marks.
- Do this instead: Use zip ties, garden wire, or tree-friendly clips. They’re removable and don’t damage the tree.
Ignoring Weather and Safety
Water and electricity don’t mix. Always:
- Use outdoor-rated lights and cords.
- Keep connections elevated and covered (use waterproof connectors or silicone tape).
- Avoid running cords across walkways. If you must, use cord covers or bury them in conduit.
Overloading the Circuit
Plugging too many strands into one outlet can trip the breaker or cause a fire.
- Rule of thumb: Don’t connect more than three standard 50-foot LED strands. Check the manufacturer’s specs.
- Use a GFCI outlet to prevent shocks.
Forgetting the Power Source
Nothing kills the mood like a dead strand. Plan your power source early.
- Use an outdoor GFCI outlet.
- Run cords along fences or under decks to keep them out of sight.
- Consider solar lights for areas far from power.
Not Planning for Maintenance
Bulbs burn out. Cords fray. Plan for easy access.
- Use releasable zip ties and easy-to-remove clips.
- Label each strand so you know which one to replace.
Lighting Ideas and Inspirations
To spark your creativity, here’s a quick reference table of popular garden lighting setups and their best uses.
| Setup Style | Best For | Recommended Lights | Pro Tip |
|---|---|---|---|
| Canopy (between trees/posts) | Outdoor dining, seating areas | Plug-in LED with warm white bulbs | Use turnbuckles to prevent sagging |
| Wrapped Trees | Small gardens, romantic nooks | Fairy lights or micro LEDs | Start at the base and spiral up |
| Fence or Wall Grid | Urban backyards, privacy screens | Edison-style or globe lights | Space bulbs 12 inches apart for a clean look |
| Pathway Lighting | Walkways, garden borders | Solar stake lights or low-hanging strings | Use warm white to guide without glare |
| Draped Curtains | Pergolas, gazebos, patios | Plug-in strands with 6-inch spacing | Hang from the top and let gravity shape it |
Remember: The best lighting setup is one that feels natural to your space. Don’t force a design that doesn’t fit. Start small, experiment, and add more over time.
Final Thoughts: Light Up Your Life
Hanging string lights in your garden isn’t just about adding light—it’s about adding life. It’s about creating moments: the first toast of the evening, a late-night conversation, the quiet joy of being outside under a canopy of stars (and bulbs).
I’ll never forget the first time I turned on my garden lights. My kids ran outside in their pajamas, laughing as they danced under the glow. My partner smiled and said, “This is our happy place.” That’s the power of simple, intentional lighting.
You don’t need a professional installer or a huge budget. With the right lights, a solid plan, and a little patience, you can transform your garden into a magical retreat. Whether you go bold with a dramatic canopy or subtle with wrapped fairy lights, the result will be worth it.
So grab your tools, sketch your layout, and start hanging. Your magical garden evenings are just a few bulbs away. And when the sun goes down and the lights come on? That’s when the real magic begins.
Frequently Asked Questions
How do I hang string lights in a garden without trees or structures?
Use freestanding poles, shepherd’s hooks, or install posts along fences or railings to create anchor points. For open spaces, consider using weighted bases or ground stakes designed for outdoor lighting. This ensures your string lights stay secure and evenly spaced.
What’s the best way to hang string lights in a garden for a balanced look?
Plan a symmetrical layout using existing structures like pergolas or fences, spacing bulbs evenly to avoid sagging. For a natural effect, drape lights in gentle waves between anchor points, ensuring tension is consistent. Always measure distances before installation.
Can I hang string lights in a garden permanently or are they just for temporary use?
Yes, you can install weatherproof LED string lights permanently if they’re rated for outdoor use (look for IP65 or higher). Use UV-resistant cables and secure connections to protect against rain and wind. This makes your garden lighting both magical and durable.
How do I hide the wires when I hang string lights in a garden?
Conceal cords under mulch, along fence lines, or behind decorative elements like planters or trellises. For a seamless look, use cable clips to guide wires along existing structures. Avoid burying cords directly to prevent damage from moisture or tools.
What tools do I need to hang string lights in a garden securely?
Essential tools include zip ties, screw hooks, tension wire (for long spans), and a ladder. For added safety, use a stud finder if attaching to wooden structures and opt for outdoor-rated hardware. A helper can also ensure even spacing and stability.
How can I hang string lights in a garden with uneven terrain?
Adjust the height of anchor points (e.g., poles or hooks) to create a level line across slopes, using adjustable mounts or telescoping poles. For steps or raised beds, run lights vertically or in zigzag patterns to follow the landscape. This adds depth and charm.

