Featured image for how to hang string lights indoor csealings
Image source: i.pinimg.com
Transform your indoor space with string lights by choosing the right mounting method—adhesive hooks, ceiling anchors, or tension rods—for a secure, damage-free glow. Ensure even spacing and drape the lights at varying heights to create depth and a cozy ambiance. Always test lights before installation and follow manufacturer guidelines for a safe, stunning display.
Key Takeaways
- Plan your layout first: Sketch light placement to avoid uneven spacing or overhangs.
- Use removable hooks: Protect ceilings with damage-free adhesive or tension-mounted hardware.
- Measure twice, hang once: Confirm light strand length matches your ceiling dimensions perfectly.
- Hide cords creatively: Tuck wires behind beams, shelves, or decorative clips for a clean look.
- Layer for ambiance: Combine string lights with lamps or candles for a warmer glow.
- Test before securing: Plug in lights to check function and placement before final installation.
📑 Table of Contents
- How to Hang String Lights Indoor Ceilings for a Cozy Glow
- Choosing the Right String Lights for Your Space
- Preparing Your Ceiling and Planning the Layout
- Tools and Materials: What You’ll Need
- Step-by-Step Installation Guide
- Creative Layout Ideas and Styling Tips
- Maintenance, Safety, and Troubleshooting
How to Hang String Lights Indoor Ceilings for a Cozy Glow
Imagine walking into a room bathed in a soft, warm glow, where the ceiling seems to twinkle with tiny stars, transforming your space into a sanctuary of comfort and charm. String lights, with their delicate shimmer, have the magical ability to elevate any indoor setting, from cozy bedrooms and intimate dining areas to spacious living rooms and even home offices. Whether you’re aiming for a rustic, romantic, or modern minimalist vibe, string lights offer a versatile and affordable way to create an inviting atmosphere. Their popularity isn’t just a trend—it’s a testament to how lighting can profoundly affect mood, ambiance, and even the perceived size of a room.
However, hanging string lights on indoor ceilings isn’t always as simple as it seems. Without the right techniques and tools, you might end up with sagging wires, uneven lighting, or, worse, damage to your ceiling. From choosing the right type of lights to selecting the best installation method, there’s a lot to consider. This comprehensive guide will walk you through every step of the process, ensuring your indoor space radiates a cozy, professional-quality glow. Whether you’re a DIY enthusiast or a first-time decorator, you’ll find practical tips, creative ideas, and safety advice to make your string light installation seamless, stylish, and long-lasting.
Choosing the Right String Lights for Your Space
Types of String Lights: LED vs. Incandescent
Before you start hammering nails or drilling holes, it’s crucial to select the right type of string lights. The two most common options are LED and incandescent bulbs, each with distinct advantages and drawbacks.
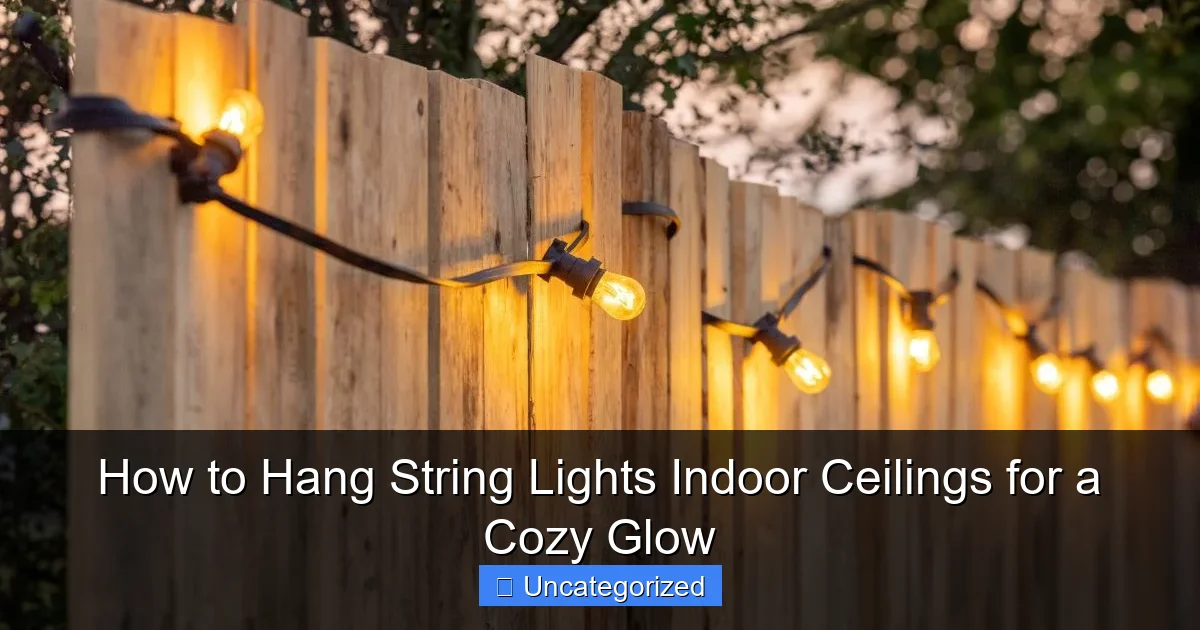
Visual guide about how to hang string lights indoor csealings
Image source: storables.com
- LED String Lights: These are the most popular choice for indoor use due to their energy efficiency, long lifespan (up to 25,000–50,000 hours), and low heat output. They’re safe to touch, making them ideal for homes with children or pets. LEDs come in various colors, including warm white, cool white, multicolor, and even color-changing options with remote controls. They’re also dimmable with compatible switches, offering greater control over ambiance.
- Incandescent String Lights: While they produce a classic, warm glow that many find nostalgic, they consume more electricity, generate more heat, and have a shorter lifespan (typically 1,000–2,000 hours). They’re less eco-friendly and can be a fire hazard if left on for extended periods or near flammable materials. Use them cautiously and only for short-term or decorative purposes.
Pro Tip: For year-round indoor use, opt for LED string lights with a warm white hue (2700K–3000K)—this mimics the cozy glow of candlelight and complements most interior styles.
Bulb Shape, Spacing, and Length
The aesthetic impact of your string lights depends heavily on bulb shape and spacing:
- Bulb Shape: Choose from classic round (G40), vintage-style Edison bulbs, mini globes, or fairy lights (tiny LEDs on thin wire). Round bulbs offer a timeless look, while Edison bulbs add industrial charm. Fairy lights are perfect for delicate, ethereal effects.
- Spacing: Bulbs spaced 4–6 inches apart provide even illumination without overcrowding. For a “dotted” effect (e.g., above a dining table), go for 8–12 inches. Closer spacing (2–3 inches) works well for a dense, starry-night look.
- Length: Measure your ceiling area first. For a 10-foot wall, use a 15-foot string to allow for draping or zigzag patterns. Always buy 10–15% longer than needed to account for curves and connections.
Example: A 12-foot LED string with G40 bulbs spaced 6 inches apart is ideal for a cozy bedroom canopy or a dining room accent.
Indoor-Specific Features to Look For
Not all string lights are safe for indoor ceilings. Prioritize these features:
- UL Certification: Ensures the product meets safety standards for indoor use.
- Low Voltage (12V or 24V): Safer than standard 120V lines, especially for long-term installations.
- Weatherproof Rating (IP44 or higher): Even indoors, humidity from kitchens or bathrooms requires moisture-resistant lights.
- Connectable Strings: Allows you to join multiple strands without overloading circuits (check wattage limits).
Data Point: According to the U.S. Consumer Product Safety Commission, LEDs reduce fire risk by 80% compared to incandescent lights due to lower heat output.
Preparing Your Ceiling and Planning the Layout
Assessing Ceiling Type and Condition
Your ceiling’s material dictates the installation method. Here’s a quick guide:
- Drywall/Plaster: Use adhesive hooks, push pins, or removable strips. Avoid nails or screws unless you’re comfortable patching holes later.
- Wooden Beams/Exposed Joists: Screw-in hooks or eyelets are ideal. Pre-drill holes to prevent splitting.
- Concrete or Brick: Requires masonry anchors and screws. Use a hammer drill for best results.
- Textured Ceilings (Popcorn, Stucco): Adhesive solutions are safest. Avoid pressure-based hooks that could damage texture.
Tip: Inspect the ceiling for cracks, water damage, or loose areas. Repair any issues before installing lights.
Measuring and Mapping the Layout
Sketch your desired pattern on paper or use masking tape to outline it on the ceiling. Common layouts include:
- Straight Lines: Parallel to the floor for a clean, modern look (e.g., above a bed or desk).
- Zigzag or “V” Pattern: Creates visual interest and covers more area. Use a 30–45° angle for optimal spacing.
- Canopy/Starburst: Radiates from a central point, perfect for bedrooms or reading nooks.
- Grid or Diamond Pattern: Ideal for large spaces like living rooms. Maintain 12–18 inches between lines.
Pro Tip: Use a laser level or chalk line to ensure straight, evenly spaced lines. For curved patterns, bend a flexible wire into shape and trace it.
Calculating Power Needs and Circuit Load
Overloading circuits can trip breakers or cause fires. Calculate total wattage:
- Check each string’s wattage (e.g., 10W for a 12-foot LED string).
- Add up all strings. A standard 15-amp circuit can handle ~1,800W (15A × 120V). Never exceed 80% (1,440W) for safety.
- Use a power strip with surge protection and avoid daisy-chaining more than 3–4 strings.
Example: For 10 LED strings (10W each), total load = 100W—well within safe limits.
Tools and Materials: What You’ll Need
Essential Tools for Every Ceiling Type
Gather these tools before starting:
- Measuring Tape: For precise spacing.
- Level or Laser Level: Ensures straight lines.
- Drill (for hard ceilings): With appropriate bits (masonry, wood, drywall).
- Screwdriver: For installing hooks.
- Step Ladder: For safe access to ceilings.
- Wire Cutters: For trimming excess wire or zip ties.
Mounting Hardware by Ceiling Type
| Ceiling Type | Recommended Hardware | Installation Method | Pros/Cons |
|---|---|---|---|
| Drywall/Plaster | Adhesive hooks (e.g., Command™), push pins | Press into ceiling | Pros: No damage, easy removal. Cons: Lower weight capacity (~2–3 lbs). |
| Wooden Beams | Screw-in hooks, eyelets | Drill pilot holes, screw in | Pros: Secure, high weight capacity. Cons: Permanent holes. |
| Concrete/Brick | Masonry anchors, screws | Drill hole, insert anchor, screw in | Pros: Extremely durable. Cons: Requires heavy-duty tools. |
| Textured Ceilings | Adhesive strips, tension rods | Press into ceiling or use rod between walls | Pros: No drilling. Cons: Limited to lightweight lights. |
Optional Accessories for Enhanced Functionality
Elevate your setup with these extras:
- Dimmer Switch: Controls brightness for mood lighting.
- Remote Control: For color-changing or timer functions.
- Zip Ties or Cord Clips: Secures excess wire and prevents sagging.
- Extension Cords (UL-rated): For hard-to-reach outlets.
- Smart Plugs: Allows voice or app control (e.g., Alexa, Google Home).
Step-by-Step Installation Guide
Method 1: Adhesive Hooks (Best for Drywall/Plaster)
Step 1: Clean the ceiling with rubbing alcohol to remove dust and grease.
Step 2: Mark hook positions using your layout plan. Space hooks 12–18 inches apart.
Step 3: Remove adhesive backing and press hooks firmly for 30 seconds. Let cure for 1–2 hours.
Step 4: Hang lights by looping the wire over hooks. Use zip ties to secure loose ends.
Pro Tip: For extra grip, apply a small dab of clear nail polish to the hook before pressing.
Method 2: Screw-In Hooks (Wooden Beams or Joists)
Step 1: Use a stud finder to locate beams. Mark drill points with a pencil.
Step 2: Pre-drill holes slightly smaller than the hook’s screw diameter.
Step 3: Screw hooks in until flush with the ceiling. Avoid over-tightening.
Step 4: Hang lights and adjust spacing. For a “draped” look, leave 6–12 inches of slack between hooks.
Example: For a zigzag pattern, install hooks in alternating positions along parallel lines.
Method 3: Tension Rods (Textured or Uneven Ceilings)
Step 1: Measure the distance between two walls. Cut a tension rod to fit.
Step 2: Twist the rod to expand it and secure it between walls.
Step 3: Clip string lights to the rod using S-hooks or zip ties.
Note: This method works best for lightweight fairy lights or short LED strings.
Method 4: Masonry Anchors (Concrete/Brick)
Step 1: Mark anchor points with a pencil. Use a hammer drill with a masonry bit.
Step 2: Drill holes 1/4 inch deeper than the anchor’s length.
Step 3: Tap anchors into holes with a hammer. Insert screws and tighten.
Step 4: Hang lights. For a professional finish, paint hooks to match the ceiling.
Creative Layout Ideas and Styling Tips
Romantic Bedroom Canopy
Transform your bedroom into a dreamy retreat:
- Install a central hook above the bed.
- Hang lights in a starburst pattern, draping them to the headboard and footboard.
- Use warm white LEDs for a soft glow. Add sheer fabric between lights for a “gauzy” effect.
Tip: Use a dimmer to adjust brightness for bedtime reading.
Modern Living Room Grid
Create a striking focal point:
- Map a 4×4 grid on the ceiling (12-inch spacing).
- Use adhesive hooks or screw-in anchors (depending on ceiling type).
- Hang lights horizontally and vertically, forming a geometric pattern.
- Opt for cool white LEDs for a contemporary look.
Example: A 10×10-foot grid with 100 mini LED bulbs adds elegance without overwhelming the space.
Minimalist Dining Room Accent
Highlight your dining area:
- Install a single line of lights 12 inches above the table.
- Use Edison bulbs for vintage charm or clear globes for a clean look.
- Secure with screw-in hooks for a permanent, polished finish.
Pro Tip: Add a dimmer switch to set the mood for dinner parties.
Whimsical Reading Nook
Design a cozy corner:
- Hang lights in a zigzag pattern above a bookshelf or armchair.
- Use multicolor LEDs for a playful touch, or stick to warm white for focus.
- Integrate with fairy lights on shelves for layered lighting.
Maintenance, Safety, and Troubleshooting
Routine Maintenance Tips
Keep your lights shining bright:
- Wipe bulbs monthly with a microfiber cloth to remove dust.
- Inspect wiring for fraying or damage every 6 months.
- Replace burnt-out bulbs promptly to maintain even brightness.
- For adhesive hooks, reapply if they loosen (use fresh adhesive strips).
Critical Safety Precautions
Prevent hazards with these rules:
- Never exceed wattage limits for your circuit.
- Unplug lights during installation or repairs.
- Keep lights away from flammable materials (curtains, bedding).
- Use only indoor-rated lights (look for the “Indoor Use Only” label).
- Turn off lights when unattended or overnight.
Common Issues and Fixes
- Sagging Lights: Add extra hooks or use zip ties to shorten the span between supports.
- Flickering Bulbs: Tighten loose bulbs or replace faulty ones.
- Adhesive Hooks Falling: Use stronger strips (e.g., 3M VHB) or switch to screw-in hooks.
- Uneven Spacing: Measure and mark positions with painter’s tape before installing hooks.
Transforming your indoor space with string lights is more than a decor choice—it’s an art form that blends functionality with emotion. From selecting the perfect bulbs to crafting a layout that complements your room’s architecture, every step contributes to a space that feels uniquely *you*. Whether you’re creating a serene bedroom oasis, a lively living room, or a romantic dining area, the right string light installation can make your home feel warmer, more inviting, and undeniably magical. Remember, the key lies in thoughtful planning, quality materials, and a touch of creativity. With this guide, you’re equipped to hang lights that don’t just illuminate a room—but elevate it. So gather your tools, trust your vision, and let your ceiling shine with a cozy glow that turns every evening into a celebration of light.
Frequently Asked Questions
How do I hang string lights on indoor ceilings without damaging the paint?
Use removable adhesive hooks or ceiling clips designed for lightweight decor—they provide a secure hold while leaving minimal marks. For extra protection, place a small piece of painter’s tape under the hook to prevent paint peeling.
What’s the best way to hang string lights on a high ceiling?
Opt for a hook-and-pulley system or use a telescoping pole with a hook attachment to reach high points safely. Secure anchor points like ceiling beams or sturdy light fixtures to support the weight of the lights.
How can I hang string lights on indoor ceilings with no visible hooks or nails?
Try clear adhesive ceiling clips or tension rods with built-in hooks for a discreet look. For smooth ceilings, removable mounting putty works well for lightweight string lights.
How far apart should I space hooks when hanging string lights on ceilings?
Place hooks every 12–18 inches for a balanced, droop-free look, adjusting based on the lights’ weight and your desired drape. Heavier bulbs or longer runs may require closer spacing.
Can I hang string lights on a textured ceiling without special tools?
Yes! Use adhesive hooks with strong bonding power (like 3M Command Strips) or twist-in ceiling anchors for textured surfaces. Ensure the hooks are rated for your lights’ weight.
How do I hide the wires when hanging string lights on indoor ceilings?
Route wires along crown molding, baseboards, or behind furniture to keep them out of sight. Use wire clips or cord covers to secure and conceal the cords for a clean, cozy glow.

