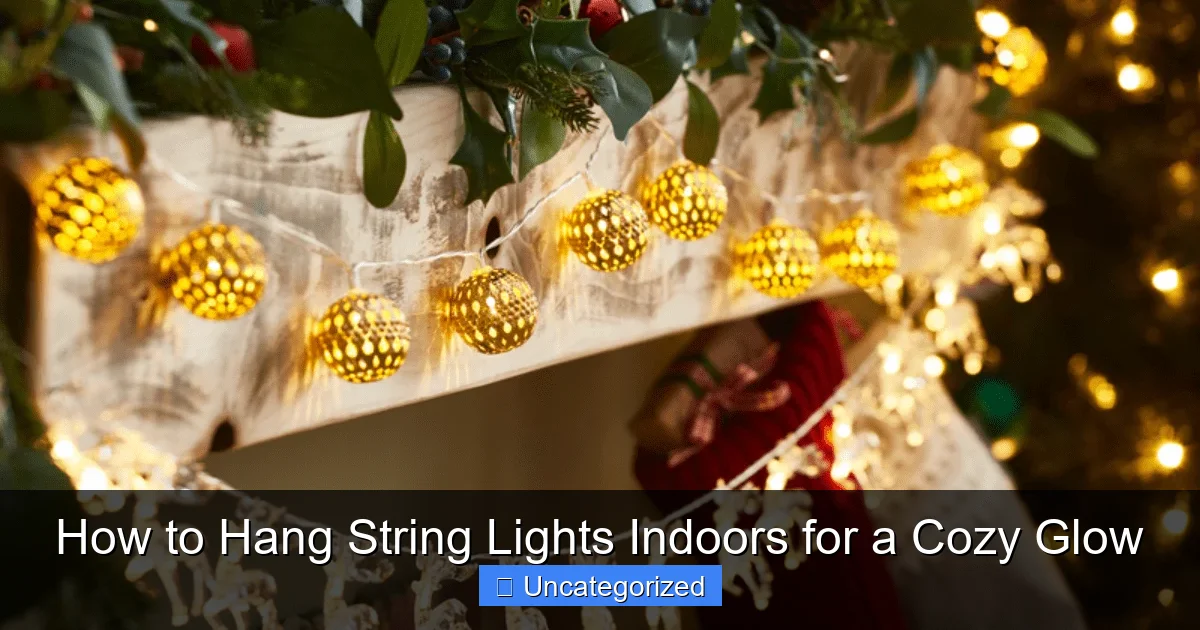
Featured image for how to hang string lights indoors
Image source: blogscdn.thehut.net
Transform any indoor space into a warm, inviting retreat by strategically hanging string lights along walls, ceilings, or furniture using damage-free adhesive hooks or removable clips. For a balanced glow, drape lights in soft swags or geometric patterns, ensuring even spacing and secure anchor points. Avoid overloading circuits and always opt for LED string lights to maximize safety and energy efficiency.
Key Takeaways
- Plan your layout first: Measure and sketch where lights will hang for balanced coverage.
- Use removable hooks: Protect walls while securing lights with damage-free adhesive or tension rods.
- Layer for depth: Combine string lights with lamps or candles for a richer glow.
- Hide cords neatly: Tuck wires behind furniture or use cord covers for a clean look.
- Choose warm bulbs: Opt for soft white or amber LEDs to enhance coziness.
- Test before installing: Ensure lights work fully before committing to your setup.
📑 Table of Contents
How to Hang String Lights Indoors for a Cozy Glow
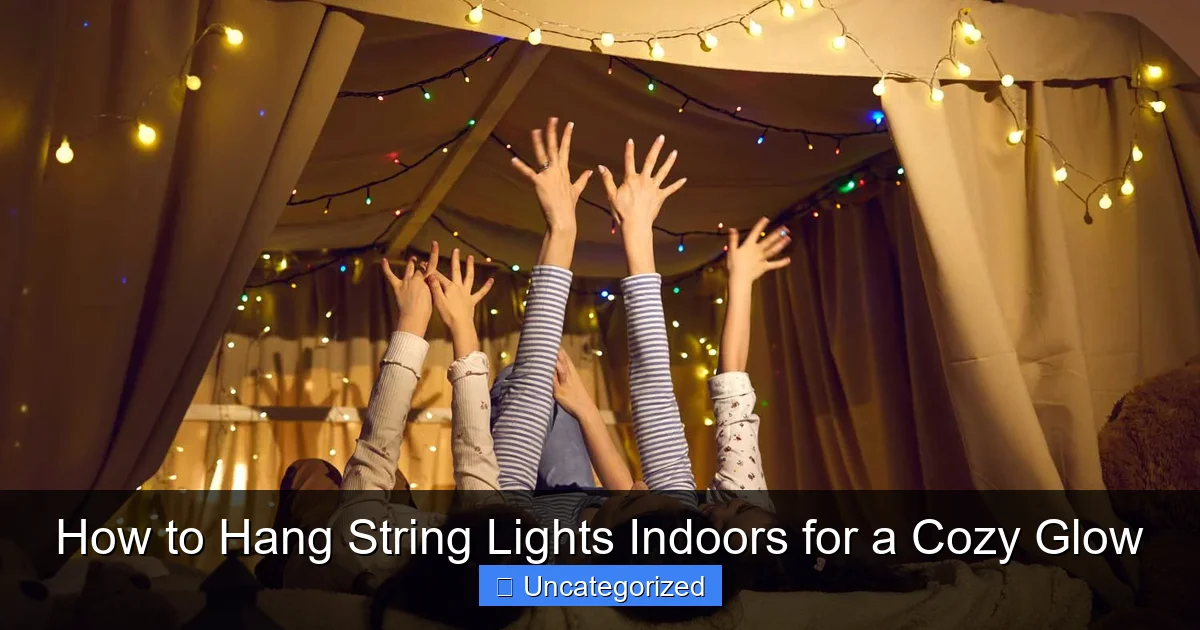
There’s something undeniably magical about the soft, warm glow of string lights. Whether you’re creating a romantic ambiance in your bedroom, adding a whimsical touch to your living room, or setting the mood for a special occasion, string lights can transform any indoor space into a cozy, inviting haven. Their versatility, ease of installation, and wide range of styles make them a go-to decor choice for homes, apartments, and even offices. From classic fairy lights to modern LED strands with color-changing options, string lights offer a simple yet powerful way to elevate your interior design.
But how do you hang string lights indoors to achieve that perfect balance of charm and functionality? While it might seem straightforward, improper installation can lead to sagging wires, uneven lighting, or even damage to your walls and ceilings. This guide will walk you through every step of the process, from choosing the right lights to creative placement ideas, installation techniques, and maintenance tips. Whether you’re a DIY beginner or a seasoned decorator, you’ll find practical advice, expert insights, and inspiration to help you create a warm, glowing atmosphere in any room. Let’s dive into the world of indoor string lights and discover how to hang them like a pro for a truly cozy glow.
1. Choosing the Right String Lights for Your Space
Before you start hanging, it’s crucial to select the right type of string lights that match your aesthetic, functional needs, and the space you’re decorating. The market offers a vast array of options, and choosing wisely will ensure your setup is both beautiful and safe.
Visual guide about how to hang string lights indoors
Image source: media.angi.com
Types of String Lights
- Fairy Lights: Tiny, delicate bulbs on thin wire—ideal for draping over shelves, bed frames, or windows. They emit a soft, twinkling glow perfect for a dreamy atmosphere.
- Edison Bulbs: Larger, vintage-style bulbs with exposed filaments. These create a rustic, industrial look and are great for accent lighting in living rooms or dining areas.
- LED String Lights: Energy-efficient, long-lasting, and available in various colors and shapes (globe, star, icicle). Many come with remote controls and dimming options.
- Net Lights: Pre-spaced lights arranged in a grid—perfect for covering large areas like walls or ceilings with minimal effort.
- Curtain Lights: Vertical strands that hang down like a curtain, ideal for windows or behind sheer drapes for a starry-night effect.
Key Features to Consider
- Length: Measure your intended area (e.g., around a window frame, across a ceiling) and choose a strand that’s slightly longer to allow for draping or wrapping. Most indoor strands range from 10 to 100 feet.
- Bulb Spacing: Closer spacing (e.g., 2–4 inches) creates a denser glow, while wider spacing (6+ inches) is better for outlining shapes or covering larger areas.
- Color Temperature: Warm white (2700K–3000K) mimics candlelight and is ideal for cozy spaces. Cool white (4000K+) feels modern and bright, better for task lighting.
- Power Source: Battery-powered lights offer flexibility for placement (no outlet needed), while plug-in models provide consistent brightness. USB-powered options are great for near desks or behind furniture.
- Indoor vs. Outdoor Rating: Always use lights rated for indoor use. Outdoor lights may have weatherproof coatings but can be overkill and less aesthetically pleasing indoors.
Example: Matching Lights to Room Types
- Bedroom: Warm white fairy lights or dimmable LED strands for a calming, romantic vibe. Consider battery-powered for easy placement behind the headboard.
- Living Room: Edison bulbs or curtain lights above a bookshelf or TV unit to add depth. Use plug-in models with a timer for convenience.
- Dining Area: Globe string lights hung across the ceiling at varying heights to mimic a chandelier. Opt for dimmable LEDs to adjust brightness for meals.
- Kids’ Room: Color-changing or novelty-shaped lights (stars, hearts) with a remote control for fun and safety.
2. Planning Your Layout and Placement
Great lighting starts with thoughtful planning. A well-designed layout ensures even illumination, avoids visual clutter, and highlights your space’s best features. Rushing into installation without a plan can lead to awkward gaps, overuse in one area, or a chaotic appearance.
Step-by-Step Layout Planning
- Visualize the Effect: Sketch your room or use a digital tool to map where lights will go. Ask: Do you want to outline architectural features (windows, doors), create zones (reading nook, dining table), or add ambient glow to the entire room?
- Measure Twice: Use a measuring tape to determine the length needed. For example:
- Window frame: Measure all four sides and add 10% for draping.
- Ceiling perimeter: Measure the room’s length and width, multiply by 2, and add 20% for swags.
- Behind a headboard: Measure the width and height, then add 15% for a cascading effect.
- Test with String or Rope: Use inexpensive yarn or rope to lay out the design. Adjust until it looks balanced. Take photos to compare options.
- Consider Power Access: Identify nearby outlets or plan for extension cords. Avoid running cords across walkways (use cord covers for safety).
Creative Placement Ideas
- Ceiling Accents: Hang lights in parallel lines across a vaulted ceiling or create a “light canopy” above a bed. Use adhesive hooks or ceiling clips for support.
- Wall Features: Outline a gallery wall, mirror, or artwork. Use picture-hanging hooks for a clean look.
- Furniture Highlights: Wrap lights around a headboard, drape them over a bookshelf, or outline a TV console. Ensure they don’t obstruct functionality (e.g., don’t block TV controls).
- Corners and Nooks: Fill empty corners with a vertical strand or create a “light curtain” in a reading nook. Battery-powered lights work well here.
- Staircases: Line the handrail or string lights along the wall beside stairs for safety and style. Use clips rated for vertical loads.
Pro Tip: Layering for Depth
Combine string lights with other lighting (floor lamps, sconces) to create layers. For example, hang fairy lights above a bookshelf while placing a warm table lamp nearby. This adds warmth without overwhelming the space.
3. Tools and Hardware for Safe Installation
The right tools and hardware ensure your string lights stay securely in place, look professional, and don’t damage your walls or ceilings. Avoid shortcuts—improper installation can lead to fallen lights, damaged surfaces, or even electrical hazards.
Essential Tools and Materials
- Adhesive Hooks: Removable, damage-free options like 3M Command Strips or Nano Hooks. Ideal for drywall, wood, and painted surfaces. Choose hooks rated for the weight of your lights (e.g., 0.5–2 lbs per hook).
- Picture-Hanging Hooks: Metal hooks with nails—great for heavier strands or permanent installations. Use a hammer and level for alignment.
- Ceiling Clips: Plastic or metal clips designed for wires. They grip the ceiling without adhesive, making them perfect for vaulted or textured ceilings.
- Zip Ties: Reusable and strong. Use them to bundle excess wire or secure lights to furniture (e.g., headboard slats).
- Extension Cords and Cord Covers: For plug-in lights, use heavy-duty indoor cords. Cord covers (raceway channels) hide and protect wires across floors or walls.
- Measuring Tape and Level: Ensure straight lines and balanced placement.
- Step Ladder or Stool: For reaching ceilings or high walls.
Installation Techniques by Surface
- Drywall: Use adhesive hooks for lightweight lights (under 1 lb). For heavier strands, install picture hooks with anchors to prevent pull-out.
- Wood: Screw-in hooks or adhesive hooks work well. Pre-drill holes for screws to avoid splitting.
- Tile or Glass: Use suction cup hooks or adhesive strips designed for smooth surfaces. Clean the area first with rubbing alcohol.
- Ceiling: For textured ceilings, use ceiling clips or adhesive hooks with a strong grip. Avoid nails in plaster ceilings.
- Furniture: Use zip ties or adhesive clips on the back/underside to hide hardware.
Pro Tips for a Professional Finish
- Hide the Cord: Tuck excess cord behind furniture, use cord clips, or run it along baseboards.
- Even Spacing: Space hooks every 12–18 inches for straight lines, or cluster them for swags.
- Test Before Finalizing: Plug in the lights temporarily to check brightness and placement before securing all hooks.
- Use a Helper: For large installations (e.g., ceiling canopies), have someone assist with alignment.
4. Step-by-Step Installation Guide
Now that you’ve chosen your lights and tools, it’s time to install! Follow this step-by-step guide for a flawless, damage-free setup.
Step 1: Prepare the Area
- Clear the space of furniture or decor that might obstruct installation.
- Clean surfaces (walls, ceilings) with a damp cloth to ensure adhesive hooks stick.
- Plug in the lights to test them—replace any burnt-out bulbs.
Step 2: Mark Hook Positions
- Use a pencil to lightly mark where each hook will go. For straight lines, snap a chalk line or use a level.
- For swags, mark anchor points and let the middle section hang naturally.
- Example: For a window frame, place hooks at each corner and every 12 inches along the sides.
Step 3: Install the Hardware
- For adhesive hooks: Press firmly for 30 seconds, then wait 1 hour before hanging lights (to maximize bond strength).
- For picture hooks: Hammer nails at a 45-degree angle, then attach the hook.
- For ceiling clips: Snap them into place along your marked line.
Step 4: Hang the Lights
- Start at the power source (outlet or battery pack) and work outward.
- Loop the light’s wire or bulb sockets over each hook. For fairy lights, wrap the wire around the hook’s arm.
- For net or curtain lights, drape the top edge over hooks, ensuring even tension.
- Adjust swags by gently pulling the wire to create gentle curves.
Step 5: Manage Cords and Excess Wire
- Bundle extra wire with zip ties or tuck it behind furniture.
- Use cord covers for exposed wires across floors (e.g., from a wall to a nearby outlet).
- For battery packs, hide them in a decorative box or behind a pillow.
Step 6: Final Adjustments and Testing
- Step back and view the lights from different angles. Adjust hook positions if needed.
- Plug in or turn on the lights. Check for dim spots or uneven glow—reposition bulbs if necessary.
- Use a timer or smart plug to automate on/off times (e.g., 6 PM to 11 PM).
Example: Hanging Curtain Lights on a Window
For a 36-inch-wide window, use 4 adhesive hooks along the top edge (spaced 12 inches apart). Drape the curtain lights over the hooks, letting strands hang 18–24 inches down. Tuck excess wire behind the curtain rod for a seamless look.
5. Maintenance, Safety, and Longevity
Proper care ensures your string lights last for years and remain safe to use. Neglect can lead to dimming, electrical issues, or fire hazards.
Regular Maintenance Tips
- Clean Bulbs: Dust bulbs every 2–3 months with a dry cloth or duster. For stubborn grime, use a damp cloth (unplug first).
- Check Connections: Inspect plugs and wires for fraying or loose connections. Replace damaged strands immediately.
- Store Properly: When not in use, wrap lights around a cardboard spool or use a storage reel to prevent tangles.
Safety Best Practices
- Never Overload Outlets: Follow the manufacturer’s guidelines for how many strands can be connected in series. Most indoor lights allow 3–5 strands.
- Use GFCI Outlets: If lights are near sinks or bathrooms, plug into a GFCI outlet to prevent shocks.
- Keep Away from Heat: Avoid placing lights near radiators, vents, or lamps.
- Unplug When Not in Use: Especially if lights are left on unattended for long periods.
- Replace Old Bulbs: Burnt-out bulbs can strain the circuit. Replace with the same type (e.g., incandescent, LED).
Maximizing Lifespan
- Use a Timer: Reduces wear from continuous use. LED lights last 25,000+ hours—timers help reach that.
- Avoid Direct Sunlight: Prolonged UV exposure can fade wires and bulbs. Use curtains to shield lights during the day.
- Seasonal Use: For holiday lights, take them down after the season to prevent dust buildup.
When to Replace Your Lights
Even the best lights eventually wear out. Replace your string lights if:
- More than 10% of bulbs are out and won’t turn on after replacement.
- The wire is cracked, frayed, or feels brittle.
- The plug or battery pack is overheating.
- Colors fade or flicker inconsistently.
6. Inspiring Examples and Pro Tips
To spark your creativity, here are real-world examples and insider tips from designers and DIY enthusiasts.
Example 1: Bedroom Canopy
- Design: Hang warm white fairy lights in parallel lines across the ceiling above the bed. Let them drape slightly at the sides.
- Hardware: 8 adhesive hooks (4 at head, 4 at foot). Use a level to ensure even spacing.
- Pro Tip: Add sheer curtains to amplify the glow. Use a dimmer remote for bedtime.
Example 2: Living Room Gallery Wall
- Design: Outline a gallery wall with Edison bulb lights. Space bulbs 6 inches apart.
- Hardware: Picture hooks at corners and every 18 inches. Hide the cord behind a frame.
- Pro Tip: Pair with a floor lamp for layered lighting.
Example 3: Dining Area Chandelier Effect
- Design: Hang globe string lights in a crisscross pattern above the table. Vary heights for depth.
- Hardware: Ceiling clips at anchor points. Use a ladder for precise placement.
- Pro Tip: Choose dimmable lights to set the mood for dinner parties.
Pro Tips from Designers
- Less is More: Overlighting can feel chaotic. Focus on 1–2 key areas per room.
- Color Psychology: Warm white promotes relaxation; soft blue adds calm; warm yellow feels inviting.
- Seasonal Swaps: Use the same hooks for holiday lights (e.g., swap fairy lights for icicle lights in winter).
- DIY Backdrop: Hang lights behind sheer fabric for a photo booth effect at parties.
| String Light Type | Best For | Average Lifespan | Energy Use (Watts per 25 ft) | Ideal Placement |
|---|---|---|---|---|
| Fairy Lights | Bedrooms, shelves, windows | 10,000–20,000 hours | 1–3 W | Behind headboards, draped over mirrors |
| Edison Bulbs | Living rooms, dining areas | 15,000 hours | 10–20 W | Ceiling canopies, above tables |
| LED Globe Lights | Accent lighting, parties | 25,000+ hours | 5–10 W | Wall outlines, curtain lights |
| Curtain Lights | Windows, backdrops | 20,000 hours | 8–15 W | Behind sheer curtains, photo backdrops |
| Net Lights | Large walls, ceilings | 15,000 hours | 12–25 W | Accent walls, under cabinets |
Hanging string lights indoors is more than a decor choice—it’s an art form that combines aesthetics, functionality, and safety. By choosing the right lights, planning your layout, using the proper hardware, and following safe installation practices, you can create a warm, inviting atmosphere that enhances any room. Whether you’re crafting a romantic bedroom nook, a vibrant living room, or a festive holiday display, the key is thoughtful execution. Remember to maintain your lights, prioritize safety, and let your creativity shine. With these tips, your home will glow with cozy charm for years to come. Now, go ahead—string those lights and bask in the magic of your handiwork!
Frequently Asked Questions
How do I hang string lights indoors without damaging my walls?
Use removable adhesive hooks, tension rods, or command strips designed for lightweight decor to avoid nails or drilling. These options provide a secure hold while leaving walls damage-free when removed properly.
Where should I place indoor string lights for the best cozy glow?
Hang string lights along headboards, mantels, or window frames to create intimate, warm lighting. Draping them in zigzag patterns on walls or ceilings also enhances the ambiance without overwhelming the space.
Can I use command hooks to hang string lights indoors?
Yes, command hooks are ideal for hanging string lights indoors, especially on smooth surfaces like walls or wood. Just ensure the hooks are rated for the weight of your lights and follow the manufacturer’s instructions.
How do I hang string lights on a ceiling without nails?
Use adhesive ceiling hooks, magnetic clips, or twist-in ceiling anchors for a no-damage solution. For a seamless look, run lights along ceiling beams or edges where hooks can be discreetly placed.
What’s the easiest way to hang string lights indoors on a budget?
DIY with binder clips, tape, or twist ties to attach lights to furniture, shelves, or curtains. This method is affordable, requires no tools, and lets you experiment with layouts before committing.
How do I hide the cords when hanging string lights indoors?
Route cords behind furniture or along baseboards, and use cord covers or clips to keep them tidy. For a polished look, match cord colors to your walls or tuck them under light-colored tape.