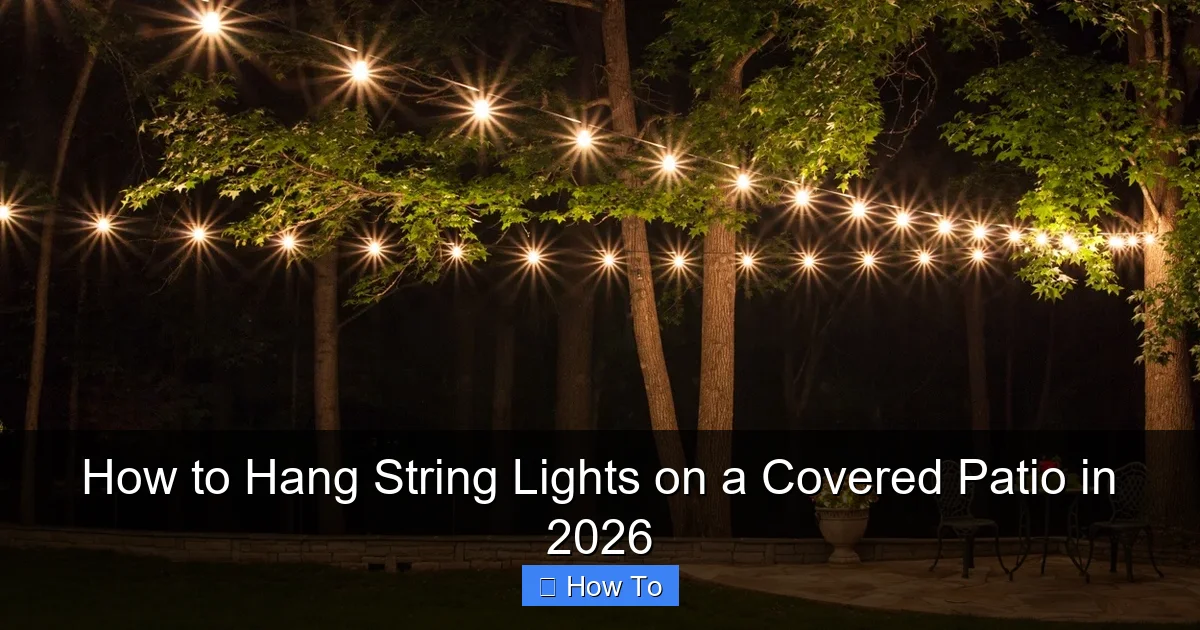
Featured image for how to hang string lights on a covered patio
Image source: cdn.christmaslightsetc.com
Hanging string lights on a covered patio in 2026 is easiest and safest when you use adhesive-backed, weatherproof mounting clips designed for outdoor use—no drilling required. Simply plan your layout, clean the surface, and secure the clips along beams or eaves for a clean, professional look that withstands wind and moisture. For a seamless glow, choose smart LED string lights with app control and built-in timers for effortless ambiance.
How to Hang String Lights on a Covered Patio in 2026
Key Takeaways
- Plan your layout first: Measure and map light placement for balanced, even coverage.
- Use removable hooks: Protect patio finishes with damage-free adhesive or tension-mounted hardware.
- Choose weatherproof lights: Opt for outdoor-rated string lights with UV and moisture resistance.
- Secure with zip ties: Reinforce connections on beams or railings for windy conditions.
- Hide cords strategically: Run wires along trim or use raceways for a clean, safe look.
- Test before finalizing: Check brightness and spacing during installation to avoid rework.
Why This Matters / Understanding the Problem
Let’s be honest—nothing transforms a covered patio into a cozy, inviting space quite like string lights. Whether you’re hosting a summer BBQ, enjoying a quiet evening with a book, or just want to make your backyard feel like a vacation spot, the right lighting sets the mood. But if you’ve ever tried how to hang string lights on a covered patio in 2026, you know it’s not as simple as just tossing them up and hoping they stay.
I learned this the hard way. Last summer, I spent an entire Saturday trying to get my lights to look “just right.” I used cheap hooks, overestimated my spacing, and ended up with a lopsided, sagging mess that looked more like a haunted house than a dreamy outdoor retreat. The lights were too close, too far, too bright, or too dim—and worst of all, they started falling down after a light breeze.
The truth? Hanging string lights on a covered patio isn’t just about aesthetics. It’s about function. You need a setup that’s safe, durable, and looks intentional—not like you gave up halfway. And in 2026, with more people working from home and spending more time outdoors, creating a functional yet beautiful outdoor living space is more important than ever.
Whether your covered patio has a wooden pergola, a solid roof, metal beams, or just a few support posts, this guide will walk you through how to hang string lights on a covered patio in 2026—the right way. No guesswork. No frustration. Just a warm, inviting glow that lasts all season (and beyond).
What You Need
Before you start, gather your tools and materials. The last thing you want is to be halfway through and realize you’re missing a key piece. Here’s what I recommend for a clean, long-lasting installation:
- String lights (LED recommended): Look for weatherproof, outdoor-rated lights with shatterproof bulbs. I love warm white LEDs (2700K–3000K) for a cozy feel. Aim for 25–50 feet depending on your patio size.
- Mounting hardware: This varies based on your patio structure:
- For wood: Eye screws or cup hooks (stainless steel for rust resistance)
- For metal beams: Self-tapping metal screws with eyelets or magnetic hooks
- For drywall or stucco: Heavy-duty adhesive hooks (like Command Outdoor) or toggle bolts
- For no-damage options: Zip ties with adhesive mounts or clips designed for gutters/beams
- Measuring tape: Essential for even spacing and symmetry.
- Pencil or chalk: For marking hook locations.
- Drill with small drill bits: For wood or metal (use a pilot hole to prevent splitting).
- Level: Keeps your lines straight—no one wants a crooked light setup.
- Extension ladder (if needed): Safety first. Use a stable ladder with a helper if you’re working high.
- Extension cord (outdoor-rated, GFCI-protected): Avoid daisy-chaining cords. Use one long cord that reaches your outlet safely.
- Timer or smart plug (optional): Automate your lights to turn on at sunset—total game-changer.
- Scissors or wire cutters: For trimming zip ties or excess cord.
Pro tip: Buy 10–15% extra lights and hooks. You’ll likely need spares, and it’s better to have them than run out mid-installation.
Step-by-Step Guide to How to Hang String Lights on a Covered Patio in 2026
Step 1: Choose Your Lighting Layout
Before you touch a hook, decide how you want your lights to flow. This is where most people rush and regret it later. I like to sketch a quick diagram of my patio on paper or use a photo on my phone to plan.
Here are the most popular (and effective) layouts for a covered patio:
- Grid or crisscross pattern: Great for large patios with multiple support beams. Creates a “ceiling” effect and spreads light evenly.
- Linear (straight lines): Simple and clean. Ideal for patios with parallel beams or posts.
- Hanging loops or “U” shapes: Adds visual interest and softens the space. Works well with longer lights and open rafters.
- Perimeter lighting: Lights run along the edges of the patio. Perfect for defining space and highlighting seating areas.
For how to hang string lights on a covered patio in 2026, I recommend starting with a linear or grid layout—they’re easier to manage and look more intentional.
Measure your space and decide how many lines you want. For a 12×16 ft patio, I usually go with 3–5 parallel lines, spaced 2–3 feet apart. Use your measuring tape and mark the starting and ending points with pencil or chalk.
Warning: Don’t hang lights directly over seating or dining areas unless they’re at least 7 feet high. You don’t want guests bumping into them or getting blinded by bulbs.
Step 2: Select and Install Your Mounting Points
This is the foundation of your entire setup. Bad mounts = sagging, falling lights. Good mounts = a flawless glow for years.
Let’s break it down by surface type:
- Wooden beams or pergola rafters:
- Use stainless steel eye screws (1.5–2 inches long).
- Pre-drill a small pilot hole (slightly smaller than the screw) to avoid splitting the wood.
- Screw in the eye hook until it’s snug but not so tight it cracks the wood.
- Space hooks 2–3 feet apart for straight lines, or 1.5–2 feet apart for grid patterns.
- Metal beams or posts:
- Use self-tapping metal screws with eyelets or magnetic hooks (great for temporary setups).
- For screws: drill a pilot hole, then screw in the eyelet. No pilot? Use a metal drill bit first.
- For magnetic hooks: clean the surface with rubbing alcohol first for better grip.
- Drywall, stucco, or vinyl siding:
- Use heavy-duty adhesive outdoor hooks (like Command Outdoor) or toggle bolts.
- For adhesive: clean the surface, press firmly, and wait 1 hour before hanging lights.
- For toggle bolts: drill a hole, insert the toggle, and tighten. These can hold up to 50 lbs—perfect for multiple light strands.
- No-damage options:
- Use zip tie mounts with adhesive backing or clips that grip gutters or beam edges.
- Ideal for rentals or if you don’t want to drill.
- Just make sure they’re rated for outdoor use and can handle the weight.
Once all your mounts are in, use a level to make sure they’re aligned. I once skipped this step and ended up with a “drunken” light line that drove me nuts. A 10-second check with a level saves hours of annoyance.
Step 3: Hang the Lights—Start at the Power Source
Always begin hanging your lights closest to the power source. This way, you avoid running out of cord or having excess dangling at the end.
Here’s how I do it:
- Unplug the lights first. Safety first, always.
- Start at the first hook near your outlet. Loop the light strand’s S-hook or built-in hook over the eye screw.
- Pull the strand taut to the next hook. Don’t stretch it too hard—just enough to eliminate sagging.
- Loop it over the second hook, then continue to the next. Repeat until you reach the end.
- For grid patterns: hang one line at a time, then cross with perpendicular lines. Use zip ties or small S-hooks to connect the intersections.
- For U-shaped loops: hang a central anchor point, then create a gentle arc between two hooks. Adjust until the curve looks natural.
Pro tip: Use the “two-finger rule”—when you press down on a straight line, there should be about 2–3 fingers of sag. Any more, and it looks sloppy. Any less, and you risk breaking the lights in wind.
If you’re using multiple strands, connect them end-to-end (check the manufacturer’s max connection limit—usually 3–4 strands). Use a waterproof connector cap if the connection is exposed.
Step 4: Manage Cords and Power Safely
This is where many people cut corners—and it’s dangerous. Exposed cords, overloaded outlets, and poor weather protection can lead to fire hazards or tripping.
Here’s how to do it right:
- Use an outdoor-rated, GFCI-protected extension cord. These cut power if there’s a short or water contact.
- Run the cord along the beam or edge of the patio, not across walkways. If it must cross, use a cord cover or tuck it under outdoor rugs.
- Secure the cord to the beam with zip ties or adhesive clips. Don’t let it hang loose.
- Plug into an outdoor GFCI outlet. If you don’t have one, consider hiring an electrician to install one. It’s worth the peace of mind.
- Use a timer or smart plug to automate on/off times. I set mine to turn on 30 minutes before sunset and off at 11 PM. No more forgetting to turn them off!
Tip: If you’re using smart bulbs, make sure they’re compatible with your smart plug and can handle outdoor temperatures.
Step 5: Test, Adjust, and Perfect
Once everything is hung and plugged in, turn on the lights. Step back and take a good look.
Ask yourself:
- Are the lights even? No dark spots or overly bright areas?
- Is the sag consistent across all lines?
- Are the cords hidden or safely routed?
- Does the layout enhance the space, or feel cluttered?
Make small adjustments:
- Shift hooks slightly to balance sag.
- Add or remove a strand if the light is too dim or too bright.
- Use zip ties to tidy up loose cords.
- Swap warm white for soft white if the glow feels too yellow.
I always do this step at night. It’s the only way to see how the lights truly look in use. I once thought my setup was perfect during the day—until I turned it on and realized one line was way too close to the grill. Fixed it in 5 minutes, but only because I tested it.
Pro Tips & Common Mistakes to Avoid
After hanging string lights on my patio (and helping friends with theirs), I’ve learned what works—and what doesn’t.
Pro Tip 1: Use LED lights with dimmers. They’re more energy-efficient, last longer, and let you adjust brightness for different moods. I use a smart dimmer that syncs with my phone—perfect for movie nights or dinner parties.
Pro Tip 2: Hang lights in the off-season too. If you use your patio in winter, lights add warmth and visibility. Just make sure they’re rated for cold temps (most LEDs are).
Pro Tip 3: Label your strands. I use colored zip ties to mark the first, middle, and last strands. Makes troubleshooting a single broken light so much easier.
Common Mistake 1: Overloading the circuit. I once connected 6 strands to one outlet. The lights flickered, and I tripped the breaker. Now I check the total wattage and never exceed 80% of the outlet’s capacity.
Common Mistake 2: Ignoring wind and weather. Even on a covered patio, wind can whip through. I use double hooks or zip ties to secure lights every 3–4 feet. One storm, my neighbor’s lights blew down—mine stayed put.
Common Mistake 3: Hanging lights too high or too low. Too high = weak light. Too low = glare and tripping hazard. Aim for 8–10 feet above the ground for ambient lighting.
Pro Insight: If your patio has a ceiling fan, avoid hanging lights directly above or near it. The fan’s movement can cause lights to sway or tangle. I once had a light strand wrap around my fan blade—not fun.
FAQs About How to Hang String Lights on a Covered Patio in 2026
Can I hang string lights on a covered patio without drilling?
Absolutely! I’ve used Command Outdoor hooks and adhesive zip tie mounts on my stucco patio. They hold up to 5 lbs each—perfect for light strands. Just make sure the surface is clean and dry before applying. For heavier setups, use toggle bolts or clips that grip beam edges.
How far apart should I space the lights?
For straight lines: 2–3 feet between hooks. For grid patterns: 1.5–2 feet. The goal is even light without sagging. I use the “two-finger rule” (mentioned earlier) to test sag. If it feels too loose, add more hooks.
Are LED string lights safe for outdoor use?
Yes—if they’re rated for outdoor use. Look for an IP44 or higher rating. This means they’re protected against water splashes and dust. I avoid cheap indoor lights—they can short out in rain or humidity.
How do I prevent sagging in long runs?
Sagging happens when lights are stretched too tight or hooks are too far apart. Use more hooks (every 2 feet), or add a center support hook in the middle of long spans. You can also use a lightweight support wire (like fishing line) threaded through the light sockets to reduce strain.
Can I leave string lights up year-round?
It depends. If your lights are outdoor-rated and your patio is fully covered (no direct rain), you can. But I recommend checking them every few months. Remove any debris, tighten loose hooks, and test for broken bulbs. In snowy areas, take them down in winter to avoid ice damage.
What’s the best way to store string lights when not in use?
I use light reels or plastic bins with dividers. Wrap each strand loosely (no tight coils) and label them. Store in a dry, cool place. One friend just tossed his in a box—ended up with tangled, broken wires the next year.
Can I connect different brands of string lights?
Technically yes, but it’s risky. Different brands may have different voltages, plug types, or max connection limits. I stick to one brand and model for safety. If you must mix, use a voltage tester and never exceed the lowest max connection count.
Final Thoughts
Hanging string lights on a covered patio isn’t just about adding light—it’s about creating a feeling. That warm, inviting glow that says, “Sit down. Relax. Stay a while.”
When I finally got my setup right, it changed how I used my patio. Suddenly, I was out there every evening—reading, grilling, or just sipping coffee in the morning. The process took a few hours, but the payoff has lasted for years.
So, if you’re tackling how to hang string lights on a covered patio in 2026, take your time. Plan your layout, choose the right mounts, test your lights at night, and don’t skip safety. It’s not about perfection—it’s about creating a space you love.
And remember: the best lighting setup is the one that works for you. Maybe you prefer a simple perimeter line. Or a dramatic grid that feels like a starry sky. Whatever it is, make it yours.
Grab your tools, invite a friend over (for moral support and ladder holding), and get started. Your dream patio is just a few hooks away.

