Featured image for how to hang string lights on covered patio with stucco
Image source: blueistyleblog.com
Hanging string lights on a covered patio with stucco is simple and secure when you use stucco-friendly mounting clips or adhesive hooks designed for textured surfaces. Avoid drilling into stucco by leveraging tension rods, gutter hooks, or removable outdoor mounting tape to preserve your patio’s integrity. With the right tools, you can create a stunning, weather-resistant ambiance in minutes—no damage, no stress.
“`html
How to Hang String Lights on Covered Patio with Stucco 2026
Key Takeaways
- Use removable hooks: Protect stucco with damage-free, adhesive-backed hooks for easy installation.
- Plan layout first: Measure spacing to ensure even light distribution and avoid mid-project adjustments.
- Anchor to beams: Secure lights to wooden or metal supports for long-term stability.
- Test lights early: Check bulbs and connections before hanging to prevent rewiring later.
- Weatherproof connections: Use outdoor-rated extension cords and seal plugs to avoid short circuits.
Why This Matters / Understanding the Problem
Let’s be real: a covered patio with stucco walls is one of the most beautiful outdoor spaces you can have. It’s cozy, sheltered, and perfect for year-round hangouts. But when it comes to how to hang string lights on covered patio with stucco 2026, things get tricky. Stucco is rough, porous, and not always friendly to adhesives or nails. And if your patio has a roof, you’ve got limited vertical space and mounting options.
I learned this the hard way last summer. I wanted a dreamy, bistro-style glow for our backyard dinner parties. I bought the lights, the hooks, the ladder—everything. But after two failed attempts (and one very sad, sagging string of lights), I realized: stucco needs a smarter approach. You can’t just slap up hooks and hope they stick. That’s why I’ve put together this guide—based on real trial, error, and success—to help you do it right the first time.
Whether you’re prepping for a summer BBQ, a cozy winter evening, or just want to upgrade your outdoor ambiance, this guide walks you through how to hang string lights on covered patio with stucco 2026 without damaging your walls or risking a light collapse.
What You Need
Before you start, gather these tools and materials. Trust me, skipping one of these can turn your dream setup into a DIY disaster.
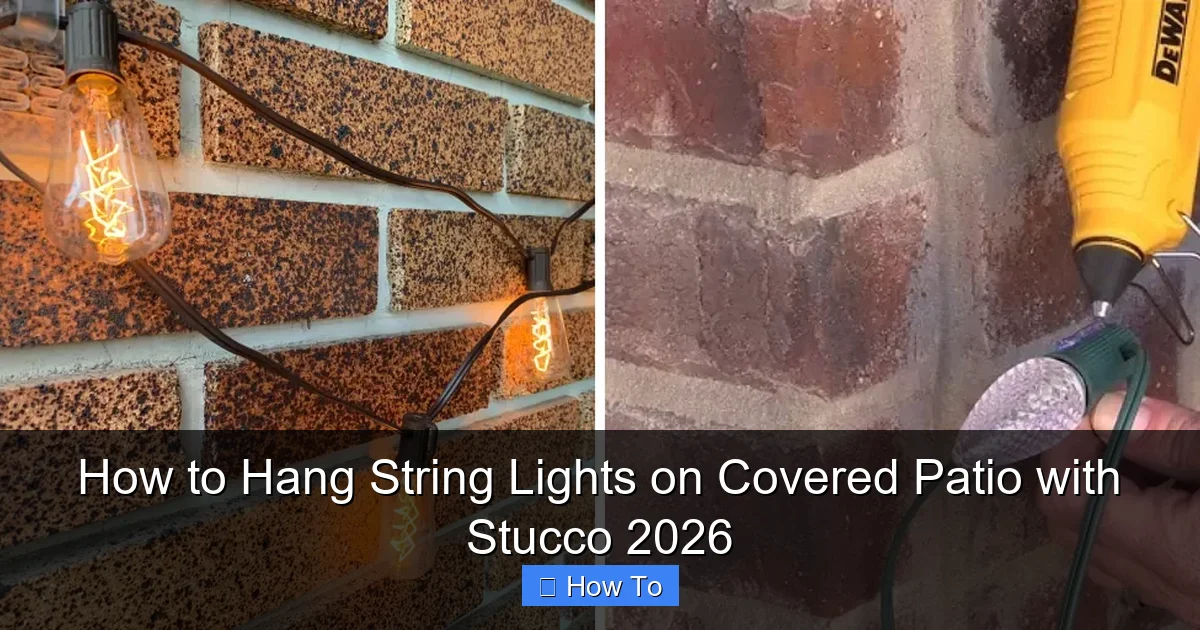
Visual guide about how to hang string lights on covered patio with stucco
Image source: lightenify.com
- Outdoor-rated string lights (LED, weatherproof, with a long cord or plug-in option)
- Stucco-compatible hooks or anchors (plastic anchors with screws, toggle bolts, or stucco-specific adhesive hooks)
- Measuring tape (for spacing and symmetry)
- Level (to keep things straight—no one likes lopsided lights)
- Drill with masonry bit (for stucco, you’ll need a 1/4″ or 5/32″ bit)
- Stud finder (optional) (if your stucco is over wood or metal framing)
- Wire clips or zip ties (for managing excess cord and securing lights)
- Pencil or chalk (for marking drill points)
- Extension ladder (if needed) (safety first!)
- Silicone sealant (optional) (to seal screw holes and prevent moisture)
- Timer or smart plug (to automate on/off times)
Pro Tip: Avoid using regular picture hooks or Command strips. Stucco is too rough and uneven for most adhesive products to hold long-term—especially with wind, rain, and temperature changes. Save yourself the headache and go with mechanical fasteners.
Step-by-Step Guide to How to Hang String Lights on Covered Patio with Stucco 2026
Step 1: Plan Your Layout (The Secret to a Polished Look)
Before you touch a drill, sketch out where your lights will go. This step is *everything*. I once rushed this and ended up with lights that looked like a spider web after a storm.
- Decide on the pattern: zigzag, straight lines, canopy (overhead), or perimeter.
- Measure the length of your patio and the distance between mounting points.
- Use a measuring tape and pencil to mark where each hook will go—typically every 12 to 24 inches, depending on light strand weight.
- For a zigzag pattern, mark points on both walls and the ceiling (if applicable), alternating sides.
- Use a level to connect marks with light chalk lines so your lights don’t dip or rise.
Personal Insight: I like a 16-inch spacing for medium-weight LED strings. It gives a balanced glow without looking sparse or overcrowded. And always plan for an extra 10% in cord length for slack and plug access.
Step 2: Choose the Right Fastener for Stucco
Stucco isn’t like drywall. It’s a hard, cement-like surface with a rough texture. Using the wrong fastener is like trying to hang a picture on sandpaper—eventually, it gives way.
- Plastic anchors + screws: My go-to for light to medium loads. They expand behind the stucco layer and grip well.
- Toggle bolts: Best for heavier lights or if you’re attaching to a ceiling joist behind the stucco.
- Stucco-specific adhesive hooks: Only if you’re using very lightweight fairy lights and the stucco is clean, dry, and smooth.
- Self-drilling metal anchors (for metal lath): If your stucco is over metal, these screw in without pre-drilling.
For most DIYers, I recommend **plastic anchors with 1-inch pan-head screws**. They’re easy to install, hold well, and don’t require special tools beyond a drill.
Warning: Never use regular drywall anchors. They’ll pull out within a month, especially in windy conditions. I learned this after my neighbor’s lights fell during a storm—embarrassing and avoidable.
Step 3: Drill Pilot Holes (Slow and Steady Wins the Race)
Now it’s time to drill. But don’t go full speed—stucco can crack or chip if you’re too aggressive.
- Use a **masonry bit** (1/4″ or 5/32″) that matches your anchor size.
- Set your drill to a low speed (around 300–500 RPM).
- Apply gentle, steady pressure. Let the bit do the work—don’t force it.
- Drill to a depth just slightly longer than your anchor (usually 1.25 to 1.5 inches).
- Blow or vacuum out the dust. A clean hole = better grip.
Pro Tip: If you hit something hard (like metal lath or wood), stop and reassess. You may need a different anchor or to adjust your layout. A stud finder can help here.
Step 4: Install Anchors and Screws
Once your holes are ready, insert the anchors and screws.
- Push the plastic anchor into the hole until it’s flush with the surface.
- Use a screwdriver or drill to drive in the screw, but don’t overtighten—this can crack the stucco or break the anchor.
- Leave the screw head sticking out just enough to hang the light strand (usually 1/4 to 1/2 inch).
- For ceiling mounts, use longer screws or toggle bolts for added support.
Personal Insight: I once overtightened a screw and cracked a chunk of stucco. It looked like a tiny meteor hit the wall. Now I use a manual screwdriver for the final turn—better control, less risk.
Step 5: Hang the String Lights (Start at the Power Source)
Now for the fun part: hanging the lights. But don’t just drape them randomly. Start smart.
- Begin at the **power source** (outlet or extension cord). This ensures you don’t run out of cord mid-way.
- Use the built-in loops or clips on the lights to hang them on the screw heads.
- If your lights don’t have clips, use **zip ties or wire clips** to secure them.
- For zigzag patterns, run the strand from one wall to the ceiling to the other wall, using the hooks as guide points.
- Keep the cord taut but not stretched—this prevents sagging and reduces stress on the anchors.
Pro Tip: Test the lights as you go. Plug them in after hanging a section. If a bulb fails, it’s easier to fix now than after the whole setup is done.
Step 6: Manage Excess Cord and Secure the Layout
No one likes a tangled mess. Clean cord management makes your setup look professional.
- Use **zip ties or wire clips** to bundle excess cord behind the main strand.
- Route the power cord along a wall or beam, securing it every 12–18 inches.
- For outdoor outlets, use a **weatherproof extension cord** and keep the plug off the ground.
- If your patio has beams or rafters, loop the cord around them for support.
Warning: Never staple cords to stucco. It can damage insulation and create a fire hazard. Use clips or ties instead.
Step 7: Seal and Protect (For Longevity)
This step is often skipped, but it’s what keeps your lights up for years—not months.
- Apply a small bead of clear silicone sealant around each screw head.
- This prevents water from seeping into the hole, which can loosen the anchor over time.
- Let it cure for 24 hours before exposing to rain.
- If you ever remove the hooks, the sealant can be scraped off easily.
Personal Insight: I started sealing my screw holes two years ago. My lights have survived three rainy seasons with zero anchor failures. It’s a 5-minute step that pays off big.
Step 8: Add Automation (The Final Touch)
Want to impress your guests? Automate your lights.
- Plug your lights into a smart plug or outdoor timer.
- Set them to turn on at dusk and off at 10 or 11 PM.
- Use an app (like Alexa or Google Home) for voice control.
- Bonus: Some smart plugs offer dimming and color-changing options if your lights support it.
Pro Tip: I use a dusk-to-dawn timer. It’s simple, reliable, and saves me from forgetting to turn them off.
Pro Tips & Common Mistakes to Avoid
1. Don’t Rush the Layout
Measure twice, drill once. A crooked line is obvious and annoying. Use a level and chalk line—it’s worth the extra 10 minutes.
2. Avoid Overloading Anchors
Each plastic anchor holds about 25–30 lbs. If you’re using heavy incandescent strings or multiple strands, space your hooks closer or use toggle bolts.
3. Watch Out for Wind Load
String lights catch wind like sails. In windy areas, reduce span length (every 12 inches) or use a zigzag pattern to break up airflow.
4. Don’t Ignore the Plug
An exposed outdoor plug is a safety hazard. Use a weatherproof outlet cover or an in-use cover box.
5. Test Before Finalizing
Turn the lights on during the day. Walk around. Look for dark spots, glare, or shadows. Adjust as needed.
6. Use the Right Lights
Not all string lights are created equal. For how to hang string lights on covered patio with stucco 2026, choose:
- LED (cooler, energy-efficient)
- UL-listed for wet locations
- With a long plug-in cord or remote transformer
7. Think About Removal
If you plan to take them down seasonally, use removable hooks or leave a little slack in the cord. Don’t glue anything permanently.
Personal Insight: I once used industrial adhesive hooks “just for the summer.” They stayed put for two years—and left a sticky, crumbly mess when I tried to remove them. Learn from my mistakes: go mechanical.
FAQs About How to Hang String Lights on Covered Patio with Stucco 2026
Can I use Command strips on stucco?
Technically, yes—but only for very lightweight fairy lights and in low-wind areas. Most Command strips fail within 6–12 months on stucco due to moisture, temperature swings, and surface texture. For long-term, reliable results, use mechanical fasteners. I tried it once. The lights fell during a rainstorm. Never again.
What if my stucco is painted or textured?
It’s fine! The texture actually helps anchors grip better. Just make sure the surface is clean and dry before drilling. If it’s painted, the anchor will still hold—just avoid drilling through flaking paint. Scrape it clean first.
How do I hang lights without drilling?
You can use:
- Stucco-specific adhesive hooks (for very light loads)
- Ceiling-mounted tracks or tension rods (if your patio has beams)
- Weighted bases or floor stands (for ground-level lighting)
But for permanent, wind-resistant setups, drilling is still the gold standard.
What’s the best spacing for hooks?
For most LED string lights, 12 to 24 inches apart works. Heavier lights (like Edison bulbs) need closer spacing—every 12 inches. Lighter fairy lights can go up to 36 inches. Always check the manufacturer’s weight rating.
Can I hang lights from the ceiling instead of the walls?
Absolutely! If your covered patio has a ceiling, use ceiling hooks or eye screws. Just make sure they’re anchored into the framing (wood or metal), not just the stucco layer. Use a stud finder or toggle bolts for support.
How do I remove the hooks later?
Unscrew them gently with a screwdriver. If the anchor is stuck, use pliers. The silicone sealant can be scraped off with a putty knife. Fill the hole with exterior-grade spackle or caulk for a clean finish.
Are solar string lights a good option?
They’re convenient, but not ideal for covered patios. Solar panels need direct sunlight to charge. Under a roof, they may not get enough light—especially in winter. I tried solar lights on our patio. They lasted two hours. Not worth it.
Final Thoughts
Hanging string lights on a covered patio with stucco doesn’t have to be a headache. With the right tools, a little planning, and the right fasteners, you can create a magical, long-lasting outdoor ambiance—without damaging your walls.
Remember, how to hang string lights on covered patio with stucco 2026 is less about brute force and more about smart choices: proper anchors, clean layout, and weatherproofing. Take your time. Test as you go. And don’t skip the silicone sealant—it’s the unsung hero of outdoor lighting.
Now, grab your lights, your drill, and a cold drink. In a few hours, you’ll have a patio that feels like a cozy retreat—perfect for late-night chats, summer dinners, or just unwinding with a book.
And when your guests ask, “Wow, how did you do this?”—just smile and say, “I followed the right steps.” Then hand them this guide. You’re welcome.
Happy lighting!
“`

