Featured image for how to hang string lights on covered patio without nails
Image source: thecreativityexchange.com
Hang string lights on your covered patio without nails using heavy-duty adhesive hooks or removable mounting tape—no damage, no hassle. These easy, renter-friendly solutions support lightweight to medium fixtures and withstand outdoor conditions when applied correctly. Transform your space in minutes with tools you already have.
How to Hang String Lights on Covered Patio Without Nails 2026
Key Takeaways
- Use adhesive hooks: Strong, damage-free options for secure string light mounting.
- Try tension rods: Ideal for creating anchor points between walls or beams.
- Opt for magnetic clips: Perfect for metal structures without drilling holes.
- Wrap around beams: Secure lights by looping around existing patio supports.
- Use removable putty: Lightweight, temporary hold for small light strands.
- Hang from gutters: Clip lights directly onto rain gutters for easy setup.
Why This Matters / Understanding the Problem
You’ve just finished cleaning your covered patio—maybe even bought new outdoor furniture—and now you’re ready to set the mood. You imagine soft, twinkling lights strung overhead, turning your outdoor space into a cozy retreat. But then you realize: how do you hang string lights without damaging the wood, metal, or vinyl ceiling?
That’s where how to hang string lights on covered patio without nails 2026 comes in. Whether you rent, hate drilling holes, or just want a removable, renter-friendly setup, this guide is for you. I’ve been there—standing on a step stool, holding a string of lights, wondering if I’d have to choose between ambiance and my security deposit.
The good news? You don’t. In 2026, there are smarter, safer, and more stylish ways to hang string lights without a single nail. From magnetic hooks to tension rods and adhesive solutions, we’ve got options that work for wood, metal, vinyl, and even stucco ceilings. This guide walks you through every step, so you can create that dreamy glow—without the damage.
And don’t worry—this isn’t one of those “just use tape” articles. We’ll cover what actually works, what to avoid, and how to make your setup last through summer BBQs, rainy nights, and holiday gatherings.
What You Need
Before we dive in, let’s gather your tools and materials. The beauty of how to hang string lights on covered patio without nails 2026 is that most of these items are affordable, easy to find, and reusable.
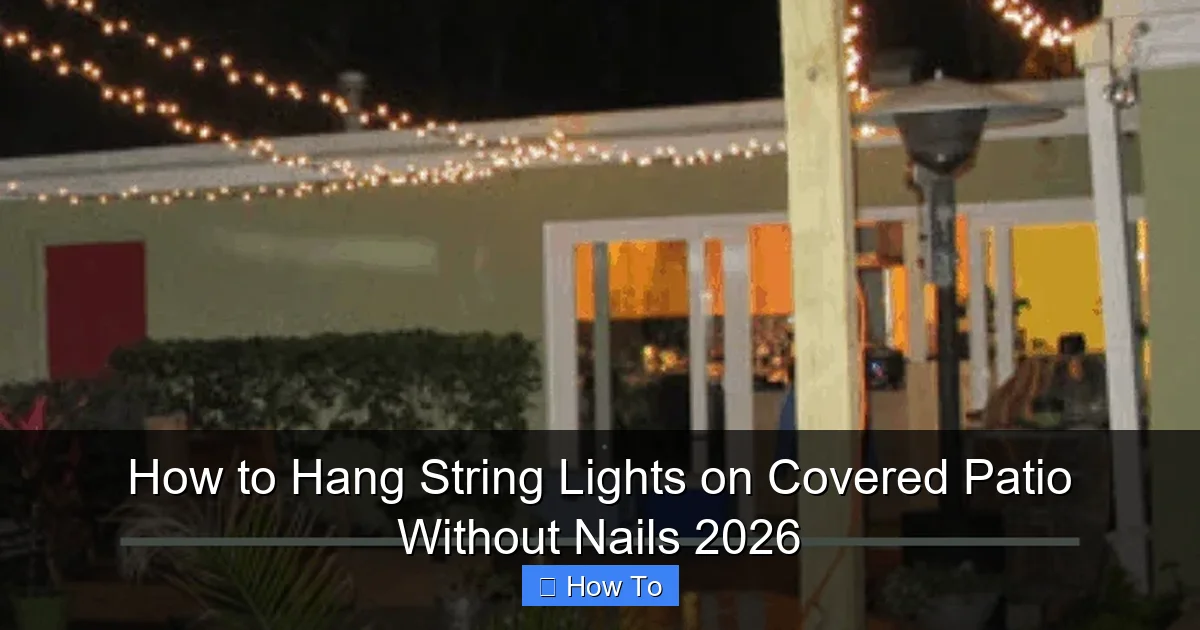
Visual guide about how to hang string lights on covered patio without nails
Image source: backyardscape.com
- String lights (LED, weatherproof, and preferably with a plug-in end for easy access)
- Non-damaging hanging hardware (choose based on your patio ceiling type):
- Adhesive ceiling hooks (3M or heavy-duty outdoor-rated)
- Magnetic hooks (for metal roofs or beams)
- Command™ Outdoor Light Clips (rated for weather and weight)
- Ceiling tension rods (for wide spans or open beams)
- Zip ties or reusable cable ties (for beams or rafters)
- Outdoor-rated adhesive putty (for light-duty, temporary use)
- Measuring tape (to plan spacing and length)
- Step ladder or sturdy stool (safety first!)
- Extension cord (outdoor-rated) (to reach power source)
- Scissors or wire cutters (for zip ties or trimming)
- Marker or pencil (for marking hook locations)
- Optional: Smart plug or timer (to automate your lights)
Pro insight: Not all “outdoor” adhesives are created equal. Look for ones rated for UV exposure, moisture, and temperature swings. I learned this the hard way when my lights fell during a summer storm—lesson learned, always check the label!
Step-by-Step Guide to How to Hang String Lights on Covered Patio Without Nails 2026
Step 1: Choose the Right Type of String Lights
Not all lights are built for outdoor use—especially if you live in a humid or rainy climate. For how to hang string lights on covered patio without nails 2026, start with the right lights.
- Look for “outdoor-rated” or “weatherproof” on the packaging. These are sealed against moisture.
- LED bulbs are energy-efficient, long-lasting, and generate less heat (safer for adhesives).
- Plug-in vs. battery-powered: Plug-in is more reliable for long-term use. Battery packs are great for short events but need frequent recharging.
- Bulb spacing: 6–12 inches between bulbs gives a balanced, ambient glow. Too close feels cluttered; too far looks sparse.
My favorite? The Twinkly Smart String Lights—they’re weatherproof, app-controlled, and have a low-profile plug that’s easy to hide. But any quality outdoor string will work.
Step 2: Assess Your Patio Ceiling Type
This is the key to choosing the right hanging method. Your ceiling material determines what hardware will stick—and stay—without damage.
- Wooden beams or rafters: You can use adhesive hooks, zip ties, or tension rods.
- Metal roof or corrugated panels: Magnetic hooks are your best friend.
- Vinyl or plastic ceiling panels: Use heavy-duty outdoor Command™ clips or adhesive putty.
- Stucco or textured surfaces: Avoid cheap adhesives. Use 3M VHB tape or outdoor-rated clips with strong backing.
- Open ceiling with exposed joists: Tension rods between beams or zip ties around joists work great.
I once tried using regular Command™ strips on a vinyl ceiling—big mistake. They peeled off after a week. After that, I always check the surface type before picking hardware.
Step 3: Plan Your Layout (Measure Twice, Hang Once)
Before you start sticking anything, sketch out your design. This saves time, avoids overhang, and ensures even spacing.
- Measure the length of your patio from end to end. Add 10–15% extra for curves or swags.
- Decide on a pattern:
- Straight lines: Simple, clean. Great for modern patios.
- Zigzag or crisscross: Adds visual interest. Best for larger patios.
- Herringbone or diamond: Elegant and dynamic. Works well with exposed beams.
- Swag or drape: Romantic, bistro-style. Use extra hooks to create gentle curves.
- Mark hook locations every 12–24 inches, depending on bulb spacing and desired drape.
- Plan power access: Make sure your plug end reaches an outdoor GFCI outlet. Use a weatherproof extension cord if needed.
Pro tip: Tape a string to the ceiling (with painter’s tape) to test your layout before installing hooks. It’s a game-changer for visualizing the final look.
Step 4: Install the Hanging Hardware
Now comes the fun part—putting up the hooks. The method depends on your ceiling type.
For Wooden Beams or Rafters:
- Use outdoor-rated adhesive hooks (like 3M Command™ Outdoor Hooks).
- Clean the surface with rubbing alcohol, let dry.
- Peel and press the hook firmly for 30 seconds. Wait 1 hour before hanging.
- Or, wrap zip ties around beams and thread the light wire through the loop.
For Metal Roofs or Beams:
- Use magnetic hooks (rated for at least 5 lbs).
- Place them directly on the metal surface. No prep needed—just stick and go.
- Great for renters or temporary setups.
For Vinyl or Plastic Ceilings:
- Use Command™ Outdoor Light Clips (designed for gutters and vinyl).
- Or, use 3M VHB tape with plastic hooks (stronger than regular adhesive).
- Avoid cheap glue dots—they fail in heat and humidity.
For Open Ceilings with Joists:
- Install tension rods between parallel beams.
- Hang lights from the rod using S-hooks or zip ties.
- Or, use zip ties to secure the light wire directly to the joists.
I once used magnetic hooks on a steel roof during a heatwave—perfect! But when I tried the same on a painted metal surface, they slid. Always test magnet strength on your specific surface.
Step 5: Hang the String Lights
Now that your hooks are in place, it’s time to string the lights. Take your time—this step is about precision and patience.
- Start at the power source. Plug in one end and work outward.
- Hang the first bulb on the nearest hook. Then move to the next, gently guiding the wire.
- For swags: Leave 6–12 inches of slack between hooks to create a gentle curve.
- For straight lines: Keep the wire taut but not stretched.
- Use S-hooks or carabiners to connect multiple light strands if needed.
- Secure the plug end with a hook or zip tie so it doesn’t dangle.
Warning: Don’t pull too hard! LED wires are thin. Over-tightening can damage the internal wiring or pull hooks loose.
I like to hang one strand at a time, stepping back to check the spacing. If it looks uneven, adjust before moving on. A little tweaking now saves a lot of frustration later.
Step 6: Test, Adjust, and Secure
Once all lights are hung, plug them in and test.
- Check for dark spots or gaps. Adjust hook spacing if needed.
- Look for sagging wires. Add extra hooks if the middle dips too low.
- Secure loose ends with zip ties or clips. Nothing ruins the look like a dangling plug.
- Hide the extension cord under furniture, along a beam, or with cord covers.
- Consider a timer or smart plug so lights turn on at sunset and off at bedtime.
My patio has a corner where the wire always sags. I added an extra Command™ clip—problem solved. Small fixes make a big difference in the final look.
Step 7: Maintain and Store Properly
For long-term use, a little maintenance goes a long way—especially with how to hang string lights on covered patio without nails 2026.
- Inspect monthly: Check hooks for loosening, especially after storms or heatwaves.
- Clean bulbs gently: Wipe with a dry cloth to remove dust and cobwebs.
- Remove before extreme weather: Take down lights during hurricanes or heavy snow.
- Store in a cool, dry place: Coil lights loosely and keep in a breathable bag. Avoid tangling.
- Reuse hardware: Most adhesive hooks and magnetic hooks can be removed and reused with new adhesive strips.
I keep my hooks in a labeled bin so I can reuse them year after year. It’s eco-friendly and saves money.
Pro Tips & Common Mistakes to Avoid
After hanging lights on three different patios (and making a few blunders), here’s what I’ve learned:
Pro tip #1: Use a level. Even a $10 laser level helps keep lines straight. Crooked lights look sloppy, even if the pattern is right.
Pro tip #2: Layer your lights. Combine string lights with fairy lights or lanterns for depth. I hang a few strands high and add smaller lights on railings for a multi-dimensional glow.
Pro tip #3: Think about shadows. Lights too close to the ceiling cast harsh shadows. Hang them 6–12 inches down for softer, more inviting light.
Common mistake #1: Overloading hooks. One hook per bulb is overkill. But hanging multiple bulbs on a single weak hook? That’s how lights fall. Distribute weight evenly.
Common mistake #2: Ignoring the plug. A dangling plug is an eyesore and a tripping hazard. Always secure it with a hook or zip tie.
Common mistake #3: Using indoor adhesives outdoors. Regular Command™ strips aren’t UV-resistant. They’ll yellow, crack, and fail. Always use outdoor-rated products.
Common mistake #4: Forgetting the timer. Lights left on all night waste energy and shorten bulb life. A simple $15 timer automates everything.
I once left my lights on for a week straight—oops. The timer saved my wallet and my bulbs.
FAQs About How to Hang String Lights on Covered Patio Without Nails 2026
Q: Can I use regular tape to hang string lights?
A: Not for long-term use. Regular tape (like duct tape) leaves residue and fails in heat or rain. For how to hang string lights on covered patio without nails 2026, stick to outdoor-rated adhesives, magnetic hooks, or tension rods. Save the tape for temporary setups only.
Q: How much weight can adhesive hooks hold?
A: It varies. Most outdoor Command™ hooks hold 3–5 lbs. That’s plenty for a string of LED lights (usually under 1 lb per 10 feet). But if you’re using heavy Edison bulbs or long runs, use multiple hooks or switch to magnetic or tension options.
Q: Will magnetic hooks damage my metal roof?
A: Not if used properly. Quality magnetic hooks have rubberized backs to prevent scratches. Just don’t drag them across the surface. I’ve used them for years on my steel roof with zero damage.
Q: Can I hang lights on a vinyl ceiling without leaving marks?
A: Yes! Use Command™ Outdoor Light Clips or 3M VHB tape with plastic hooks. Both remove cleanly when warmed with a hair dryer. Avoid glue or nails—they’ll crack the vinyl.
Q: How do I connect multiple light strands?
A: Use S-hooks, carabiners, or zip ties to link the ends. Make sure the total wattage doesn’t exceed your outlet’s capacity (usually 15–20 amps). For long runs, use a power strip with surge protection.
Q: Are battery-powered lights a good option?
A: For short events, yes. But for permanent patio lighting, plug-in is better. Battery lights need frequent charging, and the packs can be bulky. Plus, they’re less bright. Save them for parties or backup.
Q: How long will my setup last?
A: With proper installation, your lights can stay up for months—or even years. I’ve had mine up for 18 months with no issues. Just check hooks every few weeks and clean the bulbs. The key is using the right hardware for your surface.
Final Thoughts
Hanging string lights on a covered patio without nails isn’t just possible—it’s easier than ever in 2026. Whether you have wood, metal, vinyl, or open beams, there’s a solution that’s safe, stylish, and damage-free.
Remember: how to hang string lights on covered patio without nails 2026 is all about planning, choosing the right tools, and taking your time. Don’t rush the layout. Test your hooks. And always think about power access.
Start simple—maybe just one strand across the center. Once you see how it transforms your space, you’ll want to add more. And that’s the magic of outdoor lighting: it turns an ordinary patio into a place where memories happen.
So grab your lights, pick your hooks, and get glowing. Your dream patio is just a few steps away—no nails, no damage, no stress.
And hey—if you mess up the first time? That’s okay. I did. The best part? You can adjust, rehang, and try again. That’s the beauty of a no-nail setup. It’s not permanent—it’s perfectly flexible.
Now go enjoy your twinkling oasis. You’ve earned it.

