
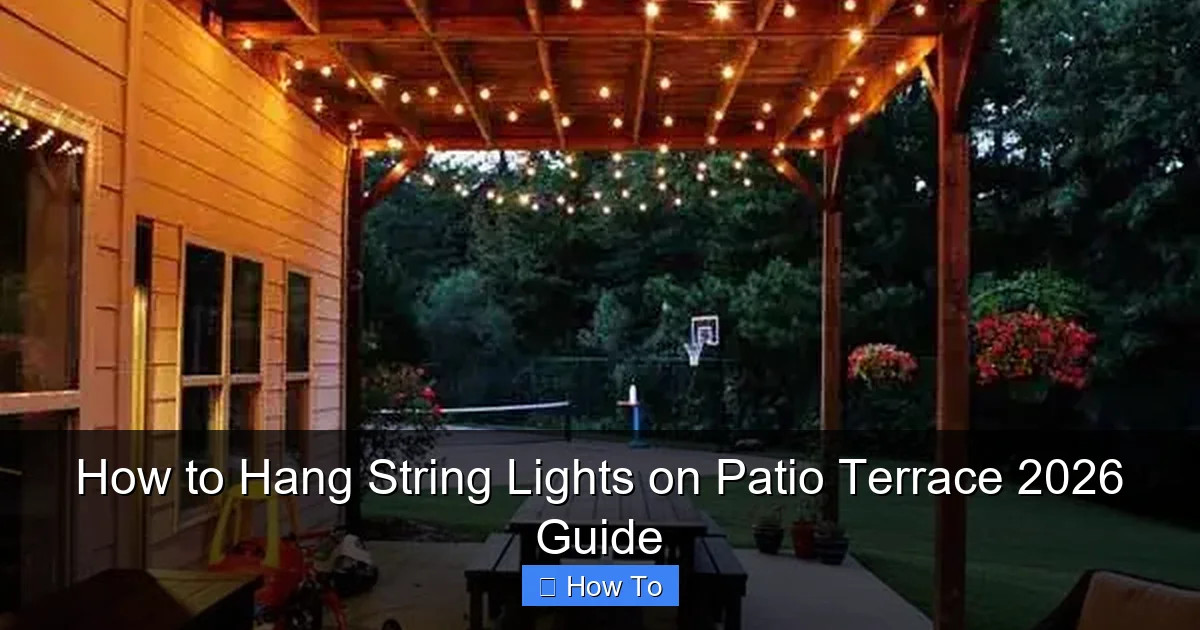
Featured image for how to hang string lights on patio terrace
Image source: menterarchitects.com
Transform your patio terrace into a glowing retreat by securely anchoring string lights to sturdy structures like railings, posts, or walls using weather-resistant hooks or zip ties. For a clean, professional look, plan your layout to avoid sagging and ensure even spacing, especially when spanning longer distances. Always use outdoor-rated lights and timers for safety and effortless ambiance in your 2026 outdoor oasis.
“`html
How to Hang String Lights on Patio Terrace 2026 Guide
Key Takeaways
- Plan your layout first: Sketch light placement to ensure even coverage and avoid mid-project changes.
- Use weatherproof lights: Choose UL-rated outdoor string lights for durability and safety in all conditions.
- Anchor securely: Install hooks, eye screws, or tension cables to prevent sagging or damage.
- Measure spacing carefully: Keep lights 12-18 inches apart for optimal brightness and visual appeal.
- Hide cords neatly: Use raceways or clips to conceal wires for a clean, professional look.
- Test before finalizing: Check connections and brightness early to fix issues without rework.
Why This Matters / Understanding the Problem
Imagine this: It’s a warm summer evening, the air is soft, and you’re sitting on your patio with a glass of wine. You’ve got music playing, maybe a few friends over, but something feels… missing. The space lacks that cozy, inviting glow that makes you want to stay outside past sunset.
That’s where string lights come in. They don’t just add light—they add mood. But here’s the catch: hanging them poorly can turn your dreamy oasis into a tangled mess or, worse, a safety hazard. I’ve been there. I once tried to “wing it” with zip ties and duct tape—spoiler: it looked like a spider’s web after a windstorm.
That’s why this How to Hang String Lights on Patio Terrace 2026 Guide exists. We’re not just slapping lights up and calling it a day. We’re creating a safe, beautiful, and lasting outdoor lighting setup that transforms your space. Whether you’ve got a small balcony or a sprawling backyard terrace, this guide walks you through every step—without the guesswork.
You’ll learn how to plan your layout, choose the right tools, avoid common pitfalls, and make your patio the envy of the neighborhood. And yes, we’ll even cover how to keep them up year-round without constant maintenance.
Real talk: String lights are more than decor. They’re an investment in your home’s ambiance and your own well-being. A well-lit patio invites relaxation, connection, and joy—night after night.
What You Need
Before we dive in, let’s gather everything. I’ve learned (the hard way) that skipping prep leads to frustration. Here’s what you’ll need for a smooth How to Hang String Lights on Patio Terrace 2026 Guide experience.
Visual guide about how to hang string lights on patio terrace
Image source: woohome.com
Lighting & Electrical
- Outdoor-rated string lights (LEDs recommended—they’re energy-efficient and cool to the touch)
- Extension cords or outdoor power strips (with GFCI protection—safety first!)
- Timer or smart plug (optional, but game-changing for automatic on/off)
- Weatherproof outlet covers (if plugging in near the ground or in damp areas)
Hanging Tools & Hardware
- Measuring tape (to map your layout)
- Chalk or painter’s tape (for marking anchor points)
- Drill with masonry or wood bits (depending on your surface)
- Eye hooks, cup hooks, or screw-in anchors (stainless steel or galvanized for rust resistance)
- Zip ties or cable clips (for securing along edges or railings)
- Zip tie mounts or adhesive hooks (for temporary or renter-friendly setups)
- Turnbuckles or tension cables (optional, for long runs to prevent sagging)
Support Structures (if needed)
- Freestanding poles or shepherd’s hooks (for open areas with no roof or walls)
- Ceiling joists or beams (if attaching to a covered patio or pergola)
- Fence posts or railings (common anchor points)
- Lightweight metal conduit or PVC pipes (DIY cross-beams for open spaces)
Optional (but helpful)
- Ladder or step stool (for reaching high areas)
- Work gloves (to protect your hands from sharp edges or hot bulbs)
- Helper (trust me, holding a ladder while untangling lights isn’t fun solo)
Pro insight: Don’t cheap out on the lights. I once bought “bargain” lights that lasted one season. Spend a bit more on weatherproof, shatterproof, and UV-resistant models. Your future self will thank you.
Step-by-Step Guide to How to Hang String Lights on Patio Terrace 2026 Guide
Let’s get into the nitty-gritty. This step-by-step method works for any patio or terrace—covered, open, urban balcony, or sprawling backyard. The key is planning and patience. No rushing. No shortcuts.
Step 1: Map Your Layout & Choose a Hanging Style
First, decide how you want the lights to flow. This is where your patio’s architecture matters. Ask yourself: Are you going for a canopy effect? A perimeter glow? Or maybe zigzagging across an open space?
Here are the most common hanging styles:
- Canopy (or “fairy light net”): Lights crisscross overhead like a grid. Great for covered patios or pergolas.
- Linear (straight lines): Parallel lines from one side to another. Ideal for long, narrow spaces.
- Perimeter: Lights follow the edges—along railings, fences, or rooflines. Perfect for open patios.
- Zigzag: Lights go diagonally between anchor points. Adds visual interest in large spaces.
Now, grab your measuring tape. Measure the length and width of your space. Sketch a quick layout on paper or use a phone app. Mark where your anchor points will go—every 2–3 feet for straight runs, or every 1–2 feet for canopies.
Example: On my 10×12 ft covered terrace, I did a 3×3 grid (three lines lengthwise, three widthwise) with lights crossing at 3-foot intervals. It gave me even coverage without overcrowding.
Warning: Avoid overloading one circuit. If you’re using multiple light strands, check the wattage. Most outdoor outlets handle 15–20 amps. When in doubt, plug into different outlets or use a timer to stagger power usage.
Step 2: Test Your Lights & Plan the Power Source
Before hanging anything, plug in your lights and test them. I can’t tell you how many times I’ve hung a whole strand only to find a dead section. It’s like finding a flat tire after you’ve driven 50 miles.
Check for:
- All bulbs working
- No frayed wires
- Weatherproof seals intact
- Plug type (angled plugs fit better in tight spaces)
Next, locate your power source. Where’s the nearest outdoor outlet? Can you run an extension cord without tripping hazards? If not, consider:
- Running a cord under a door (use a cord cover)
- Using a weatherproof outlet box on a post
- Installing a permanent outdoor outlet (hire an electrician if needed)
Plan your cord path. You want it to be hidden or protected. No one wants to see a messy tangle snaking across the patio.
Pro tip: Use a smart plug with an app or voice control. I use mine with Alexa—“Alexa, turn on patio lights” feels like living in the future.
Step 3: Install Anchor Points (The Backbone of Your Setup)
This is the most critical step. Weak anchors = sagging lights, falling hardware, or worse—damage to your home.
For wood surfaces (decking, pergola, fence):
- Use stainless steel eye hooks or cup hooks (1.5–2 inches long)
- Drill a pilot hole first to prevent splitting
- Screw in by hand, then tighten with pliers—don’t over-tighten
For concrete, brick, or stucco:
- Use masonry anchors with screws (toggle bolts or plastic anchors)
- Drill a hole with a masonry bit
- Insert anchor, then screw in the hook
For railings or metal posts:
- Use zip ties, cable clips, or magnetic hooks
- For permanence, drill and use small metal brackets
For open spaces (no roof or walls):
- Install freestanding poles (shepherd’s hooks or metal posts)
- Or create a DIY frame with PVC or conduit
- Anchor poles into concrete bases or weighted planters
Space anchor points based on your layout. For straight lines: every 3–4 feet. For canopies: every 1.5–2 feet. Use chalk or tape to mark spots before drilling.
Real-life fix: I once skipped pilot holes on my cedar pergola. The wood cracked, and the hook pulled out in a storm. Now? Pilot holes every time.
Step 4: Hang the Lights (With Tension & Safety in Mind)
Now for the fun part—hanging the lights. But don’t just loop and go. Proper tension prevents sagging and keeps lights from dragging on the ground.
For straight runs:
- Start at the plug end. Attach the first bulb or loop to the anchor.
- Unroll the strand as you go, but don’t stretch it. Keep it loose.
- At the end, attach the last bulb or loop to the final anchor.
- If the line sags, add a turnbuckle in the middle to tighten.
For canopies:
- Start with the first line (say, north to south).
- Then weave the perpendicular lines (east to west), looping over and under.
- Use zip ties or small clips at each intersection to hold the grid.
For zigzags or perimeter:
- Follow your layout marks.
- Use adhesive hooks or zip ties for temporary setups.
- For permanent, use screws or anchors.
Always leave a little slack near the plug. This prevents stress on the cord and makes it easier to unplug.
Pro insight: If you’re using multiple strands, connect them with outdoor-rated connectors. Never splice cords with electrical tape—it’s a fire hazard.
Step 5: Secure Cords & Manage Power
You’ve hung the lights—great! Now keep them safe and tidy.
- Use cable clips or zip tie mounts to secure cords along walls, railings, or beams.
- Keep cords off the ground to prevent tripping and water damage.
- Use cord covers if running across walkways.
- Plug into a GFCI outlet (or use a GFCI extension cord). This shuts off power if water gets in.
- Cover the plug with a weatherproof outlet box if exposed to rain.
For long-term setups, consider burying cords in conduit (if allowed by local codes) or running them under decking.
Step 6: Test, Adjust, and Enjoy
Step back. Plug in. Turn on. Watch the magic.
Now, look for:
- Uneven sagging? Add turnbuckles or extra anchors.
- Glare in your eyes? Angle lights slightly downward.
- Dark spots? Add a small spotlight or extra strand.
- Cords in the way? Reroute with clips or covers.
Make small tweaks until it feels right. I once had to redo a whole line because the lights were too bright near the seating area. A quick dimmer switch fixed it.
Step 7: Maintain for Year-Round Use (Optional)
If you want to keep your lights up all year (I do!), here’s how:
- Check anchors monthly for looseness.
- Wipe bulbs with a dry cloth to remove dust or bugs.
- Trim vines or leaves that grow into the strands.
- After storms, inspect for damage.
- Use a timer to limit usage (saves energy and extends bulb life).
Or, if you prefer seasonal use, store lights in a dry, labeled bin. Wrap them around a cardboard tube to prevent tangling.
Personal note: I leave mine up year-round. The winter glow against snow is pure magic. Just use cold-rated lights and check for ice buildup.
Pro Tips & Common Mistakes to Avoid
After years of trial and error, here’s what I wish I knew earlier—your cheat sheet for a flawless How to Hang String Lights on Patio Terrace 2026 Guide.
Pro Tips
- Use a laser level to keep lines straight—no more crooked canopies.
- Buy extra hooks (I always lose a few). Keep them in a labeled bag.
- Mix bulb types—warm white for ambiance, colored for holidays.
- Hang lights in daylight—it’s easier to see anchor points and avoid mistakes.
- Use a light meter app (like Lux Light Meter) to check brightness—aim for 10–20 lux for cozy lighting.
Common Mistakes (And How to Fix Them)
- Mistake: Overloading circuits → Fix: Use a wattage calculator and spread across outlets.
- Mistake: Weak anchors → Fix: Use longer screws or toggle bolts in hollow walls.
- Mistake: Sagging lines → Fix: Add turnbuckles or extra mid-span anchors.
- Mistake: Exposed plugs → Fix: Use a weatherproof box or plug into a covered outlet.
- Mistake: Poor layout → Fix: Sketch first, then adjust with tape before drilling.
Real talk: I once used indoor-rated lights outdoors. They lasted one rainstorm. Always check the IP rating—IP65 or higher is best for patios.
FAQs About How to Hang String Lights on Patio Terrace 2026 Guide
Can I hang string lights without drilling?
Absolutely! Use zip ties, adhesive hooks, or magnetic hooks on railings, metal posts, or glass. For open spaces, try freestanding poles anchored in planters. Just ensure they’re stable in wind.
How do I prevent sagging in long runs?
Add a turnbuckle in the middle to tighten the line. Or install an extra anchor point. For canopies, use a center support pole or cross-bracing.
Are LED string lights safe for year-round use?
Yes, if they’re outdoor-rated, cold-resistant, and IP65+. Check the packaging. LEDs stay cool and use less energy, making them ideal for long-term setups.
How many strands can I connect?
Check the manufacturer’s limit (usually 3–5 strands). Never exceed it. Overloading causes overheating and fire risk. When in doubt, use a separate plug.
Can I use solar-powered string lights?
Yes, but they’re best for low-light areas. They charge slowly and may dim in winter. For consistent brightness, stick with plug-in models. Or use solar spotlights to supplement.
How do I hang lights on a sloped roof or uneven surface?
Use adjustable hooks or brackets that can tilt. Or create a stepped layout—shorter runs at different heights. I did this on my sloped pergola using eye hooks at varying levels.
What’s the best way to store string lights?
Wrap them around a cardboard tube or plastic reel. Label with the length and bulb type. Store in a dry, cool place. I use old paper towel tubes—free and effective!
Final Thoughts
Hanging string lights isn’t just a DIY project—it’s an act of creating joy. Every time I turn mine on, I feel that little spark of happiness. The soft glow, the warmth, the way it transforms my patio into a sanctuary.
This How to Hang String Lights on Patio Terrace 2026 Guide isn’t about perfection. It’s about progress. Start small. A single strand over your dining area. A cozy perimeter along the railing. You don’t need a grand plan—just a desire to make your space feel like home.
Remember: Plan your layout. Test your lights. Use the right anchors. Keep cords safe. And most importantly—enjoy the process. The best setups are the ones that grow with you, year after year.
So grab your tools, call a friend, and light up your life. Your patio is waiting.
One last tip: Take a photo when you’re done. You’ll look back at it years from now and smile. I do.
“`

