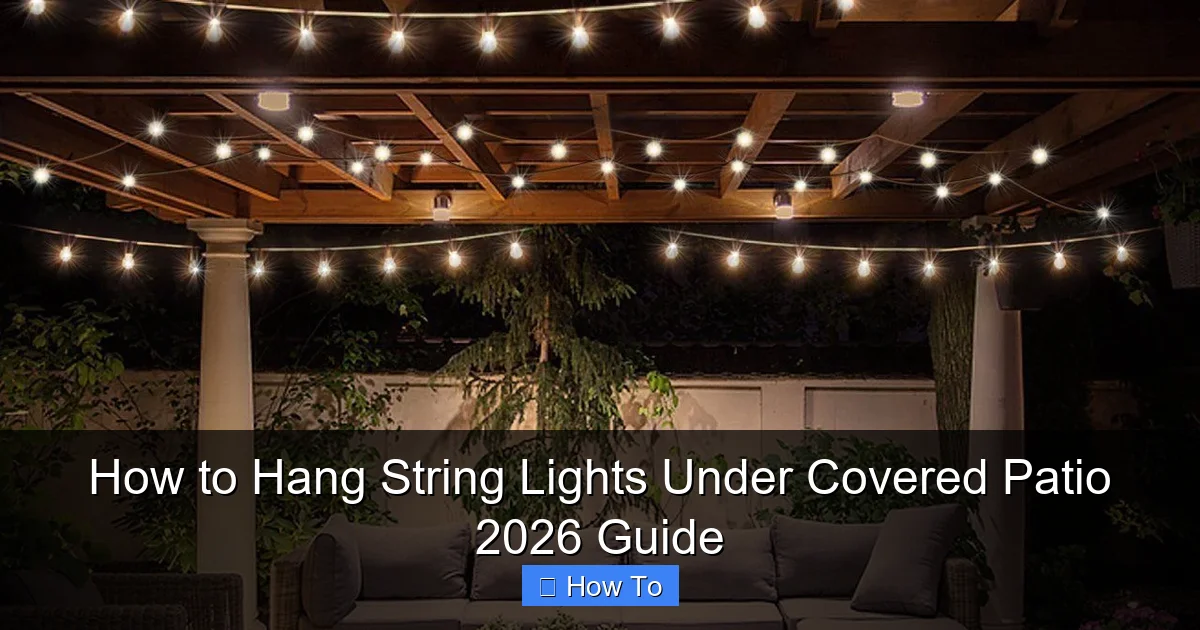
Featured image for how to hang string lights under covered patio
Image source: i.pinimg.com
Transform your covered patio into a cozy, inviting retreat by securely mounting string lights using weather-resistant hooks or adhesive clips designed for outdoor use. Ensure proper spacing and a stable power source to maintain both safety and ambiance, especially under low-clearance or sloped ceilings. This 2026 guide reveals expert tips for a seamless, professional-looking installation that withstands the elements year-round.
“`html
How to Hang String Lights Under Covered Patio 2026 Guide
Key Takeaways
- Plan your layout first: Sketch light placement to avoid uneven spacing or overhangs.
- Use weatherproof lights: Ensure durability with IP65-rated or outdoor-rated string lights.
- Secure with hooks or clips: Install screw-in hooks or adhesive clips for a stable hold.
- Measure power source access: Place lights near outlets or use outdoor extension cords safely.
- Test before finalizing: Check brightness and connections before securing lights permanently.
- Hide cords creatively: Use cable raceways or trim to keep wires tidy and safe.
Why This Matters / Understanding the Problem
Let’s be honest—nothing sets the mood quite like soft, glowing string lights under a covered patio. Whether you’re hosting a summer BBQ, enjoying a quiet evening with a book, or just want to make your backyard feel more inviting, how to hang string lights under covered patio 2026 guide is your ticket to transforming a dull space into a cozy retreat.
But here’s the catch: it’s not as simple as draping lights across the beams and calling it a day. Without proper planning, you could end up with sagging wires, tangled messes, or even safety hazards. I learned this the hard way when I tried hanging lights last year—let’s just say I spent more time untangling than relaxing.
The good news? With the right approach, hanging string lights under a covered patio is totally doable. This guide walks you through every step, from planning to final touches, so you can avoid rookie mistakes and enjoy your dreamy outdoor ambiance all season long.
Pro Insight: A covered patio is perfect for string lights because it protects them from rain and wind—but that also means you need to consider weight distribution, mounting points, and aesthetics. Think of it as interior design… for the outdoors.
What You Need
Before you start, gather your supplies. Trust me—running to the hardware store mid-project kills the vibe. Here’s your checklist for how to hang string lights under covered patio 2026 guide:
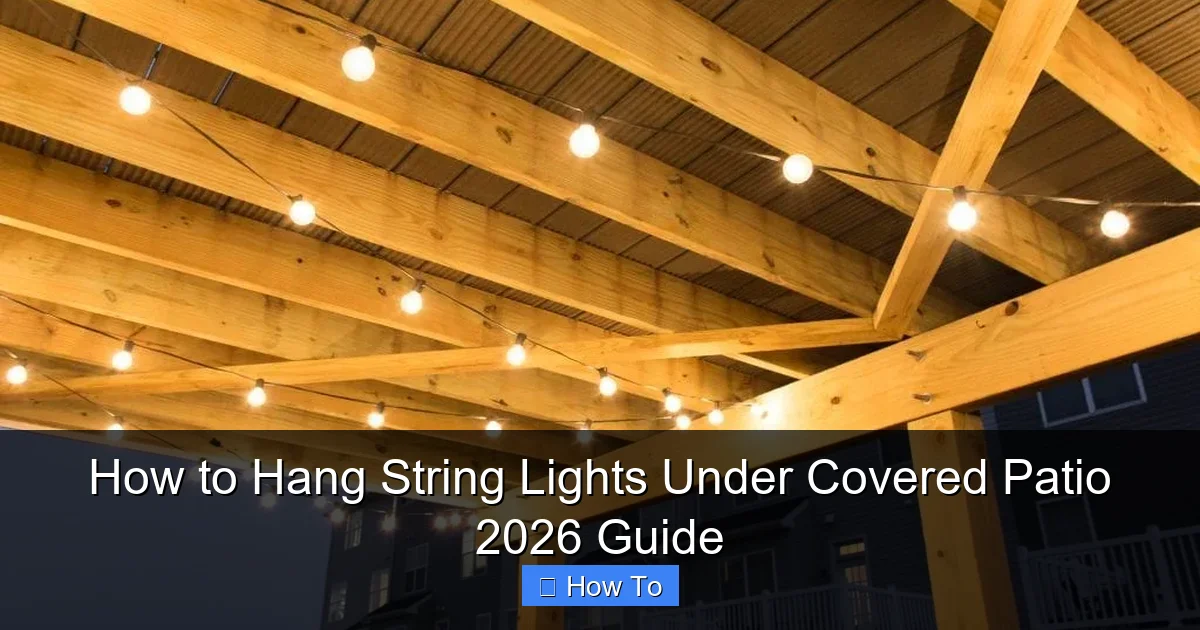
Visual guide about how to hang string lights under covered patio
Image source: bybrittanygoldwyn.com
- String lights (LED recommended): Choose weatherproof, outdoor-rated lights. LED bulbs last longer, use less energy, and stay cool.
- Measuring tape: You’ll need this for spacing and layout planning.
- Pencil or masking tape: For marking drill points without damaging surfaces.
- Drill with appropriate bits: For wood, metal, or concrete, depending on your patio structure.
- Mounting hardware: Use outdoor-rated options like:
- Eye hooks (for wood or beams)
- Adhesive hooks (for smooth surfaces like vinyl or metal)
- Ceiling anchors (for drywall or stucco)
- Zip ties (for temporary or lightweight setups)
- Extension cords and power strips: Outdoor-rated GFCI-protected cords are a must for safety.
- Ladder: A stable step or extension ladder, depending on height.
- Level: To keep lines straight and avoid that “drunken chandelier” look.
- Timer or smart plug (optional): Automate your lights to turn on at sunset.
- Gloves and safety glasses: Because safety first, always.
Bonus: If you’re using a smart lighting system, consider app-controlled or color-changing lights for extra flair. But for most, classic warm white is timeless and easy to manage.
Step-by-Step Guide to How to Hang String Lights Under Covered Patio 2026 Guide
Step 1: Plan Your Layout and Design
Before you touch a single light, plan your layout. This is the most important step in how to hang string lights under covered patio 2026 guide.
Start by sketching your patio. Note where the beams, posts, and roof meet. Decide if you want:
– A canopy effect (lights crisscrossing overhead)
– A border outline (lights along the edges)
– A zigzag or wave pattern (for visual interest)
Measure the total length you’ll need. Buy lights with a little extra—better to have too much than too little. Pro tip: Most string lights come in 25–50 ft lengths. If you need more, connect multiple strands (check the manufacturer’s max connection limit).
Warning: Don’t overload circuits! Most outdoor outlets support 12–15 amps. A typical 50-ft LED string uses about 0.5 amps. Use a power calculator to avoid tripping breakers.
Step 2: Choose the Right Mounting Method
Your mounting choice depends on your patio’s structure. Here’s how to pick the best one:
- Wooden beams or rafters: Use stainless steel eye hooks. They’re strong, rust-resistant, and easy to install.
- Metal frames or pergolas: Use magnetic hooks (if metal is ferrous) or adhesive hooks rated for metal.
- Smooth surfaces (vinyl, stucco, glass): Use heavy-duty adhesive hooks (like 3M Command Outdoor). Test a small area first.
- Concrete or brick: Use toggle bolts or concrete anchors with a hammer drill.
- Temporary setups: Zip ties or removable adhesive strips work for renters or seasonal decor.
For a permanent look, eye hooks are the gold standard. They last years and handle weight well. Adhesive options are great for renters or if you don’t want to drill.
Step 3: Mark and Install Mounting Points
Now, mark where each hook or anchor will go. Use your layout sketch and measuring tape.
For a straight line: Measure and mark every 2–3 feet. Use a level to keep lines straight. For a crisscross pattern: Mark anchor points at each corner and along the center beam.
Drill pilot holes for eye hooks (prevents wood from splitting). Twist hooks in by hand, then use pliers to tighten. For adhesive hooks: Clean the surface with isopropyl alcohol, wait 1 hour, then press firmly for 30 seconds.
Pro Tip: Use masking tape to mark drill points. It’s removable and won’t leave residue. Also, wear safety glasses—wood chips and dust are no fun in the eyes.
Step 4: Test Lights Before Hanging
Plug in your string lights before hanging. Check for:
– Dead bulbs
– Flickering
– Loose connections
– Proper brightness
Replace any faulty strands. It’s way easier to fix on the ground than on a ladder. Also, test your extension cord and outlet. A GFCI outlet is a must for outdoor use—it cuts power if it detects a fault.
Step 5: Hang the Lights (The Right Way)
Now for the fun part! Start at the power source. Hang the first hook, then attach the light’s plug end. Work outward, spacing lights evenly.
For straight lines: Hook the light’s loop or clip to each anchor. For crisscross: Use a “web” pattern—attach lights diagonally from corner to corner. Use zip ties or small hooks to secure mid-span if lights sag.
Keep tension consistent. Too tight = stress on wires. Too loose = saggy mess. A slight dip is okay—it adds charm.
Common Mistake: Hanging lights directly on beams with nails. Nails can damage wires and aren’t secure. Always use proper hooks or anchors.
Step 6: Manage Cables and Power
No one wants a tangled web of cords. Use these tricks to keep things clean:
- Run extension cords along beams or walls. Secure with zip ties or adhesive clips.
- Use a weatherproof power box to protect connections from moisture.
- Hide cords with cord covers or paint them to match the surface.
- Use a timer or smart plug to automate on/off times.
For a seamless look, route the cord to a nearby outlet. If the outlet is far, use a buriable outdoor-rated extension cord (run it under mulch or grass).
Step 7: Final Adjustments and Testing
Step back and admire your work. Look for:
– Uneven spacing
– Sagging sections
– Exposed cords
– Glare or hot spots
Adjust hooks or add supports where needed. Turn on the lights at night to see the full effect. Make tweaks until it’s perfect.
Pro tip: Take a photo at night. It’s easier to spot issues in the dark than in daylight.
Pro Tips & Common Mistakes to Avoid
Over the years, I’ve hung hundreds of string lights. Here are my top insider tips—and the mistakes I’ve made so you don’t have to.
- Use LED, not incandescent: LEDs are cooler, safer, and last 25x longer. Plus, they’re more energy-efficient.
- Check bulb spacing: Closer bulbs (every 3–4 inches) give a denser glow. Wider spacing (6+ inches) feels more open.
- Layer your lights: Add fairy lights or lanterns for depth. A mix of light sources feels more natural.
- Weatherproof everything: Use outdoor-rated lights, cords, and connectors. Seal any splices with waterproof tape.
- Don’t skip the timer: A dusk-to-dawn timer means you never forget to turn them off.
Warning: Never use indoor lights outdoors. They’re not rated for moisture, UV, or temperature changes. One rainstorm can ruin them—or worse, cause a fire hazard.
Common Mistakes:
- Overloading circuits: Too many strands can trip breakers. Use a power meter to check.
- Ignoring weight: Heavy bulbs or long runs can pull down hooks. Use anchors rated for 5+ lbs.
- Hanging in direct sunlight: UV degrades plastic. Hang lights under eaves or use UV-resistant bulbs.
- Forgetting maintenance: Clean lights yearly. Dust and dirt reduce brightness.
- Using cheap adhesive hooks: They fail in heat or rain. Invest in quality.
One time, I used dollar-store hooks. Within a month, half the lights were on the ground. Lesson learned: spend a few extra bucks on durable hardware.
FAQs About How to Hang String Lights Under Covered Patio 2026 Guide
Q: Can I hang string lights on a vinyl or metal pergola without drilling?
A: Absolutely! Use heavy-duty adhesive hooks (like 3M Command Outdoor). They’re rated for 5–7 lbs and remove cleanly. Just clean the surface first and let the adhesive cure for 24 hours. I’ve used these on my metal pergola for two summers—no sagging, no damage.
Q: How do I prevent lights from sagging in the middle?
A: Add a support hook or zip tie every 3–4 feet. For long spans, use a center anchor on the beam. You can also use a thin, clear fishing line to lift the middle—it’s nearly invisible at night.
Q: Are battery-powered string lights a good option?
A: They’re great for short-term setups or renters. But batteries need frequent replacing and don’t last as long. For a permanent patio, hardwired or plug-in lights are more reliable. I use battery lights for my porch swing—easy to remove when not in use.
Q: Can I connect multiple string light strands?
A: Yes, but check the manufacturer’s limit. Most LED strands allow 10–20 connections. Never exceed the max—it can overload the circuit. Use a parallel connection (not daisy-chain) for long runs.
Q: What’s the best way to store lights when not in use?
A: Coil them loosely around a cardboard tube or reel. Store in a dry, cool place. I use a plastic bin with silica gel packs to prevent moisture. Never leave lights outside in winter—cold damages electronics.
Q: How do I hang lights in a high-ceiling patio?
A: Use a pulley system with thin nylon rope. Attach the rope to hooks, then run the lights through. This lets you raise/lower for cleaning or storage. I use this on my 12-foot porch—it’s a game-changer.
Q: Can I use smart string lights under a covered patio?
A: Definitely! Smart lights let you change colors, brightness, or set schedules via an app. Look for ones with weatherproof ratings (IP65 or higher). I use Philips Hue Outdoor—they sync with my Alexa for voice control.
Final Thoughts
Hanging string lights under a covered patio isn’t just about decor—it’s about creating a space where memories happen. Whether it’s a family dinner, a romantic evening, or just a quiet night with a glass of wine, the right lighting makes all the difference.
This how to hang string lights under covered patio 2026 guide gives you everything you need: the right tools, smart planning, and pro-level execution. No more tangled messes. No more sagging lights. Just a beautiful, functional setup that lasts.
Remember: take your time. Plan first, hang second. And don’t be afraid to experiment. Try a new pattern next year. Add a dimmer. Layer in some lanterns. Your patio is your canvas.
So grab your lights, call a friend, and get started. In a few hours, you’ll have a backyard oasis that’s ready for 2026—and beyond. Light it up, and enjoy every glowing moment.
Final Tip: Share your setup on social media! Tag #PatioLights2026 for a chance to be featured. Let’s inspire each other to make our outdoor spaces shine.
“`

