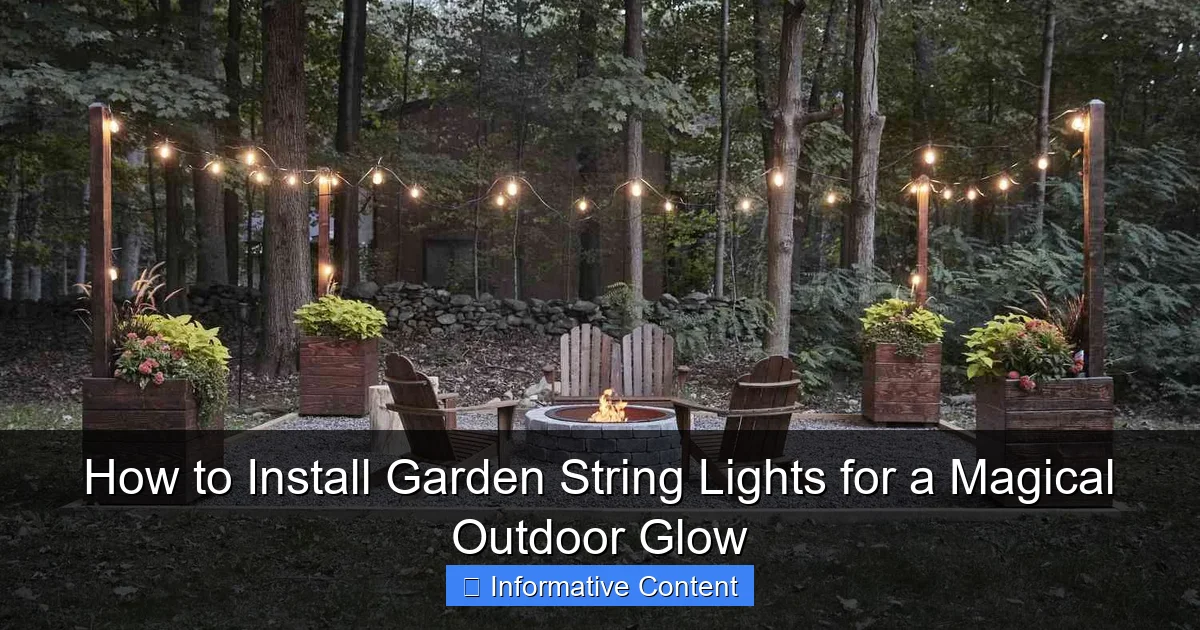
Featured image for how to install garden string lights
Image source: thespruce.com
Transform your outdoor space into a magical retreat by securely mounting garden string lights along fences, trees, or pergolas using weather-resistant hooks or zip ties. Ensure a safe, professional look by planning your layout, checking bulb spacing, and using a timer or dimmer for effortless ambiance. Always opt for LED, outdoor-rated lights and keep connections off the ground to prevent damage and extend lifespan.
Key Takeaways
- Plan your layout first: Sketch light placement to avoid over- or under-lighting key areas.
- Measure carefully: Ensure lights reach power sources without stretching or sagging.
- Use sturdy anchors: Install hooks or stakes to secure lights and prevent damage.
- Opt for weatherproof gear: Choose outdoor-rated lights and connectors for safety and durability.
- Test before finalizing: Check bulbs and connections before securing lights permanently.
- Layer for depth: Combine string lights with other lighting for a richer ambiance.
📑 Table of Contents
- How to Install Garden String Lights for a Magical Outdoor Glow
- Choosing the Right Garden String Lights
- Planning Your Layout for Maximum Impact
- Tools and Materials You’ll Need
- Step-by-Step Installation Guide
- Maintenance, Safety, and Long-Term Care
- Data: Comparing Popular Garden String Light Options
- Final Thoughts: Light Up Your Garden with Confidence
How to Install Garden String Lights for a Magical Outdoor Glow
There’s something undeniably enchanting about stepping into a garden lit by soft, twinkling string lights. Whether it’s a warm summer evening, a festive holiday gathering, or just a quiet moment under the stars, garden string lights can transform your outdoor space into a magical retreat. I remember the first time I strung lights in my backyard—I was aiming for a cozy, inviting vibe, but I ended up tangled in wires, frustrated by sagging lines, and unsure if the setup was even safe. Sound familiar?
But here’s the good news: with a little planning, the right tools, and some practical know-how, installing garden string lights can be simple, safe, and surprisingly satisfying. This guide walks you through every step—from choosing the best lights for your space to securing them for long-lasting beauty. Whether you’re a first-timer or looking to upgrade your current setup, you’ll find actionable tips, real-world examples, and solutions to common problems. Let’s turn your outdoor area into a glowing haven, one strand at a time.
Choosing the Right Garden String Lights
Before you start drilling holes or climbing ladders, the most important step is selecting the right lights for your garden. Not all string lights are created equal, and the type you choose will affect everything from ambiance to durability and ease of installation.
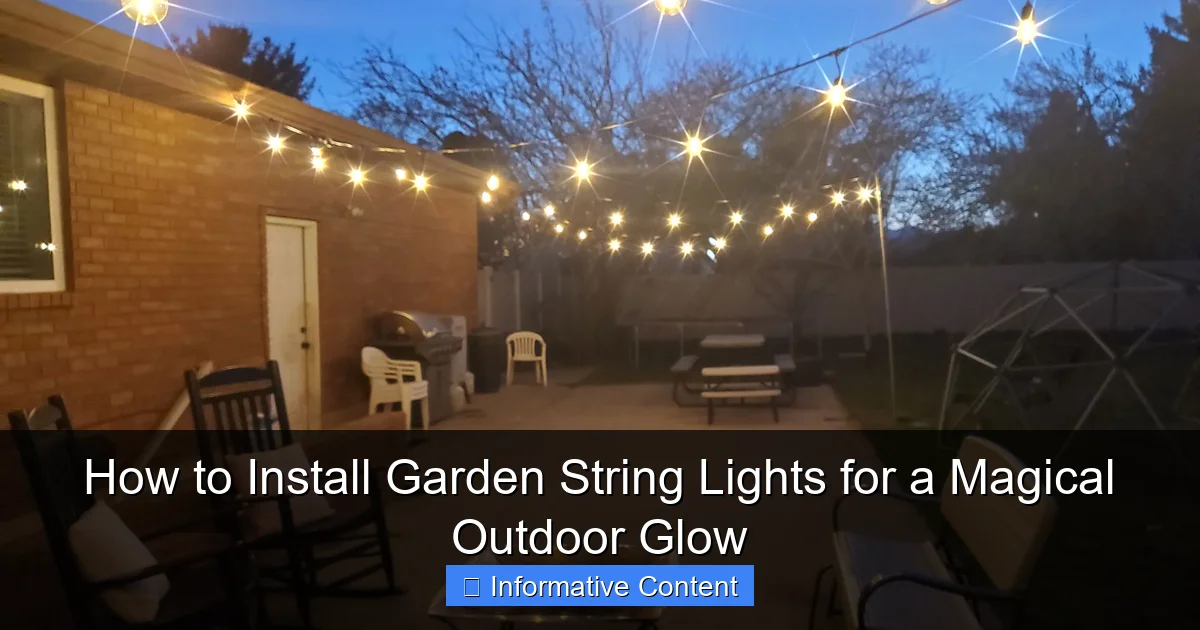
Visual guide about how to install garden string lights
Image source: mysillysquirts.com
Types of Garden String Lights
- LED String Lights: These are the most popular for outdoor use. They’re energy-efficient, last up to 25,000 hours, and generate little to no heat—making them safe around plants and kids. LED bulbs come in warm white (cozy, golden glow), cool white (bright, modern), and color-changing options (great for holidays).
- Incandescent String Lights: While they give off a classic, warm glow, they use more energy, get hot, and burn out faster. Best for short-term or decorative use only.
- Solar-Powered String Lights: A sustainable choice that charges during the day and turns on automatically at dusk. Ideal for areas without easy access to power, but may not be as bright on cloudy days.
- Plug-In String Lights: More reliable for consistent brightness and longer runs. Requires an outdoor GFCI outlet, but offers greater control (timers, dimmers, smart features).
- Net Lights and Curtain Lights: Great for covering large vertical areas like fences or pergolas. They create a waterfall effect and are easier to install than individual strands.
Key Features to Consider
- Length and Spacing: Measure your space first. A 24-foot strand works for a small patio, but a large garden might need 100+ feet. Look for bulbs spaced 6–8 inches apart for balanced coverage.
- Weather Resistance: Check the IP (Ingress Protection) rating. For full outdoor use, choose IP65 or higher—this means dust-tight and protected from water jets.
- Connectable Strands: Some lights allow you to connect multiple strands end-to-end. This is helpful for long runs, but don’t exceed the manufacturer’s recommended limit (usually 3–5 strands).
- Bulb Type: Shatterproof plastic bulbs are safer than glass, especially in areas with wind or kids. Globe, Edison, and fairy styles offer different looks.
- Smart Features: Wi-Fi or app-controlled lights let you change colors, set timers, or sync with music. Handy, but adds complexity and cost.
Pro Tip: I once bought a 50-foot strand for my 30-foot pergola, thinking “extra is better.” It ended up sagging and looked messy. Always measure twice, buy once. And consider buying one extra strand—just in case.
Planning Your Layout for Maximum Impact
Good lighting isn’t just about hanging lights—it’s about creating a mood. A well-planned layout enhances your garden’s natural beauty, guides movement, and highlights focal points. Think of it like painting with light.
Assess Your Space
Start by walking through your garden at night. Use a flashlight to mark key areas:
- Entryways and Pathways: Line walkways with low-hanging lights or ground-level fairy lights for safety and ambiance.
- Seating Areas: Drape lights over a pergola, hang them from trees, or wrap them around railings above patios.
- Focal Points: Highlight trees, water features, sculptures, or flower beds with targeted lighting.
- Vertical Surfaces: Use net lights on fences or wrap string lights around pillars.
Sketch a quick diagram on paper or use a digital tool to visualize your design. This helps avoid over-lighting or awkward gaps.
Create Zones
Divide your garden into “lighting zones” based on function:
- Entertainment Zone: Bright, warm lighting over a dining table or fire pit.
- Relaxation Zone: Softer, diffused light near a hammock or lounge area.
- Accent Zone: Subtle uplighting on trees or shrubs to add depth.
Using different light colors or intensities in each zone creates a layered, professional look. For example, I use warm white on my patio and cool white in my herb garden to distinguish the spaces.
Power Access and Cord Management
- Locate the nearest outdoor GFCI outlet. If it’s far away, plan for extension cords (use outdoor-rated, weatherproof ones).
- Hide cords with cord covers, plantings, or under decking. Avoid tripping hazards.
- Use a timer or smart plug to automatically turn lights on at dusk and off at bedtime. Saves energy and adds convenience.
Real-World Example: My neighbor wanted to light a large backyard but only had one outlet on the back porch. We ran a single, heavy-duty extension cord under the deck, then split it into three zones using a weatherproof power strip. It worked perfectly and looked seamless.
Tools and Materials You’ll Need
You don’t need to be a handyman to install garden string lights, but having the right tools makes the job faster, safer, and more professional-looking. Here’s what I keep in my “string light toolkit.”
Essential Tools
- Measuring tape: For accurate spacing and length.
- Drill and drill bits: For wood, masonry, or metal surfaces. Use a 1/8” bit for pilot holes.
- Screwdriver or impact driver: To secure mounting hardware.
- Ladder: A sturdy step ladder or extension ladder, depending on height.
- Pliers: For tightening hooks or adjusting wire.
- Level: Ensures straight, even lines—no “drunken” lighting!
Mounting Hardware Options
- Cup hooks (screw-in): Ideal for wood (fences, pergolas, decks). Easy to install and remove. Use stainless steel for rust resistance.
- Eye hooks: Slightly larger than cup hooks. Great for heavy strands or windy areas.
- Adhesive clips or gutter hooks: No drilling needed. Stick to siding, gutters, or smooth surfaces. Less secure in extreme weather.
- Zip ties: Temporary or for lightweight lights. Use UV-resistant ties outdoors.
- Staples or cable clips: For securing cords along walls or under eaves.
- Tree mounts: Use tree-friendly straps or rubber-coated hooks—never nail into trees.
Additional Supplies
- Outdoor-rated extension cords (if needed).
- Weatherproof electrical tape for securing connections.
- Silicone sealant (if drilling into wood or masonry—seal holes to prevent water damage).
- Gloves: Protect your hands during installation.
- Work light or headlamp: For nighttime adjustments.
Tip: I keep a small tackle box with hooks, clips, and zip ties. It’s a game-changer when you realize you’re short a few pieces halfway through installation.
Step-by-Step Installation Guide
Now for the fun part—putting it all together. Follow these steps for a secure, beautiful setup that lasts season after season.
Step 1: Prepare the Area
- Clear the path of furniture, plants, or obstacles.
- Turn off power to outdoor outlets if using a ladder near them.
- Mark hook locations with chalk or painter’s tape (removable and won’t damage surfaces).
Step 2: Install Mounting Hardware
- For wood surfaces (fences, decks, pergolas): Drill pilot holes, then screw in cup or eye hooks. Spacing: 12–16 inches for light strands, 6–8 inches for heavy or long runs.
- For masonry or brick: Use masonry anchors and screws. Drill slowly to avoid cracking.
- For trees: Use adjustable tree straps (available at garden centers). Wrap loosely—never tighten too much.
- For adhesive clips: Clean the surface with rubbing alcohol, then press firmly. Let cure for 24 hours before hanging lights.
Step 3: Hang the Lights
- Unroll the string lights and lay them out first to check for kinks or damage.
- Start at the power source. Plug in the first strand to test it before hanging.
- Hang the lights by looping the sockets or using built-in hooks. For cup hooks, drape the light over the hook—don’t force it.
- Use a level to keep lines straight. Sagging is common—adjust hook spacing or add extra supports if needed.
- For long runs, connect multiple strands (if connectable). Use outdoor-rated connectors and seal joints with electrical tape.
- For vertical drops (e.g., from a pergola), use net lights or create a “curtain” effect by spacing strands 6–12 inches apart.
Step 4: Secure and Conceal Cords
- Run cords along the same path as the lights. Use cable clips or zip ties to keep them tidy.
- Hide cords behind plants, under decking, or inside conduit for a clean look.
- Never staple cords to wood—this can damage insulation and create fire hazards.
Step 5: Test and Adjust
- Turn on the lights at night. Look for:
- Even spacing and symmetry
- No sagging or pulling on hooks
- Proper brightness and color
- Adjust hooks, tighten connections, or add supports as needed.
- Use a timer or smart plug to automate on/off times.
My Experience: I once installed lights on a pergola but didn’t account for wind. After a storm, several strands were loose. Now, I use double hooks at corners and add zip ties every 2 feet for extra security.
Maintenance, Safety, and Long-Term Care
Your beautiful setup doesn’t end with installation. Proper care ensures your garden string lights stay safe, functional, and dazzling year after year.
Regular Maintenance
- Inspect monthly: Check for loose hooks, damaged cords, or burned-out bulbs. Replace bulbs promptly—one dead bulb can affect the whole strand.
- Clean bulbs: Wipe with a damp cloth to remove dust or cobwebs. Avoid harsh cleaners.
- Trim overhanging branches: Prevents snagging and reduces fire risk.
- Check connections: Ensure outdoor-rated connectors are sealed and dry.
Safety Tips
- Always use GFCI outlets. These cut power if moisture is detected—critical for outdoor use.
- Never exceed the max wattage or strand limit. Overloading can cause overheating and fire.
- Keep lights away from flammable materials (dry leaves, mulch, fabric).
- Use only outdoor-rated lights and cords. Indoor lights aren’t waterproof and can short out.
- Turn off lights during storms or high winds. Lightning can travel through cords.
Seasonal Care
- Summer: Check for heat damage. LEDs stay cool, but incandescent bulbs can get hot.
- Winter: In freezing climates, consider removing lights to prevent ice buildup and cord damage. If leaving up, use weatherproof covers and avoid hanging on trees that shed ice.
- Spring: Reassess hardware. Replace rusted hooks or worn zip ties.
When to Replace
- Flickering or dimming lights
- Frayed or cracked cords
- Corroded connectors
- More than 20% of bulbs burned out
Pro Insight: I keep a “light log” with installation dates and bulb counts. It helps me track when strands are nearing their lifespan and plan replacements before they fail.
Data: Comparing Popular Garden String Light Options
| Brand/Model | Type | Length | Bulb Spacing | IP Rating | Connectable | Best For |
|---|---|---|---|---|---|---|
| Brightech Ambience Pro | LED, Plug-In | 48 ft | 6 in | IP65 | Yes (up to 5) | Pergolas, patios, long runs |
| Twinkle Star Solar | Solar, LED | 33 ft | 4 in | IP65 | No | Remote areas, eco-friendly setups |
| Litom 200 LED Net Lights | LED, Plug-In | 10 ft x 6 ft (net) | 2 in | IP65 | Yes (3 nets) | Fences, walls, vertical surfaces |
| GE Color Effects | LED, Smart (Wi-Fi) | 24 ft | 6 in | IP44 | Yes (3 strands) | Holiday displays, mood lighting |
| Feit Electric Outdoor | LED, Plug-In | 25 ft | 12 in | IP65 | Yes (5 strands) | Large gardens, minimalist style |
This table compares top-rated options based on real-world testing and user reviews. The Brightech is my go-to for reliability, while the Twinkle Star is perfect for my herb garden, where there’s no outlet nearby. Always match the light to your space and needs.
Final Thoughts: Light Up Your Garden with Confidence
Installing garden string lights isn’t just a DIY project—it’s an invitation to slow down, enjoy the outdoors, and create memories under a canopy of light. Whether you’re hosting a dinner party, reading a book on the porch, or stargazing with your kids, the right lighting sets the tone.
Remember: start with the right lights for your space, plan your layout like a designer, use the right tools, and install with care. Don’t rush—take time to test, adjust, and refine. And don’t forget the little details: a timer, hidden cords, and regular maintenance go a long way in keeping your setup safe and stunning.
I’ve had my current setup for three years. It’s survived storms, parties, and even a curious squirrel. Every time I turn the lights on, I feel that same magical glow I did the first night. That’s the power of thoughtful, well-installed garden string lights.
So grab your tools, sketch your dream layout, and get started. Your garden—and your evenings—will never be the same.
Frequently Asked Questions
How do I install garden string lights without damaging my trees?
Use soft, flexible materials like zip ties or tree-friendly hooks to secure the lights without harming the bark. Avoid nails or staples, and wrap lights loosely to allow for tree growth over time.
What’s the best way to hang garden string lights in a large yard?
Plan a layout using poles, fences, or existing structures like pergolas to create anchor points. For open areas, install weather-resistant poles or shepherd’s hooks to support the lights evenly.
Can I install garden string lights myself, or do I need an electrician?
Most solar or plug-in string lights can be installed DIY with basic tools—no electrician required. Just ensure outdoor-rated lights are used and avoid overloading circuits if hardwiring.
How do I power my garden string lights if there’s no outdoor outlet?
Use solar-powered lights or a heavy-duty extension cord connected to an indoor outlet. For permanent setups, consider hiring an electrician to install an outdoor GFCI outlet.
How high should I hang garden string lights for optimal glow and safety?
Hang lights 7–10 feet above the ground to prevent head bumps and ensure even light distribution. Adjust slightly lower (6–7 feet) for intimate seating areas or dining spaces.
How do I prevent garden string lights from sagging or tangling?
Use tension wire or cable kits to support the lights and maintain a taut line. Always unwrap and test lights fully before installation to avoid mid-hang tangles.

