Featured image for how to install outdoor patio string lights
Image source: warisanlighting.com
Transform your outdoor space in minutes by securely mounting patio string lights along walls, fences, or poles using weather-resistant hooks or zip ties. Ensure a safe, professional look by planning your layout, checking bulb spacing, and connecting to a GFCI outlet for weatherproof power—no electrician needed. This 2026 guide simplifies installation with step-by-step tips for a stunning, hassle-free ambiance all season long.
How to Install Outdoor Patio String Lights in 2026 Easy Guide
Key Takeaways
- Plan your layout: Sketch light placement before installation to ensure even coverage and avoid overloading circuits.
- Choose weatherproof lights: Opt for UL-listed, outdoor-rated string lights for durability and safety in all conditions.
- Measure spacing: Hang lights 6-8 feet apart for optimal brightness and structural support.
- Use proper hardware: Install outdoor-rated hooks or clips to prevent sagging and damage to surfaces.
- Secure connections: Elevate plugs with a weatherproof outlet box to protect from moisture and tripping hazards.
- Test before finalizing: Check lights and adjust tension to ensure a polished, professional look.
Why This Matters / Understanding the Problem
Let’s be real—there’s nothing quite like stepping into your backyard on a warm summer evening, only to realize it’s too dark to enjoy. You’ve got the perfect patio setup: comfy chairs, a fire pit, maybe even a little herb garden. But without the right lighting? It’s like having a gourmet meal with no seasoning.
That’s where how to install outdoor patio string lights in 2026 easy guide comes in. String lights aren’t just for holidays anymore. In 2026, they’re a staple of modern outdoor living—adding warmth, ambiance, and that cozy “I could live out here” vibe. Whether you’re hosting a dinner party or just unwinding after work, the right lighting transforms your space.
But here’s the catch: many people hesitate because they think it’s complicated. “Do I need an electrician?” “Will it look messy?” “What if I mess up the spacing?” I’ve been there. I tried my first install with tangled wires, uneven spacing, and one light that flickered like it was haunted. Not exactly the mood I was going for.
The good news? You don’t need a degree in electrical engineering. With the right tools and a little patience, anyone can do it. This guide walks you through how to install outdoor patio string lights in 2026 easy guide—step by step, with real-world tips, common pitfalls, and a few “I wish I knew that sooner” moments.
Whether you’re a DIY newbie or a seasoned tinkerer, this guide is built for you. No fluff. No overpriced tools. Just practical, honest advice from someone who’s done it (and learned from the mistakes).
Pro tip: Start small. You don’t have to light your entire yard on day one. A single strand over your dining area can make a huge difference.
What You Need
Before you start, let’s talk about what you’ll need. The beauty of this project is that it’s low-cost and doesn’t require a ton of gear. Here’s my tried-and-true list:

Visual guide about how to install outdoor patio string lights
Image source: m.media-amazon.com
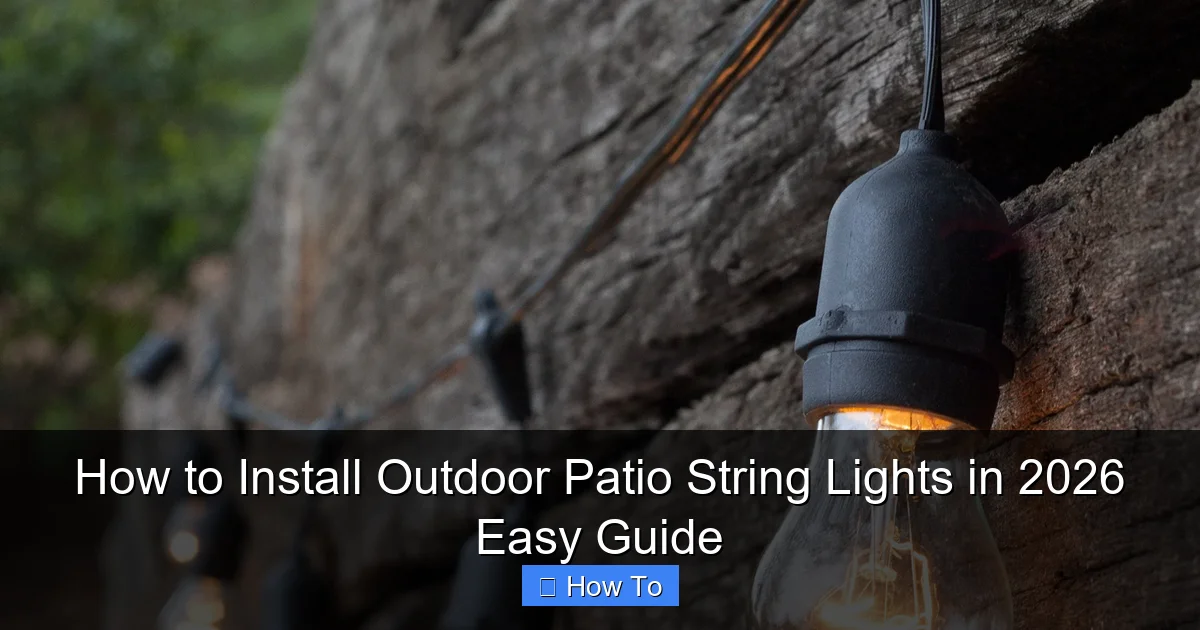
- Outdoor-rated string lights – Look for IP65 or higher waterproof rating. LED bulbs are energy-efficient and last longer. I prefer Edison-style bulbs for that warm, café vibe.
- Mounting hardware – This varies by surface:
- For wood: stainless steel cup hooks or screw-in hooks
- For stucco or brick: plastic anchor hooks or masonry screws
- For metal: magnetic clips (if surface allows)
- For pergolas: zip ties or adjustable cable clamps
- Measuring tape – A must for even spacing and avoiding “oops, that’s too short” moments.
- Level – A small one works. Keeps your lines straight and professional-looking.
- Drill and appropriate bits – For drilling pilot holes (especially in wood or masonry).
- Extension cords (outdoor-rated) – Get one with a built-in timer or smart plug for convenience.
- Smart plug or timer (optional) – I love this for hands-off control. No more running outside to turn them on.
- Zip ties or wire clips – For securing loose ends or managing slack.
- Ladder – A sturdy one, if you’re working above waist height.
- Marker or painter’s tape – To mark hook locations before drilling.
A few extra things I’ve learned over the years:
- Buy 10–15% more lights than you think you need. You’ll likely need to account for corners, slack, and unexpected gaps.
- Use a power source near the middle of your layout. This reduces voltage drop, which can make bulbs dim at the far end.
- Consider a solar-powered option. Great for areas without outlets. Just make sure they get 6+ hours of sun.
Warning: Never use indoor string lights outdoors. They’re not rated for moisture, UV, or temperature swings—and can be a fire hazard.
Step-by-Step Guide to How to Install Outdoor Patio String Lights in 2026 Easy Guide
Now, let’s get into the nitty-gritty. I’ll walk you through the process like I’m standing next to you, coffee in hand, ready to help. This how to install outdoor patio string lights in 2026 easy guide is designed for real homes—not just Pinterest-perfect patios.
Step 1: Plan Your Layout (The Most Important Step)
Before you touch a single tool, take a walk around your space. Ask yourself:
- Where do you spend the most time? (Dining table? Lounge area? Fire pit?)
- Do you want ambient lighting, task lighting, or both?
- Are there natural anchor points? (Trees, posts, eaves, pergola beams, fences)
I once tried to run lights from my house to a tree 30 feet away. Big mistake. The sag was so bad, it looked like a hammock. Now I always break long runs into shorter sections with mid-point anchors.
Here’s how to plan:
- Sketch a rough layout on paper or use a free app like SketchUp Free or RoomSketcher.
- Measure the distance between anchor points. Add 10–15% for slack and connections.
- Decide on the pattern:
- Straight lines – Simple, clean, great for pergolas or eaves.
- Grid or crisscross – Adds drama. Best for larger spaces.
- Zigzag – Fun and dynamic. Works well over dining tables.
- Canopy or tent effect – Lights anchored to a central pole or tree, radiating outward.
- Mark power source location. Try to place it near the middle of your layout to avoid dim bulbs.
Personal insight: I use painter’s tape to “test” my layout. I tape hooks in place and run a string to visualize the look. It’s saved me from drilling unnecessary holes more than once.
Step 2: Choose the Right Mounting Method
This is where many people go wrong. The wrong hardware can damage your home, fall down, or look sloppy. Let’s match your surface to the best option:
- Wood (eaves, pergola, deck railing): Use stainless steel cup hooks. They’re strong, rust-resistant, and easy to install. Drill a pilot hole first to prevent splitting.
- Stucco or brick: Use plastic anchor hooks with masonry screws. They grip the wall without cracking. Avoid nails—they won’t hold.
- Metal (gutters, railings): Use magnetic clips if the surface is magnetic. Otherwise, adjustable cable clamps work great.
- Fences: Screw-in hooks or heavy-duty zip ties. Just make sure your fence is sturdy enough to hold the weight.
- Trees: Use tree-friendly hooks (like the kind with rubber padding) or zip ties with a loop. Never wrap wire tightly around bark—it can damage the tree.
For pergolas or gazebos, you can often use the existing beams. I love using zip ties with a loop end—they’re removable and don’t require drilling.
Warning: Avoid adhesive hooks for long-term outdoor use. They may hold at first, but UV and moisture will weaken the bond over time.
Step 3: Install the Hooks or Anchors
Now it’s time to get your hands dirty. Here’s how to do it right:
- Mark your hook locations using a measuring tape and level. I like to space hooks 3–4 feet apart for a balanced look.
- Use a small drill bit to make pilot holes (especially in wood). This prevents splitting and makes screwing in hooks easier.
- Screw in the hooks by hand first, then use a screwdriver or drill on low torque to finish. Don’t over-tighten—this can strip the wood or crack stucco.
- For masonry, use a masonry bit and hammer drill. Insert the plastic anchor, then screw in the hook.
- For trees, place hooks 2–3 inches above ground to avoid tripping hazards. Use rubber padding if available.
I always double-check alignment with a level before moving to the next hook. A crooked line is hard to unsee once the lights are up.
Pro tip: If you’re running lights in a zigzag pattern, mark both sides first. Then use a string to connect the dots and ensure symmetry.
Step 4: Run the Lights (Without Tangling)
This is where patience pays off. I’ve learned the hard way: never unroll your lights on the ground and then try to hang them. You’ll end up with a bird’s nest.
Here’s my method:
- Unroll the lights slowly, keeping the plug end accessible.
- Start at the power source. Plug it in (but don’t turn it on yet) to test the length.
- Hang the first bulb at the first hook. Don’t stretch the wire—let it hang naturally.
- Move to the next hook and hang the next bulb. Keep a slight sag (about 6–12 inches between bulbs) to avoid tension.
- For long runs, have a helper hold the middle while you go from end to end.
- Use zip ties or clips to secure loose wires or excess cord near the plug.
If you’re doing a grid or crisscross, start with the main lines first. Then add the diagonals. It’s easier to adjust spacing this way.
Personal insight: I use a ladder with a tray to hold extra bulbs and clips. It keeps my hands free and prevents me from dropping tools.
Step 5: Secure and Adjust for a Professional Look
Now that the lights are up, it’s time to fine-tune:
- Adjust the sag. You want a gentle “U” shape between hooks, not a tight line or a droopy mess. Think “elegant draping,” not “laundry line.”
- Straighten bulbs. Make sure they all face the same direction (usually downward for ambient light).
- Secure loose wires. Use zip ties or clips to bundle extra cord near the plug or along beams.
- Hide the plug. Tuck it behind a planter, under a deck, or use a weatherproof outlet cover.
- Test the lights. Plug them in and walk around. Look for dim bulbs, flickering, or dark spots.
If a bulb is dim, it might be at the end of a long run. Consider moving the power source or using a shorter string with a splitter.
Pro tip: Use a smart plug with a timer. I set mine to turn on at sunset and off at 11 PM. No more forgetting to turn them off!
Step 6: Weatherproof and Maintain
Outdoor lights take a beating. Sun, rain, wind—it all adds up. Here’s how to make them last:
- Use outdoor-rated extension cords. Look for “SJTW” or “SJTOW” on the label—these are weather-resistant.
- Seal connections. If you’re using a splitter or plug, cover it with a weatherproof outlet cover or electrical tape.
- Trim nearby branches. Overhanging leaves can rub against wires and cause damage.
- Inspect monthly. Check for loose hooks, frayed wires, or dim bulbs.
- Remove in extreme weather. If you’re expecting a storm with high winds, take them down temporarily. Better safe than sorry.
I leave my lights up year-round, but I do a full inspection every spring. I replace any damaged bulbs and tighten loose hooks.
Warning: Never use metal hooks on aluminum gutters. The dissimilar metals can corrode and damage the gutter.
Pro Tips & Common Mistakes to Avoid
After 10+ years of installing outdoor lights (and making every mistake in the book), here are my top insights:
- Don’t over-tighten. Lights should hang with a slight sag. Tight wires can pull hooks loose or damage the cord.
- Avoid long, uninterrupted runs. More than 50 feet? Break it into sections. Voltage drop is real.
- Use a splitter, not a daisy chain. Plugging one string into another can overload the circuit. Use a splitter with multiple outlets instead.
- Match bulb color temperature. I prefer 2700K–3000K (warm white) for a cozy feel. Cool white (4000K+) feels too sterile for patios.
- Label your lights. If you have multiple strings, label them with painter’s tape. Makes troubleshooting way easier.
- Test before you commit. Plug in the lights and leave them on for 24 hours. Check for heat, flickering, or dim spots.
- Think about shadows. Lights that shine directly into your eyes are annoying. Angle bulbs downward or use diffusers.
Personal story: I once used indoor-rated lights on my patio. Within a month, the plastic casing cracked from UV exposure. Lesson learned: always check the rating.
FAQs About How to Install Outdoor Patio String Lights in 2026 Easy Guide
Let’s answer the questions I get most often from friends and neighbors.
Q: Can I install string lights without drilling holes?
A: Yes! Use magnetic clips for metal surfaces, zip ties for pergolas, or tree-friendly hooks for trees. For stucco, try adhesive-backed hooks rated for outdoor use—but only for short-term (under 6 months). I used these for a party and they held great, but I wouldn’t leave them up year-round.
Q: How do I hide the extension cord?
A: Great question. I use cord covers that match my fence color, or I run the cord under a deck or behind a planter. If it’s visible, wrap it with camouflage tape or use a decorative cord sleeve. For a clean look, bury it under mulch (but only if it’s outdoor-rated and protected).
Q: What if I don’t have an outdoor outlet?
A: Options: use solar-powered string lights (best for sunny areas), run a weatherproof extension cord from an indoor outlet (with a GFCI), or install a new outdoor outlet (hire an electrician for this). I went the solar route for my side yard—no wires, no fuss.
Q: How do I prevent sagging in long runs?
A: Use mid-point anchors every 10–15 feet. I use a small hook or zip tie to support the middle. For very long runs, consider heavy-duty commercial string lights with thicker wire. They’re designed to handle more tension.
Q: Are LED string lights worth it?
A: Absolutely. They use 80% less energy, last 10–25 years, and generate less heat. I switched to LEDs 5 years ago and haven’t replaced a single bulb since. Plus, they’re safer—no risk of burning your hand if you touch them.
Q: Can I leave string lights up year-round?
A: Yes, if they’re rated for outdoor use and installed correctly. I do it. But I inspect them every spring and replace any damaged parts. If you live in a snowy area, consider removing them in winter to avoid ice buildup.
Q: How do I make my lights look professional?
A: It’s all in the details. Use a level for straight lines. Keep consistent spacing between bulbs. Hide cords. And add a smart plug so they turn on automatically. Little things make a big difference.
Final Thoughts
Installing outdoor patio string lights isn’t rocket science—but it does take a little care. This how to install outdoor patio string lights in 2026 easy guide is all about doing it right the first time, so you can enjoy your space without stress.
Start small. Pick one area—maybe your dining table or lounge spot. Use quality lights and the right hardware. Take your time with the layout. And don’t forget to test before you commit.
The best part? Once they’re up, you’ll wonder how you ever lived without them. That warm glow, the gentle hum of conversation, the stars overhead… it’s magic.
So grab your tools, pour yourself a drink, and get to work. Your perfect outdoor oasis is just a few hooks and a string of lights away.
And hey—if you mess up? No worries. I’ve been there. Just take them down, learn from it, and try again. The goal isn’t perfection. It’s a space you love.
Now go light up your life. 🌙✨

