Featured image for how to install patio string lights
Image source: warisanlighting.com
Transform your outdoor space in minutes by securely mounting patio string lights using weather-resistant hooks or zip ties along walls, fences, or pergolas. Ensure proper spacing and connect to a GFCI outlet for safety, then drape or zigzag the lights for a professional, inviting glow. This simple 2026 guide makes installation fast, safe, and stunning—no electrician required.
“`html
How to Install Patio String Lights in 2026 Easy Guide
Key Takeaways
- Plan your layout first: Measure space and mark anchor points for even lighting.
- Use weatherproof lights: Choose UL-listed or outdoor-rated string lights for safety.
- Secure with sturdy hardware: Install hooks, eye screws, or zip ties on stable structures.
- Test lights before installing: Ensure all bulbs work to avoid post-setup hassles.
- Keep cords tidy: Hide wires along walls or railings for a clean look.
- Use a timer or smart plug: Automate on/off times to save energy effortlessly.
Why This Matters / Understanding the Problem
Let’s be honest: nothing ruins a cozy backyard evening faster than realizing your patio lights are tangled, dim, or worse—not even working. I’ve been there. One summer, I spent an entire weekend trying to string up lights only to end up with a droopy, half-lit mess. That’s when I realized how to install patio string lights in 2026 easy guide isn’t just about hanging bulbs—it’s about creating a vibe that lasts.
Whether you’re hosting a dinner party, enjoying a quiet night under the stars, or just want to boost your outdoor space, the right lighting changes everything. But with so many options, tools, and setups, it’s easy to feel overwhelmed. The good news? Installing patio string lights doesn’t require an electrician or a degree in engineering. With the right approach, you can have a professional-looking setup in just a few hours.
In this guide, I’ll walk you through every step—from choosing the right lights to securing them safely—so you can skip the frustration and get straight to the ambiance. Think of this as your friendly, no-nonsense walkthrough for how to install patio string lights in 2026 easy guide, packed with real-world tips I’ve learned the hard way.
What You Need
Before you start, let’s gather your toolkit. Trust me, having everything ready saves time and avoids mid-project trips to the hardware store.
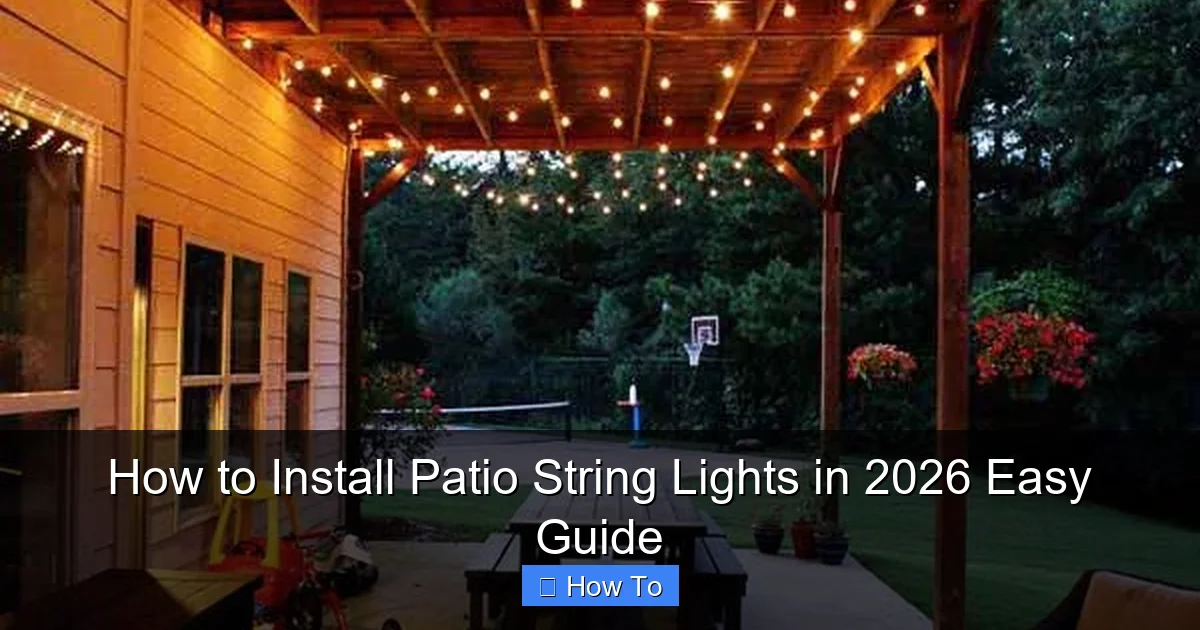
Visual guide about how to install patio string lights
Image source: amazinginteriordesign.com
- String lights – Choose weatherproof, LED, and with the right bulb style (globe, Edison, or fairy lights).
- Measuring tape – To map your space accurately.
- Drill & screws (or hooks) – For wood, stucco, or concrete surfaces.
- Eye screws or S-hooks – Great for wood or vinyl fences.
- Zip ties or cable clips – For temporary or flexible mounting.
- Extension cord (outdoor-rated) – With a GFCI plug for safety.
- Staple gun (optional) – For low-voltage wires (use with caution).
- Ladder – For reaching high areas.
- Level (optional) – To keep lines straight.
- Timer or smart plug – So your lights turn on automatically.
Pro Insight: I once used indoor-rated lights outside—big mistake. After one rainy night, they shorted out. Always check for an IP65 or higher waterproof rating. It’s worth the extra few bucks.
Step-by-Step Guide to How to Install Patio String Lights in 2026 Easy Guide
Step 1: Plan Your Layout (The Key to Success)
Start by walking around your patio and visualizing where the lights will go. Are you wrapping them around a pergola? Draping them between trees? Or creating a canopy over a dining area?
Use your measuring tape to map the distance between mounting points. For a canopy effect, aim for a grid pattern (e.g., 4×4 ft squares). For a perimeter, measure the edges of your space.
- Sketch a rough diagram on paper or use a free app like SketchUp Free.
- Mark where each light strand will start and end.
- Ensure each strand is within 6 feet of an outlet or extension cord.
Tip: I like to lay out the strands on the ground first to test the length. Nothing’s worse than realizing you’re 10 feet short mid-install.
This step is crucial for how to install patio string lights in 2026 easy guide—a solid plan prevents saggy lines and power issues.
Step 2: Choose the Right Mounting Method
The surface you’re mounting to determines your hardware. Here’s the breakdown:
- Wood (decks, pergolas, fences): Use eye screws or S-hooks. Drill pilot holes first to avoid splitting.
- Stucco or concrete walls: Use masonry screws or plastic anchors. A hammer drill makes this faster.
- Vinyl or aluminum siding: Use adhesive hooks (like 3M Command) to avoid drilling.
- Trees: Use zip ties or adjustable tree straps—never nails. Trees grow, and you don’t want to harm them.
For a clean look, I prefer eye screws on wood. They’re sturdy and let the lights hang straight. For stucco, I use Tapcon screws—they grip tight without cracking.
Warning: Don’t use staples on high-tension wires. I once stapled too tightly, and the insulation wore through after a few months. Use cable clips instead.
Step 3: Install Mounting Points
Now it’s time to get your hands dirty. Start with one corner and work systematically.
- Drill pilot holes (¼” for wood, ⅛” for stucco).
- Screw in eye screws or hooks. For stucco, insert plastic anchors first, then screw.
- Use a level to keep lines straight (especially for canopies).
- For trees, wrap zip ties loosely around the trunk or large branch.
I space my hooks 6–8 feet apart for canopies. For perimeter lighting, 4–5 feet works. The goal? Even tension—no sagging.
Pro Tip: If you’re installing on a pergola, run a thin steel wire (like a clothesline) between the hooks first. Hang the lights on that. It’s easier to adjust and reduces strain on the structure.
Step 4: Hang the Lights (The Fun Part)
Unroll your first strand and test it indoors. Make sure all bulbs work and there are no frayed wires.
Start at the power source (outlet or timer). Hang the first end on a hook, then stretch the strand to the next point. Use S-hooks or carabiners to connect multiple strands—this lets you adjust tension.
- For canopies: Create a grid. Run strands parallel, then cross them perpendicular.
- For perimeters: Drape strands loosely between hooks. A slight curve looks more natural than a straight line.
- For trees: Wrap strands in a spiral, starting at the base.
I always leave a little slack—about 10% extra length. This prevents tension on the sockets during wind or rain.
Common Mistake: Overloading outlets. I once daisy-chained 5 strands into one extension cord. The breaker tripped. Check your lights’ wattage and stay under 80% of the outlet’s capacity.
Step 5: Connect to Power & Test
Use an outdoor-rated extension cord with a GFCI plug. Plug it into a GFCI outlet (or use a GFCI adapter). This protects against shocks and trips the circuit if there’s a fault.
- Plug in the first strand and turn it on.
- Walk along the path to check for dim spots, flickering, or dark bulbs.
- Replace any faulty bulbs or frayed strands.
For long setups, use a timer or smart plug. I love the Kasa Smart Plug—it lets me turn lights on at sunset via an app.
Safety First: Never run cords through doors or windows. If you must cross a walkway, use a cord cover or bury it under mulch (not soil).
Step 6: Secure & Weatherproof
Once the lights are up and working, secure loose wires and protect connections.
- Use zip ties or cable clips to bundle cords every 2–3 feet.
- For outdoor outlets, use a weatherproof cover (like a Bell Weatherproof Box).
- Seal plug connections with electrical tape or a silicone cover.
I also add a few extra zip ties on windy days. Nothing’s more annoying than lights clanging all night.
Pro Tip: If you’re using LED lights, they last longer if kept dry. I store my strands in a sealed bin during winter—no tangles, no moisture damage.
Pro Tips & Common Mistakes to Avoid
After 10+ years of installing patio lights, here’s what I’ve learned:
- Use LED, not incandescent: LEDs use 80% less energy, last longer, and won’t heat up your space. My patio stays cool even after hours of use.
- Buy extra bulbs: Keep a pack of replacements on hand. I keep mine in a small toolbox labeled “Light Kit.”
- Go for dimmable lights: A dimmer lets you adjust the mood—bright for parties, soft for quiet nights.
- Check local codes: Some areas require permits for permanent outdoor electrical work. When in doubt, hire an electrician.
- Don’t ignore the weather: High winds can snap hooks. I reinforce mine with a secondary zip tie during storm season.
Biggest Mistake: Skipping the test phase. I once installed 300 feet of lights without checking. One strand had a short, and I spent an hour tracing the fault. Always test before hanging.
For how to install patio string lights in 2026 easy guide, the secret is patience. Take your time, and the results will speak for themselves.
FAQs About How to Install Patio String Lights in 2026 Easy Guide
Can I install string lights without drilling?
Absolutely! Use adhesive hooks (like 3M Command) for vinyl, aluminum, or stucco. For trees, zip ties or tree straps work great. I’ve even used tension rods in a pergola to avoid screws. Just avoid high-tension setups—adhesive hooks can fail in heavy rain or wind.
How many strands can I connect together?
Check the manufacturer’s rating. Most LED strands let you connect 20–30 at once. But remember: wattage matters. If your outlet is 15A (1,800W), stay under 1,440W (80% rule). I limit myself to 10 strands per outlet to be safe.
Are solar string lights worth it?
For low-use areas (like a garden path), yes. But for patios, I prefer plug-in. Solar lights often don’t get enough sun in shaded areas, and their batteries degrade over time. My solar set died after two winters. Plug-in is more reliable.
How do I keep the lights from sagging?
Use more hooks—closer spacing (4–5 ft) reduces sag. For long spans, add a support wire (like steel cable) between hooks. I also tighten the strands just before the final hook. A little tension goes a long way.
Can I leave string lights up all year?
Only if they’re rated for year-round use. Most are designed for seasonal use. I take mine down in winter to prevent ice damage and prolong lifespan. If you want permanent lighting, consider hardwired LED strips or landscape lighting.
What’s the best way to store string lights?
Wrap them around a cardboard tube or a cord reel. I use old wrapping paper tubes—they’re free and prevent tangles. Store in a dry, cool place. Never coil them too tightly—this can damage internal wires.
How do I clean string lights?
Unplug first! Wipe bulbs with a microfiber cloth and mild soap. For stubborn grime, use a soft brush. Never use water on plug connections. I clean mine once a year—usually in spring, before the season starts.
Final Thoughts
Installing patio string lights isn’t rocket science, but it does take a little planning and care. The key to nailing how to install patio string lights in 2026 easy guide is to focus on safety, durability, and simplicity. You don’t need fancy tools or a pro electrician—just a clear plan and the right materials.
Start small. Test one strand before going all-in. Use quality, weatherproof lights. And always, always test before hanging. A little extra time upfront saves headaches later.
Once your lights are up, step back and enjoy. There’s something magical about seeing your patio glow at night—it’s not just lighting, it’s a mood, a memory, a moment. So go ahead, string those lights, and make your outdoor space shine.
And hey, if you run into a snag, don’t sweat it. Every pro installer has had a “lights-down” moment. The important thing is to keep going. Your perfect patio night is worth the effort.
“`

