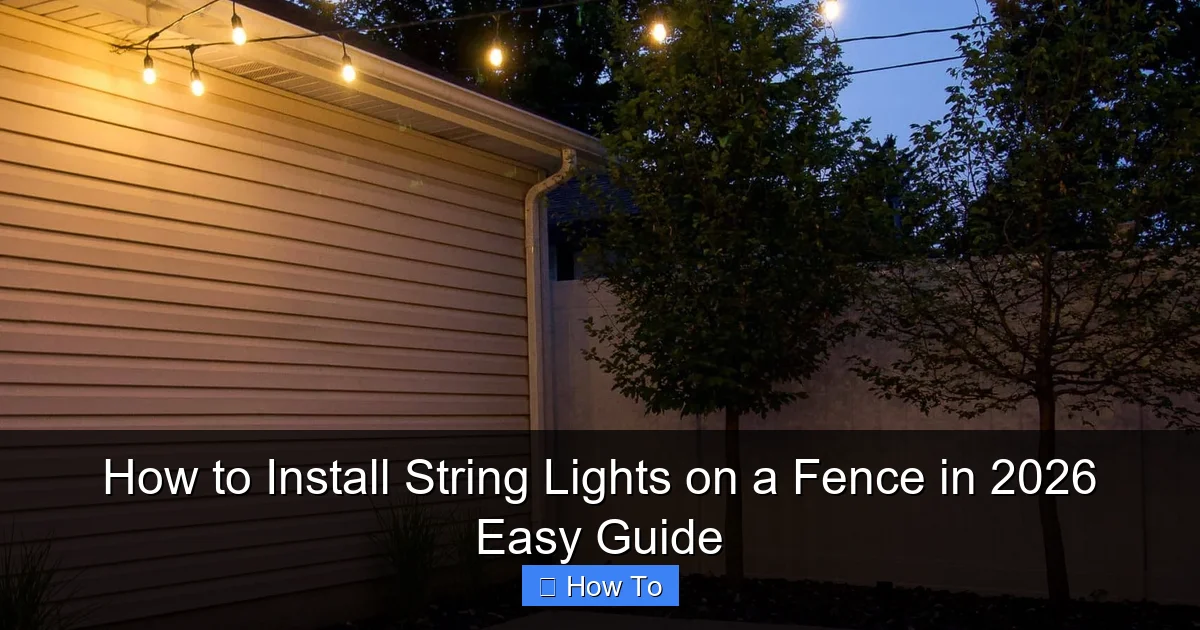
Featured image for how to install string lights on a fence
Image source: thediyplaybook.com
Transform your outdoor space in minutes by securely attaching string lights to your fence using durable, weather-resistant clips or hooks—no drilling required. This 2026 guide walks you through a simple, step-by-step process to safely space, power, and hang lights for a stunning, professional look. Perfect for patios, gardens, or backyard ambiance, this method ensures a hassle-free setup that lasts all season.
How to Install String Lights on a Fence in 2026 Easy Guide
Key Takeaways
- Plan your layout first: Measure and mark spacing for even, balanced light distribution.
- Use outdoor-rated lights: Ensure durability and safety with weatherproof, UL-listed string lights.
- Secure with clips or hooks: Avoid nails; use damage-free fasteners for long-term stability.
- Hide cords creatively: Tuck wires behind fence boards or use cable raceways for a clean look.
- Test before finalizing: Check connections and brightness early to avoid rework later.
- Use a timer or smart plug: Automate on/off times for convenience and energy savings.
Why This Matters / Understanding the Problem
Remember that warm, golden glow you get when the sun dips below the horizon? Now imagine capturing that magic every night—right in your backyard.
String lights on a fence do exactly that. They transform plain wood or metal into a cozy, inviting space perfect for summer dinners, late-night chats, or even solo stargazing with a cup of tea.
But here’s the thing: installing string lights on a fence sounds simple… until you’re halfway through, tangled in wires, wondering if you should’ve just called an electrician.
I’ve been there. My first attempt? A lopsided mess that flickered like a haunted house. The second? Much better—thanks to a few hard-won lessons.
The good news? You don’t need to be an electrician to nail this. With the right approach, installing string lights on a fence is easier than assembling IKEA furniture (and way more rewarding).
This how to install string lights on a fence in 2026 easy guide is packed with real-world tips, step-by-step clarity, and the little details that make or break your setup. Whether you’re lighting a small patio or a long backyard fence, I’ve got you covered.
We’ll focus on safety, style, and simplicity—so you can enjoy your lights tonight, not next week.
What You Need
Before we dive in, let’s gather the essentials. No surprises. No last-minute hardware store runs.
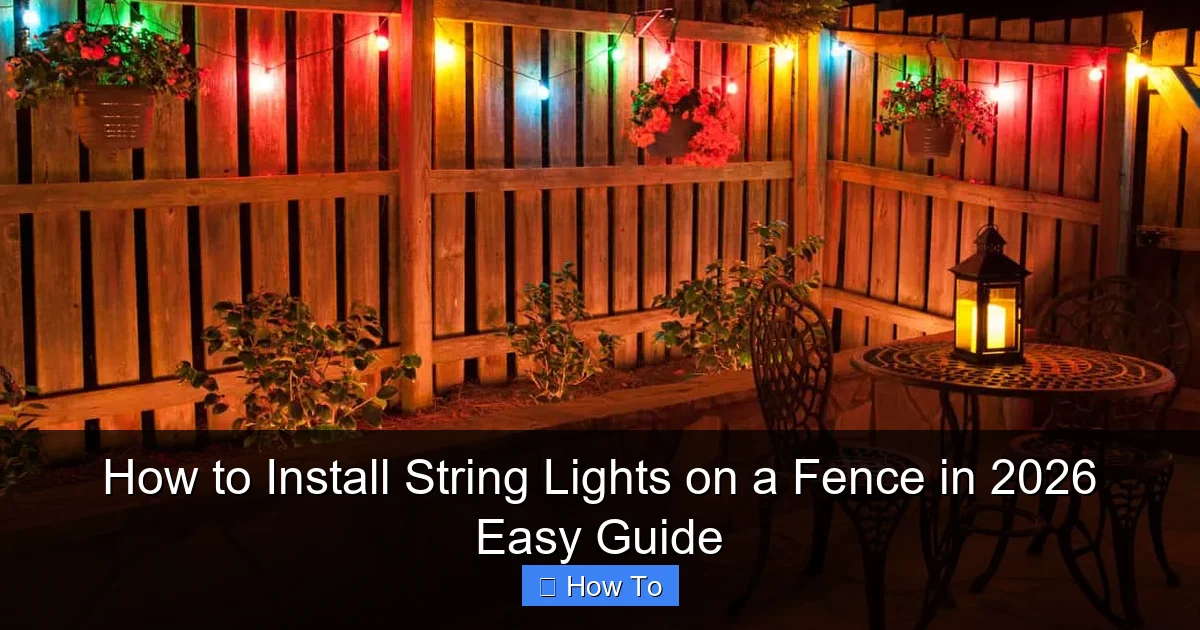
Visual guide about how to install string lights on a fence
Image source: cdn.trendir.com
Here’s your fence string light toolkit—curated from years of trial, error, and a few “why didn’t I think of that?” moments.
- String lights (LED, preferably weatherproof and shatterproof)
- Measuring tape (to avoid overbuying or running short)
- Fence clips or hooks (screw-in, adhesive, or S-hooks—your fence type matters)
- Drill & screws (for permanent mounts, if allowed)
- Extension cords (outdoor-rated, GFCI-protected)
- Timer or smart plug (so lights turn on/off automatically)
- Zip ties (for securing loose cords)
- Level (optional, but helpful for straight lines)
- Ladder (if your fence is tall or you’re short on height)
- Power source nearby (or plan for a safe, hidden extension)
Pro insight: I learned the hard way that “outdoor-rated” isn’t just a label. One rainy night, my cheap indoor lights sparked and died. Now I only use IP65 or higher-rated lights—they handle rain, wind, and even snow. Trust me, it’s worth the extra $10.
Also, consider your fence material. Wood? Easy to screw into. Vinyl or metal? You’ll need adhesive clips or magnetic hooks. Chain-link? S-hooks work wonders.
And don’t forget: how to install string lights on a fence in 2026 easy guide isn’t just about tools—it’s about planning. Measure your fence, count your light strands, and sketch a quick layout. It saves headaches later.
Step-by-Step Guide to How to Install String Lights on a Fence in 2026 Easy Guide
Alright, let’s get to the fun part. This is where your backyard starts to feel like a dreamy oasis.
Follow these steps, and you’ll have a clean, safe, and beautiful setup—no electrical degree required.
Step 1: Choose the Right String Lights
Not all lights are created equal. And yes, this matters more than you think.
For fence installations, LED string lights are the gold standard. They’re energy-efficient, cool to the touch, and last for years—even in rain or snow.
Look for:
- Weatherproof rating (IP65 or higher) – protects against dust and water jets
- Shatterproof bulbs – safer if a branch falls or a ball hits the fence
- Warm white or soft amber glow – cozy, not clinical
- Plug-in with end-to-end connectors – lets you link multiple strands
I love Edison-style bulbs for a vintage vibe, but globe lights work great for a modern look. Pick what matches your style.
Warning: Avoid cheap “battery-powered” lights for long-term use. They fade fast, die in cold weather, and aren’t bright enough for real ambiance. Save them for parties—not permanent setups.
Pro tip: Buy one extra strand. You’ll thank me when you realize your fence is longer than you thought (or when one bulb burns out mid-summer).
Step 2: Plan Your Layout & Measure Carefully
Measure your fence from end to end. Then, measure again. Seriously.
Why? Because fences aren’t always straight. A 20-foot fence might actually be 20.5 feet with a slight curve. Measure in multiple spots.
Now, decide your lighting pattern:
- Straight line (top rail): Classic, simple, clean. Best for modern yards.
- Zigzag or crisscross: Adds visual interest. Great for long, flat fences.
- Downward drape (curtain style): Lights hang down like a curtain. Needs extra support.
- Double row: One line at the top, one at mid-height. Adds depth.
Sketch a quick drawing. Mark where you’ll place hooks, where the power will come from, and how many strands you’ll need.
For example: A 30-foot fence with 10-foot light strands means you’ll need 3 strands. But if you’re doing a zigzag, you might need 4.
And remember: how to install string lights on a fence in 2026 easy guide is all about pre-planning. A 10-minute sketch now saves 2 hours of frustration later.
Step 3: Pick the Right Mounting Method
This is where most people mess up. The wrong clip or hook can ruin your lights—or your fence.
Your choice depends on fence material and how permanent you want the setup.
For Wooden Fences:
- Screw-in hooks or eye screws: Most secure. Use stainless steel (won’t rust).
- Cup hooks: Small, discreet, great for top rails.
Drill pilot holes first to avoid splitting the wood. Space hooks every 12–18 inches for even support.
For Vinyl or PVC Fences:
- Adhesive clips (3M VHB tape): No drilling. Holds up to 5 lbs per clip.
- Magnetic hooks: Only if your vinyl has a steel backing (rare).
Clean the surface with rubbing alcohol before applying adhesive. Wait 24 hours before hanging lights.
For Metal or Chain-Link Fences:
- S-hooks or carabiner clips: Easy to attach and remove.
- Zip ties: Quick, but can degrade in UV light. Use UV-resistant ones.
For chain-link, thread S-hooks through the mesh at the top. Works like a charm.
My personal trick: I use removable adhesive clips on my vinyl fence. They hold strong all summer, then peel off cleanly in fall. No holes, no damage. Perfect for renters or seasonal setups.
Step 4: Install the Hooks or Clips
Now the fun begins. Time to get your hands dirty.
Start at one end. Use a level or a long straightedge to keep the first hook straight. Then, measure and mark every 12–18 inches.
For screw-in hooks:
- Drill a pilot hole (slightly smaller than the screw).
- Twist the hook in by hand—don’t over-tighten.
- Make sure the hook opens outward so lights hang freely.
For adhesive clips:
- Wipe the fence with alcohol.
- Peel and press firmly for 30 seconds.
- Wait 24 hours before hanging (yes, really).
For S-hooks on chain-link:
- Open the hook slightly with pliers.
- Thread through the top mesh, then close it.
Pro tip: Use a ladder with a tool tray. Keep your drill, hooks, and measuring tape within reach. Less climbing = fewer mistakes.
And don’t rush. A crooked hook now means crooked lights later. Take your time.
Step 5: Hang the String Lights
Now the magic happens. But don’t just start hanging—follow this order:
- Plug in the first strand and test it. Make sure it turns on and all bulbs work.
- Start at the end farthest from the power source. This reduces strain on the plug.
- Hang one bulb per hook. Don’t bunch them up. Let the strand drape naturally.
- For zigzag patterns: Run the strand diagonally between hooks, then back. Use zip ties at corners to keep it tidy.
- For curtain style: Hang the main strand at the top, then use S-hooks to drop shorter strands down every 2–3 feet.
Keep the lights slightly loose. If they’re too tight, wind can snap the wires. A little sag is good.
Real talk: I once hung my lights too tight. A storm blew in, the wind pulled the strand, and—pop!—the plug snapped. Now I leave a 2-inch “safety loop” near each plug and socket.
And if you’re using multiple strands, connect them before hanging. It’s easier to test the whole run at once.
Step 6: Secure the Power Source & Cords
This is where safety and aesthetics meet.
Never run cords across walkways. Trip hazards are real. Instead:
- Route cords along the fence base and hide them with mulch, rocks, or cord covers.
- Use outdoor-rated extension cords with GFCI protection (Ground Fault Circuit Interrupter).
- Plug into a GFCI outlet (test it monthly).
- Use a timer or smart plug so lights turn on at sunset and off at bedtime.
I use a Wi-Fi smart plug with my Alexa. I say, “Turn on the fence lights,” and boom—ambiance.
For long runs, use a junction box (outdoor-rated) to connect multiple strands. Keeps everything neat and safe.
And if your power source is far away, consider a buried conduit (PVC pipe) to protect the cord. Overkill for most, but worth it for permanent setups.
Finally, how to install string lights on a fence in 2026 easy guide wouldn’t be complete without this: zip tie loose cords to the fence. No dangling wires. No tripping. Just clean, professional results.
Step 7: Test, Adjust, and Enjoy
You’re almost there. Now it’s time to see your work shine.
Turn on the lights. Walk around the yard. Check for:
- Even spacing – no sagging or pulling
- Proper brightness – not too dim, not blinding
- No exposed wires – everything is covered or secured
- Smooth operation – timer or switch works
Make small adjustments. Tighten a loose hook. Straighten a crooked strand. Move a cord out of the walkway.
Then—sit back. Pour a drink. Invite a friend. Bask in the glow.
That’s the reward. That’s why we do this.
Pro Tips & Common Mistakes to Avoid
Let’s talk real talk. These are the things I wish I knew before my first install.
Pro tip #1: Use light clips with built-in cord management. They hold the bulb and keep the cord tidy. No more tangled messes.
Pro tip #2: Install lights before your next party. Test them in real conditions. You don’t want to fix a burnt-out bulb during a barbecue.
Pro tip #3: For long fences, start in the middle and work outward. It balances the load and reduces strain on the first plug.
Now, the mistakes:
- Mistake: Overloading circuits. One 100-bulb strand uses about 4 watts. But if you run 5 strands on one outlet, you risk tripping the breaker. Use a power strip with surge protection and don’t exceed 80% of the circuit’s capacity.
- Mistake: Skipping GFCI. Water and electricity don’t mix. A GFCI outlet cuts power if it detects a fault. Non-negotiable for outdoor use.
- Mistake: Hanging lights too high. If you need a 10-foot ladder to fix a bulb, you’ll never maintain them. Keep lights within easy reach (6–7 feet max).
- Mistake: Ignoring the weather. Even “weatherproof” lights need protection. Angle bulbs downward to shed water. Use waterproof tape on connections.
- Mistake: Forgetting the off switch. Manual on/off means you’ll forget to turn them off. Use a timer. Save energy. Sleep better.
And one last thing: how to install string lights on a fence in 2026 easy guide isn’t just about installation—it’s about maintenance. Check bulbs every few months. Replace any that flicker. Tighten loose hooks.
A little care goes a long way.
FAQs About How to Install String Lights on a Fence in 2026 Easy Guide
Can I leave string lights on all night?
Technically, yes—but I don’t recommend it. LEDs are efficient, but leaving them on 24/7 can shorten their lifespan. Use a timer to turn them off after 4–6 hours. Your energy bill and the environment will thank you.
Are solar string lights worth it?
For short-term or decorative use? Sure. But for reliable, bright lighting, plug-in is better. Solar lights fade in winter, take hours to charge, and aren’t as bright. Save them for garden accents, not fence installations.
How do I hide the cords?
Great question. I use black cord covers that blend with mulch. Or, run cords behind plants or along the fence base. For a clean look, bury them in a shallow trench (1–2 inches deep) with a conduit for protection.
Can I install lights on a neighbor’s fence?
Only with written permission. Even if it’s “just clips,” you could be liable if a bulb breaks or causes damage. Always ask first. Better to light your own space than start a dispute.
What if my fence is curved or uneven?
No problem. Use flexible clips or zip ties to follow the shape. For curves, hang lights in small sections, not one long straight line. It looks more natural and reduces stress on the strands.
How many strands do I need?
Measure your fence. Divide by the length of each strand (usually 10–25 feet). Add one extra for overlap or a backup. Example: 30-foot fence ÷ 10-foot strand = 3 strands. Buy 4.
Can I use smart bulbs with fence lights?
Yes! But use outdoor-rated smart bulbs (like Philips Hue or LIFX). They cost more, but you can change colors, set schedules, and control them from your phone. Just make sure the socket is waterproof.
Final Thoughts
There you have it—your complete how to install string lights on a fence in 2026 easy guide.
It’s not rocket science. But it does take planning, the right tools, and a little patience.
You’ve learned how to pick weatherproof lights, choose the best mounting method, hang them safely, and keep cords tidy. You’ve avoided common pitfalls and picked up pro tips from real-world experience.
Now, go light up your world.
Start small. Maybe just one side of the fence. Test it. Adjust it. Then expand.
And remember: this isn’t just about lights. It’s about creating a space where memories happen. Where laughter echoes under a canopy of stars and bulbs.
So grab your tools, sketch your plan, and get to work. Your backyard is waiting.
And when the sun goes down and your fence glows like a dream? That’s when you’ll know it was all worth it.
Happy lighting, friend.

