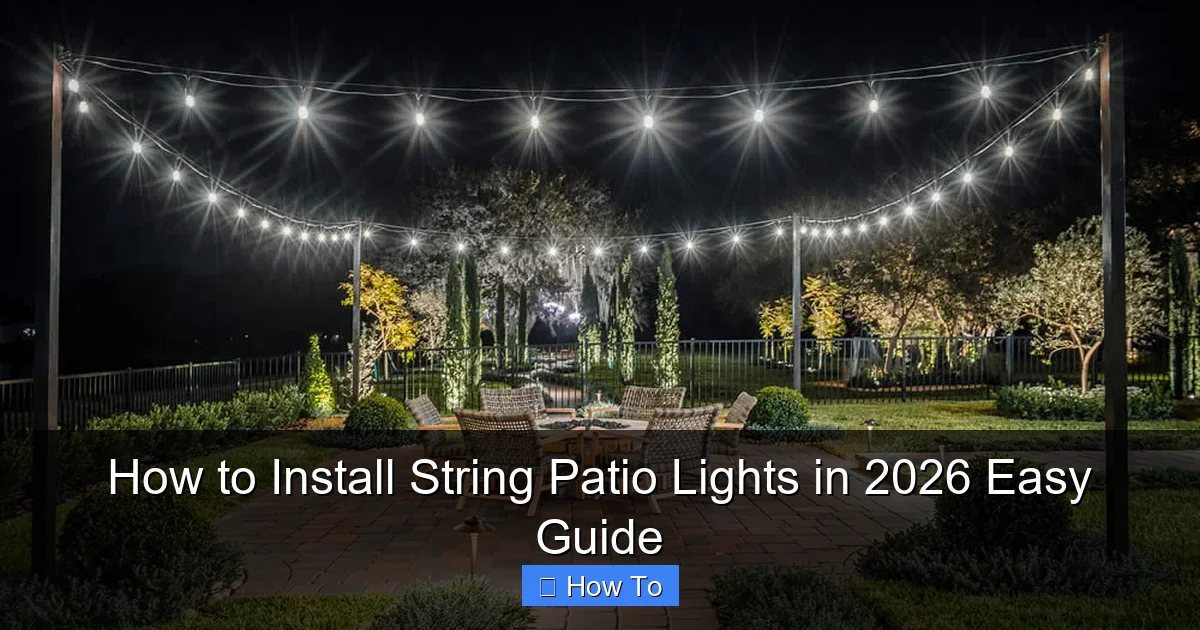
Featured image for how to install string patio lights
Image source: outdoorlights.com
Installing string patio lights in 2026 is easier than ever with smart, weather-resistant designs and simple mounting solutions. Whether you’re hanging them on a pergola, fence, or open yard, start by planning your layout and securing durable hooks or tension cables before connecting the lights to a GFCI outlet for safety. This quick guide ensures a stunning, long-lasting glow for your outdoor space with minimal effort.
“`html
How to Install String Patio Lights in 2026: Easy Guide
Key Takeaways
- Plan your layout first: Measure space and sketch light placement for even coverage.
- Choose weatherproof lights: Ensure durability with UL-listed, outdoor-rated string lights.
- Secure mounting hardware: Use hooks, clips, or tension wires for safe, sag-free installation.
- Test lights before mounting: Check functionality to avoid rework after installation.
- Use a timer or smart plug: Automate on/off times for energy efficiency and convenience.
- Maintain safe distances: Keep cords away from high-traffic areas to prevent tripping.
Why This Matters / Understanding the Problem
Picture this: It’s a warm summer evening. You’ve got friends over, the grill’s sizzling, and the sun’s just dipping below the horizon. But then—darkness. Your patio is pitch black, and suddenly the vibe is more “haunted backyard” than “relaxing retreat.”
That’s where string patio lights come in. They’re not just about looks (though, yes, they’re stunning). They extend your outdoor time, make your space feel cozy, and add a touch of magic to any gathering. But if you’ve ever tried to how to install string patio lights in 2026 easy guide yourself, you know it’s not just about hanging a few bulbs. It’s about planning, placement, and avoiding the dreaded “saggy, sparkly mess.”
Whether you’re lighting up a small balcony, a sprawling backyard, or a cozy deck, this guide walks you through every step—no electrician needed. And yes, we’ll keep it simple, safe, and stylish.
What You Need
Before you start, gather your tools and materials. Trust me, nothing kills the DIY mood faster than realizing you’re missing a crucial piece halfway through.
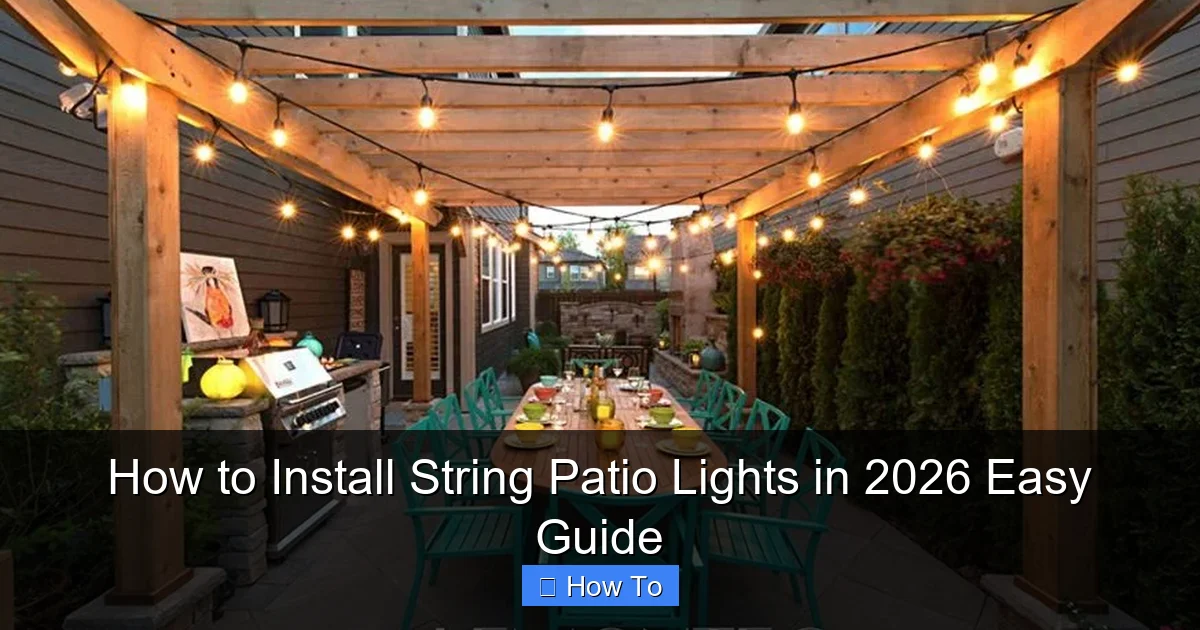
Visual guide about how to install string patio lights
Image source: everythingbackyard.net
- String lights (LED, weatherproof, 25–50 feet depending on space)
- Mounting hardware (hooks, eye screws, zip ties, or adhesive clips)
- Measuring tape (a 25-foot tape works best)
- Ladder (if mounting on walls or high points)
- Drill & drill bits (for wood, stucco, or brick—match your surface)
- Level (to avoid a crooked look)
- Extension cord (outdoor-rated, with GFCI protection)
- Timer or smart plug (optional, but a game-changer)
- Marker or chalk (for marking drill points)
Pro note: If you’re renting or don’t want to drill, adhesive hooks or tension wires are great alternatives. We’ll cover those in the steps below.
Step-by-Step Guide to How to Install String Patio Lights in 2026 Easy Guide
Step 1: Map Out Your Layout
Start by sketching your patio or outdoor space. Use a notepad or even your phone’s notes app. Draw where you want the lights to go—across a pergola, along a fence, in a zigzag pattern, or in a canopy style.
Ask yourself:
- Where’s the nearest outdoor outlet?
- Are there natural anchor points (trees, posts, eaves, railings)?
- Will the lights block walkways or doors?
Measure the total distance you need to cover. Then, buy string lights that are 10–20% longer. Why? You’ll need extra for loops, turns, and slack near outlets. Nothing’s worse than running out of wire mid-install.
Tip: Use painter’s tape to mark light paths on the ground or walls. It’s temporary, easy to remove, and helps you visualize the final look.
Step 2: Choose the Right String Lights
Not all string lights are created equal. For a how to install string patio lights in 2026 easy guide, focus on three things: durability, brightness, and power source.
- LED lights: Energy-efficient, last 25,000+ hours, and stay cool. Perfect for year-round use.
- Weatherproof rating (IP65 or higher): Look for “wet-rated” or “all-weather” labels. Rain, snow, or sun—your lights should survive.
- Plug-in vs. solar: Plug-in lights are brighter and more reliable. Solar works great for low-light zones, but they dim on cloudy days.
For most patios, I recommend 48-foot LED string lights with Edison-style bulbs. They’re warm, inviting, and give that “restaurant patio” vibe without the price tag.
Step 3: Pick Your Mounting Method
Your mounting style depends on your space and how permanent you want it to be.
- For wood or vinyl siding: Use cup hooks or eye screws. They’re cheap, easy to install, and hold well.
- For brick or stucco: Use masonry anchors or plastic wall anchors. Drill pilot holes first to avoid cracking.
- For railings or posts: Zip ties or cable clamps work great. No drilling needed.
- For renters or temporary setups: Use adhesive hooks (like 3M Command strips) or a tension wire system (like a clothesline).
Warning: Avoid nails or staples. They can damage surfaces and create fire hazards if they pierce the wire insulation.
Step 4: Mark and Install Anchor Points
Now it’s time to get physical. Use your layout sketch to mark where each anchor point goes. Space them 3–5 feet apart for even light distribution.
- Use a measuring tape and level to mark spots.
- For hooks: Drill pilot holes (if needed), then twist in the hooks by hand or with pliers.
- For adhesive hooks: Clean the surface with rubbing alcohol, let dry, then press firmly for 30 seconds.
- For tension wires: Attach hooks at both ends, stretch a wire between them, and clip lights onto it.
Pro tip: Start at the outlet side. That way, you can plug in as you go and test lights early.
Step 5: Hang the Lights (With Tension Control)
This is where most people go wrong: hanging lights too tight or too loose.
- Too tight = stretched wires, broken bulbs, and a stiff, unnatural look.
- Too loose = saggy, droopy lights that look like a tangled spiderweb.
Here’s how to get it right:
- Unroll the lights completely. Don’t hang them from the coil.
- Start at the outlet. Hook the first bulb or loop onto the anchor.
- Walk to the next anchor, keeping slight tension—like a guitar string, not a rubber band.
- Clip in the next bulb or loop. Repeat until all lights are up.
- For long runs, use zip ties at midpoints to support the wire (don’t tie tightly—just a loose loop).
Pro tip: Use a “catenary” shape—slightly dip the wire between anchors. It looks natural and handles wind better.
Step 6: Connect to Power & Test
Plug in the lights. But first, double-check:
- Is the extension cord outdoor-rated and GFCI-protected?
- Are all connections dry and away from standing water?
- Is the cord routed safely (not across walkways or under furniture)?
Turn on the lights. If any bulbs are out, check connections first. If a whole section is dead, it’s likely a broken bulb or loose wire. Replace bulbs or re-secure the wire.
For a smarter setup, plug into a smart plug or timer. Set it to turn on at sunset and off at 10 PM. No more forgetting to switch them off!
Step 7: Adjust and Refine
Step back and look. Does the pattern feel balanced? Are any bulbs pointing the wrong way? Do the lights cast shadows in key areas?
- Rotate bulbs to face outward or downward.
- Add extra clips to reduce sagging.
- Use a second set of lights for layered effects (e.g., one row high, one low).
For a “canopy” look: Hang lights in a grid or diamond pattern across a pergola. Use a second extension cord if needed.
Pro Tips & Common Mistakes to Avoid
After installing lights on 15+ patios (mine and friends’), here’s what I’ve learned:
Tip 1: Use outdoor-rated extension cords. Indoor cords can melt or spark when wet. Look for “SJTW” or “SJTO” labels.
Tip 2: Buy lights with replaceable bulbs. If one burns out, you don’t have to replace the whole strand.
Tip 3: Test lights before hanging. Plug them in on the ground. Fix any issues first. Trust me, it’s easier than climbing a ladder with dead lights.
Mistake 1: Overloading circuits. Don’t plug 10 sets into one outlet. Most outdoor circuits handle 15–20 amps. Check your breaker box.
Mistake 2: Ignoring wind. If your lights flap in the breeze, add extra clips or use a tension wire. Wind can break bulbs or pull out hooks.
Mistake 3: Hanging lights too high. Aim for 8–10 feet above ground. Higher = dimmer light. Lower = risk of head bumps.
For renters: Use adhesive hooks rated for 5+ lbs. They hold well and leave no marks. I’ve used them for 2 years with zero issues.
For winter: If you leave lights up year-round, use commercial-grade sets. They handle snow and ice better. Or take them down and store in a dry place.
FAQs About How to Install String Patio Lights in 2026 Easy Guide
Q: Can I install string lights on a balcony with no outlet?
A: Yes! Use solar-powered lights or a battery-operated strand. Solar works best if you get 4+ hours of direct sun daily. Battery lights last 8–10 hours and are great for short-term events.
Q: How do I hide the extension cord?
A: Route it along baseboards, under furniture, or through a planter. Use cord covers (available at hardware stores) for a clean look. Or, get a low-profile extension cord in a color that blends with your patio.
Q: Can I connect multiple light strands?
A: Yes, but check the maximum wattage on the first strand. Most allow 3–4 connected sets. Overloading can melt connectors. Use a Y-splitter if you need more outlets.
Q: What if my walls are stucco or brick?
A: Use masonry anchors. Drill a pilot hole, insert the anchor, then screw in the hook. For stucco, go slow—it’s brittle. Adhesive hooks also work if you’re careful not to overload them.
Q: How do I keep lights from sagging?
A: Use a tension wire (like a clothesline) as a backbone. Clip lights onto it. Or, add extra anchor points every 3–4 feet. For long runs, a “catenary” dip looks better than a straight line.
Q: Are smart plugs worth it?
A: 100%. I use a Wi-Fi smart plug with an app. I set it to turn on at sunset and off at 10 PM. No more fumbling with switches. Some even work with Alexa or Google Home.
Q: Can I leave lights up all year?
A: If they’re weatherproof and commercial-grade, yes. But take them down during storms or extreme weather. For casual use, I recommend seasonal removal. Store in a dry, dark place.
Final Thoughts
Installing string patio lights isn’t just about adding light—it’s about creating a mood. With this how to install string patio lights in 2026 easy guide, you’ve got the tools to turn any outdoor space into a cozy, inviting oasis.
Remember: Plan your layout, choose durable lights, hang with tension control, and test as you go. Avoid common pitfalls like overloading circuits or sagging wires. And if you’re unsure, start small. A single strand can make a big difference.
So grab your hooks, your lights, and your favorite drink. In a few hours, you’ll be sipping under a canopy of stars—or at least, the next best thing.
Now go light up your world—one bulb at a time.
“`

