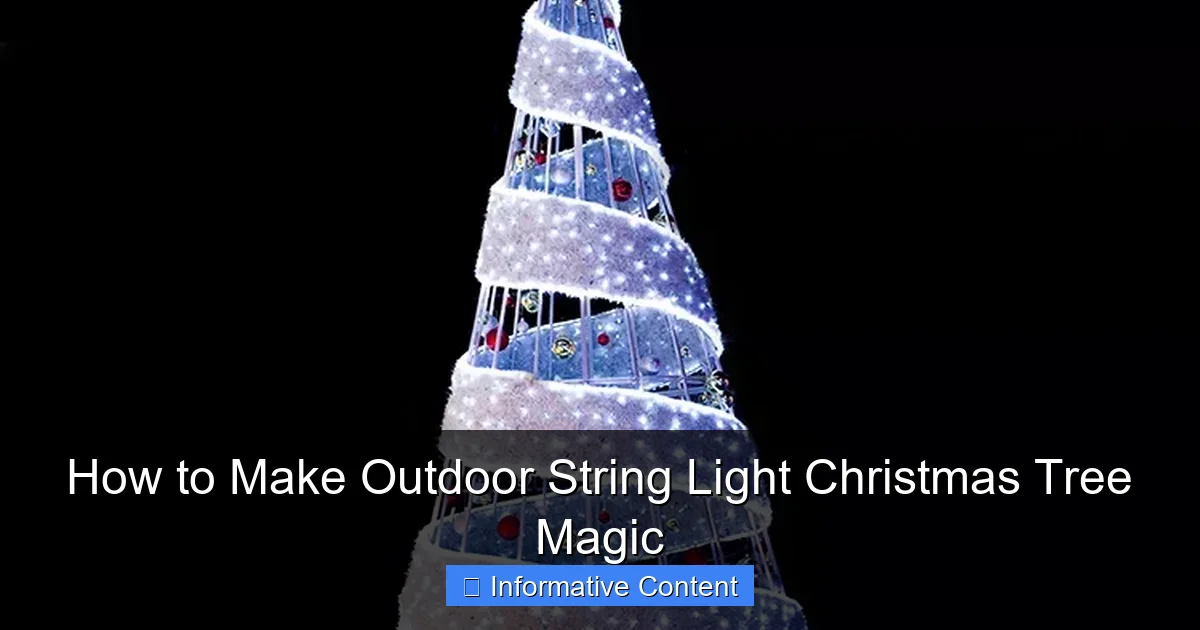
Featured image for how to make outdoor string light christmas tree
Image source: rkrorwxhqiqmlm5m.ldycdn.com
Transform your yard into a dazzling winter wonderland by wrapping outdoor trees with weather-resistant string lights using a simple spiral technique for even, magical glow. Choose LED lights on green or black wire to blend seamlessly with branches and ensure energy efficiency, then secure them with light clips or zip ties for a safe, long-lasting display. Add a timer for automatic evening sparkle—effortless, enchanting, and perfect for holiday cheer.
Key Takeaways
- Plan your design: Sketch tree shape and light placement first for best results.
- Use outdoor-rated lights: Ensure safety and durability with weatherproof string lights.
- Secure lights properly: Attach with clips or zip ties to avoid sagging or damage.
- Layer lights strategically: Wrap from base to top for even, magical illumination.
- Add a timer: Automate on/off times to save energy and simplify use.
- Test before installing: Check all bulbs and connections to prevent mid-project failures.
📑 Table of Contents
- How to Make Outdoor String Light Christmas Tree Magic
- Why an Outdoor String Light Christmas Tree Is Worth It
- Choosing the Right Lights and Materials
- Planning and Designing Your Tree Shape
- Step-by-Step Installation Guide
- Creative Ideas and Pro Tips for Maximum Impact
- Common Mistakes and How to Avoid Them
How to Make Outdoor String Light Christmas Tree Magic
Every year, as the days grow shorter and the air gets crisp, I find myself drawn to the quiet glow of outdoor string lights. There’s something magical about how they transform ordinary yards into winter wonderlands. A few years ago, I decided to take that magic a step further—by creating an outdoor string light Christmas tree right in my front yard. What started as a simple idea turned into a neighborhood sensation. Kids would stop to stare, neighbors would knock on my door to ask for tips, and even the mailman started leaving little notes in the mailbox: “Love the tree tonight!”
You don’t need to be an electrician or a landscaping expert to pull this off. In fact, the beauty of an outdoor string light Christmas tree lies in its simplicity. It’s not about perfection—it’s about warmth, creativity, and a little holiday spirit. Whether you’re lighting up a small courtyard, a suburban yard, or a sprawling garden, this project is flexible, affordable, and surprisingly easy. And the best part? You can customize it to match your style, from minimalist elegance to full-on festive flair. So grab your ladder, a few strings of lights, and let’s make some magic.
Why an Outdoor String Light Christmas Tree Is Worth It
Let’s be honest: traditional Christmas trees are beautiful, but they’re also a lot of work. You’ve got to buy or cut one, set it up, water it daily, clean up needles, and eventually take it down. An outdoor string light Christmas tree? It’s the low-maintenance, high-impact alternative that gives you all the holiday charm without the mess.
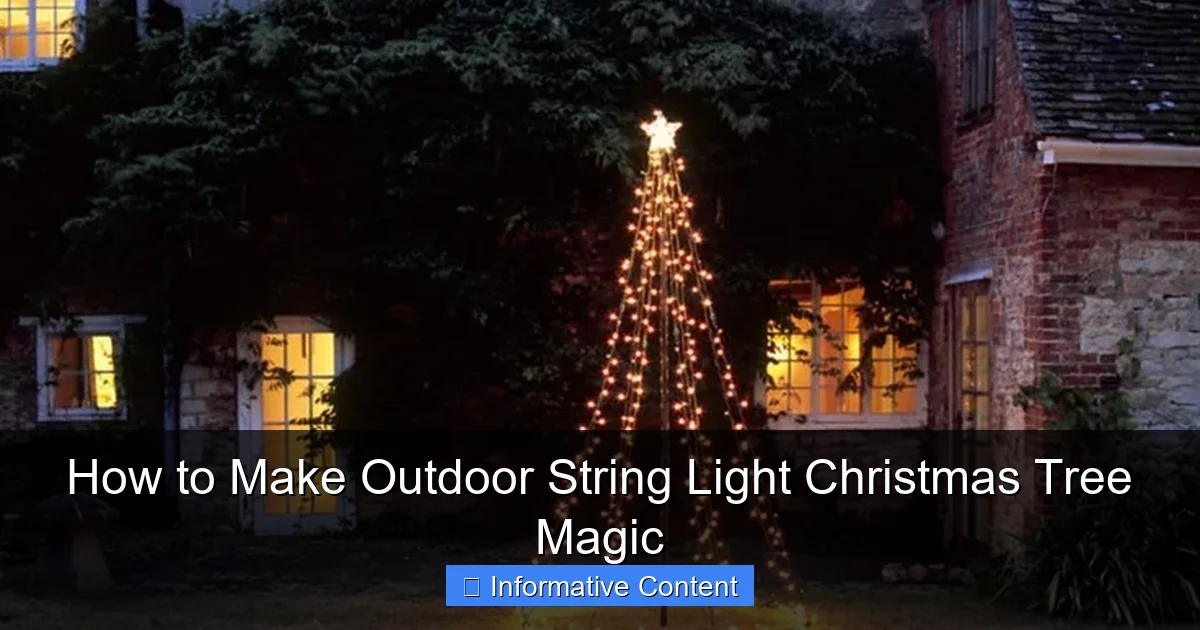
Visual guide about how to make outdoor string light christmas tree
Image source: craftionary.net
Low Effort, High Impact
One of the biggest perks is the ease of setup. Unlike a real tree, you don’t need to worry about watering, shedding, or fire hazards. String lights are lightweight, reusable, and can be stored compactly. Once you’ve installed the structure, you can hang and remove the lights in under an hour. I once had a snowstorm hit the night before I planned to decorate—no problem. I waited a day, brushed off the snow, and had my tree glowing by evening.
Endless Customization
Want a rainbow tree for a quirky touch? Go for it. Prefer classic warm white for a cozy feel? That works too. You can change the lights every year—or even switch them seasonally. Some people use red and green for Christmas, then swap to blue and white for Hanukkah or winter solstice. I even know someone who uses purple and gold for Mardi Gras. The point is: your tree reflects you.
Eco-Friendly and Reusable
If you use LED string lights (which I highly recommend), you’re saving energy and reducing waste. A single strand of LED lights uses up to 80% less electricity than incandescent bulbs and lasts for years. Plus, since there’s no real tree involved, you’re not contributing to deforestation or the carbon footprint of tree transport.
Perfect for Small Spaces
Got a tiny balcony or a narrow front yard? No problem. You can scale your string light tree to fit almost any space. I’ve seen stunning versions on apartment rooftops, apartment courtyards, and even mounted on fences. The vertical design makes it ideal for urban dwellers who want to spread holiday cheer without taking up valuable ground space.
Choosing the Right Lights and Materials
Not all string lights are created equal. The right choice can mean the difference between a dazzling display and a frustrating, flickering mess. Let’s break down what you need to know before you shop.
Pick the Right Type of String Lights
For outdoor use, you’ll want weather-resistant, outdoor-rated string lights. Here’s what to look for:
- LED vs. Incandescent: LEDs are brighter, more energy-efficient, last longer, and stay cool to the touch. Incandescent bulbs are cheaper upfront but burn out faster and use more power.
- Bulb Style: Mini lights give a soft, starry glow. Globe (G40, G50) bulbs are larger and more decorative—great for a vintage look. C7 and C9 bulbs are the classic “Christmas” look, often used in commercial displays.
- Color Temperature: Warm white (2700K–3000K) feels cozy and traditional. Cool white (4000K–5000K) is brighter and modern. Multicolor adds festive fun.
- Connectivity: Some lights can be linked together (end-to-end). Check how many strands your outlet can safely support—usually 2–3 for incandescent, up to 10+ for LED.
Essential Tools and Hardware
You don’t need a full workshop, but a few key items make the job easier and safer:
- Outdoor-rated extension cords (with GFCI protection to prevent shocks)
- Zip ties or outdoor-rated light clips (avoid nails or screws that can damage lights)
- Measuring tape and ladder (a sturdy step ladder or extension ladder)
- Weatherproof electrical tape (to seal connections from moisture)
- Timer or smart plug (so your tree turns on and off automatically)
Optional but Helpful Extras
- Stakes or ground anchors (to stabilize the tree base)
- Reflective backboard (a white tarp or foam board behind the tree to boost brightness)
- Remote-controlled dimmer (for mood lighting)
- Extra bulbs and fuses (just in case!)
Pro tip: Buy lights with replaceable bulbs and fuses. If one bulb burns out, the whole strand won’t go dark. And always test your lights indoors before hanging them outside—this saves you from climbing the ladder twice!
Planning and Designing Your Tree Shape
This is where the fun begins. Your tree’s shape sets the tone for the entire display. The most common design is a classic cone—wider at the base, tapering to a point at the top. But you can get creative: spirals, stars, or even abstract geometric patterns.
Step 1: Sketch Your Design
Grab a piece of paper and sketch your yard from above. Mark where you want the tree: near a window for indoor viewing? In the center of the lawn? Against a fence? Then, draw your tree shape. A cone is easiest, but you can also go for:
- Spiral: Lights wrap around a central pole, like a candy cane
- Layered rings: Horizontal hoops at different heights, like a chandelier
- Vertical strips: Parallel lines for a modern, minimalist look
- Star or snowflake: Use a frame or guide for intricate shapes
Step 2: Determine Size and Spacing
Size depends on your space and desired impact. For a typical suburban yard, a 6- to 10-foot-tall tree works well. Here’s a quick guide:
- Base width: 3–5 feet (wider = fuller look)
- Light spacing: 6–8 inches apart vertically (closer = denser glow)
- Total strands: For a 7-foot cone, plan for 15–20 strands of 25-foot lights (adjust based on bulb spacing)
Use painter’s tape to mark the outline on the ground. This helps you visualize scale and avoid overbuying or underbuying lights.
Step 3: Choose a Support Structure
You need something to hang the lights on. Options include:
- Metal or PVC pipe: A central pole (like a 10-foot PVC conduit) buried 1–2 feet in the ground. Sturdy and reusable.
- Wooden frame: Build a triangle or cone from 2x4s, anchored with stakes. Great for custom shapes.
- Existing structures: Hang lights from a tree branch, pergola, or roofline (use hooks or clips, not nails).
- Freestanding tripod: A metal or wooden tripod for renters or those who don’t want to dig.
Real-life example: My neighbor used a repurposed flagpole as the center. He wrapped the lights around it in a spiral, then added a star at the top. It looked like a giant candy cane—kids loved it!
Step-by-Step Installation Guide
Now for the main event: putting it all together. Follow these steps for a safe, secure, and stunning tree.
Step 1: Set Up the Support
If using a pole, dig a 1–2 foot hole and secure it with concrete or heavy rocks. For a wooden frame, assemble it on the ground, then anchor with stakes. Make sure it’s stable—wind can knock over a wobbly structure.
Step 2: Attach the Base
Start at the bottom. Use zip ties or outdoor clips to secure the first strand of lights around the base. For a cone shape, this is the widest part. Wrap the strand in a spiral, moving upward. Keep tension even so the lights don’t sag.
Step 3: Work Upward in Layers
For a cone, each layer should be slightly narrower than the one below. Use a measuring tape to space strands evenly (every 6–8 inches). For a spiral, wrap the lights around the pole, moving upward in a continuous line. For rings, attach horizontal hoops at different heights and drape lights across them.
Tip: Work in sections. Hang one strand, test it, then add the next. This way, you catch any dead bulbs early.
Step 4: Add a Topper
Every tree needs a star or angel! You can:
- Buy a lighted star and attach it to the top
- Make your own from wire and string lights
- Use a solar-powered garden star
Step 5: Secure and Protect Cords
Use outdoor-rated clips or zip ties to attach cords to the support. Keep cords off the ground to prevent tripping. If running a cord across the yard, bury it under a mulch path or use a cord cover. Seal all outdoor connections with electrical tape to keep out moisture.
Step 6: Test and Adjust
Plug in your tree during daylight. Check for:
- Dead bulbs or frayed wires
- Uneven spacing or sagging
- Brightness and color consistency
Make adjustments while the ladder is still handy. Once you’re happy, set your timer or smart plug to turn the lights on at dusk.
Creative Ideas and Pro Tips for Maximum Impact
Now that your tree is up, let’s take it from “nice” to “wow.” These ideas and tricks will make your display unforgettable.
Layer with Additional Lights
Don’t stop at the tree. Add:
- Ground lights: String lights along the base for a “glowing roots” effect
- Path lights: Guide visitors to your front door
- Spotlights: Shine up at the tree from below to create a dramatic silhouette
Use Reflective Surfaces
Place a white tarp, foam board, or even a mirror behind the tree. This bounces light forward, making the tree appear brighter and fuller—especially useful in darker yards.
Add Themed Decorations
Match your tree to your holiday theme:
- Classic: Red bows, white lights, gold star
- Winter Wonderland: Blue and silver lights, snowflake cutouts
- Whimsical: Rainbow lights, oversized ornaments, tinsel
- Minimalist: Single-color lights, geometric star
Sync with Music (Optional)
For a next-level experience, use programmable LED lights that sync to music. You can play holiday tunes through outdoor speakers and watch the tree “dance.” It’s a crowd-pleaser—but make sure your neighbors don’t mind the noise!
Maintenance and Longevity Tips
- Check weekly: Replace burned-out bulbs and tighten loose clips
- Protect from snow: Brush off heavy snow to prevent sagging
- Store properly: After the season, remove lights, coil them neatly, and store in a dry, cool place
- Label strands: Use tags or colored tape to remember which lights go where
Real-life tip: I keep a small repair kit in my garage: spare bulbs, zip ties, electrical tape, and a spare fuse. It’s saved me more than once on Christmas Eve!
Common Mistakes and How to Avoid Them
Even the best-laid plans can go sideways. Here are the most common pitfalls—and how to steer clear of them.
Overloading Circuits
Too many lights on one outlet can trip the breaker. Always check the wattage of your lights and use a GFCI-protected outdoor outlet. If you’re unsure, use multiple outlets or a heavy-duty extension cord.
Ignoring Weatherproofing
Moisture is the enemy. Use outdoor-rated lights, seal connections, and elevate cords off the ground. If a storm is coming, unplug your tree—better safe than sorry.
Uneven or Sagging Lights
This happens when strands are too long or not secured properly. Use clips or ties every 6–8 inches. For long spans, add a support wire (like a thin metal cable) to carry the weight.
Forgetting the Timer
It’s easy to leave lights on all night—wasting energy and annoying neighbors. A simple mechanical timer or smart plug solves this. Set it to turn on at 5 PM and off at 10 PM, or sync with sunset.
Skipping the Test Run
Always test lights indoors first. I learned this the hard way when I hung a strand, only to find half the bulbs were dead. Now, I test every strand on the kitchen table—no ladder required.
| Component | Recommended Choice | Why It Matters |
|---|---|---|
| String Lights | LED, outdoor-rated, replaceable bulbs | Energy-efficient, durable, safe |
| Support Structure | PVC pipe or wooden frame | Stable, reusable, customizable |
| Fasteners | Outdoor zip ties or light clips | Won’t damage lights or wood |
| Power Source | GFCI outlet + timer | Prevents shocks, saves energy |
| Topper | Lighted star or wire frame | Adds festive focal point |
Creating an outdoor string light Christmas tree isn’t just about decorations—it’s about creating a moment. A moment where a child gasps in delight, a neighbor feels the warmth of the season, or you stand in your yard, wrapped in a blanket, smiling at the glow you built with your own hands. It’s simple, yes. But it’s also powerful.
This year, don’t just hang lights. Build a tree. Not a real one that sheds needles, but one made of light, love, and a little bit of magic. Whether it’s 6 feet tall or 10, spiral or cone-shaped, classic or quirky, your tree will shine in a way that feels uniquely yours. And when the snow falls and the world grows quiet, your string light tree will stand as a beacon—reminding everyone that even in the darkest season, light finds a way.
So gather your supplies, invite a friend to help, and let the holiday spirit guide you. The magic isn’t in the lights—it’s in the making. Happy decorating!
Frequently Asked Questions
How do I make an outdoor string light Christmas tree?
To make an outdoor string light Christmas tree, start by shaping a cone from chicken wire or metal mesh and securing it with stakes. Wrap weatherproof string lights around the frame in even layers, working from the bottom to the top for a full, glowing effect. Use zip ties or clips to keep the lights in place.
What type of string lights are best for an outdoor Christmas tree?
LED string lights are ideal for an outdoor string light Christmas tree because they’re energy-efficient, weather-resistant, and come in various colors and brightness levels. Look for UL-rated, waterproof lights with durable insulation to ensure safety and longevity in outdoor conditions.
Can I leave my outdoor string light Christmas tree up all winter?
Yes, as long as you use high-quality, weatherproof string lights and secure the frame properly to withstand wind and snow. Check local weather advisories and inspect lights regularly for damage to avoid hazards during extreme conditions.
How do I power my outdoor string light Christmas tree safely?
Use a GFCI outlet to power your lights, and keep connections dry with outdoor-rated extension cords and waterproof covers. For larger displays, consider a timer or smart plug to control lighting schedules and reduce energy use.
How tall should my DIY outdoor string light Christmas tree be?
The height depends on your space and visibility—6 to 12 feet is common for yards. For a dramatic outdoor string light Christmas tree, ensure the base is wide enough to support the frame and lights without tipping.
Can I add ornaments or decorations to my outdoor light tree?
Yes, but stick to lightweight, weather-resistant decorations like plastic ornaments or fabric bows. Avoid heavy items that could damage the frame or lights, and secure them with zip ties or hooks to prevent wind damage.

