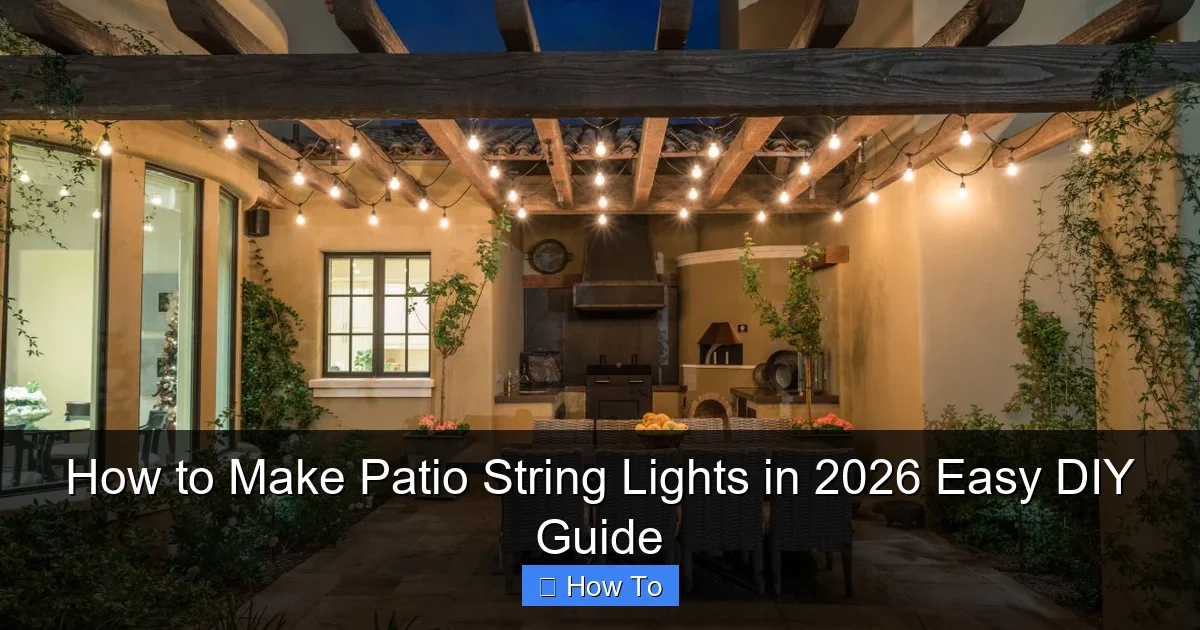
Featured image for how to make patio string lights
Image source: cdn.homedit.com
Transform your outdoor space in 2026 with easy, customizable DIY patio string lights using affordable materials like LED bulbs, weatherproof sockets, and a dimmer switch for ambiance. Follow our step-by-step guide to safely wire, hang, and style your lights—no electrician needed—for a stunning, energy-efficient glow that elevates any backyard or patio.
“`html
How to Make Patio String Lights in 2026 Easy DIY Guide
Key Takeaways
- Plan your layout first: Measure your patio to determine light spacing and power needs.
- Choose weatherproof materials: Use IP65-rated bulbs and outdoor-grade extension cords for safety.
- Install secure mounting: Anchor hooks or clips into studs or use adhesive strips for renters.
- Opt for LED efficiency: Select energy-saving, dimmable LEDs for longer life and lower bills.
- Test before finalizing: Check all bulbs and connections before permanent installation.
- Add smart controls: Use timers or app-controlled plugs for automatic on/off scheduling.
Why This Matters / Understanding the Problem
Picture this: it’s a warm summer evening, you’re sipping iced tea on your patio, and the sun is setting. The mood is perfect—except the lighting isn’t. Maybe the overhead bulb is too harsh, or there’s just not enough glow to set the scene. You’ve seen those dreamy photos of backyards with twinkling lights strung between trees, but you’re not sure if it’s worth the cost or hassle.
That’s where this How to Make Patio String Lights in 2026 Easy DIY Guide comes in. Instead of spending $100+ on pre-made kits, you can create a custom, long-lasting, and stylish outdoor lighting setup for a fraction of the price—and with way more personality.
DIY patio string lights aren’t just about saving money. They’re about crafting an atmosphere that matches your vibe—whether that’s boho-chic, modern minimalist, or farmhouse cozy. And in 2026, with smart tech, solar options, and weatherproof materials more accessible than ever, the DIY route is not only easier but also smarter.
Whether you’re lighting up a small balcony or a sprawling backyard, this guide will walk you through every step—no electrician needed. You’ll learn how to plan, install, and maintain your lights so they last for years, not just one season.
What You Need
Before we dive in, let’s gather everything. The beauty of this How to Make Patio String Lights in 2026 Easy DIY Guide is that it uses mostly off-the-shelf, easy-to-find materials. No special tools required—just basic hardware and a few clever tricks.
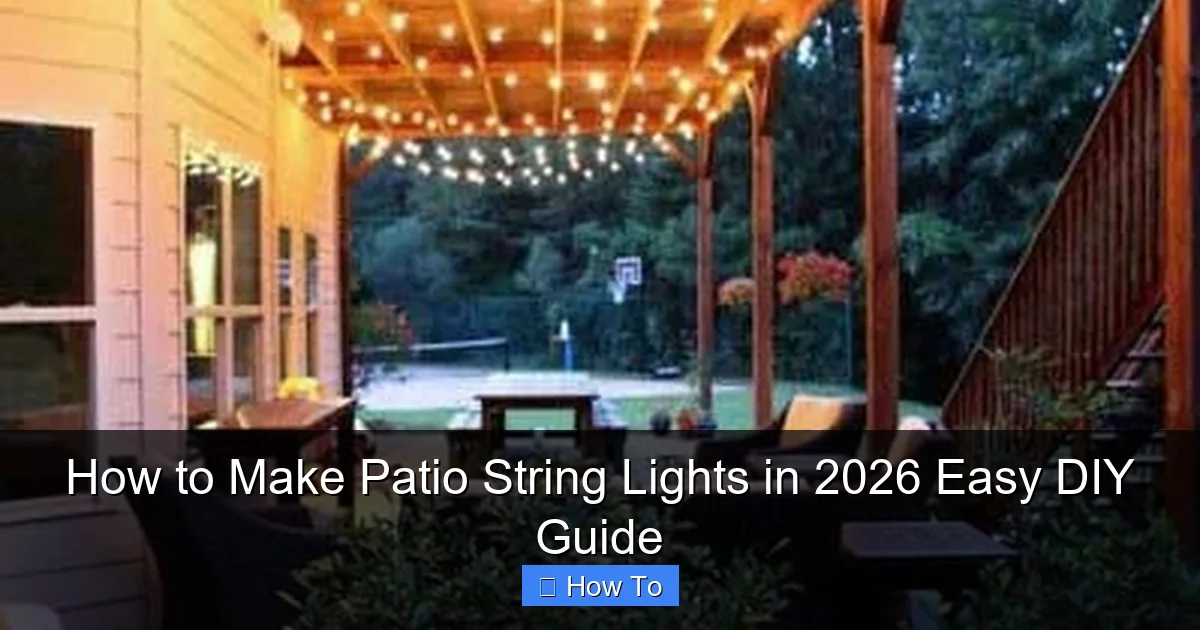
Visual guide about how to make patio string lights
Image source: nextluxury.com
- String lights: LED Edison bulbs (warm white or soft amber), solar-powered or plug-in (we’ll cover both). Look for weatherproof and shatter-resistant options.
- Support structure: Galvanized steel cable (1/8″ or 3/16″), eye hooks, turnbuckles, or zip ties (for trees/poles).
- Anchor points: Wall-mounted hooks, ground stakes, or tree straps (never nails in trees!).
- Extension cords: Outdoor-rated, heavy-duty (if using plug-in lights).
- Timer or smart plug: For automatic on/off (highly recommended).
- Measuring tape: To plan spacing and length.
- Drill & screwdriver: For mounting hardware (optional, depending on setup).
- Zip ties, S-hooks, or carabiners: For attaching lights to cables or poles.
- Weatherproof sealant: Silicone or outdoor caulk for sealing electrical connections.
Pro Insight: I once used cheap plastic hooks on stucco and lost half my lights in a windstorm. Learn from my mistake: always use corrosion-resistant, load-rated hardware for outdoor use.
Bonus: If you’re going solar, grab a few solar-powered string lights with separate panels. They charge during the day and turn on automatically at dusk—perfect for off-grid areas.
Step-by-Step Guide to How to Make Patio String Lights in 2026 Easy DIY Guide
Now, let’s build your dream patio lighting. This How to Make Patio String Lights in 2026 Easy DIY Guide breaks it down into simple, doable steps. Whether you’re a DIY newbie or a seasoned tinkerer, you’ve got this.
Step 1: Plan Your Layout & Measure the Space
First, sketch your patio or outdoor area. Where do you want the lights? Over the dining table? Between two trees? Along the fence? Think about how the light will fall and where shadows might form.
Measure the distance between your anchor points. For example, if you’re stringing between two trees 15 feet apart, you’ll need at least 18 feet of cable and lights to allow for sag (more on that below).
Use painter’s tape to mark anchor points on walls or posts. This helps you visualize the final look before drilling or hammering.
Tip: Aim for a 10–20% sag in your cable (like a gentle smile). Too tight = stress on hardware. Too loose = lights dip too low.
Step 2: Choose Your Light Type & Power Source
You’ve got two main options: plug-in and solar. Each has pros and cons.
Plug-in lights are brighter, more consistent, and often have smart features (like app control or dimming). But you’ll need a nearby outdoor outlet and extension cords.
Solar lights are eco-friendly, easy to install, and work anywhere—no outlet needed. However, they’re usually dimmer and can struggle in cloudy climates.
In 2026, many solar lights now come with detachable panels, so you can mount the panel in full sun and the lights under shade—genius!
For this guide, we’ll focus on both, but I recommend hybrid setups: solar for trees and remote areas, plug-in for dining zones where you need more light.
Step 3: Install Your Support Structure
This is the backbone of your setup. A weak support = falling lights = sad patio.
If you’re using walls or posts:
- Mark anchor points at equal height (use a level).
- Drill pilot holes, then screw in galvanized eye hooks or j-hooks. Use wall anchors for stucco or brick.
- For extra strength, use a turnbuckle between the hook and cable—it lets you adjust tension later.
If you’re using trees:
- Never use nails or screws—they damage the tree and can cause rot.
- Use tree straps (wide, flexible webbing) or zip ties (for small branches). Wrap them loosely so they don’t girdle the tree as it grows.
- Attach a carabiner or S-hook to the strap for easy light removal.
If you’re using ground stakes (for open yards):
- Hammer in metal T-posts or ground anchors at each end.
- Attach eye bolts to the tops.
Warning: I once used flimsy plastic stakes that bent in the first wind. Invest in steel—it’s worth the $10.
Step 4: Run the Support Cable (For Plug-In Lights)
If you’re using plug-in lights, run a steel cable between anchor points. This supports the weight and keeps lights from sagging too much.
Cut the cable 6–12 inches longer than the distance (to allow for knots and turnbuckles).
Thread one end through an eye hook, then secure it with a cable clamp or wire rope thimble (looks like a tiny metal donut). This prevents fraying.
Attach the other end to the opposite anchor, but don’t tighten yet. You’ll adjust tension after hanging the lights.
For extra security, add a turnbuckle in the middle. It lets you fine-tune sag and absorb wind movement.
Step 5: Hang the String Lights
Now the fun part: adding the glow.
For plug-in lights:
- Start at one end and attach the first bulb socket to the cable using zip ties, S-hooks, or carabiners.
- Work your way down, spacing bulbs evenly (usually 6–12 inches apart).
- For extra support, use light clips (small plastic hooks that grip the cable).
- Once all lights are up, plug in and test. Look for dim or flickering bulbs—swap them out now.
For solar lights:
- Attach the light strand directly to the support (tree strap, post, etc.).
- Mount the solar panel in a spot with direct sunlight (south-facing is best in the Northern Hemisphere).
- Use a panel extension cord (if available) to position the panel away from the lights.
Pro tip: For a curtain effect, hang multiple strands in parallel lines. Use a ladder or extension pole for high areas.
Step 6: Secure Electrical Connections & Manage Cords
This is where many DIYers cut corners—and regret it later.
If you’re using extension cords:
- Use outdoor-rated, heavy-duty cords (look for “SJTW” or “14-gauge”).
- Keep cords off the ground—loop them over hooks or use cord clips.
- Seal plug connections with outdoor electrical tape or silicone sealant.
For plug-in lights, add a smart plug or timer so your lights turn on at dusk and off at midnight. I use a $15 Wi-Fi plug—it’s a game-changer.
For solar lights, ensure the panel isn’t shaded by trees or buildings. Trim branches if needed.
Real Talk: I once left a wet plug exposed. It sparked and tripped the breaker. Now I always use a weatherproof outlet cover or in-line GFCI.
Step 7: Test, Adjust, and Enjoy
Turn on the lights at dusk. Walk around and check:
- Are the bulbs evenly spaced?
- Is the sag consistent?
- Are cords safe and hidden?
- Do the lights turn on/off when expected?
Adjust turnbuckles or zip ties as needed. Trim any excess cable with wire cutters.
Now, grab a drink, invite friends over, and enjoy your handiwork. You’ve just created a magical outdoor space—all thanks to this How to Make Patio String Lights in 2026 Easy DIY Guide.
Pro Tips & Common Mistakes to Avoid
After building 12+ patio lighting setups (and fixing plenty of my own mistakes), here’s what I’ve learned:
- Don’t skip the sag test. A tight cable can snap in wind. A loose one looks messy. Aim for a gentle dip.
- Use LED, not incandescent. LEDs use 80% less energy, last 25x longer, and won’t melt in summer heat.
- Label your cords. Tape a tag to each extension cord so you know which one controls which zone.
- Think about maintenance. Hang lights so you can reach them for bulb changes or cleaning.
- Protect against weather. Even “weatherproof” lights can fail. Use sealant on connections and consider a light shield (a small roof over the plug).
- Mix and match styles. Combine Edison bulbs with fairy lights for texture. Or use colored LEDs for holidays.
- Don’t overload circuits. Most outdoor outlets handle 15–20 amps. Check your breaker box.
Personal Story: I once hung lights between two oak trees with zip ties. Three years later, the trees grew around the ties and cracked the bark. Now I use adjustable tree straps that expand as the tree grows.
Also, avoid these rookie errors:
- Using indoor lights outside (they’ll fail fast).
- Hanging lights in straight lines only (curves and waves look more natural).
- Ignoring local codes (some areas require permits for permanent wiring).
FAQs About How to Make Patio String Lights in 2026 Easy DIY Guide
Q: How much do DIY patio string lights cost?
A: You can do it for $30–$100, depending on size. A basic 25-foot plug-in strand is $20, cable and hooks $15, and a smart plug $15. Solar options are similar but may need more panels for larger areas.
Q: Can I leave my DIY lights up all year?
A: Yes—if they’re rated for outdoor use and you seal all connections. I leave mine up through winter, but I take them down during ice storms. For permanent setups, use conduit to protect wires.
Q: What if I don’t have trees or walls to attach to?
A: Use ground stakes, freestanding poles, or umbrellas with built-in hooks. You can also hang lights from a pergola, awning, or even a clothesline pole.
Q: How do I fix a flickering bulb?
A: First, unplug the strand. Then, twist the bulb gently to ensure it’s seated. If it still flickers, replace it. For solar lights, clean the panel with a damp cloth—dust and grime reduce efficiency.
Q: Are solar lights bright enough for dining?
A: Modern solar lights are much better, but they’re usually softer. For dining, I use a mix: solar for ambiance, plug-in for task lighting (like over the table).
Q: Can I use smart bulbs with this setup?
A: Absolutely! Many plug-in strands work with Alexa, Google Home, or apps. Just ensure the bulbs are rated for outdoor use. I use smart Edison bulbs that I can dim or change color with my phone.
Q: How do I remove lights without damaging my setup?
A: Use reusable zip ties or carabiners so you can unclip and rehang. For cables, loosen the turnbuckle and slide the cable out—no need to cut.
Final Thoughts
Creating your own patio string lights isn’t just a DIY project—it’s a way to make your outdoor space feel like home. With this How to Make Patio String Lights in 2026 Easy DIY Guide, you’ve got everything you need to build a lighting setup that’s beautiful, functional, and uniquely yours.
Remember: start small. Try a single strand over your bistro table. Once you see how easy and rewarding it is, expand to the whole yard.
And don’t stress about perfection. Some of my best-looking setups were “happy accidents”—like when a gust of wind twisted the lights into a spiral, and I just left it. Nature has a way of making things look better than planned.
So grab your tools, pick your favorite bulbs, and light up your nights. Whether you’re hosting a party or just enjoying a quiet evening, your patio will shine—literally and figuratively.
Now go make magic. Your dream patio is just a few lights away.
“`

