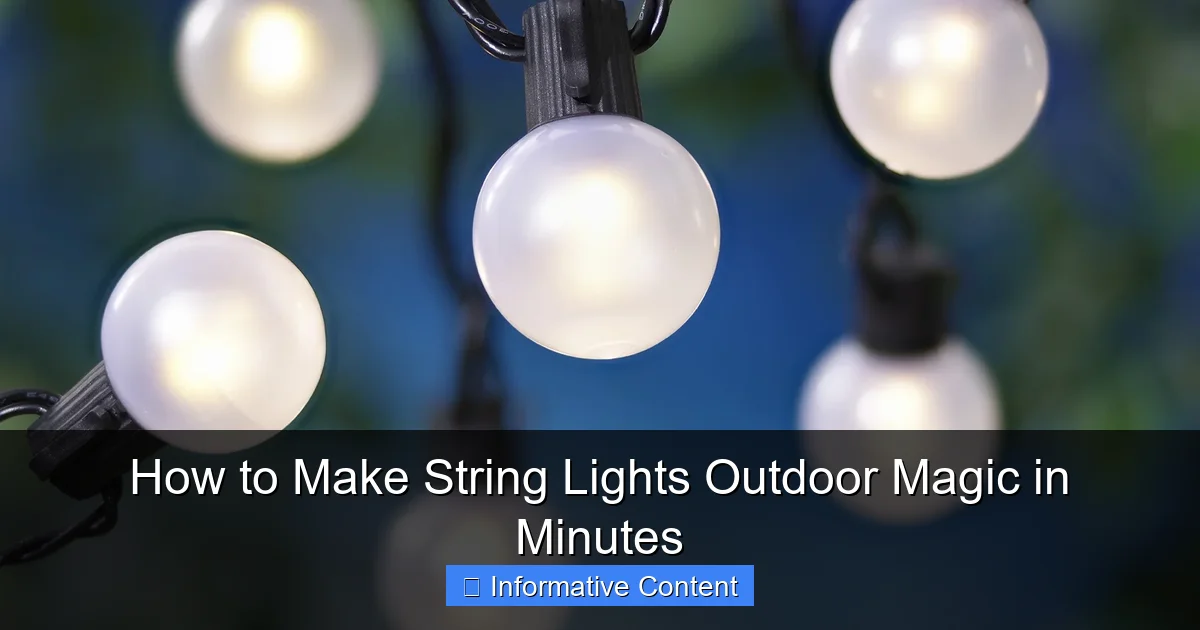
Featured image for how to make string lights outdoor
Image source: i5.walmartimages.com
Transform your outdoor space instantly by hanging string lights with simple, strategic techniques—no electrician required. Use weather-resistant lights and secure them with hooks or zip ties along fences, trees, or pergolas to create a magical ambiance in minutes. Perfect for patios, gardens, or balconies, this effortless upgrade adds warmth and charm to any evening gathering.
Key Takeaways
- Plan your layout: Sketch light placement for balanced, eye-catching coverage.
- Use weatherproof lights: Choose UL-rated string lights for outdoor durability.
- Secure with clips: Install hooks or clips to avoid damage to surfaces.
- Layer lighting effects: Combine string lights with lanterns for depth.
- Time with a timer: Automate on/off to save energy and enhance ambiance.
- Highlight key features: Frame patios, trees, or pathways for dramatic impact.
📑 Table of Contents
- How to Make String Lights Outdoor Magic in Minutes
- Choosing the Right String Lights for Outdoor Use
- Planning Your Outdoor Layout for Maximum Impact
- Installation Tips and Tools for a Secure Setup
- Creative Ideas to Elevate Your Outdoor Lighting
- Maintenance and Safety: Keeping Your Lights Shining
- Data Table: Recommended Outdoor String Lights
- Conclusion
How to Make String Lights Outdoor Magic in Minutes
Remember that moment when you stepped into a friend’s backyard and the whole space felt like it was glowing with quiet magic? Not from a spotlight or a fire, but from soft, twinkling string lights draped over trees, wrapped around a pergola, or zigzagging across a fence? That’s the kind of outdoor ambiance that transforms a simple patio into a cozy retreat, a place where conversations linger and memories are made. And the best part? You don’t need an electrician or a big budget to create that same feeling. With a little planning and the right know-how, you can make string lights outdoor magic happen in minutes—yes, really.
Whether you’re hosting a summer barbecue, planning a romantic dinner under the stars, or just want to enjoy your garden after sunset, string lights outdoor are one of the easiest and most effective ways to elevate your space. They’re affordable, versatile, and—when done right—can last for years. But here’s the catch: not all setups are created equal. Some lights sag, others flicker out in a month, and some just don’t deliver that dreamy glow you imagined. That’s why I’m sharing what I’ve learned over years of trial, error, and backyard experiments. From choosing the right lights to installation tips and creative layouts, this guide will help you turn your outdoor space into a glowing oasis—without the stress or the hefty price tag.
Choosing the Right String Lights for Outdoor Use
Before you start draping lights across your yard, the first step is picking the right kind. Not all string lights are built for the outdoors, and choosing the wrong type can lead to frustration, safety hazards, or a setup that lasts just one season. Let’s break down what to look for.
Weather Resistance and Durability
Outdoor lights need to handle rain, wind, UV exposure, and temperature swings. Look for lights labeled IP44 or higher (Ingress Protection rating). This means they’re protected against splashing water and dust. For areas with heavy rain or snow, aim for IP65 or IP67—these are fully sealed and can survive submersion for short periods.
- Example: I once used indoor-rated string lights on my porch. After one thunderstorm, half the bulbs stopped working. Lesson learned: always check the IP rating.
- Tip: If you live in a humid or rainy climate, consider silicone-sealed bulbs or lights with rubberized cords.
Bulb Type: LED vs. Incandescent
For outdoor use, LED string lights are almost always the better choice. Here’s why:
- Energy efficiency: LEDs use up to 80% less power and last 25,000+ hours.
- Durability: They’re less fragile and generate less heat, reducing fire risk.
- Brightness options: Available in warm white, cool white, multicolor, and even color-changing (RGB).
Incandescent bulbs, while nostalgic and warm, burn out faster, get hot, and are less energy-efficient. Save them for indoor use or short-term events.
Power Source: Plug-In vs. Solar
You’ve got two main options:
- Plug-in (wired): Reliable and bright. Best for permanent or semi-permanent setups. Requires access to an outdoor GFCI outlet (Ground Fault Circuit Interrupter).
- Solar: No wires, no outlets needed. Great for remote areas like garden paths or trees. But they depend on sunlight—cloudy days mean dim or non-functional lights.
Pro tip: If you’re using solar, place the solar panel in direct sun for at least 6–8 hours daily. I once mounted mine under a tree—big mistake. The lights barely lit up after dusk.
Length, Spacing, and Connectivity
Measure your space first. Buy lights that are 10–15% longer than needed to allow for draping or wrapping. Look for end-to-end connectors so you can link multiple strands (usually up to 3–5, depending on wattage).
Example: For a 20-foot pergola, get a 25-foot strand or connect two 15-footers. Avoid daisy-chaining more than the manufacturer recommends—it can overload the circuit.
Planning Your Outdoor Layout for Maximum Impact
Now that you’ve got your lights, it’s time to plan where and how to install them. A good layout enhances your space without overwhelming it. Think of it like decorating a room—balance, symmetry, and focal points matter.
Identify Key Zones
Start by mapping your outdoor space into zones:
- Dining area: Lights above the table create intimacy. Drape them in a crisscross pattern or hang a single strand along the edge.
- Seating area: Wrap lights around railings, pergolas, or trees. Use a zigzag pattern across a fence for a modern look.
- Pathways and walkways: Line the edges with solar stake lights or low-hanging strands to guide guests.
- Focal points: Highlight a tree, water feature, or sculpture with a spotlight effect (e.g., wrapping a tree trunk or hanging a canopy).
Tip: I once hung lights in a straight line across my patio—looked like a construction zone. When I switched to a crisscross pattern, it instantly felt cozy and intentional.
Use the Rule of Thirds
Divide your space into thirds (horizontally or vertically) and place lights along those lines. This creates visual balance. For example:
- On a rectangular patio, run a strand one-third from the top edge, another one-third from the bottom.
- On a tree, wrap lights from the trunk to the canopy in a spiral, hitting key branches at third intervals.
Think Vertical and Layered
Don’t just hang lights at eye level. Use height to your advantage:
- Ceiling or roofline: If you have a covered porch, run lights along the eaves.
- Overhead canopies: Create a “starry sky” effect by hanging lights from a pergola or between trees.
- Tree trunks and branches: Wrap lights around trunks or drape them between branches for a natural, organic look.
Example: I once wrapped my maple tree in warm white LEDs. At night, it looked like it was lit from within—magical!
Test Before You Install
Lay out the lights (unplugged) using temporary clips or zip ties. Walk around, view from different angles, and adjust. This saves time and prevents costly mistakes.
Installation Tips and Tools for a Secure Setup
Now comes the fun part—installing! But don’t rush. A secure setup means fewer sags, less damage to your home, and longer-lasting lights.
Gather the Right Tools
- Outdoor-rated zip ties (UV-resistant)
- Stainless steel hooks or eye screws (rust-proof)
- Clips or adhesive hooks (for gutters, fences, or railings)
- Measuring tape and ladder
- Drill with masonry bit (if installing into brick or stucco)
- Extension cord with GFCI (if using plug-in lights)
Secure Mounting Techniques
Never nail or staple lights directly to wood or siding—it damages the cord and creates fire hazards. Instead:
- For wood surfaces: Use eye hooks or cup hooks. Drill pilot holes first to avoid splitting.
- For metal or vinyl siding: Use adhesive hooks (rated for outdoor use) or magnetic clips.
- For brick or stucco: Use masonry screws with plastic anchors. Avoid drilling into mortar joints.
- For trees: Use tree-friendly zip ties (loose enough to allow growth) or fishing line (less damaging).
Prevent Sagging
Sagging lights look messy and can pull on connectors. To avoid this:
- Install anchor points every 12–18 inches.
- Use light-duty tension wire (like picture wire) behind the lights for support.
- For long runs, hang a central support (e.g., a pole or beam) to reduce span.
Tip: I once skipped anchors on a 30-foot run. The lights sagged so much, they touched the ground. Not safe—and not pretty.
Manage Cables and Power
- Keep cords off the ground to prevent tripping and water damage.
- Use cord clips or conduit channels to run cords along walls or fences.
- For plug-in lights, use a weatherproof outlet cover to protect the connection.
- Label extension cords with outdoor-rated tape so you know which switch controls what.
Creative Ideas to Elevate Your Outdoor Lighting
String lights don’t have to be boring. With a little creativity, you can turn your yard into a glowing wonderland.
Canopy and Tent Effects
Create a “ceiling” of light:
- Hang lights between two trees or posts in a crisscross or net pattern.
- Use a pergola or awning as a base. Drape lights in a zigzag or straight lines.
- Example: I once hung lights in a diamond pattern over my dining area. It felt like dining in a fairy tale.
Tree and Plant Accents
Wrap lights around:
- Tree trunks (use a spiral pattern).
- Bushes or hedges (for a glowing outline).
- Palm trees (vertical strands from top to base).
- Topiaries or sculptures (for a whimsical touch).
Water and Reflective Features
Use light to enhance water:
- Place submersible LED lights in a pond or fountain.
- Hang lights above a pool or reflecting pool to create shimmering reflections.
- Tip: Avoid placing cords near water. Use battery-powered or solar lights for safety.
Path and Border Lighting
- Line walkways with stake lights or low-hanging strands.
- Use solar path lights for energy-free illumination.
- Outline flower beds or garden borders with flexible LED strips.
Interactive and Seasonal Themes
- Switch colors for holidays (red/green for Christmas, pastels for Easter).
- Use smart bulbs (like Philips Hue) for app-controlled color and timing.
- Add lanterns or candles alongside lights for layered lighting.
Maintenance and Safety: Keeping Your Lights Shining
Good installation is just the start. To keep your string lights outdoor looking great and working safely, regular maintenance is key.
Seasonal Care
- Winter: If you live in a cold climate, consider taking down non-weatherproof lights. For permanent setups, check for ice buildup and ensure cords aren’t frozen.
- Spring: Clean bulbs with a soft cloth and mild soap. Check for cracked cords or loose connections.
- Summer: Trim overgrown vines or branches that could damage lights.
- Fall: Before storms, inspect anchors and tighten loose hooks.
Troubleshooting Common Issues
- Flickering or dim lights: Could be a loose bulb, overloaded circuit, or failing power source. Replace bulbs and check connections.
- One section not working: Often a single bulb is loose or burned out. Use a bulb tester to find the culprit.
- Solar lights not charging: Clean the panel, ensure it’s in direct sun, and check the battery (replace every 1–2 years).
Safety First
- Never use indoor-rated lights outdoors.
- Keep cords away from high-traffic areas.
- Use GFCI outlets to prevent shocks.
- Don’t overload circuits—check the wattage rating of your lights and extension cords.
- Turn off lights during storms or high winds.
Storage Tips
- When removing lights, wind them around a cardboard rectangle or storage reel to prevent tangles.
- Store in a dry, cool place. Use resealable bags to keep out dust and moisture.
- Label boxes by location (e.g., “Back Porch,” “Front Tree”) for easy reinstallation.
Data Table: Recommended Outdoor String Lights
| Brand/Model | Bulb Type | Length | Power Source | Weather Rating | Best For | Price Range |
|---|---|---|---|---|---|---|
| Brightech Ambience Pro | LED Edison | 48 ft | Plug-in | IP65 | Pergolas, patios | $35–$50 |
| Sunlite Solar String | LED | 33 ft | Solar | IP44 | Trees, gardens | $25–$35 |
| Philips Hue Outdoor | Smart LED | 20 ft | Plug-in | IP65 | Color themes, automation | $100–$150 |
| Twinkle Star 25 ft | LED | 25 ft | Plug-in | IP44 | Fences, railings | $15–$25 |
| Enchanted Garden Solar | LED | 39 ft | Solar | IP65 | Pathways, remote areas | $30–$40 |
Conclusion
Creating string lights outdoor magic isn’t about spending a fortune or hiring a pro. It’s about thoughtful planning, the right tools, and a little creativity. Whether you’re wrapping a tree, lighting a path, or turning your patio into a glowing retreat, the process can be simple, safe, and deeply satisfying. I’ve had nights where my backyard felt like a secret garden, all thanks to a few well-placed strands of light. And you can too.
Start small. Test your ideas. Don’t be afraid to adjust. And remember: the best lighting doesn’t just illuminate—it invites. It says, “Come sit. Stay a while. Look up at the stars.” So grab your lights, gather your tools, and let the magic begin. In just minutes, your outdoor space can go from ordinary to unforgettable. And the best part? You made it happen—with your own two hands.
Frequently Asked Questions
How do I install outdoor string lights without damaging my walls or roof?
Use removable hooks, adhesive clips, or tension rods designed for outdoor use to hang string lights without nails or screws. These solutions protect surfaces while providing secure support for your outdoor string lights.
What type of string lights are best for year-round outdoor use?
Opt for commercial-grade, weatherproof LED string lights with a high IP rating (IP65 or higher) to withstand rain, snow, and UV exposure. These are ideal for creating lasting outdoor string lights magic in any climate.
Can I connect multiple string light strands together?
Yes, most outdoor string lights have end-to-end connectors—just check the manufacturer’s maximum strand limit (usually 3–5) to avoid overloading circuits. Always use outdoor-rated extension cords for safety.
How do I hide the wires for a clean, professional look?
Run cords along fences, under eaves, or through cable raceways, and use zip ties or cord clips to keep them tidy. For ground-level runs, bury them under mulch or use decorative conduit covers.
Do I need a special transformer or outlet for outdoor string lights?
Only if using high-voltage or heavy-duty lights; most plug-in outdoor string lights work with standard GFCI outlets. For permanent setups, consult an electrician about low-voltage or solar options.
How can I make my outdoor string lights look magical without overdoing it?
Layer lights at varying heights (e.g., trees, railings, pergolas) and mix warm white with subtle colored accents. Add timers or dimmers to control ambiance and energy use effortlessly.

