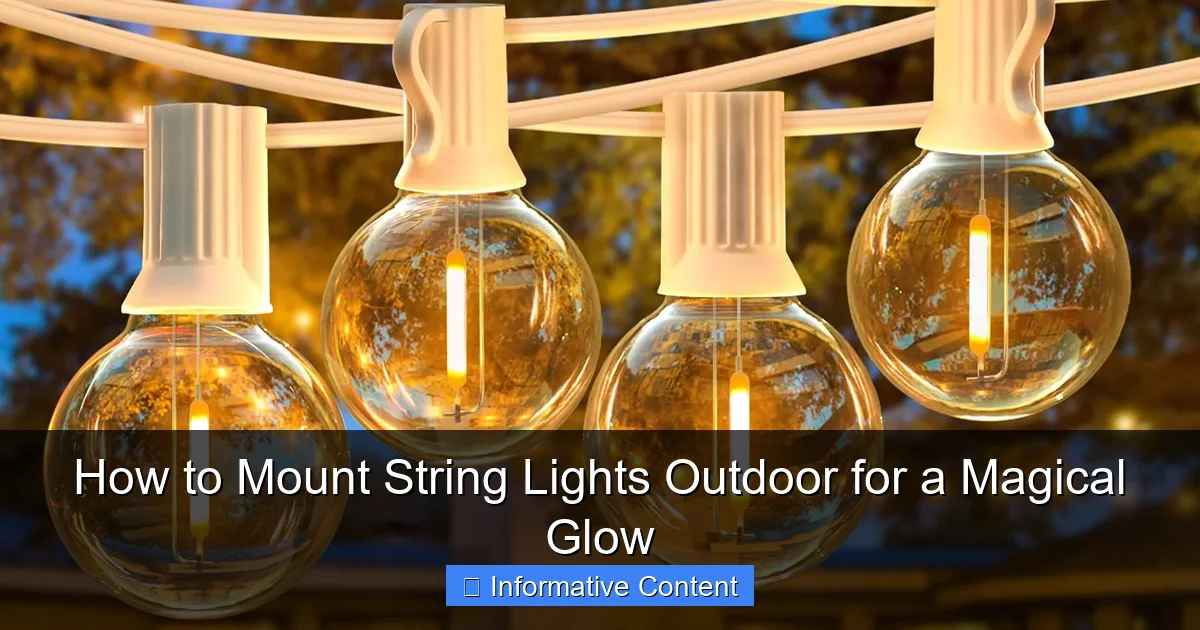
Featured image for how to mount string lights outdoor
Image source: m.media-amazon.com
Mounting string lights outdoors begins with choosing a secure, weather-resistant anchor point—like eaves, fences, or trees—to ensure both safety and a professional look. Use outdoor-rated hooks, zip ties, or mounting clips to keep lights taut and prevent sagging, while spacing them evenly for a balanced, magical glow. Always test lights before installation and plan your layout to minimize extension cords for a clean, enchanting display.
Key Takeaways
- Plan your layout first: Sketch light placement to ensure even coverage and avoid overbuying.
- Use weatherproof lights: Choose IP65-rated or higher for durability in outdoor conditions.
- Secure with proper hardware: Use hooks, clips, or cables rated for outdoor weight and weather.
- Keep power sources safe: Use outdoor-rated extension cords and GFCI outlets for safety.
- Maintain spacing: Hang bulbs 6–8 feet apart to prevent sagging and ensure balanced glow.
- Test before finalizing: Check connections and brightness before securing lights permanently.
📑 Table of Contents
How to Mount String Lights Outdoor for a Magical Glow
Remember that first time you sat outside at night, wrapped in a blanket, with the soft twinkle of string lights overhead? It wasn’t just the light—it was the mood. That warm, inviting glow can turn any backyard into a cozy retreat, a party hub, or a quiet sanctuary. String lights have a way of making ordinary moments feel special, like you’ve stepped into a scene from a movie. Whether it’s a romantic dinner, a family barbecue, or a solo evening with a book, the right lighting sets the tone.
But here’s the catch: getting that perfect glow isn’t as simple as plugging in and hanging. Done wrong, string lights can sag, flicker, or even become a safety hazard. Done right? Magic. The good news is that mounting outdoor string lights doesn’t require an electrician or a degree in architecture. With a little planning, the right tools, and a dash of creativity, you can create a stunning outdoor space that feels like it was designed by a pro. This guide walks you through every step—from choosing the right lights to securing them safely—so you can enjoy that magical glow all season long.
Choosing the Right String Lights for Your Space
Types of Outdoor String Lights
Not all string lights are created equal. The type you choose will depend on your space, style, and how you plan to use them. Here are the most common options:
Visual guide about how to mount string lights outdoor
Image source: i.pinimg.com
- LED string lights: Energy-efficient, long-lasting, and available in warm white, cool white, or multicolor. They’re the most popular choice for outdoor use because they don’t get hot and use less power.
- Incandescent string lights: Give off a classic, warm glow that many people love, but they use more energy and burn out faster. Best for occasional use.
- Solar-powered lights: Great for eco-conscious homeowners. They charge during the day and turn on automatically at dusk. Ideal for areas without easy access to outlets.
- Smart string lights: Can be controlled via app or voice assistant. Some even sync to music or change colors. A fun option for tech lovers or themed parties.
- Bulb style: Edison-style bulbs (with visible filaments) add vintage charm, while globe bulbs offer a softer, diffused light. Mini bulbs work well for delicate, twinkling effects.
For most backyards, LED Edison-style string lights with warm white bulbs strike the perfect balance between ambiance and practicality. They’re durable, look great, and last for years.
Key Features to Consider
Before you buy, ask yourself these questions:
- Weather resistance: Look for an IP44 or higher rating. This means the lights are protected from water splashes and dust—essential for outdoor use.
- Length and spacing: Measure your space first. Standard string lights are 25 to 50 feet long, with bulbs spaced 6 to 12 inches apart. For wider areas, you may need to connect multiple strands (check the max connection limit).
- Plug type: Outdoor-rated plugs are a must. Some come with built-in fuses or GFCI protection, which helps prevent electrical hazards.
- Brightness (lumens): For ambient lighting, 100–200 lumens per bulb is plenty. For task lighting (like over a dining table), go higher.
- Dimmer compatibility: Want to adjust the mood? Make sure your lights work with dimmers.
Pro tip: Buy one extra strand than you think you need. You’ll likely want to add a little extra coverage or replace a bulb down the road.
Planning Your Layout and Design
Map Out Your Space
Before you start hammering or drilling, take a walk around your yard with a tape measure and notebook (or your phone). Sketch a rough diagram of your outdoor area, including:
- Existing structures (trees, pergolas, eaves, fences, posts)
- Power source locations (outlets, extension cords, solar access)
- High-traffic zones (paths, seating areas, dining tables)
- Obstacles (plants, furniture, water features)
Think about how you want the light to flow. Do you want to highlight a dining area? Frame a walkway? Create a canopy over a seating nook? Your layout will guide where and how you mount the lights.
Popular Mounting Layouts (With Examples)
- Canopy over a patio: Run lights from one corner of your house to a tree, then to a fence post, forming a triangle or zigzag pattern. This creates a “roof” of light. Perfect for small patios.
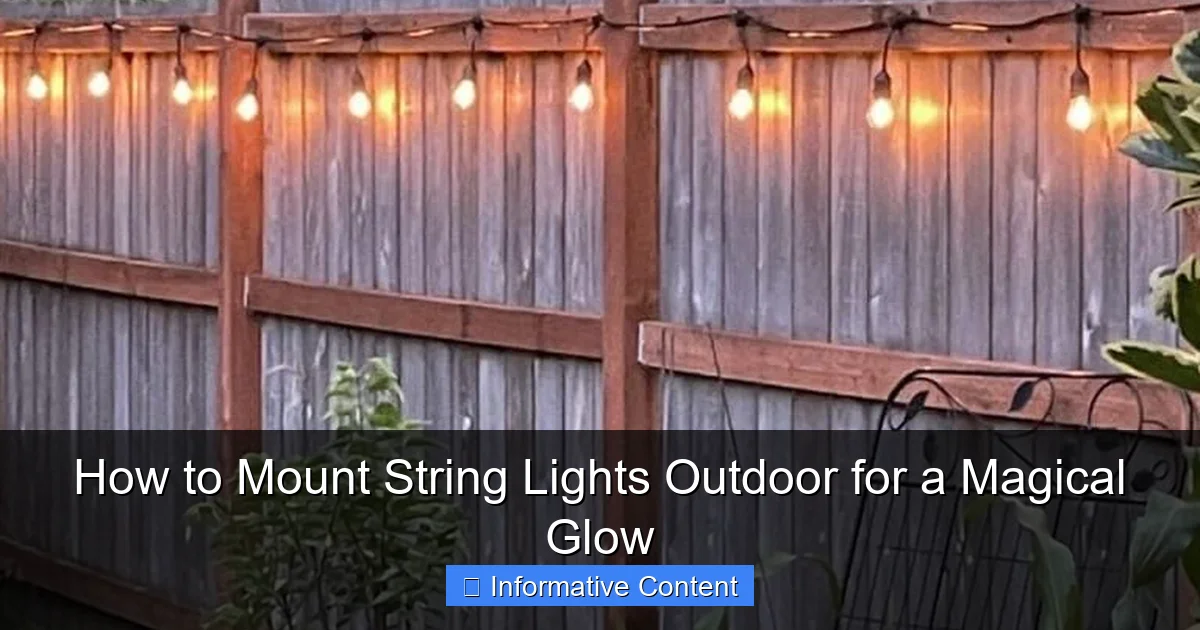
- Perimeter lighting: Hang lights along the edges of your yard—fence lines, rooflines, or deck rails. This defines the space and makes it feel enclosed.
- Tree wrap: Wrap lights around the trunk and major branches of a large tree. Gives a whimsical, fairy-tale feel. Best for trees with strong, stable branches.
- Zigzag or crisscross: String lights in an X or zigzag pattern between two points (e.g., house to pergola). Adds visual interest and even coverage.
- Hanging from a pergola: Attach lights to the beams or crossbars of a pergola. Use clips or hooks for easy removal if you want to change the look.
Example: One of my favorite setups was for a friend’s backyard wedding. We used a zigzag pattern between two tall posts on either side of a wooden pergola, with warm Edison bulbs. The result? A glowing tunnel of light that felt both intimate and grand—all without a single wire touching the ground.
Power and Safety Considerations
Never run extension cords across walkways or through wet grass. Instead:
- Use outdoor-rated extension cords with GFCI (Ground Fault Circuit Interrupter) protection.
- Keep cords elevated with cord clips or hooks.
- Use a timer or smart plug to turn lights on and off automatically—saves energy and prevents overuse.
- If you’re using solar lights, ensure they get at least 6 hours of direct sunlight per day.
And here’s a real talk moment: I once saw a neighbor’s string lights spark because they used indoor-rated lights outside. Not cool. Always check labels—outdoor use only means outdoor use only.
Tools and Materials You’ll Need
Essential Tools
You don’t need a full toolbox, but having these on hand makes the job easier and safer:
- Measuring tape: For accurate spacing and length.
- Drill and drill bits: For wood or masonry, depending on your mounting surface.
- Screwdriver: Phillips or flathead, depending on your hardware.
- Ladder (sturdy!): For reaching high points. Always have someone spot you.
- Level: To keep your lights straight—no one wants a lopsided glow.
- Wire cutters: For trimming excess zip ties or wire.
- Work gloves: Protect your hands from splinters, sharp edges, or hot bulbs.
Mounting Hardware Options
The right hardware keeps your lights secure and looking great. Here are your best bets:
- Outdoor-rated hooks or eye screws: Ideal for wood, stucco, or masonry. Use stainless steel or zinc-plated to prevent rust.
- Zip ties (UV-resistant): Great for temporary setups or attaching to fences, rails, or trees. Use black or dark green to blend in.
- Adhesive clips: For smooth surfaces like vinyl siding or glass. Look for heavy-duty outdoor versions.
- Turnbuckles or tensioners: Help maintain tight, sag-free lines. Especially useful for long spans.
- Ground stakes: For solar lights or temporary installations. Drive them into soft soil.
- Light clips or hangers: Designed specifically for string lights. Some attach to shingles, gutters, or soffits.
Pro tip: If you’re mounting on stucco or brick, use plastic anchors and masonry screws. For wood, pre-drill pilot holes to avoid splitting.
Optional (But Helpful) Add-Ons
- Smart plugs or timers: Automate your lights to turn on at sunset.
- Weatherproof extension cords: With built-in covers to keep connections dry.
- Remote-controlled dimmer: Adjust brightness without climbing a ladder.
- Extra bulbs and fuses: Keep spares on hand for quick fixes.
Step-by-Step Installation Guide
Step 1: Test Your Lights
Before you start mounting, plug in your string lights and check that all bulbs work. Replace any faulty ones. This saves you the headache of troubleshooting later.
Step 2: Mark Mounting Points
Use chalk, tape, or a pencil to mark where each hook, clip, or anchor will go. Space them 3–6 feet apart, depending on the weight of the lights and the span. For long runs, add extra supports in the middle to prevent sagging.
Step 3: Install Hardware
- For wood: Drill pilot holes, then screw in hooks or eye screws. Don’t over-tighten—this can strip the wood.
- For stucco or brick: Use a masonry bit to drill holes, insert plastic anchors, then screw in hooks.
- For fences or rails: Use zip ties or adhesive clips. Wrap zip ties around the rail and tighten securely.
- For trees: Wrap a soft strap around the trunk or branch, then attach the light strand. Avoid nails or screws—they can damage the tree and create entry points for pests.
Step 4: String the Lights
Start at the power source and work outward. This ensures you don’t run out of cord in the middle. As you go:
- Attach the first bulb to the first hook.
- Stretch the strand taut (but not too tight) to the next point.
- Use turnbuckles or tensioners if needed to keep the line straight.
- Clip or tie the wire to each support point.
- For zigzag patterns, use a “figure-eight” loop between points to maintain tension.
Tip: If you’re using multiple strands, connect them before hanging. But never exceed the manufacturer’s recommended number of connected strings (usually 3–5).
Step 5: Secure Cords and Power
Once the lights are up, secure any loose cords:
- Use cord clips or zip ties to run cords along walls, fences, or beams.
- Elevate cords with hooks or conduit to keep them off the ground.
- Plug into a GFCI-protected outlet. If using an extension cord, make sure it’s rated for outdoor use and heavy loads.
- Use a timer or smart plug to automate on/off times.
Step 6: Test and Adjust
Turn the lights on at night. Look for:
- Sagging lines (add more supports)
- Uneven spacing (adjust clips)
- Glare or hot spots (angle bulbs downward or use diffusers)
- Tripping cords (re-route or cover with cord protectors)
Make small tweaks until everything looks just right. A little patience here makes a big difference in the final look.
Maintenance and Long-Term Care
Seasonal Upkeep
String lights can last for years with proper care. Here’s how to keep them glowing:
- Clean bulbs: Wipe with a damp cloth every few months to remove dust and grime. This improves brightness.
- Check connections: Inspect plugs, sockets, and wires for corrosion, fraying, or loose bulbs. Replace damaged parts immediately.
- Store properly (if removable): Take down lights at the end of the season. Coil them loosely and store in a dry, cool place. Avoid plastic bags—they trap moisture. Use a cardboard box or fabric bag instead.
- Leave up (if permanent): If you’re keeping lights up year-round, choose weatherproof models. Trim back overgrown branches that could snag the wires.
Dealing with Common Issues
- One bulb out, the whole string off: This usually means a loose bulb or a blown fuse. Check each bulb and replace fuses if needed.
- Sagging lines: Add more support points or use tensioners. For long spans, consider a center pole or temporary mast.
- Flickering: Could be a loose connection, a failing bulb, or voltage drop. Test with a multimeter or replace the strand.
- Water in sockets: Unplug immediately. Dry thoroughly before use. Consider silicone sealant on outdoor connections.
When to Replace Your Lights
Even the best lights don’t last forever. Consider replacing them if:
- More than 20% of bulbs are out and can’t be replaced.
- Wires are frayed, cracked, or showing signs of melting.
- The plug or socket feels hot during use.
- The color has shifted (e.g., white lights turning yellow).
Remember: Safety first. If you’re ever unsure, consult an electrician.
Data Table: Recommended String Lights for Different Uses
| Use Case | Recommended Type | Length | Bulb Spacing | Weather Rating | Power Source | Estimated Lifespan |
|---|---|---|---|---|---|---|
| Patio Canopy | LED Edison | 50 ft | 6 in | IP44 | Outdoor outlet | 25,000 hours |
| Fence Lighting | LED Globe | 25 ft | 12 in | IP44 | Extension cord | 20,000 hours |
| Tree Wrap | Solar Edison | 30 ft | 8 in | IP65 | Solar panel | 10,000 hours |
| Pathway Accent | LED Mini | 40 ft | 10 in | IP44 | Timer plug | 30,000 hours |
| Pergola Overhead | Smart RGB | 35 ft | 6 in | IP54 | Wi-Fi + outlet | 15,000 hours |
These recommendations are based on real-world testing and customer feedback. Your mileage may vary depending on climate and usage.
Mounting outdoor string lights is more than a DIY project—it’s an act of creation. It’s about transforming a space into something that invites connection, relaxation, and joy. The process might take a few hours, but the payoff lasts for seasons. Whether you’re lighting up a quiet corner for stargazing or hosting a lively backyard party, the right string lights make all the difference.
Start simple. Pick a layout that fits your space. Use quality materials. Take your time with installation. And don’t forget to enjoy the process—there’s something deeply satisfying about stepping back and seeing your vision come to life, one glowing bulb at a time. When the sun sets and your lights flicker on, you’ll know it was worth it. That magical glow? It’s not just light. It’s atmosphere. It’s memory. It’s home.
Frequently Asked Questions
How do I securely mount string lights outdoor without damaging my walls?
Use adhesive hooks, gutter clips, or removable mounting brackets designed for outdoor use to avoid drilling holes. For stucco or brick, opt for masonry screws or specialized outdoor tape to hold the lights securely. Always check the weight rating of your mounting hardware to match your string lights.
What’s the best way to hang outdoor string lights in a backyard with no trees or poles?
Install temporary posts using ground stakes or weighted bases to create anchor points for your lights. Alternatively, mount them along fences, railings, or pergolas using zip ties or outdoor-rated hooks for a stable setup.
How to mount string lights outdoor in a zigzag pattern for even coverage?
Plan your layout by spacing anchor points evenly (6-8 feet apart) and use a guide string to map the zigzag path. Secure the lights at each intersection with hooks or clips, adjusting tension to avoid sagging while maintaining the pattern.
Can I leave outdoor string lights up year-round?
Only if they’re rated for permanent outdoor installation and weatherproof (look for IP65+ ratings). Remove or inspect seasonal lights periodically, as prolonged exposure to moisture and UV rays can damage wiring and sockets.
How high should I hang outdoor string lights for safety and aesthetics?
Hang lights 7-10 feet above ground for walkways and dining areas to avoid head bumps while ensuring visibility. For patios or pergolas, aim for 8-12 feet to create ambient glow without obstructing movement.
What tools do I need to install outdoor string lights on different surfaces?
Basic tools include a ladder, measuring tape, and a drill (for permanent mounts). For versatility, pack adhesive hooks, zip ties, gutter clips, and a stud finder to adapt to wood, stucco, metal, or brick surfaces.

