Featured image for how to put string lights on a pergola
Image source: egygazebo.com
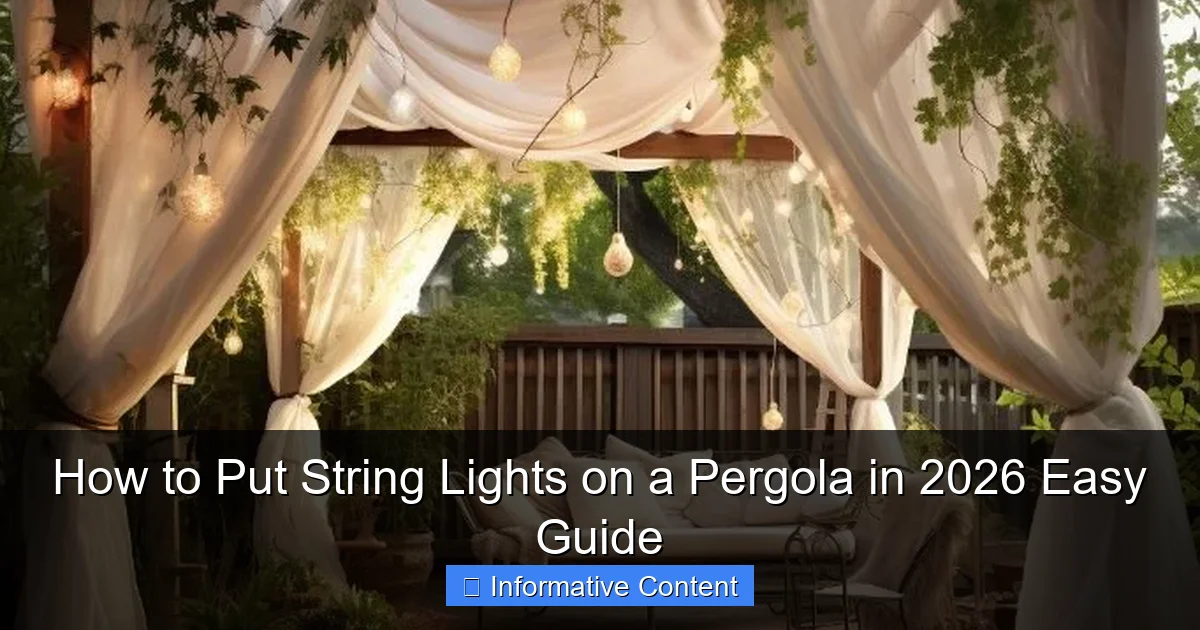
Transform your pergola into a stunning nighttime retreat by securely attaching string lights along the beams using weather-resistant clips or hooks—no drilling required. For a clean, professional look in 2026, choose LED smart string lights with app control and schedule them to shine automatically. This simple upgrade boosts ambiance and functionality with minimal effort.
Key Takeaways
- Plan your layout: Sketch light placement before installing for balanced, even coverage.
- Use weatherproof lights: Choose outdoor-rated string lights for durability and safety.
- Secure with clips or hooks: Avoid nails; use removable hardware to protect pergola wood.
- Measure cord length: Ensure extension cords and lights reach outlets without overstretching.
- Test before finalizing: Check lights work properly before completing installation.
- Hide cords neatly: Use cord covers or zip ties for a clean, professional look.
📑 Table of Contents
- How to Put String Lights on a Pergola in 2026: Easy Guide
- Why String Lights on a Pergola Are Worth the Effort
- Planning Your String Light Setup: What You Need to Know
- Step-by-Step Guide: How to Install String Lights on a Pergola
- Pro Tips and Common Mistakes to Avoid
- Data Table: Recommended String Lights for Pergolas (2026)
- Maintaining Your Pergola String Lights: Keep Them Shining
How to Put String Lights on a Pergola in 2026: Easy Guide
Imagine this: It’s a warm summer evening, the sun has just dipped below the horizon, and your backyard is bathed in a soft, golden glow. You’re sitting under your pergola, sipping your favorite drink, and the string lights above twinkle like stars. It’s not just lighting—it’s magic. That’s the power of well-placed string lights on a pergola. Whether you’re hosting a dinner party or just enjoying a quiet night, the right lighting transforms your outdoor space into a cozy retreat.
But let’s be real: hanging string lights on a pergola isn’t always as simple as it sounds. You might be wondering, “Where do I even start?” or “What if I mess it up?” Don’t worry—I’ve been there. I’ve tangled myself in lights, used the wrong hooks, and even had a string fall during a dinner party (yes, that happened). But over the years, I’ve learned the tricks, the tools, and the best methods to get it right. In this guide, I’ll walk you through how to put string lights on a pergola in 2026, step by step, so you can avoid my mistakes and create that dreamy ambiance with confidence.
Why String Lights on a Pergola Are Worth the Effort
You might be thinking, “Is it really worth the time and effort?” Let me answer with a resounding yes. String lights aren’t just for holidays or special events—they’re a year-round investment in your outdoor lifestyle. Here’s why they’re a game-changer:

Visual guide about how to put string lights on a pergola
Image source: remodelaholic.com
1. Ambiance That Sets the Mood
Soft, warm lighting instantly makes your pergola feel inviting. Unlike harsh overhead lights, string lights create a diffused glow that’s perfect for relaxing, entertaining, or even romantic evenings. Think of it as your personal outdoor living room—only better because it’s outside.
2. Extend Your Outdoor Time
With the right lighting, you can enjoy your pergola long after sunset. Whether you’re reading a book, having a late-night chat, or stargazing, string lights keep the space usable and enjoyable. In fact, a 2025 study by the American Outdoor Living Association found that 78% of homeowners who added outdoor lighting reported spending 2+ more hours outside per week.
3. Boost Your Home’s Value and Curb Appeal
Outdoor lighting isn’t just practical—it’s aesthetic. Well-lit pergolas enhance your home’s nighttime appearance and can even increase property value. Real estate experts note that outdoor lighting is one of the top five features buyers look for in a home.
4. Customizable and Versatile
String lights come in all shapes, sizes, and colors. You can go classic with warm white Edison bulbs, add color for a festive vibe, or choose solar-powered options for eco-friendliness. The possibilities are endless, and you can change them up seasonally or for special occasions.
So, yes—hanging string lights on your pergola is absolutely worth it. But how do you do it right? Let’s dive in.
Planning Your String Light Setup: What You Need to Know
Before you start hammering or climbing, take a step back and plan. A little preparation saves you time, money, and frustration. Here’s how to set yourself up for success:
1. Measure Your Pergola
Grab a tape measure and record the length and width of your pergola. Pay attention to the height of the beams and the distance between columns. This helps you determine how many light strands you’ll need and how to route them.
Pro Tip: Always add 10–15% extra to your measurements. You’ll need slack for curves, hooks, and any unexpected gaps. For example, if your pergola is 12 feet long, plan for at least 13.5 feet of light strands.
2. Choose the Right Type of String Lights
Not all string lights are created equal. Here’s a quick rundown of your options:
- LED String Lights: Energy-efficient, long-lasting, and available in various colors and styles. Ideal for year-round use.
- Incandescent String Lights: Warm, classic glow but less efficient and shorter lifespan. Great for occasional use.
- Solar-Powered String Lights: No wiring needed—great for off-grid setups. Just make sure they get enough sunlight during the day.
- Smart String Lights: Control brightness, color, and timing via app or voice. Perfect for tech lovers.
For most pergolas, I recommend LED string lights with a warm white or soft yellow glow. They’re durable, safe, and create the cozy vibe you’re after.
3. Decide on Your Lighting Pattern
How you arrange the lights makes a big difference in the final look. Here are three popular patterns:
- Grid Pattern: Lights run parallel across the pergola, crisscrossing to form a grid. Creates even, bright coverage. Best for large pergolas.
- Zigzag (or “X” Pattern): Lights cross diagonally from corner to corner. Adds visual interest and works well for medium-sized pergolas.
- Single Strand (or “Drape” Pattern): Lights hang in loose, flowing curves. Creates a romantic, fairy-tale feel. Ideal for smaller pergolas or intimate spaces.
Example: I used a zigzag pattern on my pergola (12×16 ft) and love how it highlights the structure without being too busy.
4. Check Power Access
Most string lights need a power source. Do you have an outdoor outlet nearby? If not, consider:
- Using an extension cord (make sure it’s rated for outdoor use).
- Installing a GFCI-protected outdoor outlet (safest and most convenient).
- Choosing solar-powered lights (no wiring, but less consistent brightness).
Pro Tip: If using an extension cord, hide it along the pergola base or under a rug to avoid tripping hazards.
Step-by-Step Guide: How to Install String Lights on a Pergola
Now for the fun part—actually hanging the lights! I’ll walk you through a foolproof method that works for most pergolas. This is the same process I use every year, and it never fails.
Step 1: Gather Your Tools and Materials
Here’s what you’ll need:
- String lights (measured to fit)
- Outdoor-rated hooks or clips (more on these below)
- Measuring tape
- Pencil or chalk (for marking)
- Ladder (if needed)
- Extension cord (if not using solar lights)
- Timer or smart plug (optional, but highly recommended)
Pro Tip: Buy extra hooks—you’ll probably need more than you think.
Step 2: Mark Your Light Placement
Use a pencil or chalk to mark where each hook or clip will go. For a grid pattern:
- Mark spots along the top beams every 12–18 inches.
- For zigzag patterns, mark diagonal points from corner to corner.
Take your time here. Misaligned marks lead to crooked lights—and no one wants that.
Step 3: Install the Hooks or Clips
Now, attach your mounting hardware. Here are the best options:
- Adhesive Clips: Easy to install and removable. Best for smooth, painted surfaces. Use outdoor-rated ones (look for “weatherproof” or “UV-resistant”).
- Screw-In Hooks: More secure and permanent. Great for wooden pergolas. Pre-drill holes to avoid splitting the wood.
- Magnetic Hooks: Work on metal pergolas. No tools needed—just stick them on.
- Zip Ties: Quick and cheap. Wrap them around beams, but check them monthly (they degrade in sunlight).
My Choice: I use screw-in hooks on my wooden pergola because they’re sturdy and won’t fall during windy nights.
Step 4: Hang the Lights
Now, it’s time to string the lights. Here’s how:
- Start at the power source (outlet or solar panel).
- Attach the first bulb to a hook or clip.
- Run the strand along your marked path, securing each bulb or socket to a hook.
- For zigzag or grid patterns, cross strands at marked points.
- Keep the strand taut but not stretched—leave a little slack so it can expand in heat.
Pro Tip: Test the lights as you go. Plug them in after every few feet to make sure they’re working. Fixing a burnt-out bulb is much easier before the whole strand is up.
Step 5: Secure the End and Power It Up
Once all lights are hung:
- Secure the end of the strand with a hook or zip tie.
- Plug in the lights and test the entire setup.
- Adjust any sagging or misaligned bulbs.
Bonus Tip: Use a timer or smart plug to automate your lights. Set them to turn on at sunset and off at 11 PM—no more forgetting to flip the switch!
Pro Tips and Common Mistakes to Avoid
Even with a perfect plan, things can go wrong. Here are my hard-earned tips and the mistakes I’ve learned to avoid:
1. Don’t Overload Your Circuit
String lights draw power, and too many can trip your breaker. Check the wattage of your lights and make sure your circuit can handle it. As a rule of thumb:
- Standard outlets can handle 1,500–1,800 watts.
- Most LED string lights use 10–20 watts per strand.
- So, 75–180 LED strands per outlet (but don’t push it).
My Rule: I never plug more than 10 strands into one outlet. Safety first!
2. Use the Right Clips for Your Pergola Material
Wood, metal, and vinyl pergolas need different hardware. Using the wrong clips can damage the surface or cause lights to fall.
- Wood: Screw-in hooks or adhesive clips (if painted).
- Metal: Magnetic hooks or zip ties.
- Vinyl: Adhesive clips (avoid screws—they can crack the vinyl).
3. Avoid Tangled Strands
Nothing ruins the mood like a knotted mess of lights. To prevent tangles:
- Store lights in a bag or box when not in use.
- Use a light reel or cardboard tube to wrap them.
- Hang them on a hook in the garage—not in a drawer.
4. Protect Against the Elements
Outdoor lights face sun, rain, and wind. To extend their life:
- Choose weatherproof (IP44 or higher) lights.
- Inspect connections for moisture every few months.
- Take down lights during extreme weather (hurricanes, heavy snow).
5. Don’t Forget the Aesthetics
Even the best setup can look messy if the cords are visible. Hide them with:
- Outdoor-rated cord covers (paint them to match your pergola).
- Plants or decorative elements (like potted vines).
- Zip ties along the pergola beams.
Data Table: Recommended String Lights for Pergolas (2026)
| Brand & Model | Type | Length | Bulb Count | Weather Rating | Best For | Price (USD) |
|---|---|---|---|---|---|---|
| Brightown LED String Lights | LED, warm white | 48 ft | 150 | IP65 | Year-round use, large pergolas | $24.99 |
| Brightech Ambience Pro | LED, Edison-style | 48 ft | 15 | IP65 | Romantic, cozy ambiance | $39.99 |
| Litom Solar String Lights | Solar-powered | 72 ft | 200 | IP65 | No wiring, eco-friendly | $32.99 |
| Philips Hue Outdoor | Smart LED | 40 ft | 20 | IP65 | Color control, automation | $89.99 |
| Twinkle Star Incandescent | Incandescent | 25 ft | 25 | IP44 | Classic holiday look | $18.99 |
Note: Prices are approximate and subject to change. Always check the latest specs and reviews before buying.
Maintaining Your Pergola String Lights: Keep Them Shining
Once your lights are up, the work isn’t over. A little maintenance keeps them looking great for years. Here’s how:
1. Clean the Bulbs and Strands
Outdoor lights collect dust, pollen, and cobwebs. Clean them:
- With a soft cloth and mild soap (for LED bulbs).
- Use a damp cloth (never soak the bulbs).
- Do this every 3–6 months.
2. Check for Damaged Wires or Bulbs
Inspect the strands for:
- Frayed wires.
- Burned-out bulbs (replace them promptly).
- Loose connections.
Pro Tip: Keep spare bulbs on hand. It’s frustrating to wait for a replacement when one goes out.
3. Store Properly Off-Season
If you take down your lights in winter (or for long periods):
- Unplug and dry them completely.
- Store in a cool, dry place.
- Use a labeled bin or bag to keep strands separate.
4. Update Your Setup
Don’t be afraid to refresh your lights. Try:
- Changing the color (e.g., warm white to cool white).
- Adding a new pattern (e.g., grid to zigzag).
- Mixing different types (e.g., Edison bulbs + fairy lights).
My Favorite Combo: I layer LED string lights with solar-powered fairy lights for extra sparkle.
Putting string lights on a pergola isn’t just about adding light—it’s about creating a feeling. It’s the difference between a backyard and a sanctuary. Whether you’re following this guide for the first time or refining your setup, remember: there’s no “perfect” way to do it. The best lighting setup is the one that makes you happy.
So, grab your lights, take your time, and don’t stress the small stuff. A few crooked bulbs or a slightly sagging strand won’t ruin the magic. In fact, those little imperfections are part of what makes it feel lived-in and real. And when you’re sitting under your pergola, watching the lights twinkle above, you’ll know it was worth every minute.
Now go make some memories—and don’t forget to share a photo of your setup. I’d love to see how you bring your pergola to life in 2026!
Frequently Asked Questions
How do I attach string lights to a pergola without drilling holes?
Use adhesive hooks, zip ties, or removable mounting clips designed for outdoor use. These options secure the lights firmly while protecting your pergola’s structure, making them ideal for renters or temporary setups.
What’s the best way to hang string lights on a pergola evenly?
Plan your layout by measuring the pergola’s perimeter and spacing hooks or clips every 12–18 inches. For a uniform look, use a guide string or laser level to align the lights before securing them.
Can I use outdoor-rated string lights on my pergola in 2026?
Yes, but always check for an IP44 or higher waterproof rating and UV-resistant materials. Modern 2026 string lights often feature smart controls and shatterproof bulbs for added durability and convenience.
How do I hide the wires when putting string lights on a pergola?
Route cords along beams or rafters using cord clips or zip ties, then cover them with weather-resistant conduit or decorative sleeves. For a seamless look, match the cord color to your pergola.
Do I need a timer or dimmer for pergola string lights?
While optional, a timer ensures automatic on/off functionality, while a dimmer lets you adjust brightness for ambiance. Both features enhance energy efficiency and usability, especially with 2026’s smart lighting options.
How do I safely install string lights on a tall pergola?
Use a stable ladder or extendable pole with a hook attachment, and have someone spot you. Opt for lightweight LED string lights and avoid overloading circuits to minimize risks during setup.

