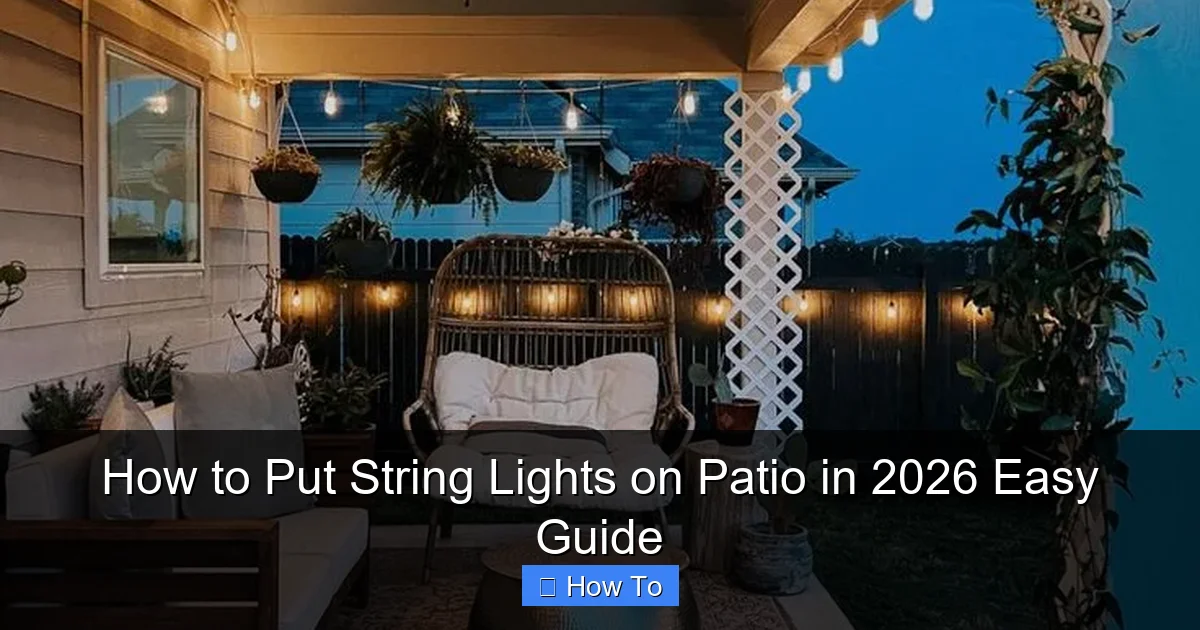
Featured image for how to put string lights on patio
Image source: i.pinimg.com
Transform your patio into a glowing oasis in 2026 by choosing weather-resistant, solar-powered string lights for effortless, energy-efficient ambiance. Mount them securely using stainless steel hooks or adhesive clips along railings, pergolas, or eaves—no electrical outlets needed. This simple setup ensures a safe, stunning display that lasts all season with minimal maintenance.
How to Put String Lights on Patio in 2026 Easy Guide
Key Takeaways
- Plan your layout first: Measure patio space and mark light placement for balanced coverage.
- Choose weatherproof lights: Ensure durability with outdoor-rated string lights for long-term use.
- Use secure mounting hardware: Install hooks, clips, or poles to prevent sagging or damage.
- Prioritize safety: Avoid overloading circuits and use a ground-fault circuit interrupter (GFCI) outlet.
- Test before finalizing: Check light functionality and spacing before securing all connections.
- Add timers or smart controls: Automate lighting for convenience and energy efficiency.
Why This Matters / Understanding the Problem
Let’s be honest—nothing transforms a patio like the soft, warm glow of string lights. I remember my first attempt at hanging them. I had this vision of a dreamy, romantic space, perfect for late-night chats and weekend barbecues. But after two hours of tangled cords, wobbly ladders, and a near-miss with a power outlet, I was ready to give up.
If you’ve ever tried to figure out how to put string lights on patio in 2026 easy guide, you know it’s not just about hanging bulbs. It’s about creating ambiance, safety, and longevity. The good news? It doesn’t have to be hard. With the right approach, you can avoid the headaches and enjoy a beautifully lit space that lasts for years.
Whether your patio is concrete, wood, or open-air, this guide walks you through every step—from planning to plug-in—so you can get it right the first time. No overpriced electricians. No guesswork. Just a cozy, inviting patio you’ll actually want to use.
Real talk: The biggest mistake people make isn’t buying the wrong lights. It’s skipping the planning phase. A little prep saves hours of frustration later.
What You Need
Before you start, gather your tools and materials. Trust me, having everything on hand makes the process way smoother. Here’s your go-to checklist for how to put string lights on patio in 2026 easy guide:
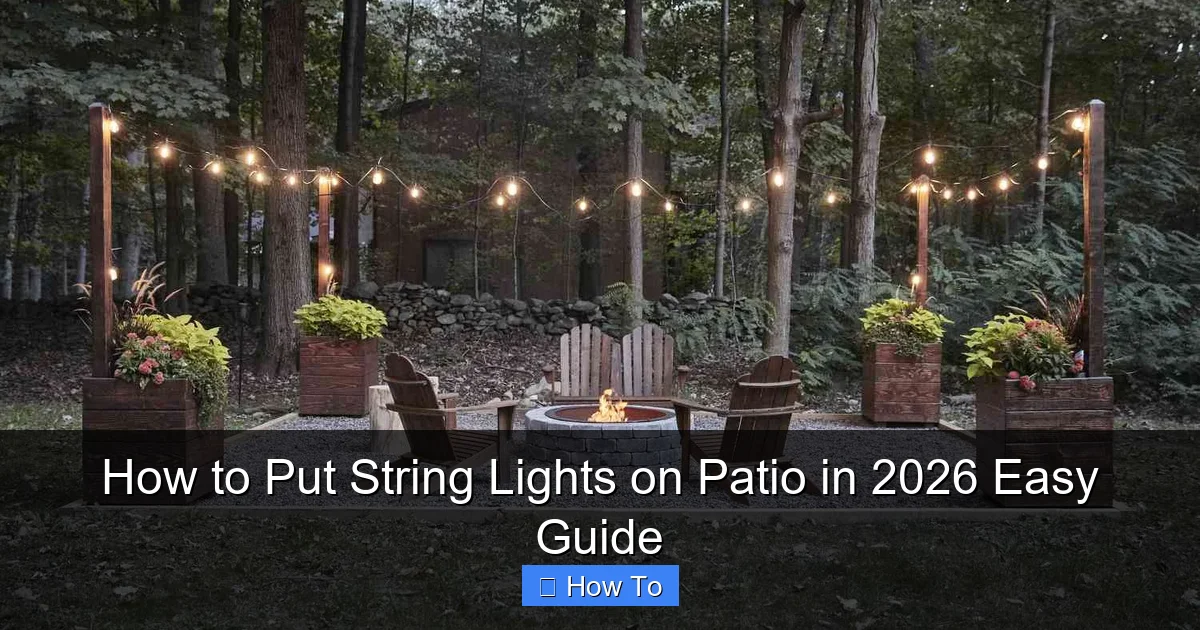
Visual guide about how to put string lights on patio
Image source: thespruce.com
- String lights (LED, weatherproof, outdoor-rated) – Look for IP65 or higher rating. I prefer Edison-style or globe bulbs for that classic look.
- Measuring tape – For spacing and layout planning.
- Pencil or chalk – To mark anchor points.
- Drill with masonry or wood bits – Depending on your patio surface (concrete, wood, stone).
- Anchors and screws (or outdoor adhesive hooks) – Plastic anchors for concrete, stainless steel for wood.
- Eye screws, J-hooks, or cup hooks – For tension and support.
- Zip ties or outdoor-rated cable clips – To manage excess cord and keep things tidy.
- Extension cords (outdoor-rated, GFCI-protected) – Safety first! Avoid daisy-chaining too many.
- Timer or smart plug (optional but highly recommended) – So your lights turn on automatically at dusk.
- Ladder (stable, non-slip) – Only if you’re working above 6 feet.
- Helper (optional but helpful) – For holding lights or handing tools.
Pro insight: Buy 10–15% more lights than you think you need. It’s better to have extra than to run short mid-install.
Now, let’s get into the real meat of how to put string lights on patio in 2026 easy guide—the step-by-step process.
Step-by-Step Guide to How to Put String Lights on Patio in 2026 Easy Guide
Step 1: Plan Your Layout (The Secret to Success)
Before you touch a drill or hook, sketch out your patio. I use graph paper or a simple phone app like MagicPlan. Think about:
- Where do you want light to fall? (Dining table? Lounge area? Entire perimeter?)
- How many light strands will you need? (Measure the perimeter or desired path.)
- Where’s the nearest outdoor outlet? (Lights should be within 10–15 feet of power.)
- Will you drape, zigzag, or run parallel lines?
For example, I once tried to run lights straight across my 20-foot-wide patio. The middle sagged like a hammock. Not cute. Now, I use a crisscross or “catenary” pattern—like a web—with support points every 4–5 feet. It’s more stable and looks intentional.
Mark your anchor points with chalk or pencil. Use painter’s tape if you’re testing a layout. This step is crucial for how to put string lights on patio in 2026 easy guide—don’t skip it!
Step 2: Choose the Right Anchoring Method
Your patio surface determines your anchor type. Here’s how to handle the most common ones:
Wooden Patio or Deck:
- Use eye screws or cup hooks directly into the wood.
- Drill pilot holes first to avoid splitting (especially in older decks).
- Space hooks every 4–6 feet for even tension.
Concrete, Brick, or Stone:
- Use masonry anchors with screws or heavy-duty adhesive hooks (like Command Outdoor).
- For permanent setups, drill pilot holes, insert anchors, then screw in hooks.
- Adhesive hooks work great for temporary setups—no drilling!
Open-Air or Pergola:
- Install J-hooks or eye screws into rafters or posts.
- For open spaces, consider a central mast or pole (more on that below).
Warning: Never use nails or pushpins on concrete—they’ll crack or pull out. And avoid over-tightening screws; it can warp the wood or strip the anchor.
Step 3: Install the Anchors (Go Slow and Steady)
Now, it’s time to install your hooks. Here’s how I do it:
- For wood: Drill a small pilot hole (slightly smaller than the screw). Twist the eye screw in by hand until snug. No power tools—overtightening ruins the wood.
- For concrete: Use a hammer drill with a masonry bit. Drill to the depth of the anchor. Tap the anchor in with a hammer, then screw in the hook.
- For adhesive hooks: Clean the surface with rubbing alcohol. Press firmly for 30 seconds. Wait 24 hours before hanging lights (they need time to bond).
Pro tip: Label your anchors with tape (A1, A2, etc.) to match your layout plan. It keeps things organized, especially for larger patios.
Step 4: Test Your Lights Before Hanging
Before you commit, plug in your lights and test them. I learned this the hard way—once I hung a whole string, only to find one bulb out. Ugh.
- Unroll the lights fully and lay them out.
- Plug them into a GFCI outlet (outdoor or with a GFCI adapter).
- Check every bulb and connection.
- If a strand fails, replace it now—not after it’s up.
Also, check the cord thickness. Thicker cords (like 16-gauge) are better for long runs. Thin cords overheat and sag.
Step 5: Hang the Lights (Start at the Power Source)
Here’s the fun part—hanging! Always start at the power source. This reduces cord tension and keeps the plug accessible.
- Loop the first light strand’s end hook (or S-hook) onto the anchor closest to the outlet.
- Stretch the strand gently to the next anchor—don’t pull hard.
- Attach it with a small S-hook, zip tie, or loop around the hook.
- Work your way outward, leaving a little slack (about 1 inch per foot) to prevent strain.
For zigzag or crisscross patterns:
- Use a central anchor (like a pergola beam or freestanding pole) as a hub.
- Run strands from the hub to perimeter anchors.
- This creates a web-like effect and avoids mid-span sag.
If you’re using multiple strands:
- Connect them with a waterproof connector (not just twisting wires).
- Use a splitter if your lights have a male/female end.
- Never exceed the manufacturer’s max wattage (usually 210–420 watts).
My trick: Use zip ties to secure the plug end to an anchor. It keeps the weight off the outlet and prevents accidental unplugging.
Step 6: Manage Cords and Hide Wires
Messy cords ruin the magic. Here’s how to keep things clean:
- Use outdoor-rated cable clips to attach cords to posts or beams.
- For floor runs, use cord covers (like rubber raceways) to prevent tripping.
- Hide excess cord behind planters, furniture, or along the base of a wall.
- For long runs, use a cord reel or storage box near the outlet.
I also use zip ties every 3–4 feet to keep the cord snug against the anchor line. It looks neater and reduces wind flapping.
Step 7: Add a Timer or Smart Control (Worth Every Penny)
Don’t leave your lights on all night. A timer or smart plug makes life easier and saves energy.
- Mechanical timer: Set it once, and it turns lights on/off at the same time daily. Cheap and reliable.
- Smart plug (Wi-Fi or Bluetooth): Control with your phone, set schedules, or use voice commands (“Hey Google, turn on patio lights”).
- Sunset/sunrise sensor: Automatically turns on at dusk, off at dawn. No setup needed.
I use a smart plug with a sunset sensor. It’s been a game-changer—no more remembering to turn lights on, and they’re off by midnight.
Step 8: Test and Adjust (The Final Touch)
Once everything’s up, step back and evaluate:
- Do the lights look balanced? (No sagging or bunching.)
- Is the cord secure? (No tripping hazards or loose ends.)
- Does the light hit where you want it? (Adjust anchors if needed.)
I like to test at night. The lighting effect is totally different from daytime. If a strand is too bright or dark, I’ll swap it for a lower-lumen bulb or add a dimmer.
Pro Tips & Common Mistakes to Avoid
After years of trial, error, and “why didn’t I think of that?” moments, here are my top insights for how to put string lights on patio in 2026 easy guide:
Pro Tip 1: Use a Central Mast for Open Patios
If your patio has no overhead structure, install a freestanding pole (like a 10-foot galvanized pipe or wooden post). Anchor it with concrete. Run lights from the pole to perimeter hooks. It’s like a chandelier for your outdoor space.
Pro Tip 2: Choose the Right Bulb Type
- LED: Energy-efficient, lasts 20,000+ hours, cool to touch. Best for year-round use.
- Incandescent: Warmer glow, but hot and short-lived. Only for seasonal setups.
- Color temperature: 2700K–3000K (warm white) is cozy. 4000K+ (cool white) feels clinical—avoid it.
Pro Tip 3: Weatherproof Everything
Even “outdoor” lights need protection:
- Use outlet covers for outdoor plugs.
- Wrap connections with electrical tape or heat-shrink tubing.
- Store lights in a dry place during storms or winter (if not permanent).
Common Mistake 1: Overloading the Circuit
Too many lights on one outlet can trip the breaker. Check your outlet’s max load (usually 15 amps). Use a circuit checker or calculate total wattage (lights + other devices).
Common Mistake 2: Ignoring Wind Load
Flapping lights wear out faster. Use tight, but not stretched tension. Add extra anchors if your patio is windy. I once lost three strands in a storm—lesson learned!
Common Mistake 3: Forgetting the “Off” Switch
No timer? You’ll leave lights on all night. That’s wasteful and attracts bugs. A simple $15 timer solves this.
Common Mistake 4: Poor Cord Management
Long, loose cords are tripping hazards. Use clips, ties, or raceways. And never run cords under rugs or furniture—fire risk!
My rule: If it looks messy during the day, it’ll look ten times worse at night. Tidy up cords before you celebrate.
FAQs About How to Put String Lights on Patio in 2026 Easy Guide
Q: Can I leave string lights up year-round?
Yes, if they’re rated for outdoor use (look for IP65 or higher). But I recommend taking them down during harsh winters or storms. Store them coiled in a breathable bag to prevent tangling. For permanent setups, use commercial-grade lights with heavy-duty cords.
Q: What’s the best way to hang lights without drilling?
Use adhesive hooks (like Command Outdoor) or freestanding poles. For wooden patios, try railing clamps or zip ties around posts. Just avoid anything that could damage surfaces or create tripping hazards.
Q: How far apart should hooks be?
For most string lights, every 4–6 feet is ideal. Closer spacing (3–4 feet) prevents sagging, especially for heavy bulbs. For open spans, add a central anchor every 8–10 feet.
Q: Can I connect multiple light strands?
Yes, but check the max wattage. Most LED strands can connect up to 20–40 bulbs. Never exceed the manufacturer’s limit. Use a waterproof connector—not just twisted wires.
Q: Do I need a GFCI outlet?
Yes, absolutely. GFCI (Ground Fault Circuit Interrupter) outlets cut power if they detect moisture or short circuits. It’s a safety must for outdoor electrical setups. If your outlet isn’t GFCI, use a GFCI adapter or install one (call an electrician).
Q: How do I fix a sagging strand?
Add a middle anchor (hook or zip tie) or shorten the span. For existing lights, use a tension wire (like a steel cable) behind the lights to support the weight. Never tighten the lights themselves—it can break the cord.
Q: What’s the easiest layout for beginners?
Start with a perimeter loop. Hang lights around the edge of your patio, connecting to posts or walls. It’s simple, looks great, and requires fewer anchors. Once you’re comfortable, try crisscross or diagonal patterns.
Final Thoughts
Putting up string lights doesn’t have to be a chore. With a little planning, the right tools, and a few pro tricks, you can transform your patio into a cozy, inviting oasis. This how to put string lights on patio in 2026 easy guide is all about doing it right—so you spend less time fixing and more time enjoying.
Remember: start with your layout, choose weatherproof lights, anchor securely, manage cords, and automate with a timer. It’s not about perfection—it’s about creating a space where you want to be.
So grab your lights, a cold drink, and your favorite playlist. Your dream patio is just a few hooks away. And when you’re done? Sit back, turn on the lights, and toast to a job well done.
Happy hanging!

