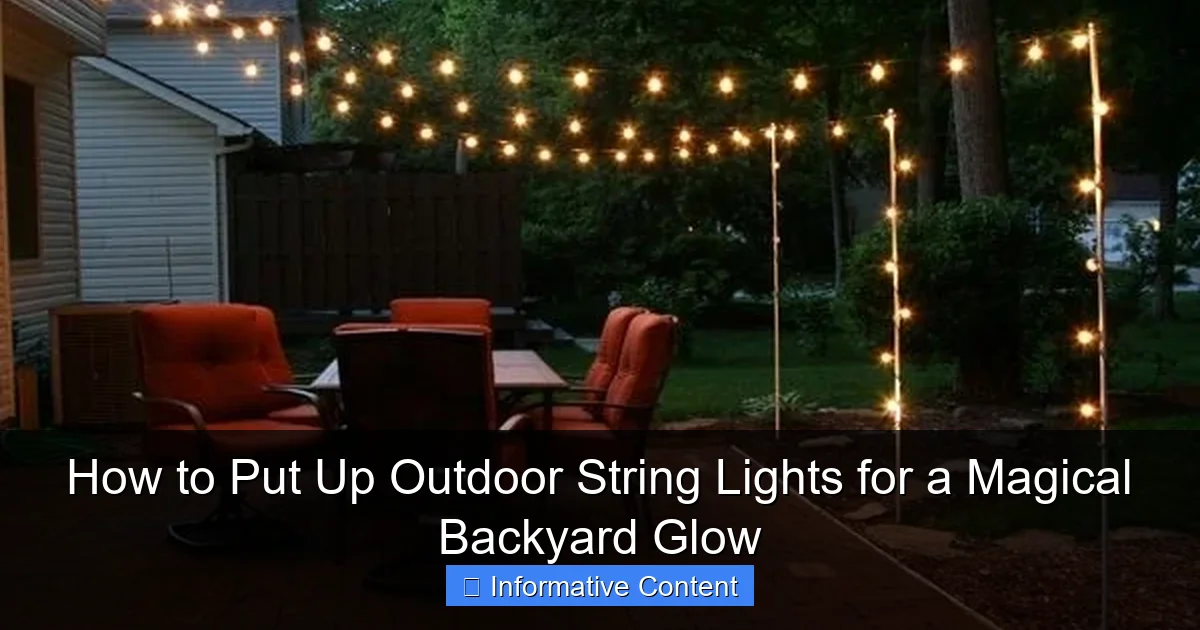
Featured image for how to put up outdoor string lights
Image source: menterarchitects.com
Transform your backyard into a magical retreat by securely mounting outdoor string lights between sturdy anchor points like trees, posts, or eaves using weather-resistant hardware. Ensure proper tension and spacing to prevent sagging, and always use LED, outdoor-rated lights for safety and longevity. With a little planning and the right tools, you’ll create a warm, enchanting glow perfect for evening gatherings.
Key Takeaways
- Plan your layout first: Sketch light placement to avoid mid-project changes.
- Use weatherproof lights: Ensure durability with UL-rated outdoor string lights.
- Secure with proper hardware: Use hooks or cables, not nails or staples.
- Check power access: Place lights near GFCI outlets or use extension cords safely.
- Space bulbs evenly: Maintain 6–8 inches between bulbs for balanced brightness.
- Test before hanging: Verify lights work to avoid re-installing faulty strands.
📑 Table of Contents
- How to Put Up Outdoor String Lights for a Magical Backyard Glow
- 1. Choosing the Right Outdoor String Lights
- 2. Planning Your Layout and Design
- 3. Selecting the Right Hanging Methods and Hardware
- 4. Installing the Lights: Step-by-Step Process
- 5. Maintenance and Long-Term Care
- 6. Inspiring Design Ideas and Pro Tips
How to Put Up Outdoor String Lights for a Magical Backyard Glow
There’s something almost magical about stepping into your backyard after dark and seeing soft, twinkling lights strung overhead. It’s like your outdoor space has transformed into a cozy, inviting retreat—perfect for late-night conversations, summer barbecues, or just unwinding with a glass of wine under the stars. I remember the first time I strung up outdoor lights in my own yard. I was skeptical—would it look cheesy? Would the wind knock them down by morning? But within minutes of turning them on, I was hooked. The warm glow instantly made my patio feel like a destination, not just an afterthought.
If you’ve been dreaming of that same backyard glow, you’re in the right place. Putting up outdoor string lights isn’t as simple as just hanging them from a tree to a fence (though that’s a great start!). It takes a little planning, the right tools, and some smart choices to create a setup that’s both beautiful and durable. Whether you’re going for a rustic bistro look, a whimsical canopy, or a modern minimalist vibe, this guide will walk you through every step—from choosing the right lights to securing them safely, season after season. Let’s turn your backyard into a glowing oasis, one string at a time.
1. Choosing the Right Outdoor String Lights
Before you start hammering hooks into your deck, take a moment to think about the type of string lights that will work best for your space and needs. Not all outdoor lights are created equal, and picking the right ones can make or break your setup.
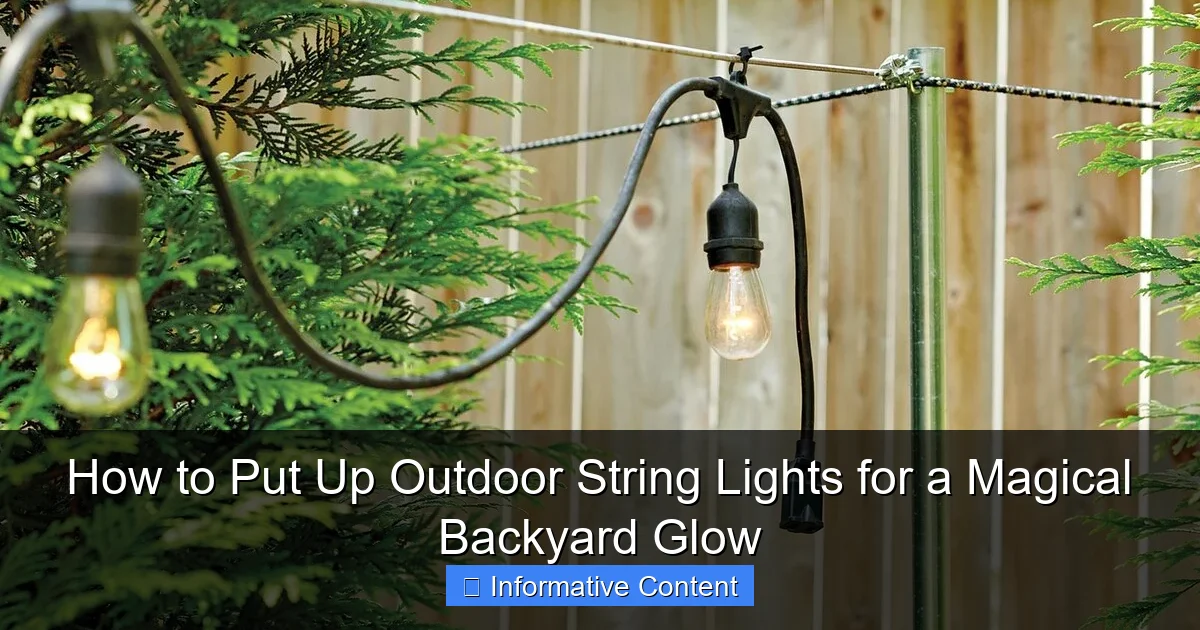
Visual guide about how to put up outdoor string lights
Image source: storables.com
Types of Outdoor String Lights
- LED String Lights: These are the most popular (and energy-efficient) choice. They last longer, use less power, and don’t get hot to the touch. I switched to LEDs after my old incandescent bulbs burned out every winter. Now, my lights last for years—even through snow and rain.
- Incandescent String Lights: These give off a warm, nostalgic glow but use more energy and burn out faster. I still use a few strands for holiday decor, but I wouldn’t rely on them for year-round use.
- Solar-Powered Lights: Great for off-grid areas or spots without outdoor outlets. They charge during the day and turn on at dusk. Just keep in mind that their brightness depends on sunlight, so they might not shine as brightly on cloudy days.
- Smart String Lights: If you love tech, these can change colors, sync to music, or be controlled via an app. I tried them once for a party—fun, but overkill for everyday use unless you really want that level of control.
Bulb Styles and Spacing
The look of your lights depends a lot on the bulb style:
- Edison Bulbs: Vintage-style, exposed filaments. They cast a warm, golden glow and are perfect for a rustic or industrial vibe. But they’re heavier, so they need stronger support.
- Mini Bulbs: Small, evenly spaced, and great for a delicate, starry effect. These are my go-to for patios and pergolas.
- Globe Bulbs: Larger, round bulbs that give off a soft, diffused light. Ideal for ambient lighting over dining areas.
- Bulb Spacing: Standard spacing is 12 inches, but some lights have 6-inch spacing for a denser glow. If you want a subtle effect, go for wider spacing. For a bold, “wow” factor, choose tighter spacing.
Weather Resistance and Safety Ratings
Always look for lights rated for outdoor use (usually labeled “wet location” or “IP65”). These are sealed to resist rain, snow, and humidity. I learned this the hard way when a set of indoor-rated lights shorted out after one storm. Also, check the cord thickness—thicker cords handle wind and weather better. And for safety, make sure your lights are UL-listed (or equivalent) and avoid overloading circuits.
2. Planning Your Layout and Design
Now that you’ve picked your lights, it’s time to plan where they’ll go. A good layout isn’t just about aesthetics—it’s about functionality, safety, and longevity. I once tried to string lights across my entire yard in one go, and it turned into a tangled, wobbly mess. Lesson learned: plan first, hang later.
Assess Your Space and Goals
Start by asking yourself:
- What’s the primary function of the lights? (Ambiance, task lighting, party decor?)
- Where do people gather? (Patio, deck, dining table, fire pit?)
- Are there natural anchor points? (Trees, posts, eaves, pergolas, fences?)
- Do you want a focal point (like a canopy over a dining area) or ambient coverage (like a crisscross pattern over the whole yard)?
For example, I focused on my back patio first—stringing lights from the house eave to the pergola, then adding a few diagonal lines for depth. That created a cozy “room” effect without overwhelming the space.
Sketch Your Layout
Grab a piece of paper or use a free design app (like SketchUp Free or even Google Drawings) to sketch your yard. Mark:
- Anchor points (trees, posts, walls)
- Distance between points (use a measuring tape)
- Light path (straight lines, zigzags, crisscross, or canopy)
- Power source location (outlet, extension cord route)
Pro tip: If you’re going for a canopy effect (like a grid of lights overhead), plan for at least 3-4 anchor points per 10 feet to prevent sagging.
Consider Height and Spacing
Hang lights high enough to walk under (at least 7 feet for standard height, 8 feet if you have tall guests). For a canopy, aim for 8-10 feet to avoid glare and create a “floating” effect. Spacing between lines depends on your design:
- Straight lines: 2-3 feet apart
- Canopy grid: 3-4 feet apart for a balanced look
- Zigzag: 1.5-2 feet between peaks for a dynamic feel
And remember: longer spans need stronger support. I once tried to span 25 feet between two trees with thin wire—it sagged so much, the lights looked like a hammock. Now I use a tension wire (more on that later).
3. Selecting the Right Hanging Methods and Hardware
This is where things get real. The wrong hardware can mean wobbly lights, damaged surfaces, or even a safety hazard. I’ve seen hooks pull out of wood, zip ties snap in the cold, and lights dangling by a thread after one storm. Let’s avoid that.
Anchor Points: What You Can Hang From
- Trees: Use tree straps (not nails or screws!) to protect bark. Wrap the strap around the trunk and attach a carabiner or hook. I use 2-inch nylon straps—they’re strong and won’t girdle the tree.
- Wooden Posts/Pergolas: Use eye screws or lags hooks. Pre-drill a hole to avoid splitting the wood. For extra strength, add a wall anchor if the post is hollow.
- Metal Posts: Use magnetic hooks (if the metal is thick enough) or U-bolts. I’ve had great luck with magnetic hooks on my steel pergola—no drilling, no rust.
- Walls/Eaves: Use eye hooks or J-hooks designed for outdoor use. Avoid nails—they loosen over time. For stucco or brick, use masonry anchors with a drill.
- Fences: Use fence clips or zip ties (but only as a temporary fix). For a permanent setup, install a wooden ledger board on top of the fence to mount hooks.
Support Systems for Long Spans
If you’re spanning more than 15 feet, or your lights are heavy (like Edison bulbs), use a tension wire system:
- Run a stainless steel cable (or high-tensile nylon cord) between anchor points.
- Secure it with turnbuckles at both ends to adjust tension.
- Clip your string lights to the wire with S-hooks or zip ties.
I used this method to span 30 feet across my backyard, and the lights have stayed taut for three years. No sagging, no stress.
Hardware to Avoid
- Regular zip ties: They degrade in UV light and snap in cold weather. Use UV-resistant zip ties or stainless steel cable ties instead.
- Nails in trees: They damage bark and can kill the tree over time.
- Plastic hooks: They crack in extreme temperatures. Stick to metal or heavy-duty nylon.
4. Installing the Lights: Step-by-Step Process
Now comes the fun part—hanging the lights! I like to do this on a calm, dry day (wind makes everything harder). Here’s my tried-and-true process.
Step 1: Test Your Lights First
Plug them in before hanging. I once spent an hour stringing up a set of lights only to realize a bulb was out. Now I test every strand in the garage.
Step 2: Install Anchor Points
Follow your layout sketch. For eye screws or hooks:
- Pre-drill a pilot hole (slightly smaller than the screw diameter).
- Screw in the hook by hand, then use a wrench to tighten it.
- For tension wires, attach turnbuckles first, then run the cable.
Pro tip: Use a level to make sure hooks are aligned. Crooked hooks = crooked lights.
Step 3: Attach the Lights
- For straight lines: Clip the first bulb socket to the starting hook. Gently pull the strand taut (but not too tight) and clip the last socket to the end hook. Use S-hooks or carabiners for easy removal.
- For canopy grids: Start at one corner. Clip each bulb socket to the tension wire or anchor point. Work in rows, keeping lines parallel.
- For zigzags: Clip the first socket, then zigzag across anchor points, clipping every few bulbs.
I use S-hooks for most installations—they’re easy to open/close and don’t damage the cord.
Step 4: Secure the Cord
Use UV-resistant zip ties or cord clips to secure the cord to anchors every 3-4 feet. This prevents wind damage and keeps the lights from swinging.
Step 5: Connect to Power
Run an outdoor-rated extension cord from the nearest outlet. Use cord covers or bury it in a shallow trench (if safe) to avoid tripping. For long runs, use a heavy-duty 14-gauge cord to prevent voltage drop.
And for safety: always use a GFCI outlet (or GFCI adapter) to prevent shocks in wet conditions.
5. Maintenance and Long-Term Care
Great lighting isn’t a one-and-done project. A little maintenance keeps your setup safe and beautiful for years.
Seasonal Checks
- Spring: Inspect for damage from winter. Replace any broken bulbs or corroded hooks. Tighten loose connections.
- Summer: Check for sagging or wind damage. Adjust tension wires if needed.
- Fall: Clean leaves/debris from lights. Trim overhanging branches that could damage the cord.
- Winter: If you live in a snowy area, consider removing lights during heavy snowfall to prevent damage. Or, use a light cover (like a clear plastic sleeve) to protect bulbs.
Cleaning Tips
- Wipe bulbs with a damp cloth (unplugged!) to remove dust.
- For Edison bulbs, use a soft brush to clean filament dust.
- Never use harsh chemicals—they can damage plastic or glass.
When to Replace
Even the best lights wear out. Replace your string lights if:
- More than 10-20% of bulbs are out (and replacements aren’t available).
- The cord is cracked, frayed, or brittle.
- The waterproof seals are damaged.
I keep a few spare bulbs and a backup strand in my garage—just in case.
6. Inspiring Design Ideas and Pro Tips
Now that you’ve mastered the basics, let’s talk creativity. Here are some of my favorite ways to take your outdoor lights to the next level.
Design Ideas
- The Canopy Effect: String lights in a grid over your dining area. Use a tension wire for support. Add sheer fabric panels for a dreamy, romantic look.
- Pathway Lighting: Line walkways or stairs with low-voltage LED path lights. I use warm white bulbs to mimic candlelight.
- Tree Wraps: Wrap lights around tree trunks (using tree straps!) for a whimsical, forest-like glow.
- Hanging Globes: Suspend globe lights at different heights from a pergola. It’s like a modern chandelier.
Color Play: Use colored lights for holidays or themed parties. I have a set of amber lights for fall and blue for winter.
Pro Tips from Experience
- Layer your lighting: Combine string lights with lanterns, path lights, or candles for depth. I use a mix of string lights and solar lanterns on my patio—it’s not too bright, not too dim.
- Use dimmers: A plug-in dimmer lets you adjust brightness. Perfect for transitioning from dinner to late-night chats.
- Hide the cord: Tuck extension cords under rugs, mulch, or use cord covers. I run mine along the edge of my deck and cover it with a weather-resistant strip.
- Think about timing: Use a timer (or smart plug) to turn lights on at dusk and off at midnight. Saves energy and ensures they’re always ready.
Common Mistakes to Avoid
- Overloading circuits (check your outlet’s wattage rating).
- Hanging lights too low (bump your head? Not fun).
- Ignoring wind exposure (secure cords and use tension wires).
- Using indoor lights outdoors (they’ll short out in rain).
Data Table: Recommended Hardware by Use Case
| Use Case | Recommended Hardware | Max Span | Notes |
|---|---|---|---|
| Trees (trunks) | Tree straps + carabiners | 10-15 ft | Avoid nails; protect bark |
| Wooden pergolas | Eye screws or lag hooks | 20-25 ft | Pre-drill holes; use wall anchors |
| Metal posts | Magnetic hooks or U-bolts | 15-20 ft | Check metal thickness for magnets |
| Long spans (20+ ft) | Tension wire + turnbuckles | 30-40 ft | Use stainless steel cable; adjust tension |
| Fences | Fence clips or ledger board | 10-15 ft | Ledger board = permanent solution |
Putting up outdoor string lights is more than just a DIY project—it’s a way to transform your backyard into a place where memories are made. Whether you’re hosting a summer soiree, enjoying a quiet evening, or just admiring the stars, the right lighting makes every moment feel special. I’ve learned that the key is balance: strong hardware, thoughtful design, and a little bit of patience. You don’t need to go overboard—start small, test what works, and build from there. And remember: it’s okay if your first attempt isn’t perfect. Mine wasn’t. But with each season, my setup gets better, and so does the magic.
So grab your lights, sketch out your vision, and get to work. Before you know it, you’ll be standing in your own backyard, bathed in that warm, golden glow—and wondering why you waited so long to do it. Happy hanging!
Frequently Asked Questions
How do I hang outdoor string lights without damaging my house?
Use removable hooks, adhesive clips, or tension wires to secure lights without nails or screws. These options work well on siding, gutters, or stucco and can be easily removed after use.
What’s the best way to plan the layout for outdoor string lights?
Map your space by measuring distances between anchor points (trees, posts, or eaves) and sketch a design to avoid overstretching cords. This ensures even spacing and prevents overloading circuits when you put up outdoor string lights.
Can I install string lights in a yard with no trees or poles?
Yes—use freestanding shepherd’s hooks, install temporary posts, or attach lights to a fence or pergola. For open spaces, consider ground-mounted poles or a DIY frame for support.
How do I safely power outdoor string lights?
Use outdoor-rated extension cords and GFCI outlets to prevent electrical hazards. Plug lights into a timer or smart plug to automate lighting and save energy.
How far apart should I space hooks when hanging string lights?
Place hooks 2–4 feet apart, depending on the weight of the lights and desired sag. Heavier bulbs need closer spacing to prevent strain on the cord and anchors.
Can I leave outdoor string lights up all year?
Only if they’re rated for year-round outdoor use and your climate allows it. Remove or inspect lights regularly in harsh weather (snow, wind) to avoid damage or safety risks.

